 FREE 1 to 3-Day Delivery on Orders $149+ Details

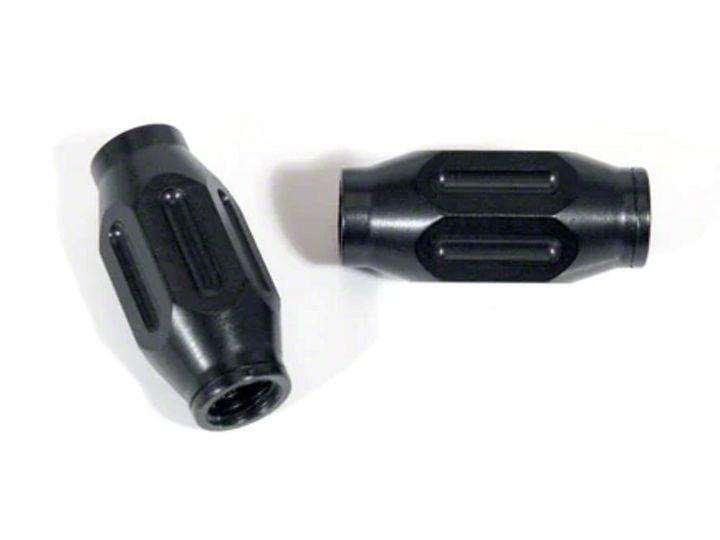
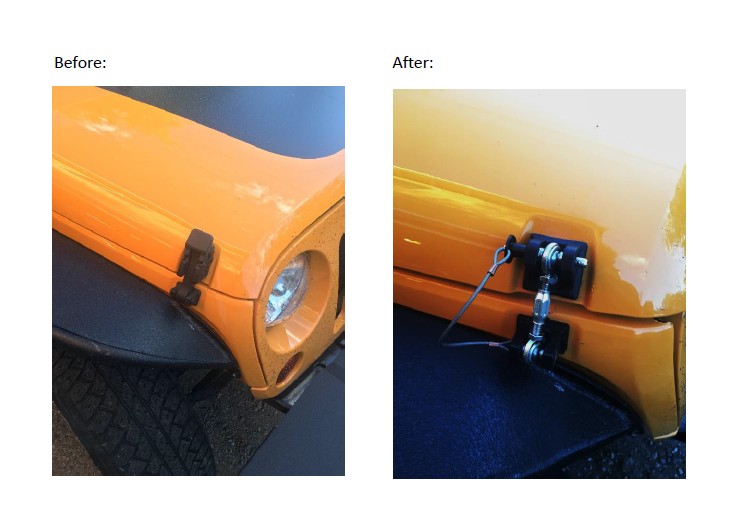
How to Install Drake Off Road Black Turnbuckle for Hood Hold Down on your Wrangler
Installation Time
1 minutes
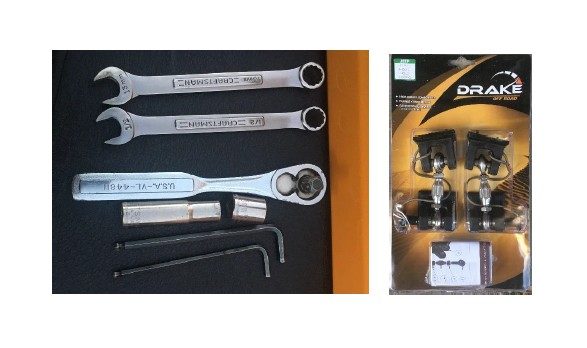
Tools Required
- 3/8” drive ratchet
- 13mm socket
- 10mm socket (deep-well socket helpful)
- 13mm wrench (2x)
- 4mm allen wrench
- 5mm allen wrench
Shop Parts in this Guide
Installation Instructions:
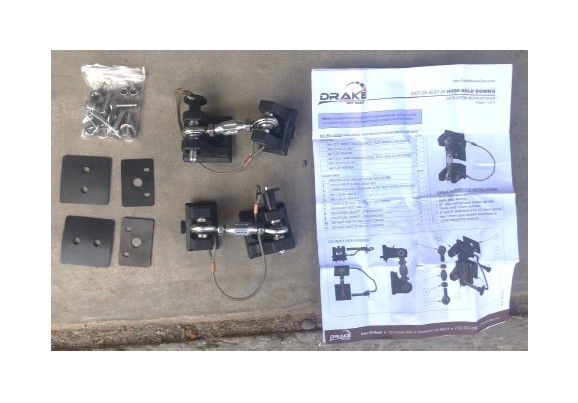
1. Inspect contents. Everything will arrive on a plastic card pack. You should have:
• 2x Hood hold-down assemblies
• 2x rectangular rubber pads (3 holes)
• 2x square rubber pads (2 holes)
• Instruction sheet
• Hardware bag
o 4x large washers
o 2x smaller washers
o 2x M8 Nylock nuts
o 2x M2 Allen bolts
o 4x M6 Nylock nuts
o 4x M6 Allen bolts
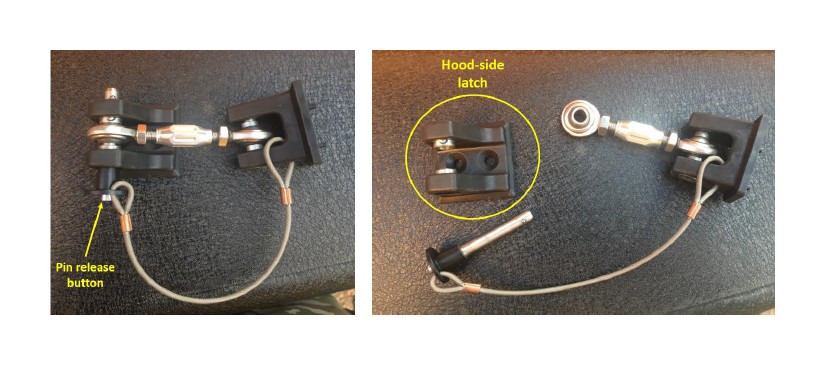
2. Remove hood-side latch.
• Open the hood and use a 10mm socket to remove the two bolts holding the hood latch on. A deep-well socket will give you a little more room to work the ratchet.
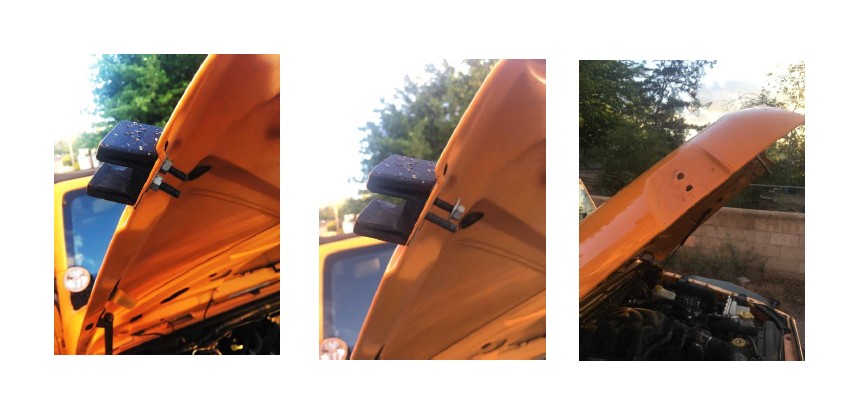
3. Install new hood-side latch.
• Choose whether you want cables in front of or behind the latch (latches are not sided). The included instructions show cables in front (pins pull out of the front) but I wanted the opposite. Start with the hold down assembly that meets your preference.
• Remove the retaining pin by depressing the button on the head and pulling it out. This will separate the hood-side from the turnbuckle.
• Place a square rubber pad on the bottom of the hood-side latch and use two M6 hardware sets (allen bolt, washer, and Nyloc nut) to mount the latch to the old one’s location. Note that the M6 washers have a larger outside diameter than the M8 ones.
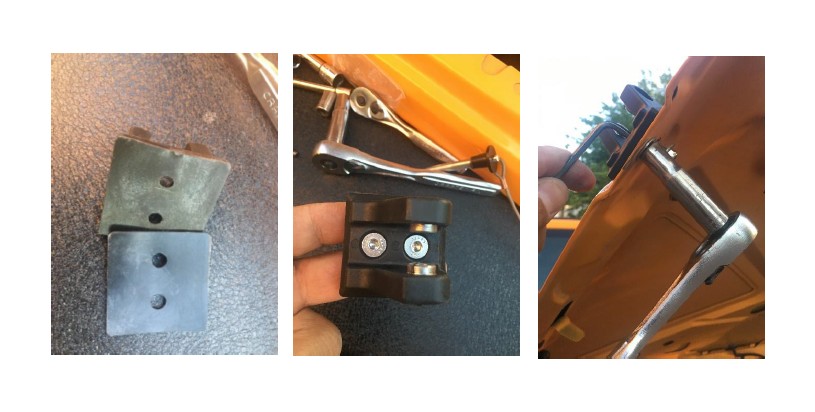
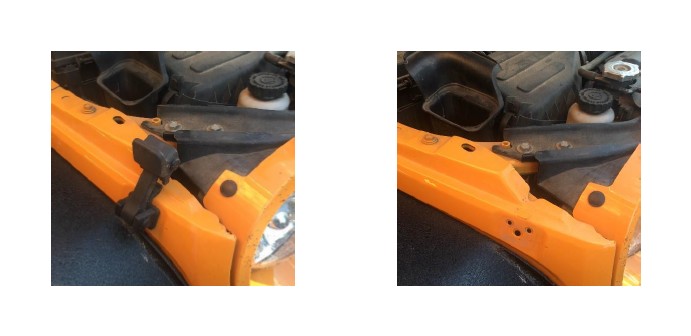
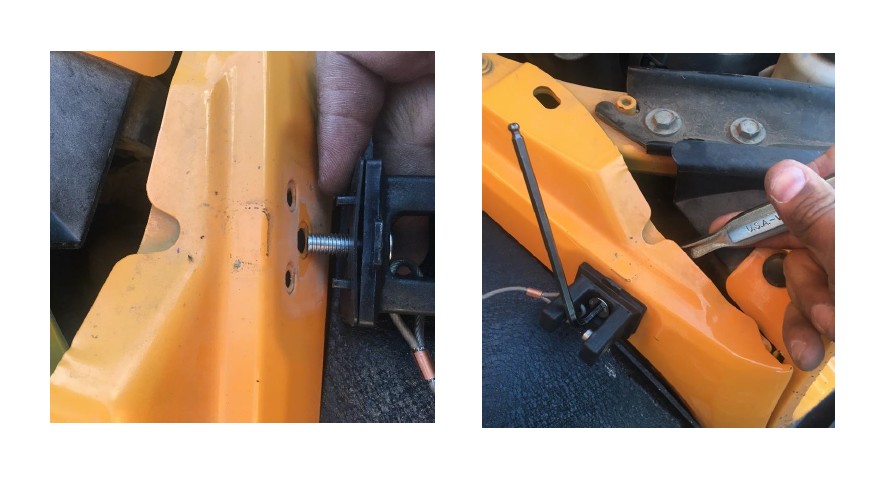
4. Remove the lower hood latch assembly.
• Remove the 13mm nut retaining the latch from the inside of the fender. This is a tight fit so the manufacturer recommends a 1/4” drive ratchet. Because I have aftermarket fender flares and trimmed fender liners, it was pretty easy for me to pass the ratchet handle up from the bottom and then guide it onto the nut. I found the extra length of a 3/8” drive ratchet made this easier. Worst case, you can gain good access by removing the grill assembly.
• You’ll only need to break the nut loose with the ratchet. After that, it will spin off with finger pressure.
5. Prepare the new lower latch assembly.
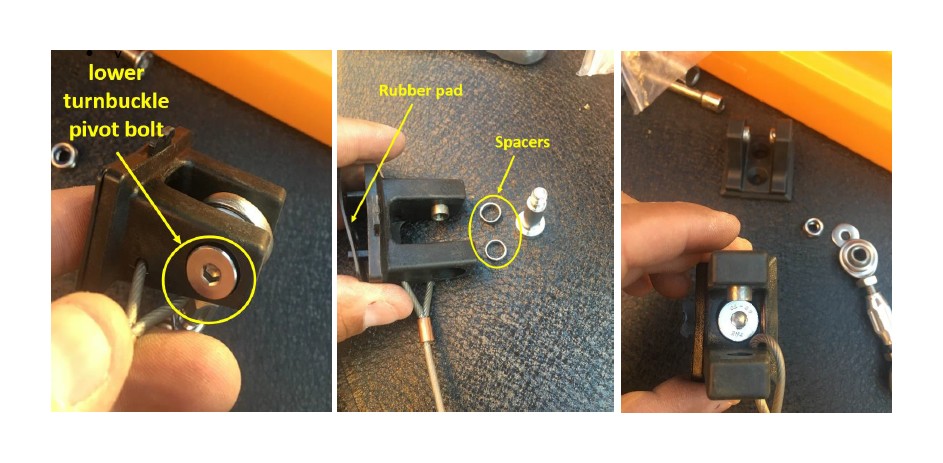
• Use a 4mm allen wrench to remove the lower turnbuckle pivot bolt. BE CAREFUL! There are two very small spacers that will fall out when this bolt is removed. Catch these and set them in a safe place.
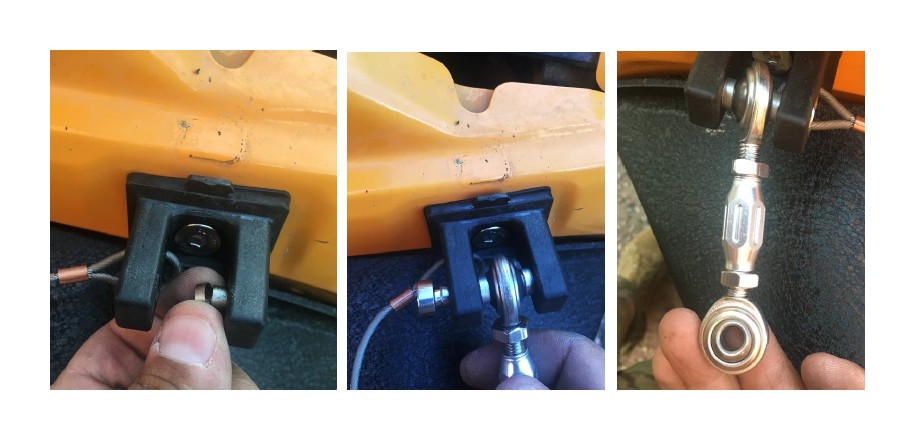
• Remove the turnbuckle from the lower mount and insert a M8 allen bolt through the hole in bottom of the lower mount.
• Place a rectangular rubber pad on the bottom of the lower mount.
• Install on the fender where the old latch was removed using a M8 nut and washer. It’s easiest to use the allen wrench for most of the tightening as there’s limited room to swing the ratchet. Be careful to not overtighten.
6. Reassemble lower latch assembly.
• Place a small spacer on the small stud inside the lower mount installed in step.
• Insert the turnbuckle pivot bolt from the opposite side just enough to slip the remaining pacer over the end.
• Hold the turnbuckle in place and slide the pivot bolt through, tightening it by hand.
• Finish tightening the pivot bold with a 4mm allen wrench. Be careful not to overtighten, as this retained end can break free of the plastic lower mount and begin to spin freely.
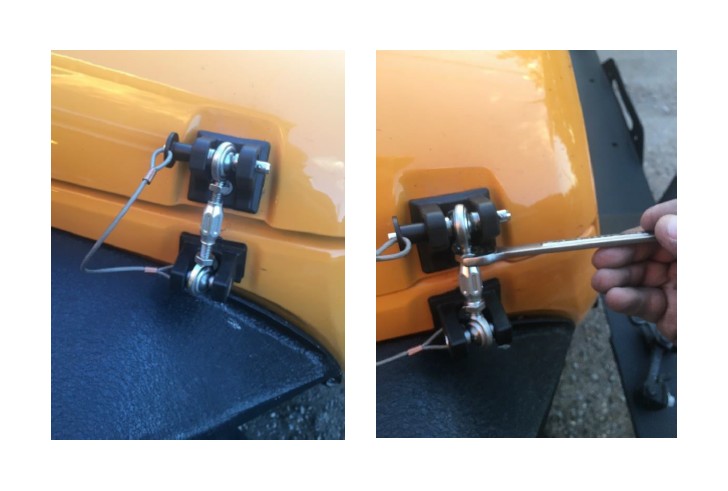
7. Adjust hold-down tension.
• Close the hood (make sure the turnbuckle is out of the way).
• Reinsert the retaining pin. If the turnbuckle is too short to allow this, turn the center sleeve to lengthen the turnbuckle.
• Turn the center sleeve to adjust turnbuckle length until the desired hold-down tension is achieved.
• Tighten the jam nuts on the turnbuckle finger tight.
• Confirm that the retaining pin can be removed and inserted. Loosen slightly if required.
• Tighten the jam nuts with a 13mm wrench. The center sleeve flats are 13mm also, so a second 13mm wrench can be used to prevent changes in turnbuckle length adjustment if needed.
Installation instructions written by Clark Adams 05/12/2017

