 FREE 1 to 3-Day Delivery on Orders $149+ Details

How to Install Deegan 38 HD Rock Sliders w/ LED Rock Lights (07-17 Wrangler JK 2 Door) on your Jeep Wrangler
Installation is the same for both 2 and 4 door models. 4 door vehicles have an addition mounting location on each side.
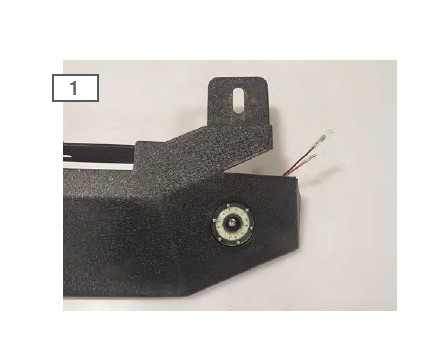
Install the (4) LED Rock lights to each of the rock sliders using the M8 Bolt/washer.
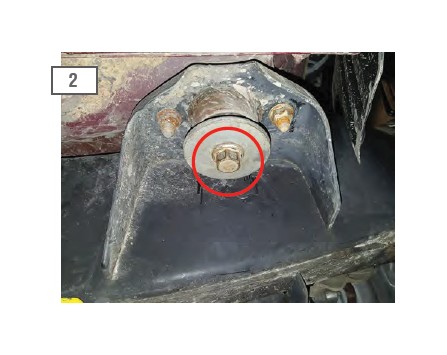
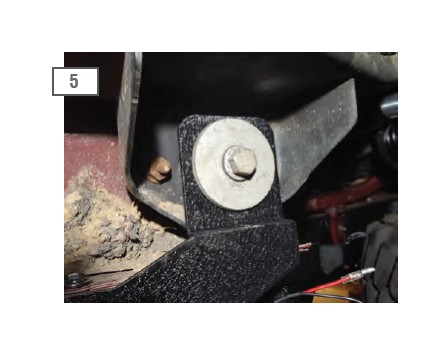
From under the vehicle access and remove the 18mm body mount bolts. (4) Bolts on 2 door, and (6) Bolts on 4 door vehicles. **NOTE Factory hardware will be reused.
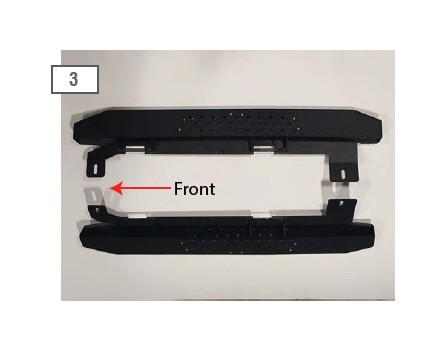
2 Door Vehicles: Note the Rock Slider mounting tab orientation. Passenger side on the top. Driver side on the bottom.
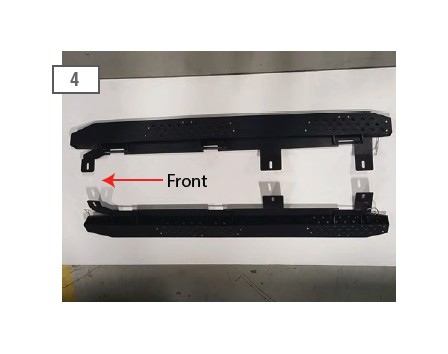
4 Door Vehicles: Note the Rock Slider mounting tab orientation. Passenger side on the top. Driver side on the bottom.
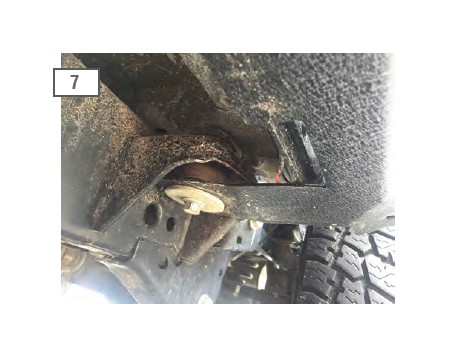
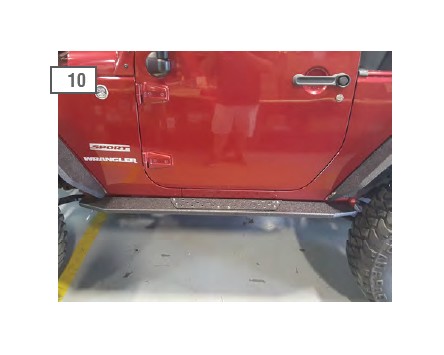
Loosely install the rock sliders using the factory 18mm bolts.
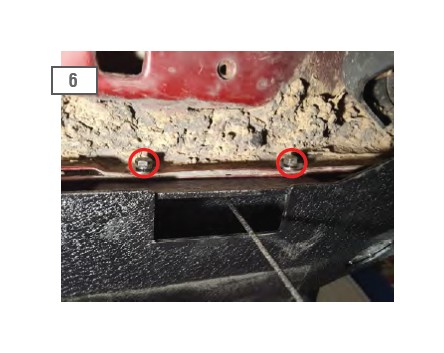
Insert the double bolt plates through the slots, and install the M6 bolts, lock washers, and flat washers through the pinch weld and tighten. **Due to vehicle manufacturing variances, it may be necessary to use the supplied spacers between the rock slider and pinch weld. Begin by test fitting the part with no spacers. If the slider makes contact with the vehicle, start by using 3mm spacer and test fitment again. If contact is still occuring install the 5mm spacer. Use the least amount of spacers as possible to achieve desired fitment.
Once the Rock Sliders are tight to the pinch welds, tighten the body mount bolt to 80 lb. ft. Remove the nut plate handle by bending it back and forth until it breaks off.
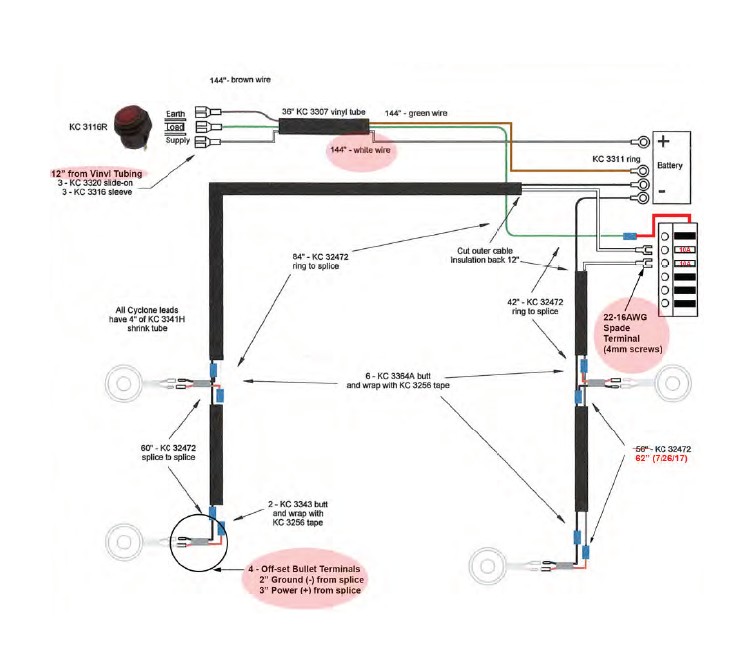
Wiring OverView(Diagram located on the last page): Connect the switch wiring as labeled on the back of the switch. Connect the brown wire to the negative battery terminal. Connect the white wire to the positive battery terminal. The green wire will provide power the rock lights when the switch is turned on. The green wire will connect to the white wires from the rock light harness through a power distribution block (fuse block). The rock light’s red wires will connect to the white rock light harness wires. The black rock light wires will connect to the black rock light harness wires. The ring terminals on the black wires will connect to the negative battery terminal. Neatly route the rock light wiring harness along the frame rails and secure with zip ties where necessary.
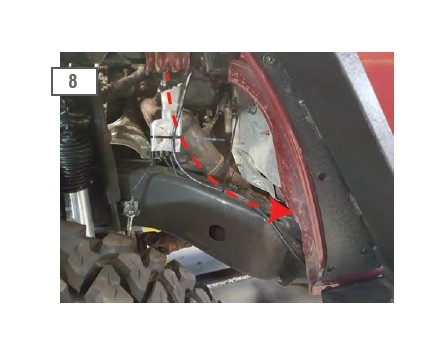
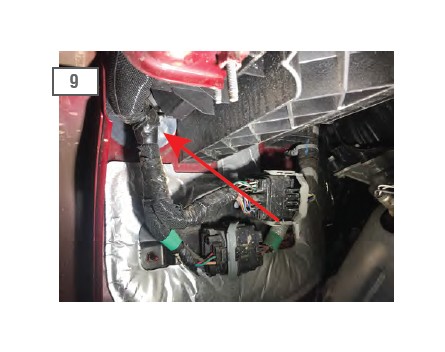
Feed the switch wiring through a firewall grommet into to the interior of the vehicle. Mount the switch as desired.
Double check installation to make sure everything is tight. Test the Rock lights.
Trouble Shooting: If the LED light stops working at any time begin by checking the fuse. If the fuse is blown, check the switch wiring. Make sure it matches the diagram on the back of the switch. The colors may not always be the same as pictured. If the light still doesn’t work, ensure the plug is seated all the way, they are a tight connection.
2 Door Contents:
(2) - Rock Sliders
(4) - LED Rock Lights
(4) - Double Bolt Plates
(1) - Rock Light Wiring Harness
(8) - M6 x 1.0 x 35mm Bolts
(8) - M6 Flat Washers
(8) - M6 Lock Washers
(4) - 5mm Spacers
(4) - 3mm Spacers
4 Door Contents:
(2) - Rock Sliders
(4) - LED Rock Lights
(6) - Double Bolt Plates
(1) - Rock Light Wiring Harness
(12) - M6 x 1.0 x 35mm Bolts
(12) - M6 Flat Washers
(12) - M6 Lock Washers
(6) - 5mm Spacers
(6) - 3mm Spacers

