 FREE 1 to 3-Day Delivery on Orders $149+ Details

How to Install Deegan 38 Grille w/ 10 in. LED Light Bar (07-17 Wrangler JK) on your Jeep Wrangler
Tools Required
- Flat Blade Screw Driver
- Drill and Drill Bits
- Allen Key Set
- Metric Wrenches
Contents:
(1) - Grille
(1) - 10" KC LED Light Bar
(2) - Light Brackets
(1) - Rivnut Tool
(4) - M6 Rivnuts
(4) - M6 Allen Bolts
(4) - M6 Lock washers
(4) - M6 Flat Washers
(2) - M8 Allen Bolts
(2) - M8 Flat Washers
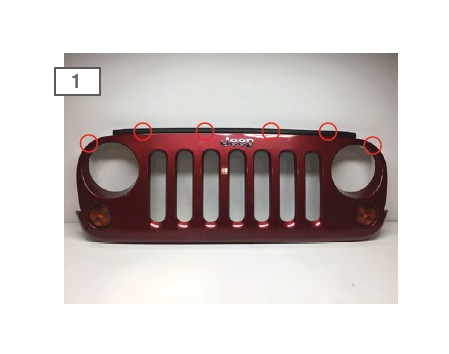
Using a panel removal tool, remove the (6) push clips holding the grille cover to the vehicle. Unplug the turn signals and pull grille cover from the vehicle.
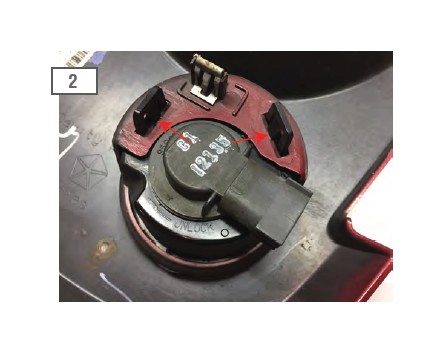
Remove the factory turn signals by unclipping them from the factory grille.
Transfer the turn signals to the new grille. Position the turn signal so that the connector points towards the outer edge of the grille. When the grille is installed the tabs on the turn signal need to straddle the lower headlight bucket tab. Failure to do so will cause the grille to stick out. It may be necessary to rotate the signals slightly once installed in order for the turn signal tabs to align correctly.

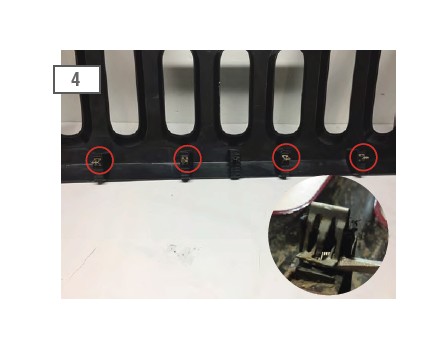
Using a flat screw driver transfer the (4) clips from the factory grille to the Deegan 38 grille.
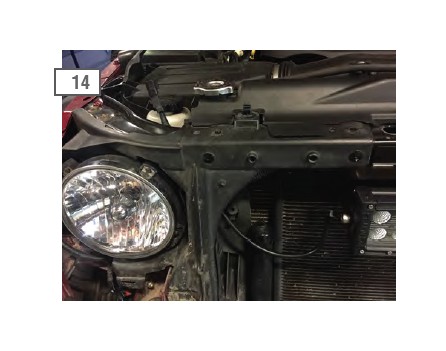
Unclip the wiring harness that runs across the radiator support and secure it out of the way.
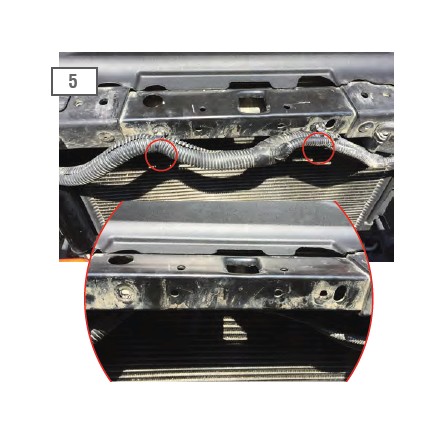
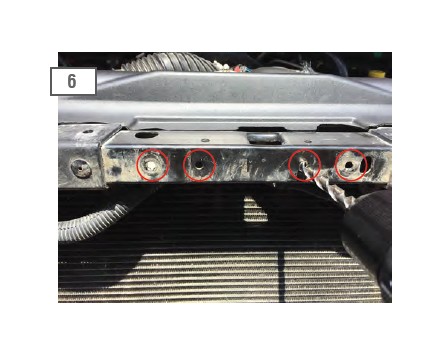
Using a 11/32” drill bit, enlarge the (4) factory holes on the radiator support to accept the supplied rivnuts. Rivnuts provide solid mounting point when there is no access behind the mounting surface.
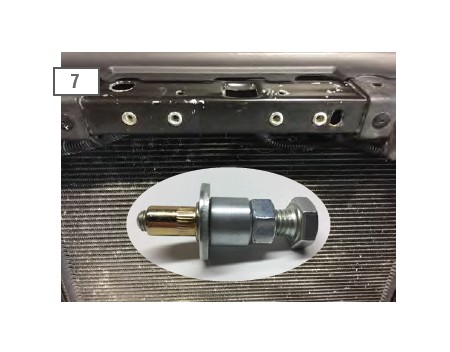
Insert the rivnut into the pre-drilled holes. Thread the rivnut tool onto the rivnut. Using a 16mm wrench, hold the nut in place while turning the head of the bolt with a 17mm ratchet. Tightening the bolt will clamp the rivnut against the sheet metal. **Note: Do not over tighten the rivnut. Doing so can pull the threads out of the insert.
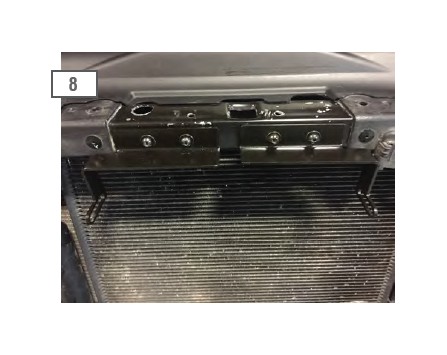
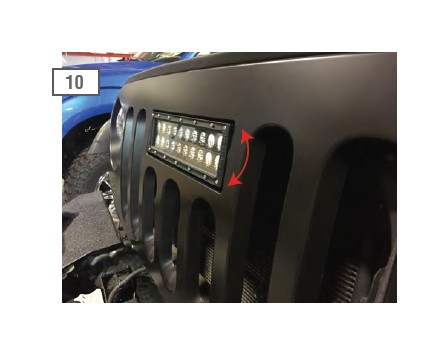
Mount the LED light bar bracket using the provided M6x1.0 bolts, lock washers, and flat washer.
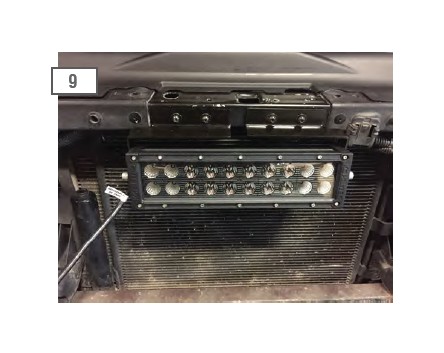
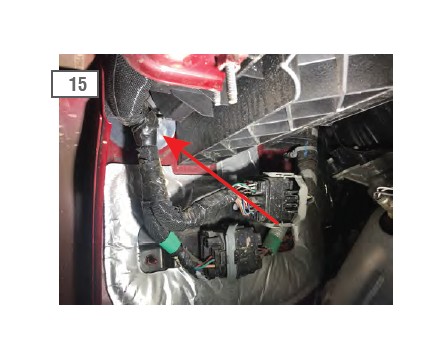
Using the supplied M8x1.25 bolts, loosely install the LED light bar to the light brackets. **Note: Do not pinch the wiring between the light and bracket. The wiring should be on the passenger side of the light. Feed the wiring connection through the radiator support as seen in step 14.
Temporarily install the grille. Adjust the light as desired. Remove the grille to tighten the LED bolts.
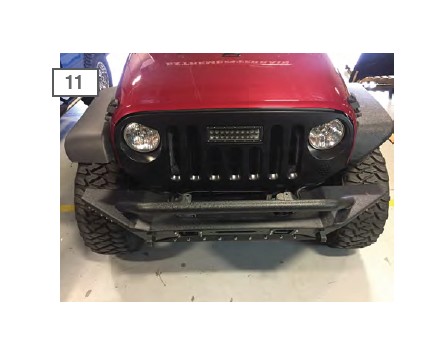
Reinstall the grille using the (6) factory push clips, and reconnect the turn signal plugs. Test the turn signals to ensure they are functioning properly before driving the vehicle.
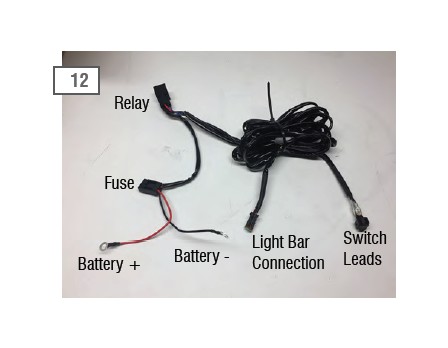
Wiring Overview:
Battery
Battery –
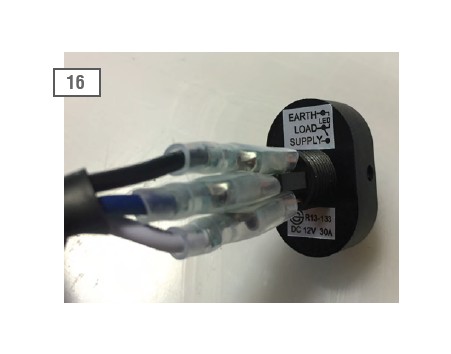
Switch Leads
LED Light Connector
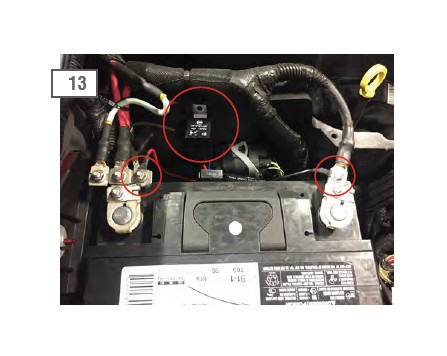
Connect the red ring terminal to the positive ( ) battery terminal. Connect the Black ring terminal to the negative (-) battery terminal. Secure the relay out of the way.
Feed the LED light bar wiring through the radiator support. Connect the light to the switch wiring harness. Ensure the plugs are pushed together all the way and clip.
Feed the switch wiring through a firewall grommet into to the interior of the vehicle. Mount the switch as desired.
Connect the wiring to the switch as seen above. Black is ground, White is supply, and blue is load.
Trouble Shooting:
If the LED light stops working at any time begin by checking the fuse. If the fuse is blown, check the switch wiring. Make sure it matches the diagram on the back of the switch. The colors may not always be the same as pictured. If the light still doesn’t work, ensure the plug is seated all the way, they are a tight connection.

