 FREE 1 to 3-Day Delivery on Orders $149+ Details

How to Install Deegan 38 Fender Flares w/ LED Marker Lights (07-17 Wrangler JK) on your Jeep Wrangler

Shop Parts in this Guide
Front Fender Install:
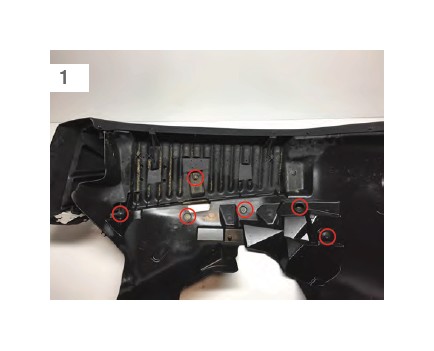
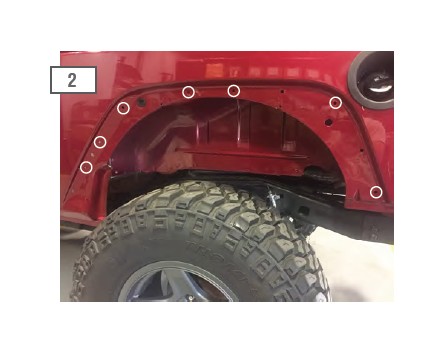
Begin by removing the factory fender liners, there are (5) 10mm bolts. Remove the factory marker light harness from the light. Remove the factory fender by firmly pulling it away from the vehicle. Start from the front of the fender and work towards the rear. The factory clips will most likely break, the clips will not be reused.
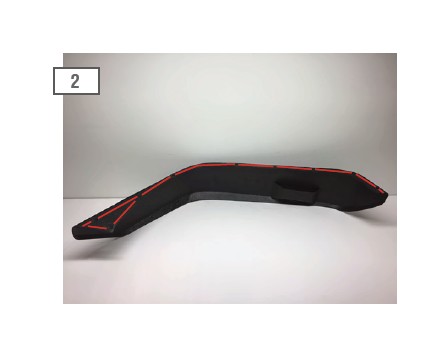
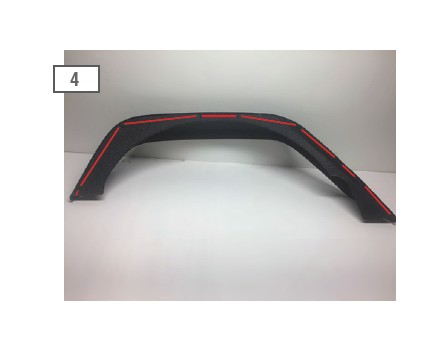
Install the supplied foam on the back side of the fenders as shown above.
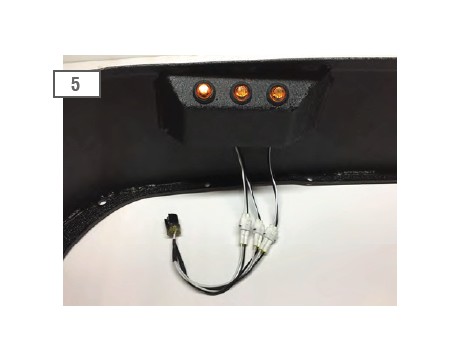
Slide the LED grommet off the back of the lights as shown. Feed the light’s plug through the hole in the fender. Press the grommet into the fender, then press the light into the grommet. **Note: There is a “Top” marked on the light.
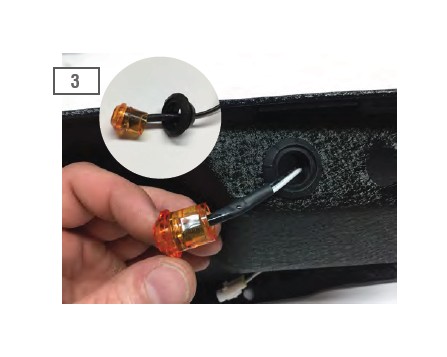
The rubber light grommet is a press fit. If there is play in the grommet after and the light is installed apply a small amount of silicone adhesive to the grove on the back side of the grommet.
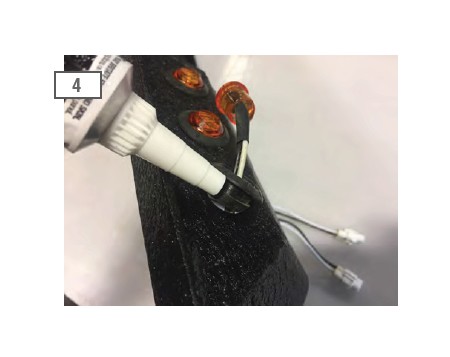
Reconnect the (3) LED light plugs to the main plug harness.
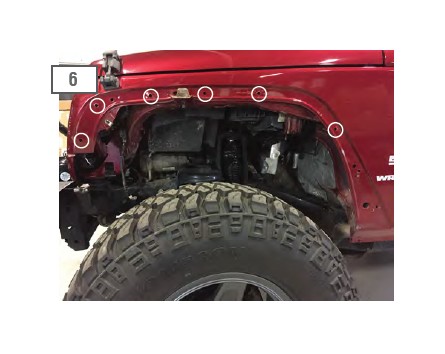
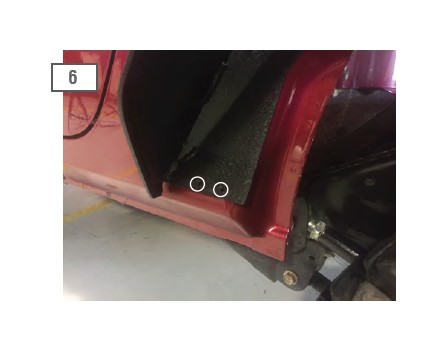
Drill the circled (6) holes above to 25/64”. Rivnuts will be installed in step 6.
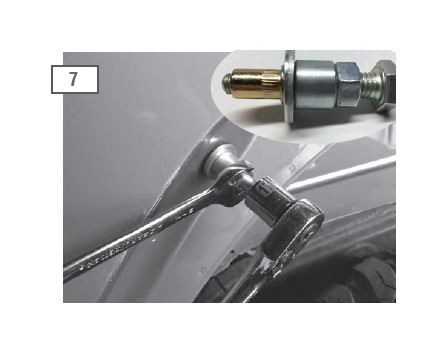
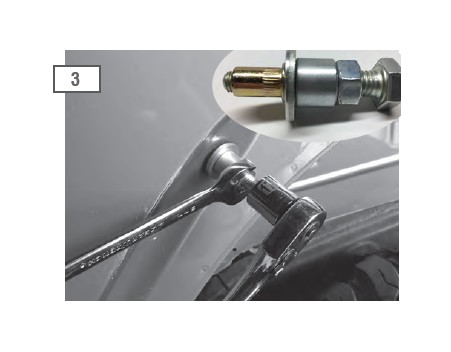
Rivnuts provide solid mounting point when there is no access behind the mounting surface. Insert the rivnut into the pre-drilled hole. Thread the rivnut tool onto the rivnut. Using a 16mm wrench, hold the nut in place while turning the head of the bolt with a 17mm ratchet. Tightening the bolt will clamp the rivnut against the sheet metal. **Note: Do not over tighten the rivnut. Doing so can pull the threads out of the insert.
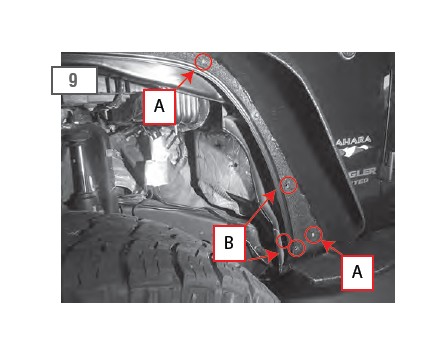
Test fit the fender by installing the M6x1.00 25mm bolts with the supplied washer, and lock washer on all mounting locations containing rivnuts. (4) Addition holes will need to be drilled in step 8.
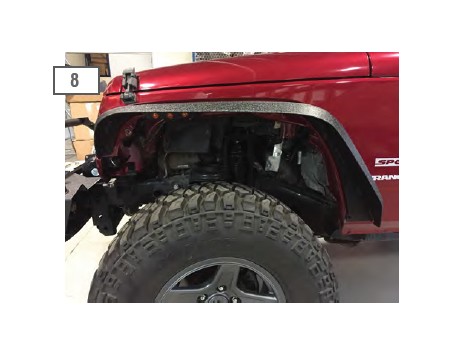
Using a marker, clearly mark the holes for drilling. Remove the fender for ease of drilling. Carefully drill the holes marked (A) to 25/64” and install a rivnut. Drill the holes marked (B) to 11/32" **Note: Keep the drill level, drill through both the outer and inner fender.
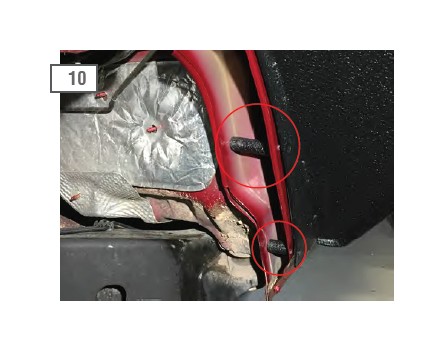
Re-install the fender using the supplied hardware on all mounting location containing rivnuts. Install the supplied spacers between the inner and outer fenders. The longer spacer uses an M8x1.25 115mm bolt, flat washer, lock washer, and nut. The short spacer uses an M8x1.25 65mm bolt, flat washer, lock washer, and nut.
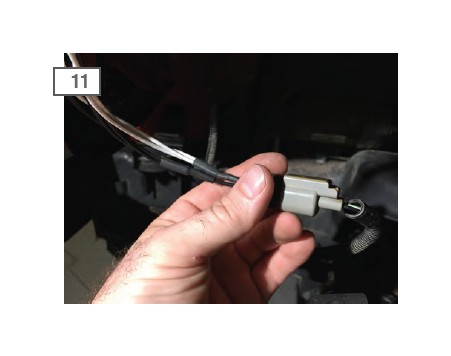
Plug the LED main harness into the vehicles marker light plug. Secure any extra wire out of the way using the included zip ties.
Rear Fender Install:
Using a flat head screw driver, remove the (5) push clips holding the rear fender liner to the vehicle. Then firmly pull the stock fender away from the vehicle moving from front to back. The factory clips will most likely break, the clips will not be reused.
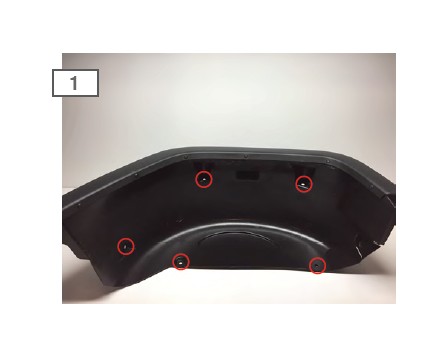
Install the supplied rivnuts in the (7) holes circled above. Begin by drilling the rivnut holes to 25/64”.
Thread the rivnut tool onto the rivnut. Using a 16mm wrench, hold the nut in place while turning the head of the bolt with a 17mm ratchet. Tightening the bolt will clamp the rivnut against the sheet metal. **Note: Do not over tighten the rivnut. Doing so can pull the threads out of the insert.
Install the supplied foam to the fender before installation as shown above.
Install the M6x1.00 25mm bolts with the supplied washer and lock washer on all mounting locations containing rivnuts.
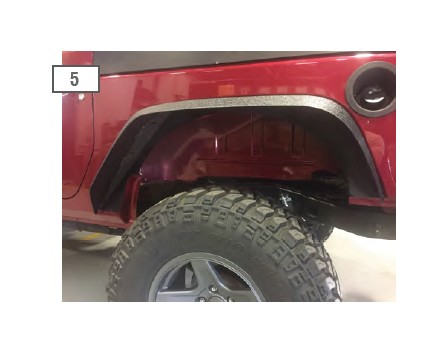
Install the (2) self-tapping screws once the fender has been fully installed.
Contents:
(30) - M6x1.00 25mm Button Head Bolts
(30) - M6 Lock Washers
(30) - M6 Flat Washers
(30) - M6 Rivnuts
(1) - M6 Rivnut Tool
(2) - M8 115mm Button Head Bolts
(2) - M8 65mm Button Head Bolts
(4) - M8 Lock Washers
(4) - M8 Flat Washers
(2) - M8 Flange Nuts
(4) - 1/8” Self-Tapping Screws
(1) - Roll Foam Tape
(1) - 4mm Allen Wrench
(1) - 5mm Allen Wrench
(2) - ZipTies

