 FREE 1 to 3-Day Delivery on Orders $149+ Details

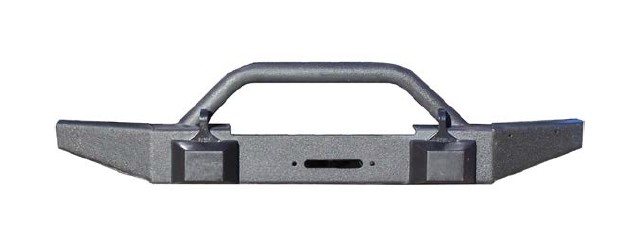
How to Install Crown Automotive Rock Front Bumper on your 07-18 Jeep Wrangler JK; 2018 Jeep Wrangler JL

Shop Parts in this Guide
* Tow Hooks not included (Replaces Part Number: 52060378AC)
Kit Contents:
1 - Front Bumper
2 - Bump Can Covers
12 - U-nuts (extras are included)
12 - Small Bolts (extras are included)
2 - Handle Nuts
2 – Large Bolts
4 – Large Washers
8 – Plastic Screws (extras are included)
1. Ensure that all components in kit are accounted for.
2. Disconnect negative battery cable.
3. Remove the grille and disconnect the bulbs from the turn signal housings.
4. Remove the front air dam by remove the 4 plastic screws on the
top and 2 on the bottom
5. Disconnect fog light connector and disconnect harness from bumper if equipped.
6. Remove the nuts holding the front bumper to the frame. There are 8 nuts, 4 per side. Retain the front bumper mounting hardware, including the stud plates or tow hooks.
7. Carefully remove the front bumper, ensuring that no wiring harnesses are connected to it.
8. Remove the front bumper cover from the top of the frame by removing the 2 plastic screws.
9. Install the stud plates or tow hooks onto the new front bumper in the same orientation that they were removed and install onto the vehicle.
10. If a winch is being installed in this bumper, install it and all its necessary accessories at this time. Torque winch mounting bolts to 40 ft. lbs.
11. Re-install the factory hardware to the stud plates or tow hooks.
12. Adjust the bumper so that the lower rear bumper brackets align with the hole in the pocket on the inside of the frame. Install a handle nut and loosely thread a large bolt (provided) into it. Some shimming may be necessary due to vehicle variances. The washers provided will act as shims in this case. Once the bumper is level, torque the lower rear bumper bolts to 20 ft. lbs. and the front bumper
nuts to 75 ft. lbs.
13. If the vehicle has tow hooks, the bump can covers should be oriented with the opening facing the top. If the vehicle does not have tow hooks, the bump can covers should be oriented with the opening facing the bottom. Install the provided u-nuts in the correct holes in the bump can covers so that they line up with the holes in the bumper. Install using the provided hardware and torque to 96 in. lbs.
14. Re-install the bulbs in the turn signal housings and then re-install the grille. Secure all wiring harnesses that were removed or disconnected.
15. Trim the stock air dam in the appropriate places until it fits securely. Install using the provided plastic screws.
16. Re-connect negative battery cable. Re-torque all hardware after 500 miles.
While every attempt is made to ensure that the information contained in these instructions is correct, no liability can be accepted by the authors for loss, damage, or injury caused by any errors in, or omissions from the information given. All service should be performed by qualified mechanics. Crown Automotive Sales Co .,Inc. cannot be held responsible for any mechanical work performed. Standard and accepted safety precautions should be used in every procedure.

