 FREE 1 to 3-Day Delivery on Orders $149+ Details

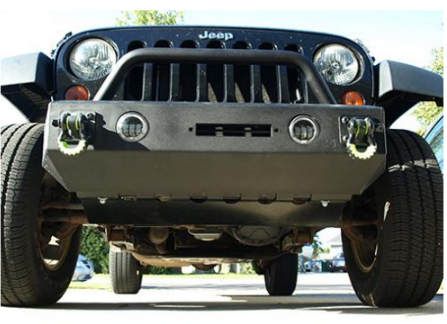
How to Install RT Off-Road Front Skid Plate (07-10 Jeep Wrangler JK) on your Jeep Wrangler
Installation Time
60 minutes
Tools Required
- Socket Wrench with 17mm and 19mm Sockets
- Open ended Wrenches 16mm and 18mm
- Drill with 9/16 Drill Bit
- Center Punch
- Optional: Floor Jack
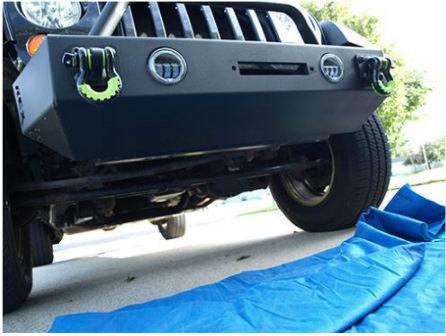
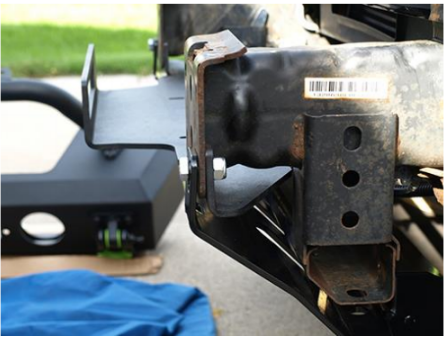
Installation Notes: The RT Off-Road Front Skid Plate was installed with an aftermarket stubby bumper. Your installation may be different based on the bumper you have installed on your Jeep®.
Before Install
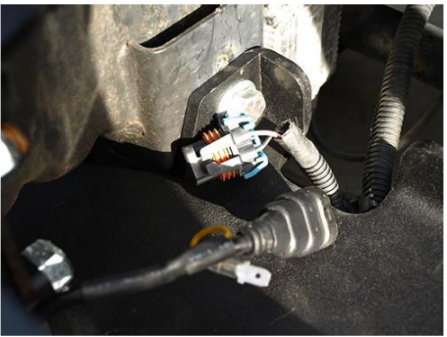
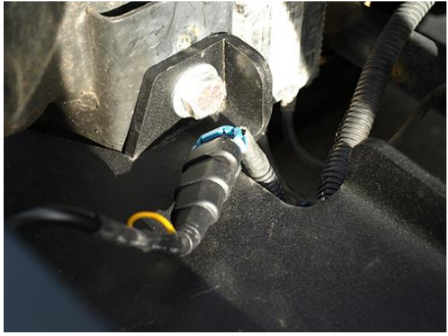
1. Disconnect the fog light wires from the passenger and driver sides.
2. Remove the eight (8) nuts securing the bumper to the frame of the Jeep®. There are four (4) bolts on the driver and passenger sides holding the bumper to the frame. Important Note: When removing the eight (8) nuts, the bumper will be free from the frame and may move or possibly fall.
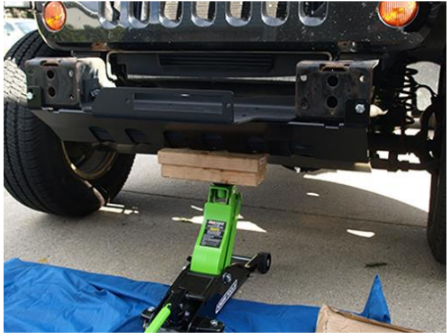
3. Place the front skid plate on a raised platform or bucket under the front of the Jeep®.
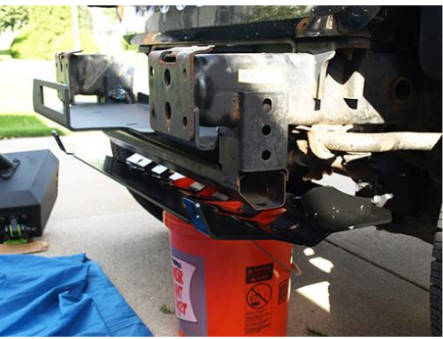
4. Slide an 18mm bolt through the front hole of the skid plate on the driver and passenger sides, attaching it to the frame of the Jeep®. Place a 19mm nut onto each bolt. Loosely tighten the bolts.
5. Lift the front skid plate, using a floor jack or other device, until the bolt holes of the welded bracket are aligned to the bottom frame brace.
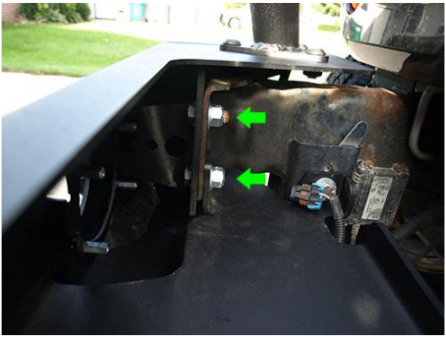
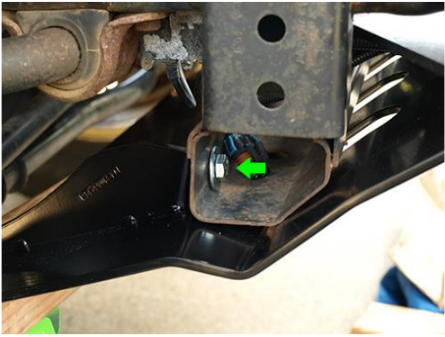
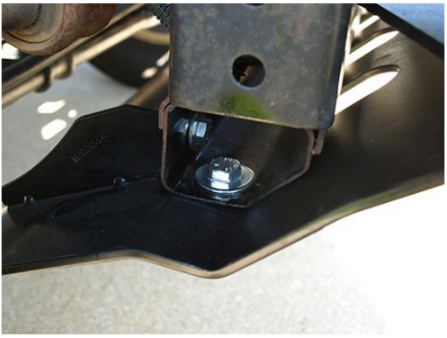
6. Slide a small washer (provided) onto a 16mm. Slide the bolt through the bottom frame brace on the passenger side and through the front skid plate. Secure it in place with a 17mm nut. Repeat this step on the driver side. Loosely tighten the bolts.
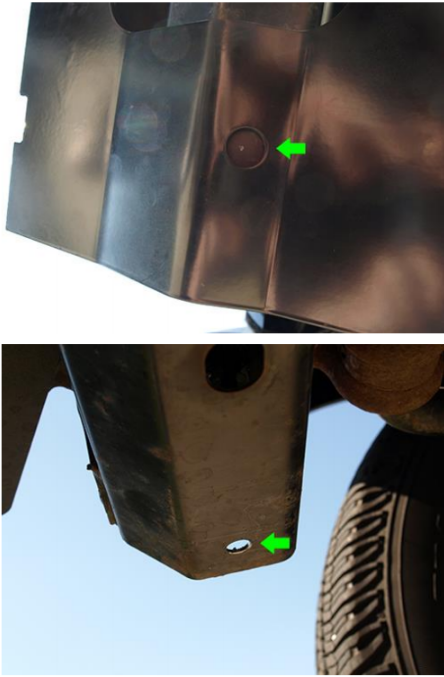
7. Drill a hole up to 9/16 in size on the bottom frame brace of the passenger side. Mark the location with a Center Punch. NOTE: Recommended to us a small drill bit to make a pilot hole and work your way up to the 9/16 drill bit size. You may need to remove the front skid plate when drilling the hole.
8. Place a larger washer (provided) onto an 18mm bolt. Slide the bolt through the hole that was just drilled into the frame brace. Place an additional washer on the other end of the bolt and a 19mm nut. Tighten the bolt.
9. Repeat step 8 on the driver side and then tighten all bolts that are holding the front skid plate to the frame brace.

10. Reattach your front bumper, tighten all bumper bolts and reconnect the fog light wires. Important Note: Depending on the bumper style you may need to remove the top front bolts that are holding the front skid plate to the frame that were installed in step 4.
After Install
Installation Instructions Written by ExtremeTerrain Customer Brian Voelzke 09/16/2018

