
How to Install Full Color American Flag Grille Decal on your Wrangler
Installation Time
1 hours
Tools Required
- Spray bottle with dish soap & water mixture
- Plastic Squeegee
- Surface cleaner-Mequiars Deep Crystal System paint cleaner
- Trim removal tool or comparable

Shop Parts in this Guide

Prep:
Clean car well to ensure good adhesion of the decal. Remove any wax from the car using a surface cleaner. Rewash the car to re-move anything missed and to rinse any chemicals left behind. Fill a spray bottle with a mixture of water and soap (we use baby shampoo), about 4 large drops per 32 oz. spray bottle of water. Be sure to install decal out of direct sunlight. Also having someone to assist you if you can is very helpful.
Step 1:
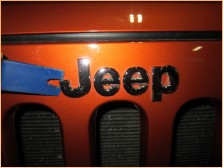
I order to install the graphic the manufactures logo will need to be removed. This can be done using a trim removal tool or similar tool. Pushing tool under logo with a steady and gentle push inward toward the logo will start to pry the logo up away from the vehicle. Once removed you can use 3M general purpose adhesive remover or similar product to remove the adhesive and the residue. After ward check to be sure the area to be installed as well as surrounding areas on the car are clean.

Step 2:
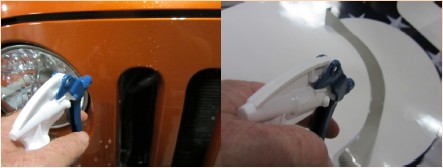
Spray grille with a generous amount of the soap and water mixture.
Step 3:
Peel backing from graphic exposing the adhe-sive. Also spray back of decal as your peeling the backing paper off. This is where a helper would be a good advantage.

Step 4:
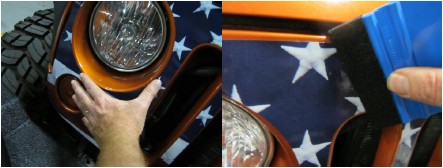
Place decal on grille. You will be able to maneu-ver the decal into position because of the soap and water solution you sprayed on earlier. At this time don’t go to the squeegee just yet. Use your hands to manipulate the decal into place. Using the headlights and other cutouts to align the graphic. It should have equal amount around all the openings and be uniformly placed on the grille. Once this is accomplished commence squeegeeing the graphic. Gently till the graphic has most of the moister removed. Once the graphic is set in you can squeegee any remaining moister and air left under the graphic

Step 4:
Once you squeegee out the water from underneath the decal and you are satisfied with the alignment you can use a hair dryer to dry the vinyl and the moisture left under the graphic. On this graphic you need to be sure the graphic is com-pletely dry and adhered to the vehicle before driving it.
Vinyl that needs to conform to curves of the hood can be pressed into place with your hands or if needed use a hair dryer to help conform to the shape of the car. Also when tucking vinyl around the edges of the car. Do not over heat it will shrivel or wrinkle.
Leave several hours, depending on climate, of dry time before cleaning car. Use a quick detailer in a spray bottle for the initial clean-ing then hand wash car waiting at least several days for the first time after drying. Do not power wash vinyl or wax vinyl.

