FREE 1 to 3-Day Delivery on Orders $149+ Details

How to Install Body Armor GEN 3 TrailDoors Front on your Jeep Wrangler

Shop Parts in this Guide
Removing Factory Doors:
** We recommend that you roll down your windows prior to removing the factory doors.
Step 1: Front doors: Locate wiring harness along with limiting strap.
Step 2: Unlock the factory plug by sliding the colored lock. Then squeeze the end of the plug to release the secondary lock. Try not to pull to hard to separate as you may damage the wiring Don’t unhook the limiting strap yet
Step 3: Locate the 2 sexbolts that are used to attach the factory door to the hinge. Use a T-45 TORX bit to remove the sexbolts. Once the bolts are removed you can remove the door Unhook the limiting strap, carefully lift the door out of the hinges. Be careful as the doors are a bit heavy. Reattach the sex bolts on the doors, that way they wont get lost. Repeat this process for the other doors.
Installation of the Trail Doors: All Part numbers
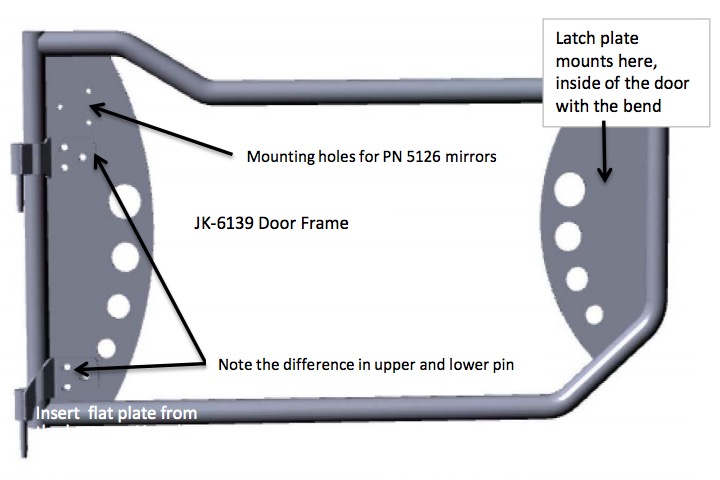
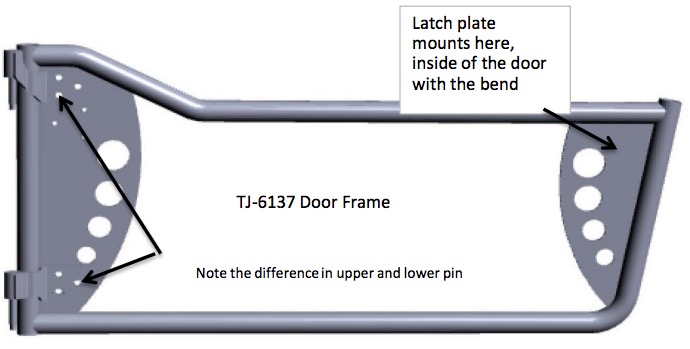
Step 1: Separate your door pins and latch plate, there are upper and lower pins for each door. To determine driver or passenger side pins and locations, refer to the images of the door frames on back page
Step 2: Locate upper pin(refer to door frame image page 2). Attach the pin with three 8M hex bolts. Use large flat washers on both sides of the door, then lock washer the nut. Face the bolts in. leave the bolts loose for now.
Step 3: Locate lower pin as shown on page 2. Attach the pin with three 8M hex bolts. Use large flat washers on both sides of the door, then lock washer the nut. Face the bolts in. leave the bolts loose for now. Select one of the bolts and attach the limiting strap prior to attaching nut
Step 4: Attach latch plate to the inside of the door with the horizontal holes against the door. Attach the latch to the backside of the latch plate using the vertical holes. Attach with two 8M bolts, flat washers, lock washer and nut, leave loose at this time
Step 5: Now with everything installed on the door you can slide the door onto the factory hinge pins. Open the latch teeth carefully close the door on the vehicle, this will help to align the latch and pins into their correct position. Now tighten the hinge bolts while the door is closed. Tighten the latch but leave loose enough for minor adjustment the key to adjusting the latch is to make sure the latch tooth has full rotation, and the notched tooth does not catch on the vehicle's striker. Once you are satisfied with the alignment tighten all hardware.
Step 6: Note: The pins may be loose in the hinges. This is intentional so not to damage the door bushings. To adjust wrap some electrical tape around pin, this will tighten the fit of the pins.