 FREE 1 to 3-Day Delivery on Orders $149+ Details

How to install Bilstein 5100 Series Front Shock for 3.5-5 in. Lift on your Wrangler
Installation Time
30 minutes
Tools Required
- Sockets: 18mm
- Socket Wrench
- Wrenches: 10mm, 16mm x2, 17mm, 18mm
- Torque Wrench
- 19mm Lug Wrench
- Jack (2) and Jack Stands
- Pliers
- Zip Ties (Recommended)

Shop Parts in this Guide
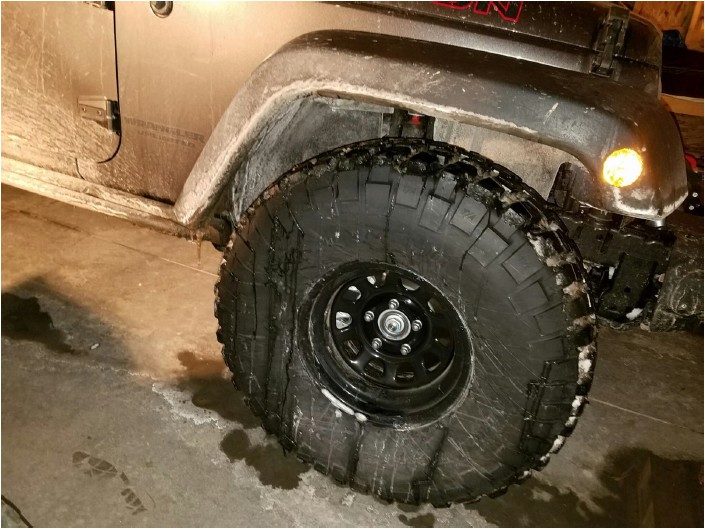
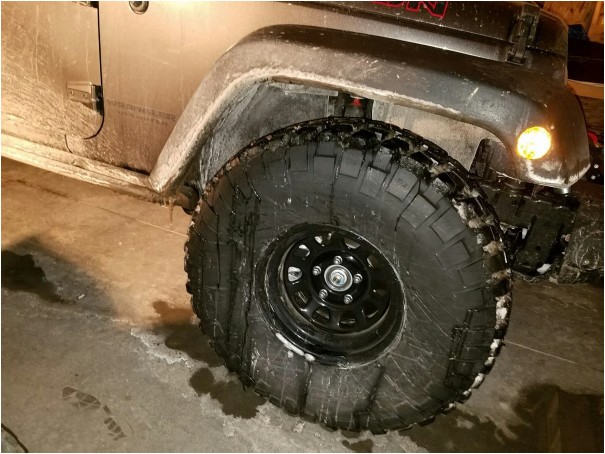
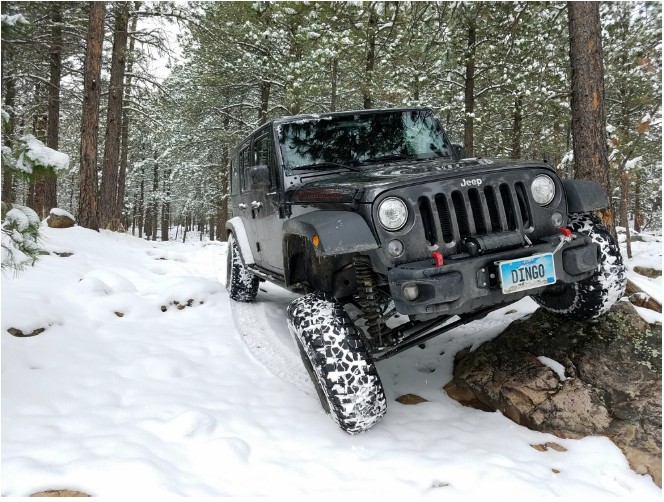
Before Picture:
Installation Instructions:
1. First, you want to park on level ground and disconnect the sway bar links. Using an 18mm socket, and 18mm wrench, remove the axle side sway bar link nut and bolt. Do this on both Driver and passenger sides.

2. Use a 19mm Lug Wrench, loosen the lug nuts on both front wheels. At this point, only loosen about ½ turn.
3. Next, Use a jack and jack stands to lift the front passenger wheel off the ground. For this step you will lift the jeep from the frame. Then use your lug wrench to remove the wheel.
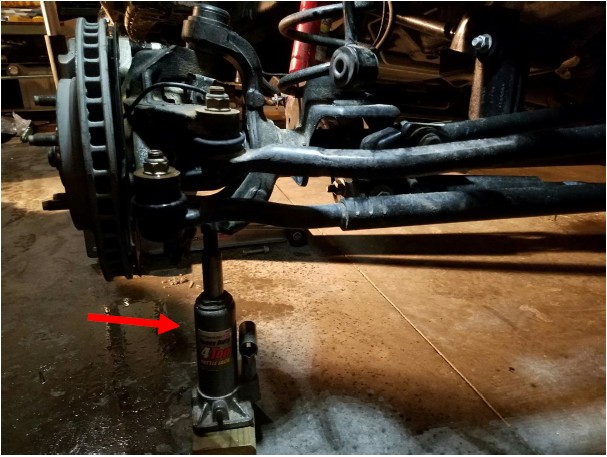
4. Using a second jack, lift the axle about ½ inch. This will take pressure off the lower shock bolt, and prevent the axle from hitting the ground when you remove it.
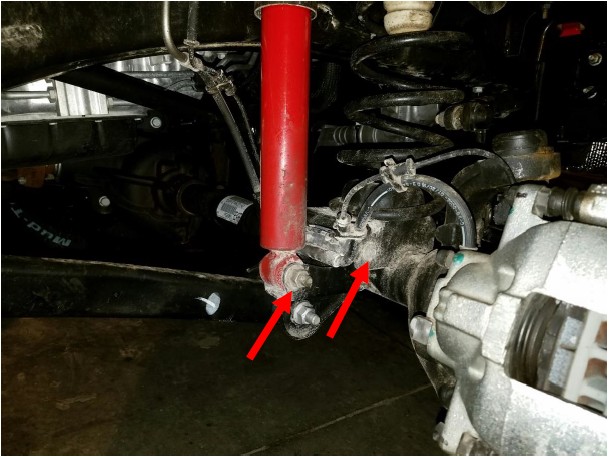
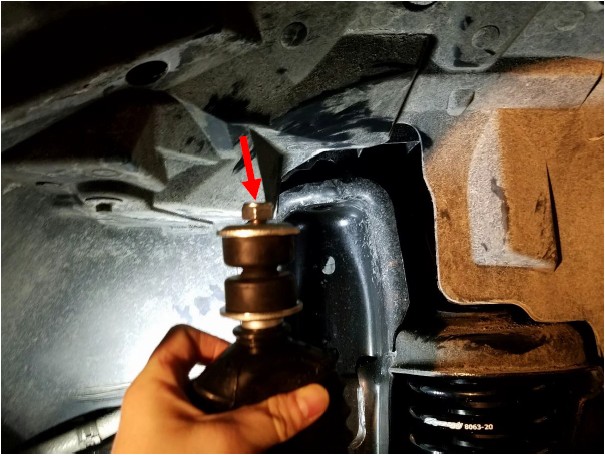
5. Using an 18mm socket and 18mm wrench, remove the lower shock nut and bolt. Then use a 10mm socket to remove the small bolt holding the factory brake line bracket.
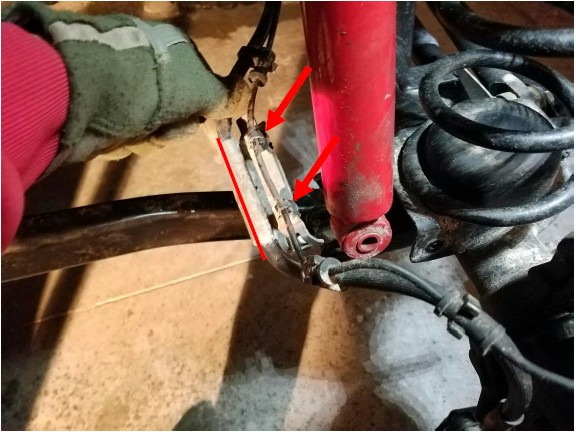
6. (Optional but highly recommended) Note: This step will give your brake line much more free length which is needed for your new longer shock travel. Using a dremel, cut a line down the bracket as shown below. Only cut about halfway through the bracket so you do not damage the brake line. Then use pliers to pry open the bracket. Then cut the cable ties attached to the ABS wire, and slide the bracket off the brake line. Be careful not to damage the brake line or ABS wire in the process.
7. Next, remove the shock from the upper mount. Using a 16mm wrench on the bottom (a 17mm wrench will work if you don’t have two 16mms), and a 16mm wrench on the top, remove the nut on top. Then slide the shock down and out of the mount. Also remove the stock shock bushings. You may need a flathead screwdriver to pop them off.
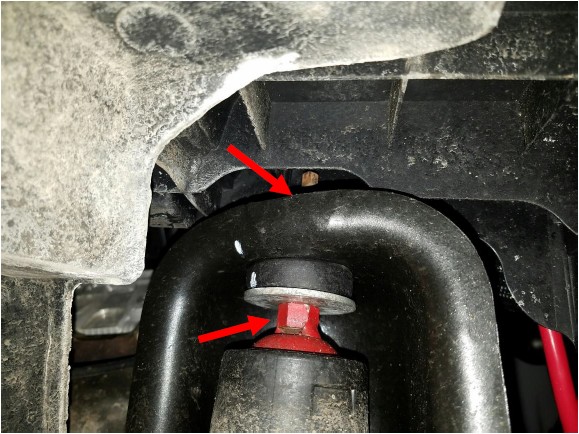
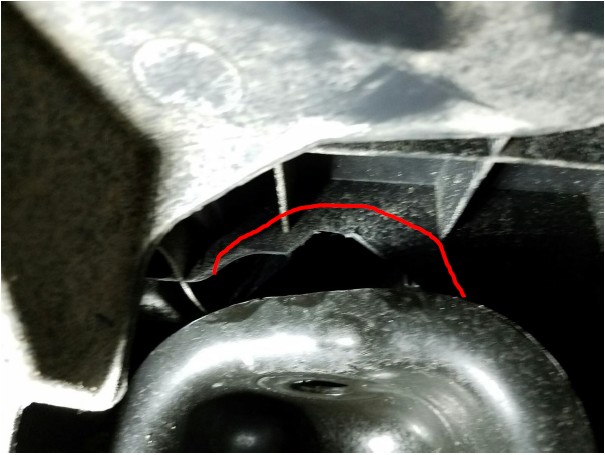
8. I recommend trimming some of the plastic above the shock mount. Use a utility knife or tin snips. This will make it much easier to install the new shock.
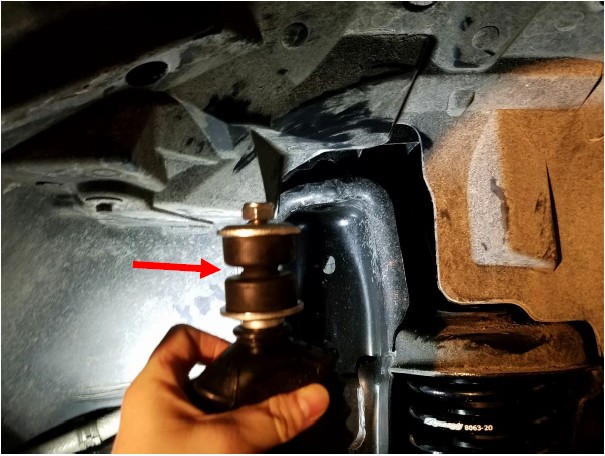
9. Insert the new shock into the upper shock mount. The washers and bushings will be used as shown below, with the washers cupping the bushings, and with the small bushing nub in the middle. Place one washer and one bushing onto the shock. Place the second bushing and washer on top of the upper shock mount, then insert the shock. Use your fingers to hand tighten the nut.
10. Tightening the upper shock mount is a very tight squeeze. You will either need a very stubby 5mm hex key, or you can use what I used below. It is a ¼” wrench, with a 5mm bit.
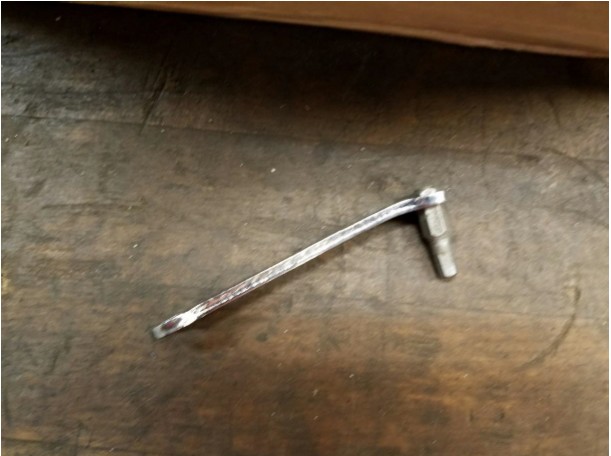
11. The 5mm bit inserts into the end of the upper shock mount bolt shown below. Once the shock is in place, use the 5mm bit as described to hold the shock in place while you use a 17mm wrench to tighten the shock nut. This nut is supposed to be torqued to 20ft/lbs, but unless you have an open ended torque wrench on hand you will need to estimate.
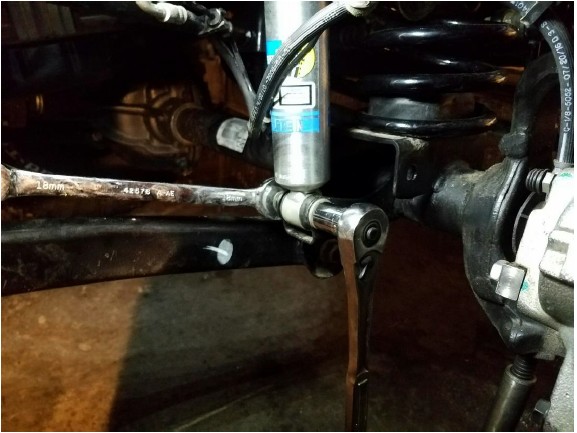
12. Align the lower shock mount and insert the stock bolt. You can either lower the axle until the holes line up, or you can manually compress the shock and put it in place, then use a flathead screwdriver under the shock to align the holes. Then use an 18mm wrench and 18mm socket to torque the nut to 56ft/lbs. Note: If you removed the brake line bracket, keep the brake line behind the shock as shown. If you did not remove the bracket, then reinstall the bracket where it was removed from.
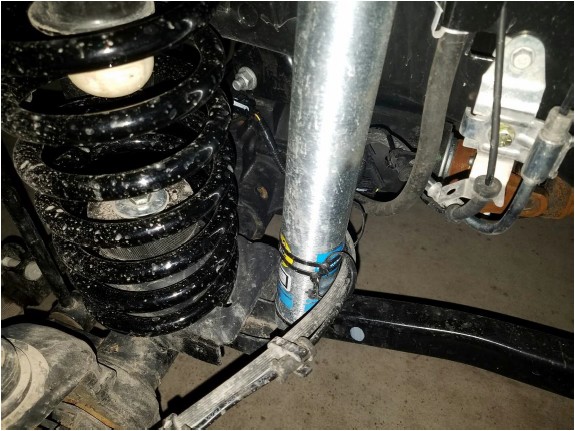
13. If you removed the stock shock bracket, you will still need to keep it out of harm’s way. Using 4 zip ties, attach the brake line to the shock. Put 2 loosely around the brake line and ABS wire, then use 2 to hold those loose zip ties to the shock. The ones around the shock should be as tight as possible. This setup will allow the brake line to move freely but keep it up in a safe location.
14. Reinstall the wheel and torque the lug nuts to 100ft/lbs. Then lower and remove the jacks and jack stands
15. Repeat steps 3-14 on the driver side.
16. Reinstall sway bar link nuts and bolts, torque to 75ft/lbs.
17. Make sure to articulate your suspension to make sure you will not bottom out your new shocks. I found that I needed 2 ¾” bump stops to keep the shocks safe from bottoming out.
After Pictures:
Installation Instructions Written by ExtremeTerrain Customer John Parker 03/10/2017

