 FREE 1 to 3-Day Delivery on Orders $149+ Details

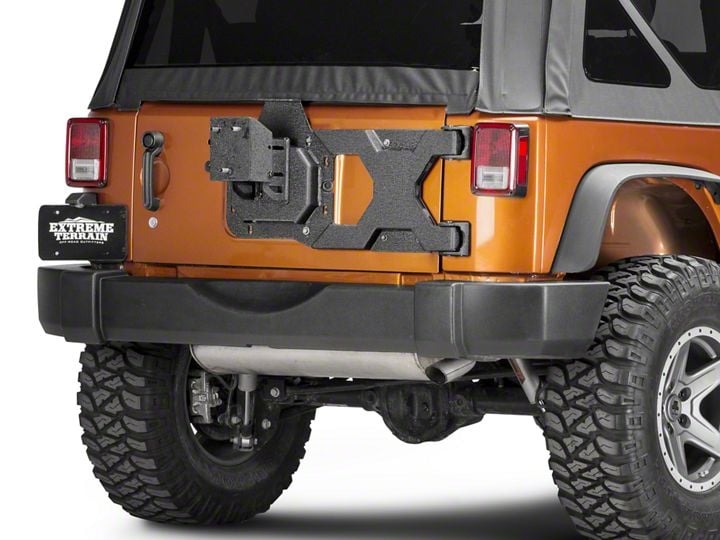
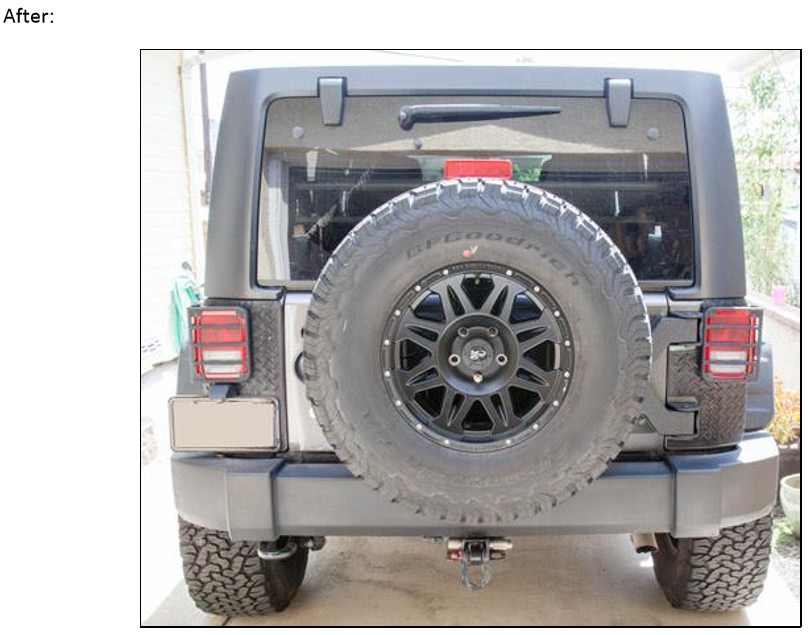
How to Install Barricade HD Tire Carrier w/ Mount (07-17 Wrangler JK) on your Jeep Wrangler
Installation Time
2.5 hours
Tools Required
- Tire Iron or Breaker Bar
- 19mm Socket
- 13mm Socket
- 10mm Socket
- 5/8" Socket
- Socket Wrench
- T50 TORX Bit
- T20 TORX Bit
- #4 Allen Wrench
- Shims and/or Small Blocks of Wood
- Painter's Tape or Masking Tape
- Pen or Marker
- Knife or Box Cutter
- Rubber Mallet or Dead Blow Hammer
- Straight Edge
- Measuring Tape or Ruler
- Optional, but recommended: Socket Wrench extension bars
- Optional: Flat Head Screw Driver
- Optional: Farm Jack
Shop Parts in this Guide
Installation Instructions:
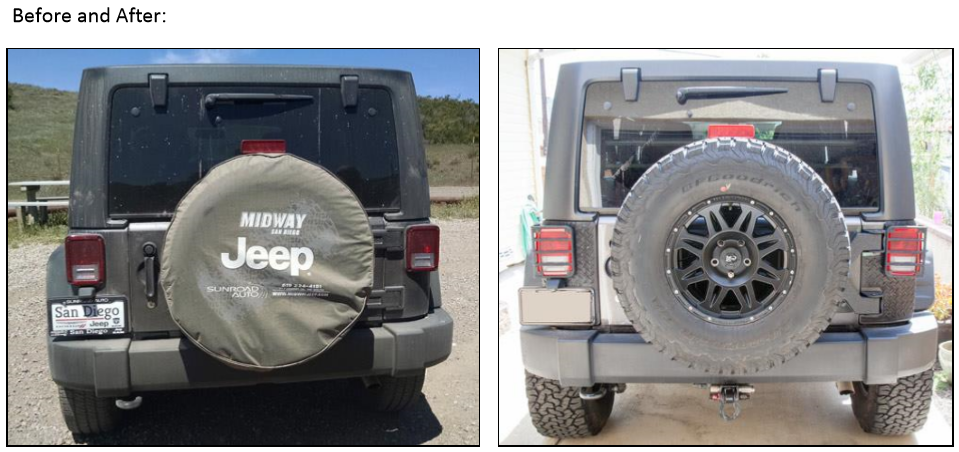
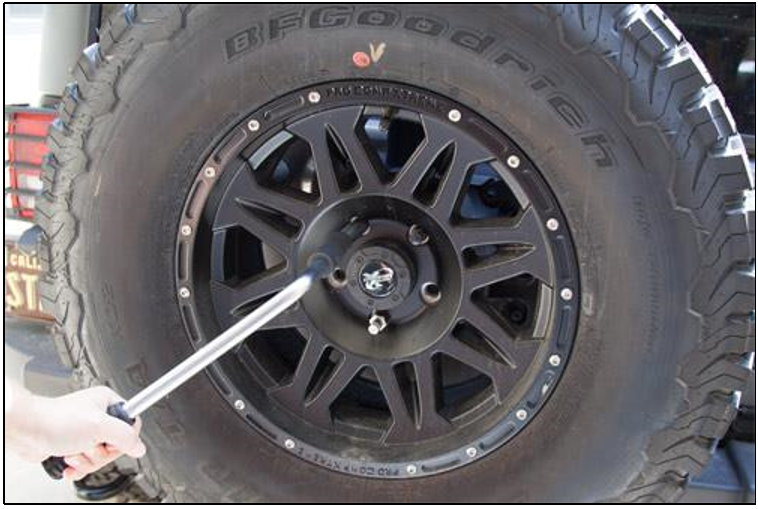
1. Remove spare tire with a tire iron and socket that fits your lug nuts (typically 19mm).
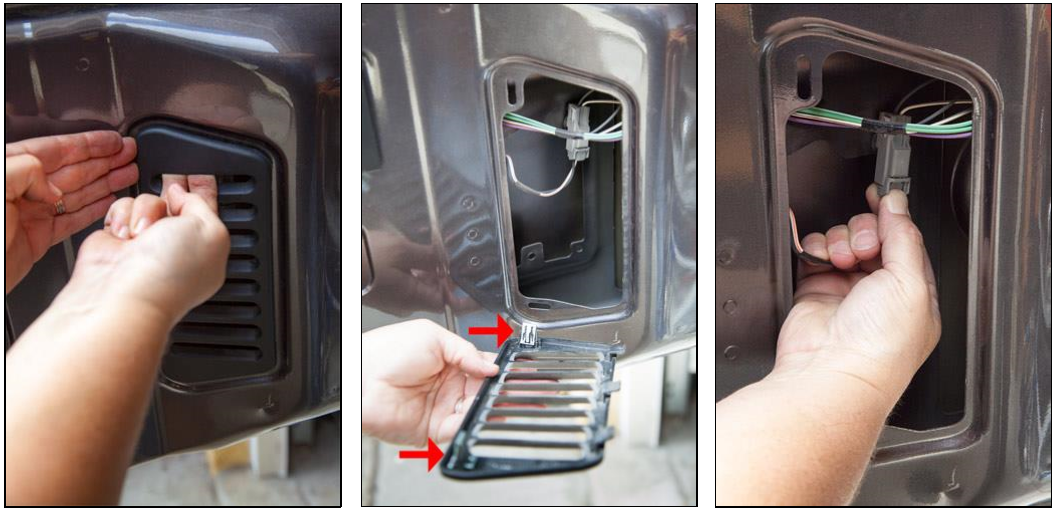
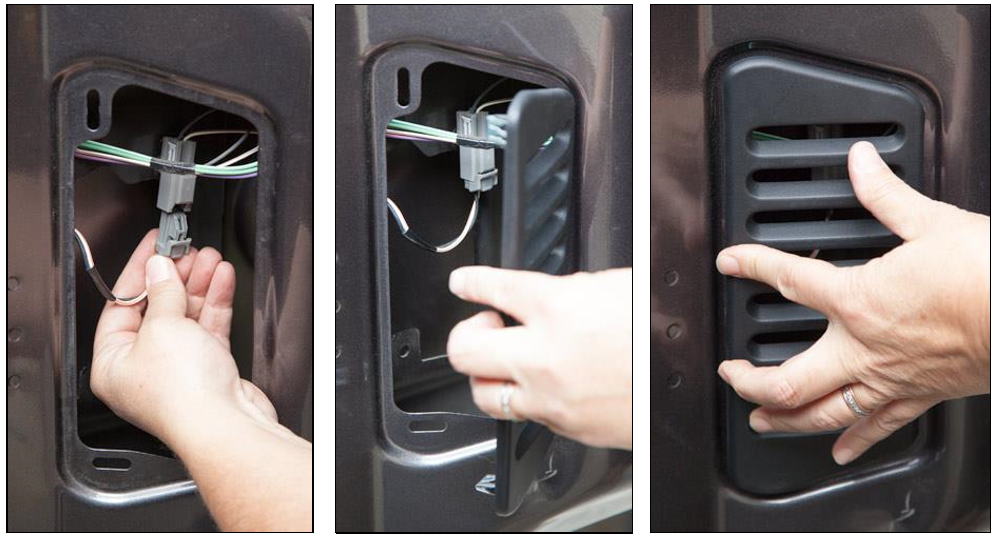
2. Open tailgate. Remove the vent from the inside of the tailgate by sliding your fingers in the vent and giving a firm tug on the upper left. If it doesn’t disengage easily, use a flat head screw driver to pry the 2 clips holding it on the top and bottom. Disconnect the 3rd brake light harness by pressing the tab and pulling the male & female connectors apart. Leave the vent cover off and close the tailgate.
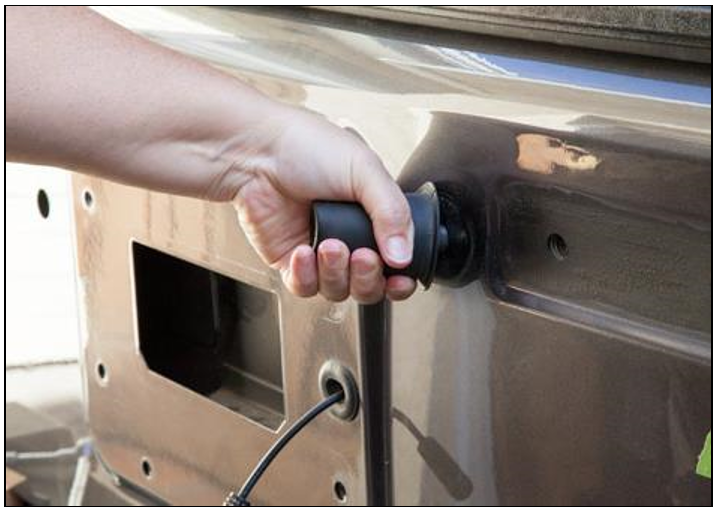
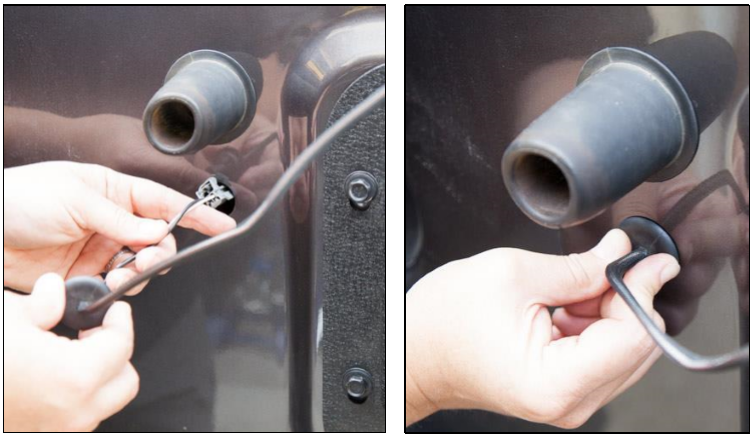
3. On the exterior of the tailgate, continue removing the 3rd brake light cable. Squeeze the rubber grommet with your fingers and separate it from the tailgate. Pull the 3rd brake light cord and connector free of the tailgate.
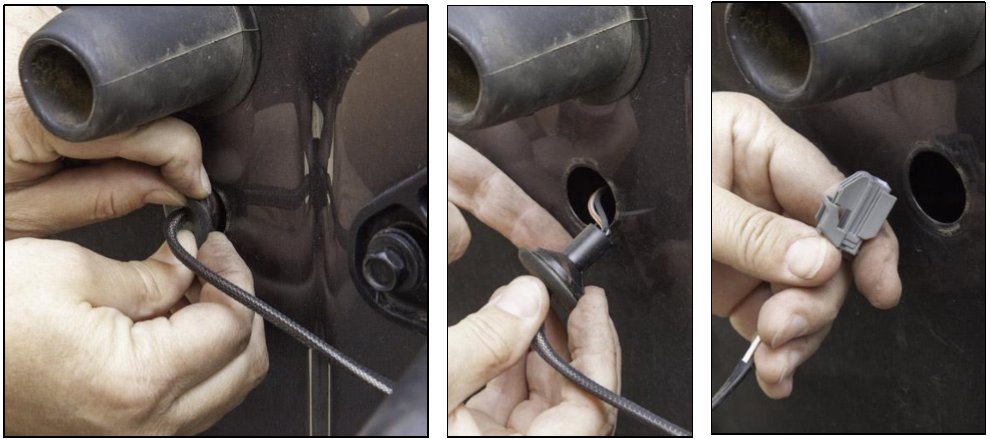
4. Remove the factory tire carrier from the tailgate. Using a 13mm Socket and Socket Wrench, remove the 8 bolts holding the factory tire carrier to the tail gate. Keep the bolts handy as you will be re-using them in Step 18.
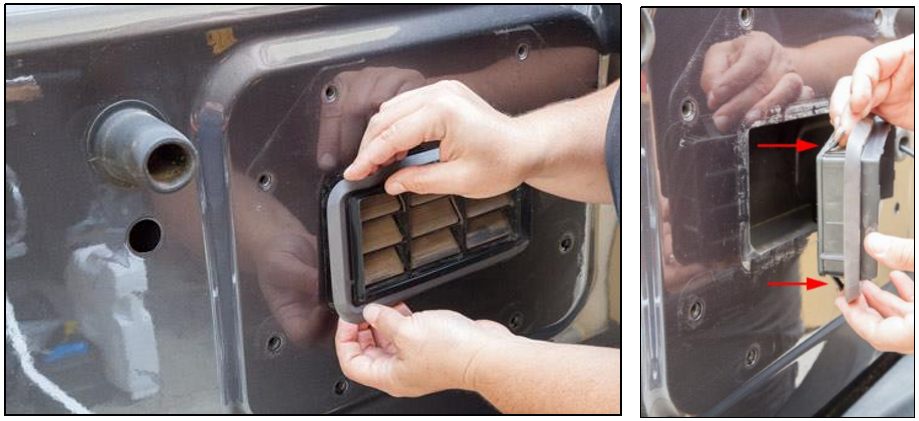
5. Remove the factory air vent cover by hand. Position fingers behind rubber gasket and pull gently to disengage clips at each of the four corners.
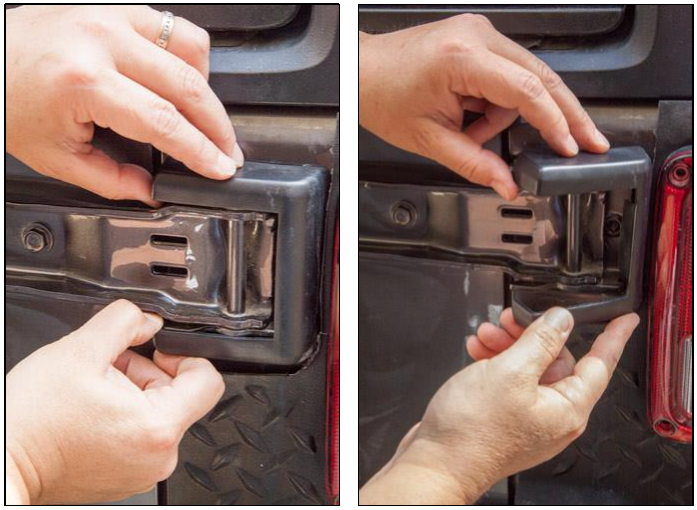
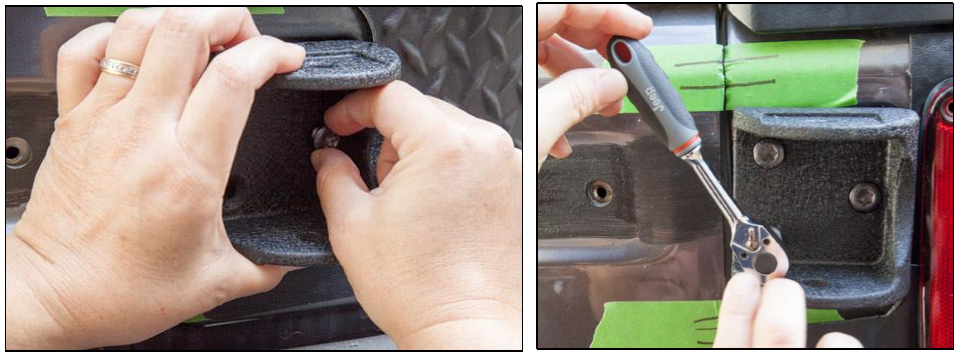
6. Remove the tailgate hinge covers. Grasp the plastic hinge cover and pull gently to remove the tailgate hinge cover. Repeat to remove the second tailgate hinge cover.

7. Remove the body hinge mount covers. Grasp the plastic hinge mount cover from the side closest to the tailgate and rotate out / pull gently to remove. Repeat to remove second hinge mount cover.
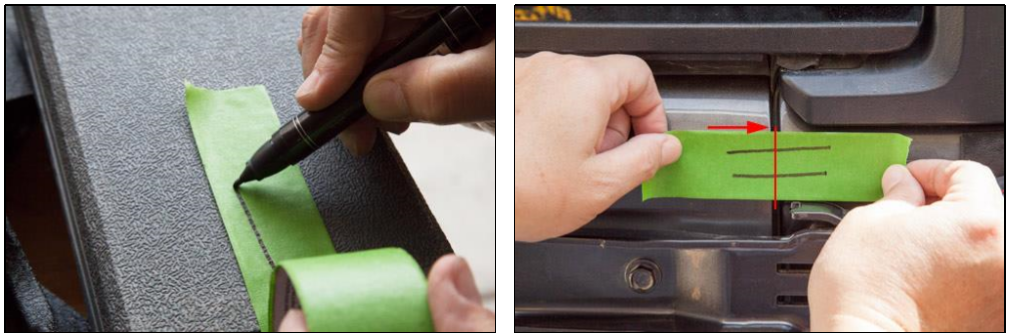
8. Draw two horizontal lines along the length of a 3-4” piece of painter’s tape using a marker and straight edge. Apply the tape to the tailgate and rear corner panel, above the top hinge. Repeat markings and apply the second piece of tape below the top hinge. Make two more pieces of marked tape and place above and below the lower hinge. The tape and lines will act as a visual guide to verify that your tailgate is aligned to the same location when the new hinges are installed. Carefully slice the tape vertically over the gap between the tailgate and the body with a knife or box cutter This will allow the tape to remain undisturbed when opening the tailgate later.
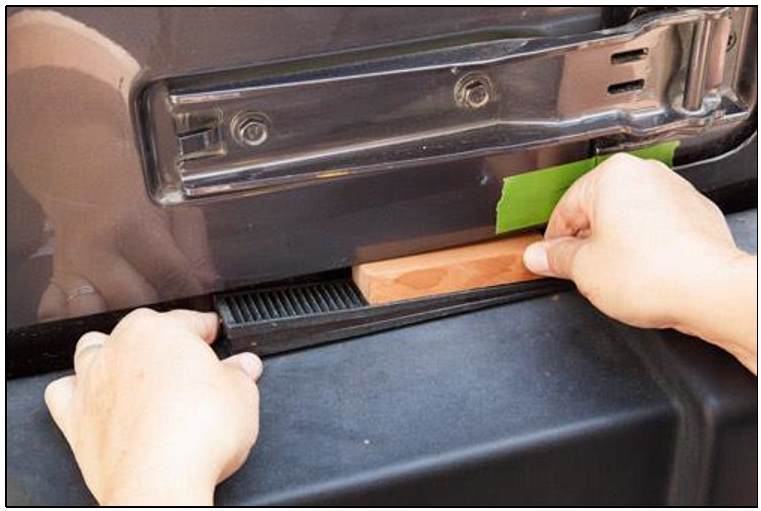
9. Shim the bottom of the tailgate at both the hinge and handle sides.
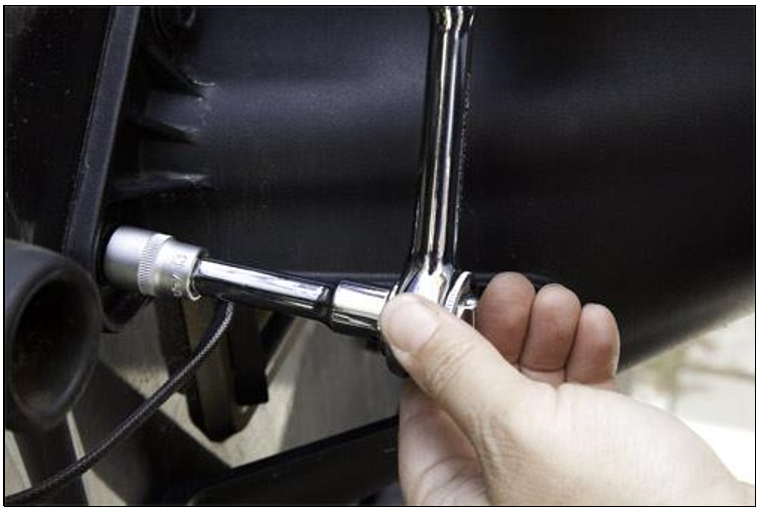
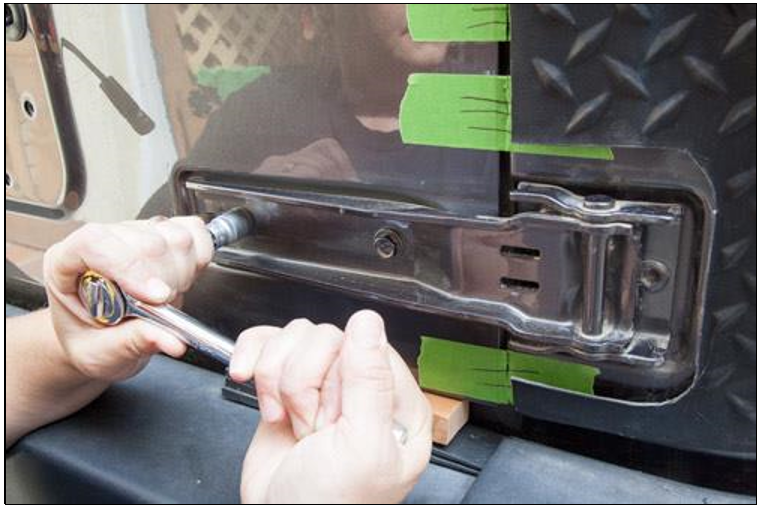
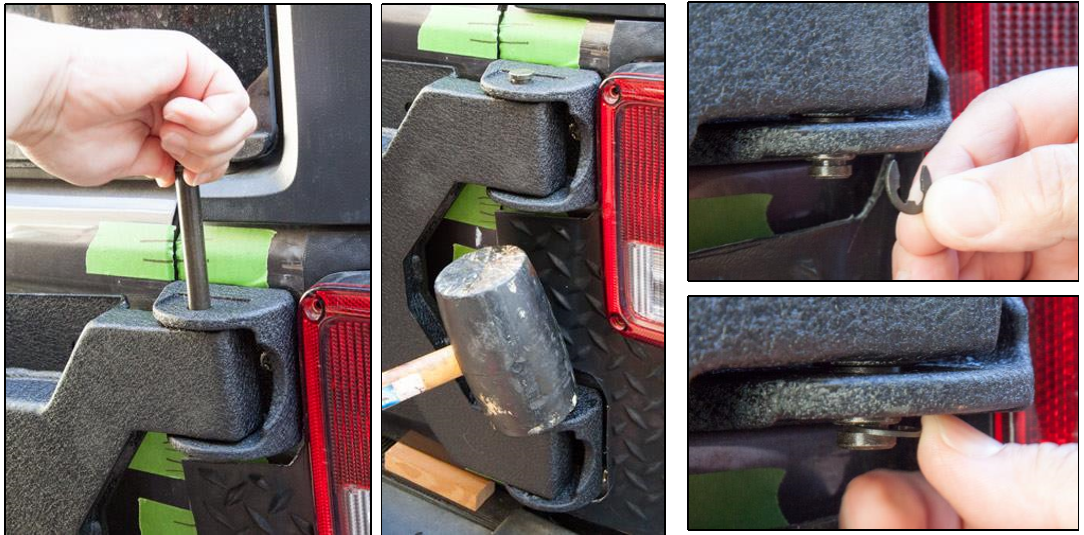
10. Use a 13mm Socket and Socket Wrench to remove the two bolts holding each hinge to the tailgate.
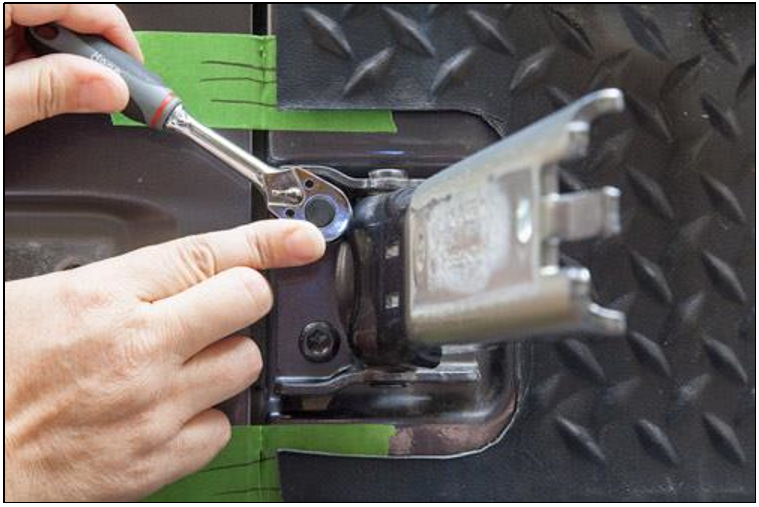
11. Gently pull the hinge to the open position. Using a T50 TORX bit, remove the three TORX bolts holding each hinge mount to the body of the Jeep. Save these bolts as you will re-use them in Step 13.
12. There are two spare tire bump stops on the tailgate. Remove the one closest to the hinge by grasping firmly and pulling.
13. Install the new hinge brackets using the six factory T50 TORX bolts that were removed in Step 11 (three bolts per hinge mount). Tighten them with a wrench and T50 TORX bit; they will self-center when secured.
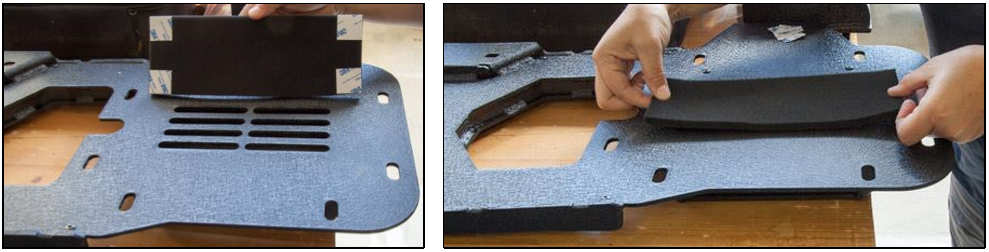
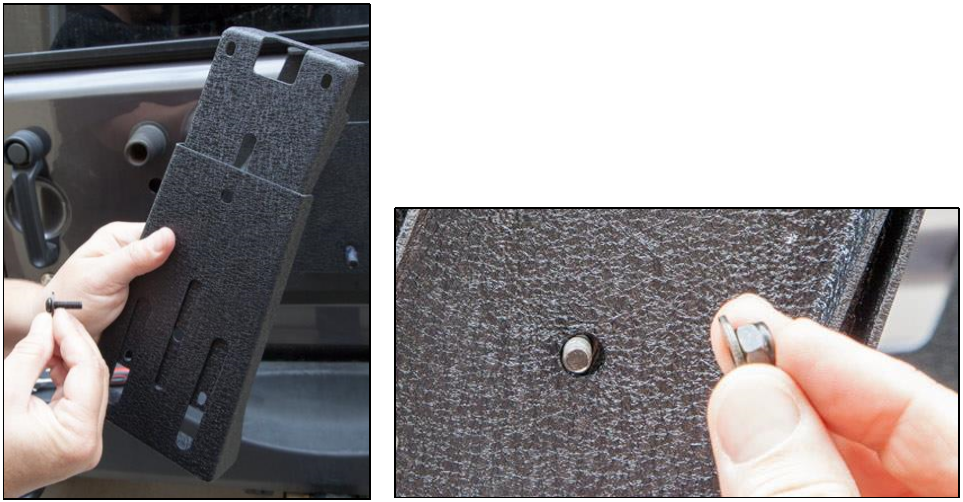
14. Locate the rectangular piece of foam that came with the Barricade spare tire carrier. Remove the paper covers from the 3M tape on the back of the foam. Position the foam over the slotted cutouts on the backside of the Barricade Tire Carrier Bracket Mount, pressing on each of the four corners to adhere.
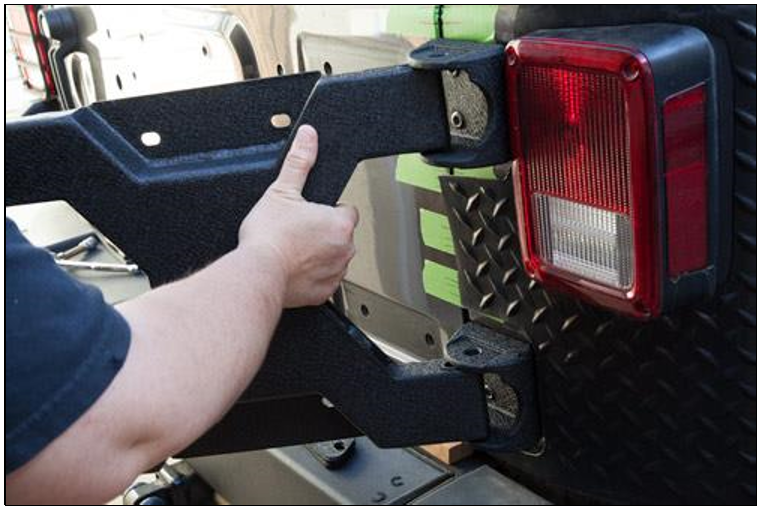
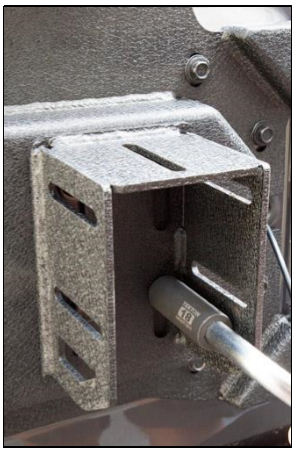
15. Position the Barricade Tire Carrier Bracket Mount ears in the hinge mounts.
16. Slide the pins into the hinge mounts and Tire Carrier Bracket Mount. You may need to use a rubber mallet to fully seat the hinge pins. Secure the bottom of each hinge pin with one of the provided C-clips.
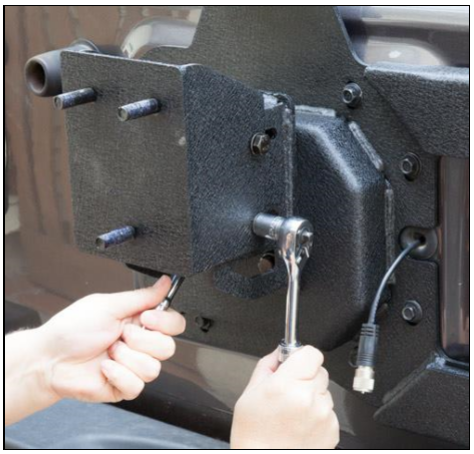
17. Position the thinnest spacer behind the top of the Tire Carrier Bracket Mount before threading the supplied 13mm bolt with washers through it. Repeat with the lower part of the Mount, using the thickest spacer. Tighten all 4 bolts with a 13mm socket & wrench.
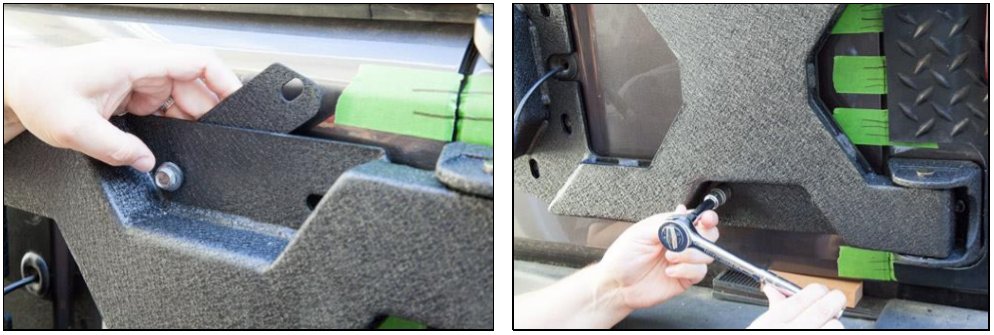
18. Use the eight factory bolts (removed in Step 4) to secure the 4 corners of the Tire Carrier Bracket Mount. Check the lines on the painter’s tape to ensure the tailgate hasn’t shifted. If required, adjust the height of the tailgate using the shim. When properly aligned, tighten all eight bolts using a 13mm socket and wrench. A short socket extension bar may make the job easier.

19. Loosely bolt the Tire Carrier Base to the Tire Carrier Bracket Mount using the four supplied 18mm bolts and washers. Secure, but do not tighten. You will need to dry fit the tire to determine the proper height.
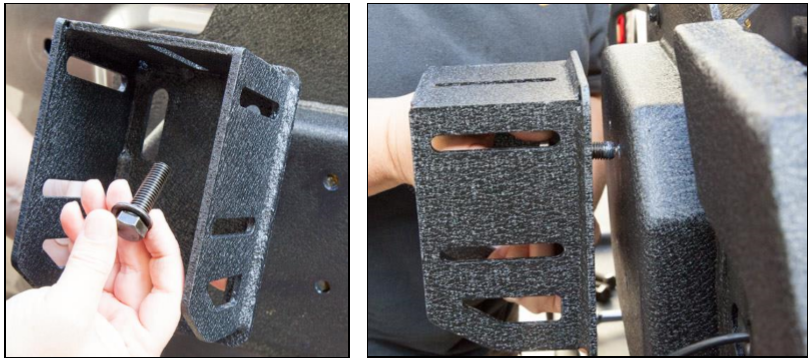
20. Loosely bolt the Spare Tire Carrier to the Tire Carrier Base with the supplied bolts, washers and nuts.
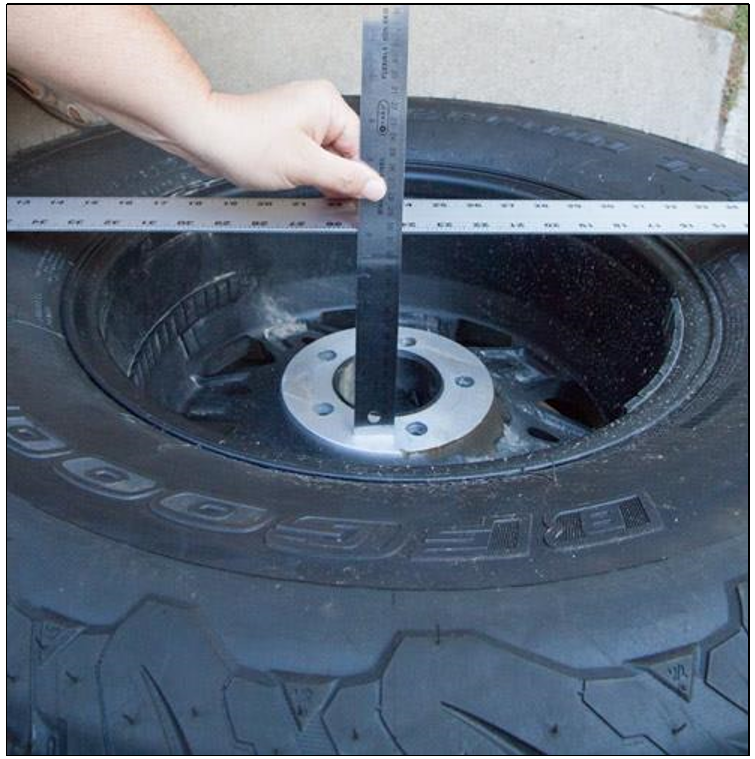
21. Measure the backspacing of your tire. Place a straight edge across the tire. Use a ruler to measure from the mounting hub of the tire to the top of the straight edge.
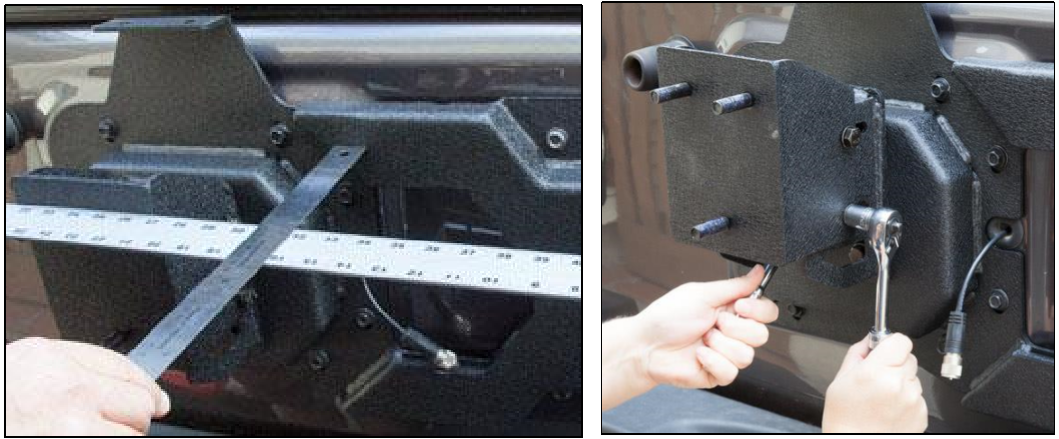
22. Place the straight edge on top of the loosely installed Spare Tire Carrier. Use a ruler to measure to the Tire Carrier Mounting Bracket. Position the Tire Carrier to the correct backspacing. Do not tighten all the way, but secure the Tire Carrier with a 5/8” socket on the bolt head and a 17mm socket on the nut, making certain that all parts are plumb and level.
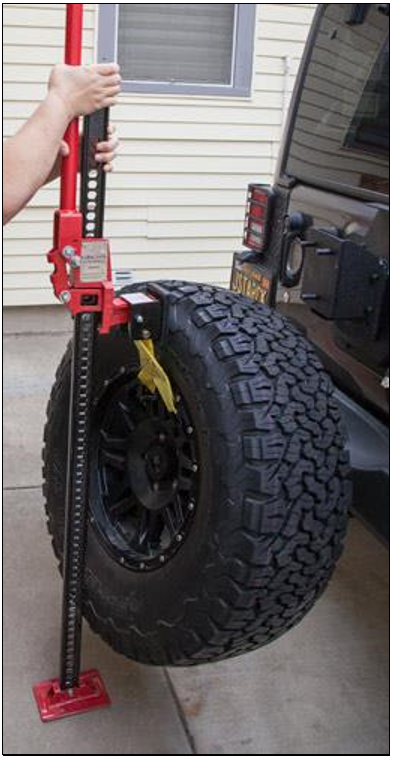
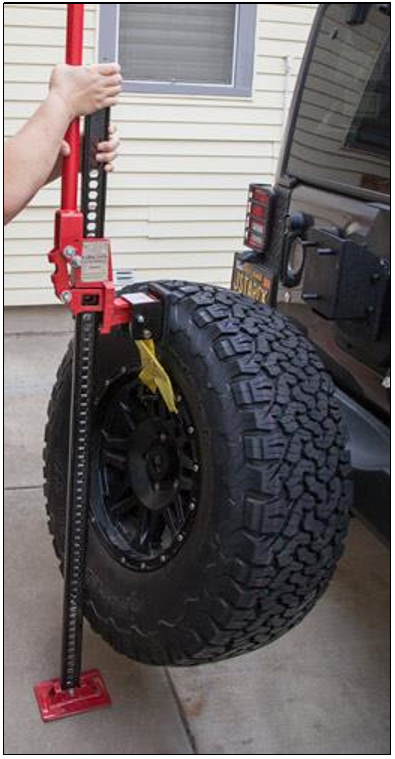
23. Dry fit the spare tire to verify the placement of the Tire Carrier Base (height) and the Tire Carrier (depth). Adjust the Tire Carrier Base and Tire Carrier as needed to ensure the spare tire is positioned close to the tailgate and bumper. A farm jack may make dry fitting the tire easier.
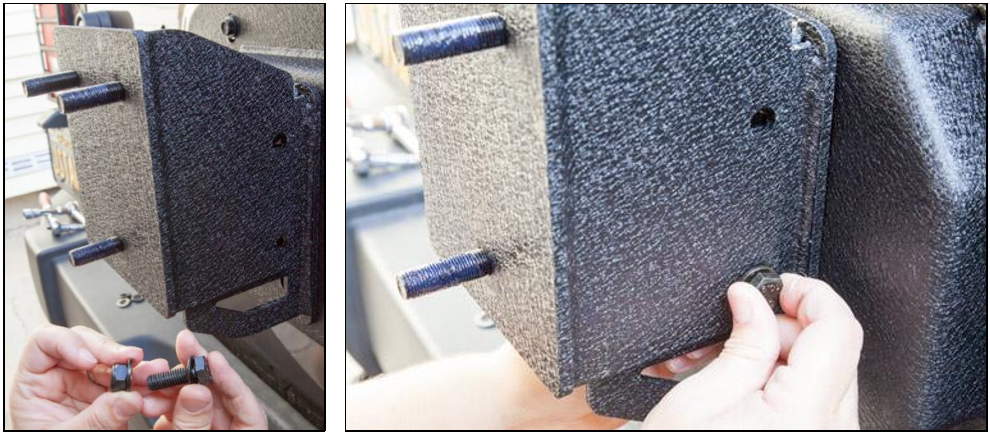
24. Remove the spare tire. Position and tighten the Tire Carrier Bracket Base to the Tire Carrier Bracket Mount with an 18mm socket & socket wrench. An extension bar may make the job easier.
25. Tighten the Tire Carrier to the Tire Carrier Base with a 5/8” socket on the bolt head and a 17mm socket on the nut, making certain that it’s plumb and level.
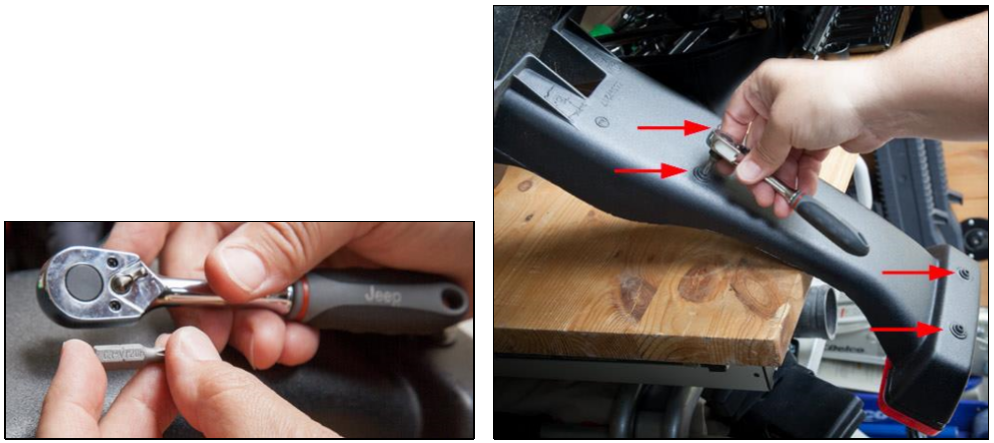
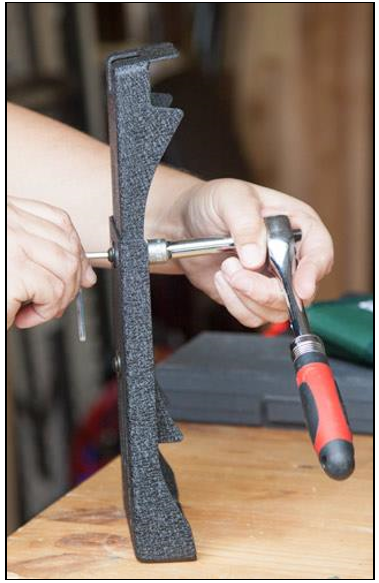
26. Loosely secure the supplied upper and lower 3rd tail light brackets together using the provided Allen bolts, washers, lock nuts, and a #4 Allen wrench.
27. Disassemble the factory 3rd brake light bracket by removing the four TORX screws from the rear of the factory tire carrier. Use a T20 TORX bit and socket wrench. Save the TORX screws as you will re-use them in Step 31.
28. Slide the 3rd tail light wiring out from under the factory bracket tabs and route it to the right of the channel.
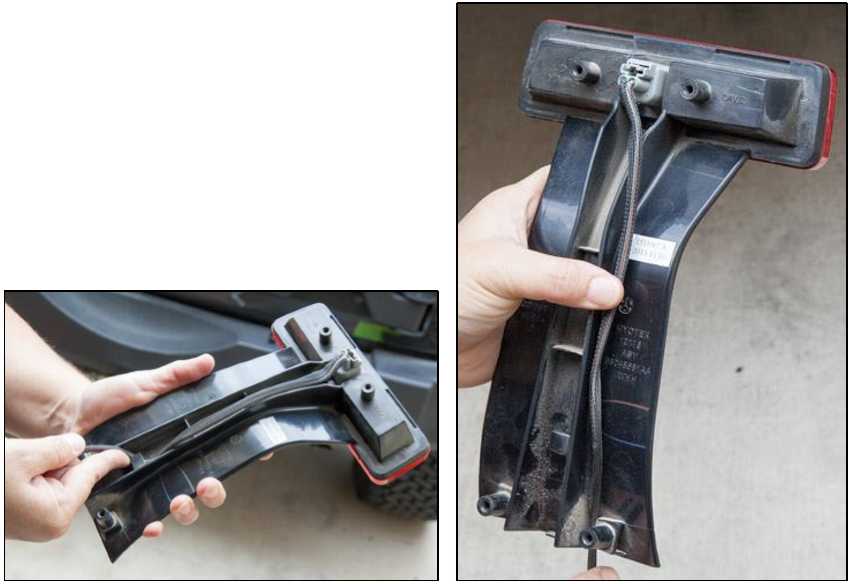
29. Position the Barricade brake light bracket on the backside of the factory 3rd brake light. Make sure the brake light wiring isn’t being pinched between the two parts.
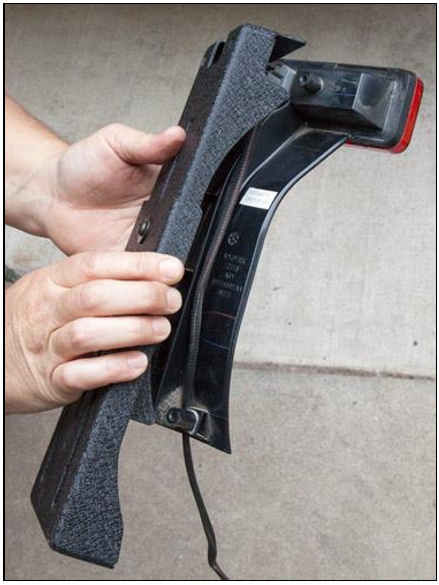
30. Secure the bracket to the brake light using the four factory TORX screws removed in Step 27, a T20 TORX bit, and wrench.
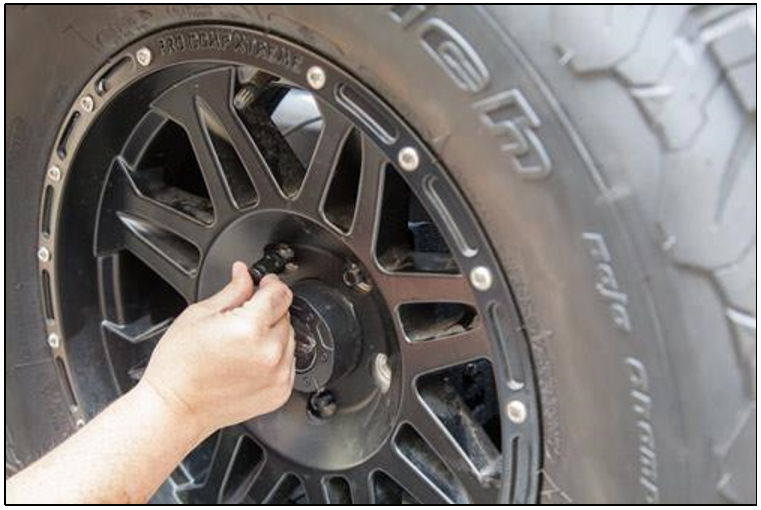
31. Loosely mount the spare tire on the tire carrier using a 19mm socket and tire iron. A farm jack may make lifting the spare tire easier.
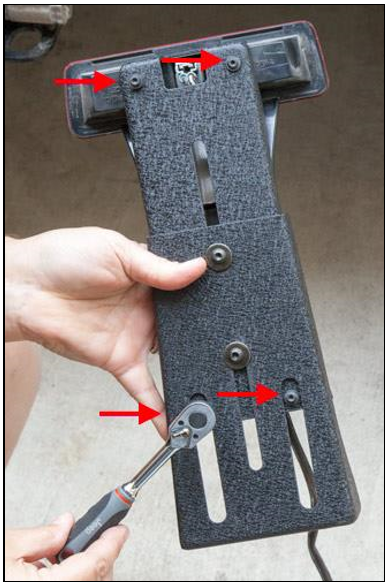
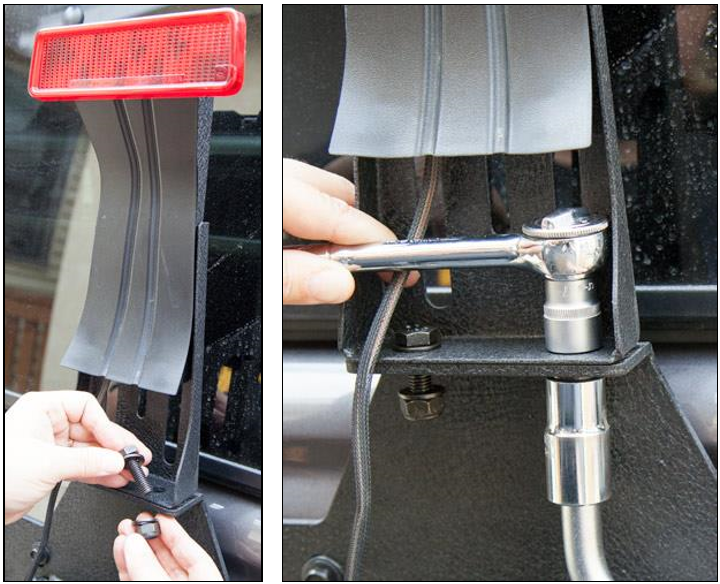
32. Dry fit the 3rd brake light assembly on the tire carrier to determine the proper height of the brake light. After determining the correct height of the 3rd brake light, remove the assembly from the tire carrier. Tighten the Barricade brackets together using a 10mm socket, socket wrench, and #4 Allen wrench.
33. Remove the spare tire using a 19mm socket and tire iron. Install the assembled 3rd brake light on the Barricade Tire Carrier Bracket Mount and secure with the provided bolts, washers, and lock nuts. Tighten with two 17mm sockets and wrenches.
34. Reinsert the factory 3rd brake light wiring into the tailgate by feeding the connector and wiring through the tailgate hole. Secure the wiring with the rubber grommet.
35. Carefully open the tailgate. If you hear a loud pop or feel resistance, do not continue opening the tailgate or you risk damaging the tailgate check strap (the plastic covered metal bar that connects the tailgate to the rear interior of the Jeep). Reconnect the brake light wiring harness and replace the vent cover.
36. Reinstall the spare tire and secure using a 19mm socket and tire iron. Remove the painter’s tape.
Installation Instructions Written by ExtremeTerrain Customers Rhea and Valerie Lovan 9/19/2017.

