 FREE 1 to 3-Day Delivery on Orders $149+ Details

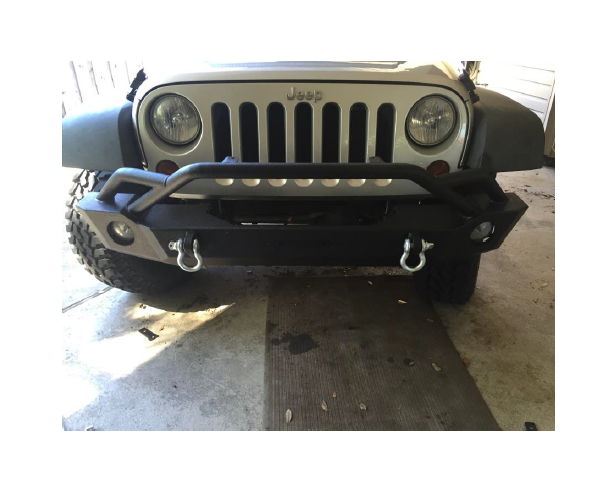
How to Install Barricade Extreme HD Front Bumper on your 07-18 Jeep Wrangler JK; 2018 Jeep Wrangler JL
Installation Time
1 hours
Tools Required
- 18mm Ratchet
- Pliers
- Philips Screwdriver
- Flathead screwdriver
- Wire stripper
- Heavy-duty scissors or wire cutters
- Electrical tape
- Tie-wraps (recommended)
- Spray Lubricant (Recommended)
- Wire (See notes)

Shop Parts in this Guide
Installation Instructions:
1. Remove factory bumper
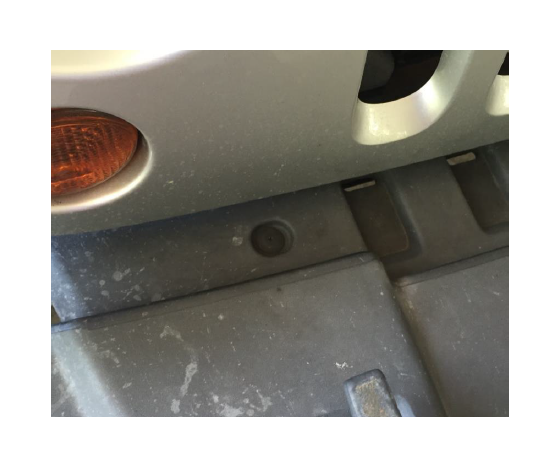
a. Begin by removing the 4 pin screws located underneath the bumper. These hold the splash guard in place. You may need to use a flathead screwdriver and pry them off if the threads are stripped. Once all of them are removed, pull the splash guard off.
b. There are similar screws on the top of the bumper that need to be removed in the same way. This will free the plastic piece under the grill.
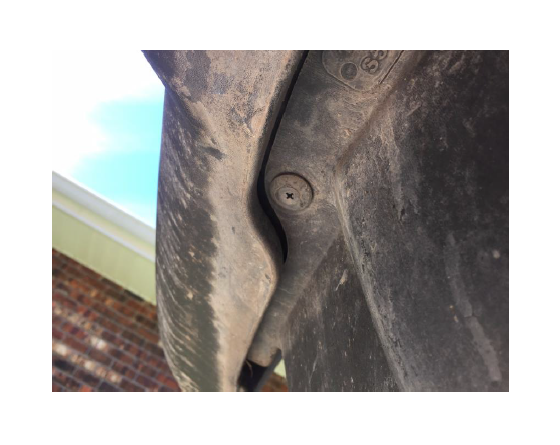
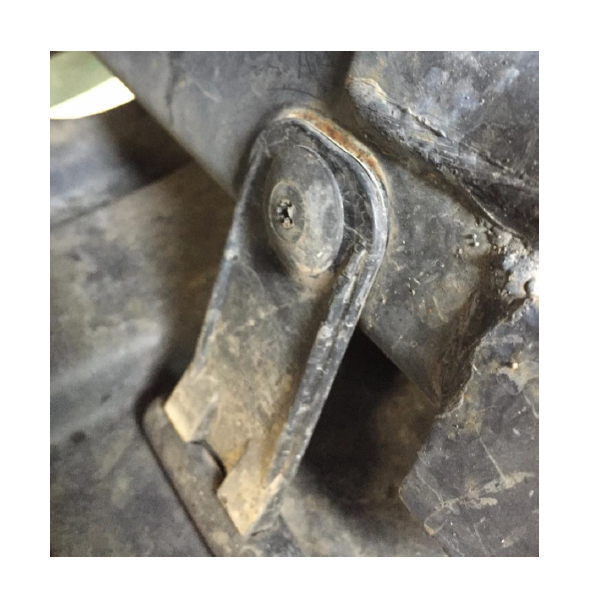
c. Two more pins are located behind the bumper that must also be removed
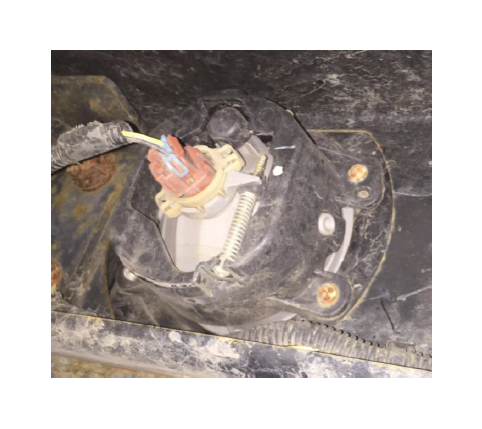
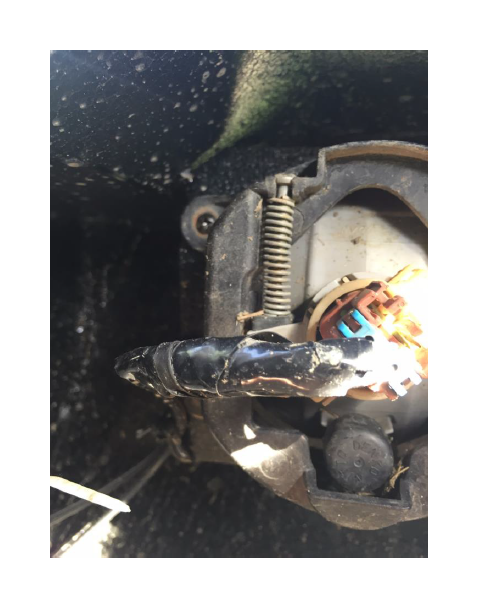
d. Using a philips screwdriver, remove the four screws on each fog light from behind the bumper and slide them out. You will not need them again later since you will use the included screws. Once removed these lights can be put aside until later by pinching and pulling out the orange plug shown below.
e. At this point you can free the fog light wires by removing the plastic pins that hold the wire in place. This can be easily done with pliers.
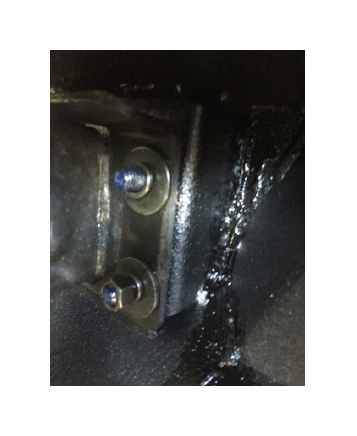
f. Using a ratchet and an 18 mm bit, remove the 8 nuts that hold the bumper into place. These are very prone to rust, so some will likely be very difficult and a spray lubricant is recommended. It may also help to turn the vehicle wheels to make it easier to reach them. It is worth noting that there are smaller bolts on the bumper that should not be mistaken for these. You only need to remove the larger 18mm nuts.
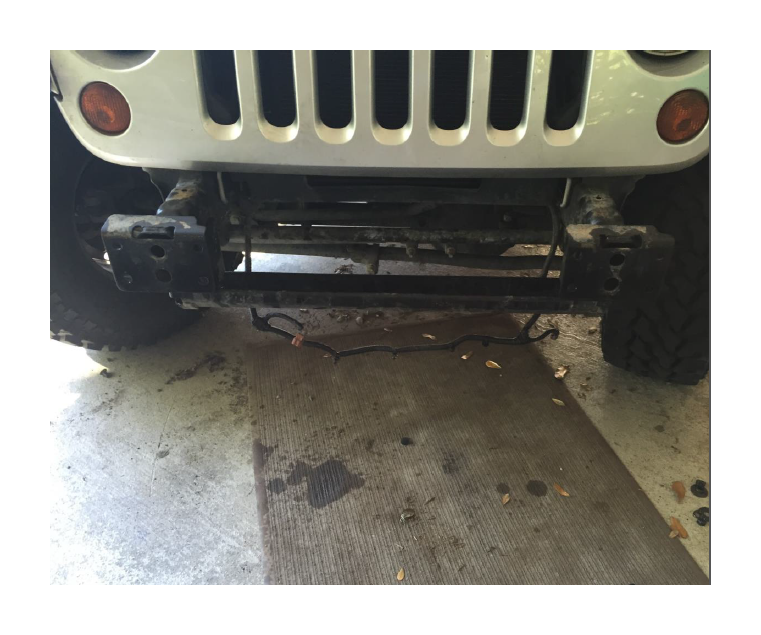
g. Once all 8 nuts are removed, the bumper will slide off easily. Allow the fog lights to hang freely while removing the bumper. The Jeep should now look like this
2. Place the new bumper into position
a. Observe where the bumper needs to go and carefully slide it into place. The best way to do this is to have one or two people moving the bumper and let someone else guide the bumper so that all bolts attach simultaneously.
b. Once all 8 bolts are in the right place, slide the bumper completely into place. Each bolt will have 3 components to be secure. Slide the washers on first, then the lock washers and finally the 18mm nuts. Tighten them with an 18mm ratchet.
c. Attach the two included D-rings to the tabs on the front of the bumper.
3. Extend the factory fog light wire
a. Install one of the fog lights into the new bumper. To do this, push the square plastic tabs included with the bumper until they snap into place, then slide the fog light into the housing and screw it in with the included screws. Tuck the wires away or move them as desired. It is very helpful to use tie wraps to hold the wire in place.
b. Measure how much you will need to extend the wire to fit the remaining light. Then cut the wire at least 4 inches away from the fog light and place the fog light to the side. Cut a section from the wire you are using that is 4-6 inches longer than the length you measured. Separate the leads on each end of the wire and do the same on the factory wire.
d. Splice the wire into the leads on the fog light and wrap all exposed wire in electrical tape. Keep a mental note of which lead connects positive and which lead connects negative.
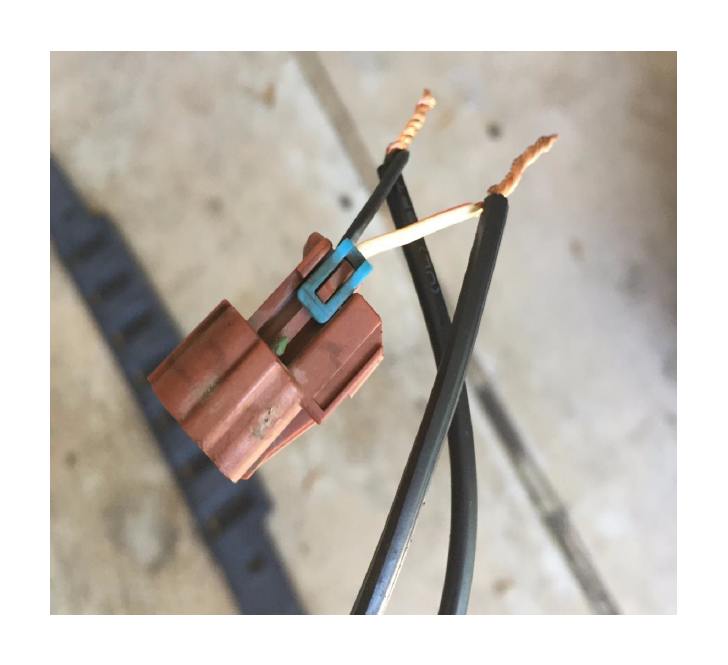
e. Splice the other end into the remaining leads hanging from the vehicle, ensuring that the positive and negative leads are separate. Wrap electrical tape around all exposed wire. Also apply electrical tape around the entire splice on each end for a sturdy connection.
f. Turn on the fog lights from inside the vehicle and make sure both fog lights are working properly.
g. Secure the fog lights into the bumper using the same procedure as before. Tuck the wiring away again as needed.
4. Check that the following are true:
a. Both fog lights are working properly
b. Both D-rings are securely attached
c. All 8 bolts are very tightly secured and all 8 washers and lock washers are used
d. No metal is exposed in the wiring and all splices are tightly wrapped with electrical tape
Before:

After:
Installation Instructions Written by ExtremeTerrain Customer Cole Dugas 4/5/2017

