 FREE 1 to 3-Day Delivery on Orders $149+ Details

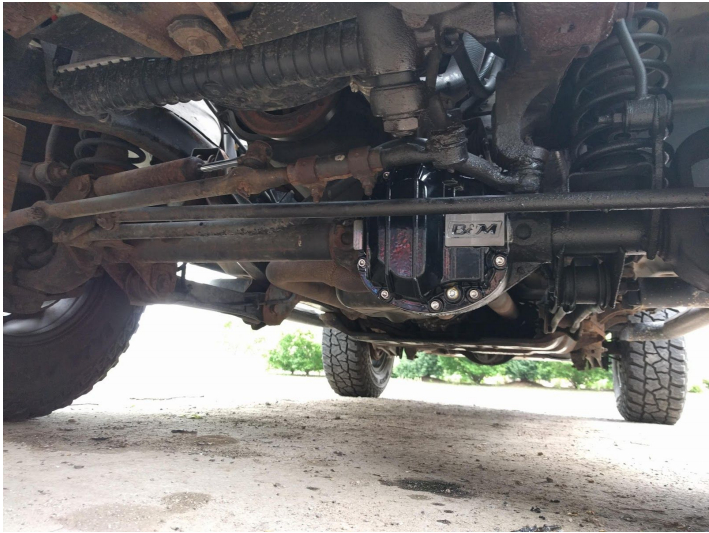
How to Install B&M Dana 30 Nodular Iron Differential Cover (87-18 Jeep Wrangler YJ, TJ, JK & JL) on your Jeep Wrangler
Installation Time
60 minutes
Tools Required
- Jack & Jack Stands
- Drain Pan
- Shop Towels
- 3/8 Ratchet (or Impact)
- 3-4” Extension
- 1/2 Socket
- 1/4” Allen Socket (Socket-type bit necessary due to torque specs)
- Torque Wrench
- Gasket Scraper/Razor Blade
- Scotch-Brite Pad (or Pneumatic Polish Tool)
- Brake Cleaner
- Scratch Awl/Sharp Tool
- Hammer/Mallet
- Flat Head Screwdriver/Putty Knife
- RTV Silicone or Replacement Gasket
- Nylon/Teflon Thread Tape
- Gear Oil to Vehicle Spec

Shop Parts in this Guide
Note: Recommended to begin by raising vehicle from frame (not suspension) to provide maximum working clearance. On TJ Wrangler this allows easy access to all bolts with impact vs ratchet only.
1. It is recommended to clean area surrounding existing cover to avoid differential contamination.
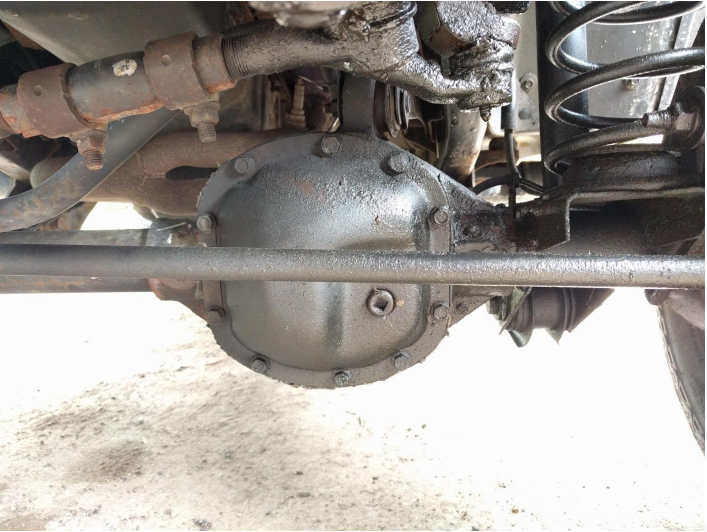
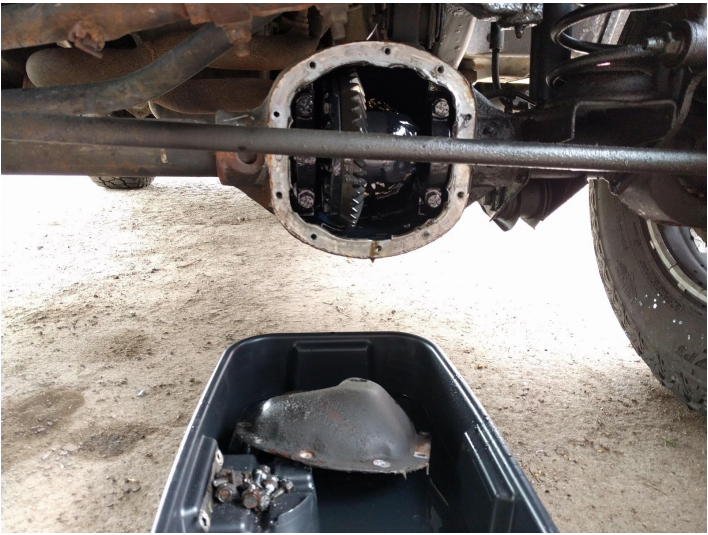
2. After placing drain pan under pumpkin, use ratchet or impact along with 1/2” socket and extension to remove all bolts except top one, then loosen top bolt. Firmly tap driver’s side of existing diff cover with hammer/mallet to loosen or alternatively, insert screwdriver/putty knife to break seal and gently pry at bottom edge to loosen taking care not to damage inner surfaces. Allow gear oil to drain. Remove final bolt allowing cover to be removed.
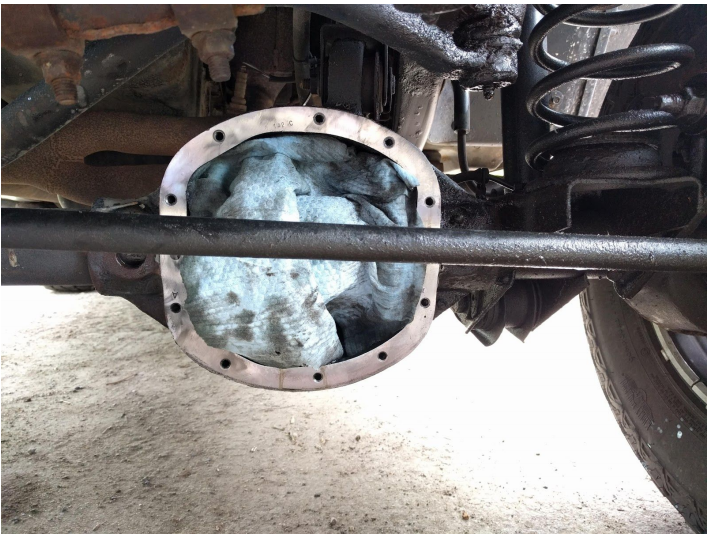
3. Carefully scrape any existing sealant to remove, again taking care to not damage mating surface. Cover gears with shop towel and spray housing liberally with brake cleaner. Recommended to polish mating surface with Scotch-brite pad or polishing wheel and additional brake cleaner as necessary.
4. Apply 2-3 wraps of nylon/teflon tape to threads of magnetic drain plug and install in cover using 1/4" Allen. Tighten using torque wrench to 25-30 ft. lbs.
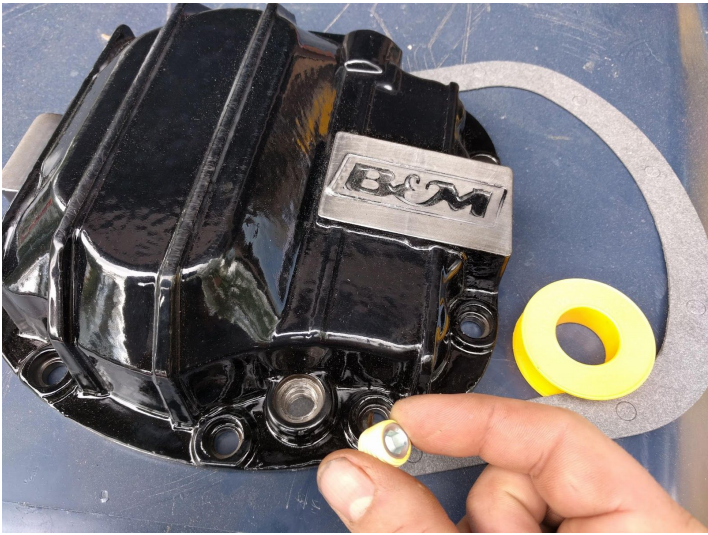
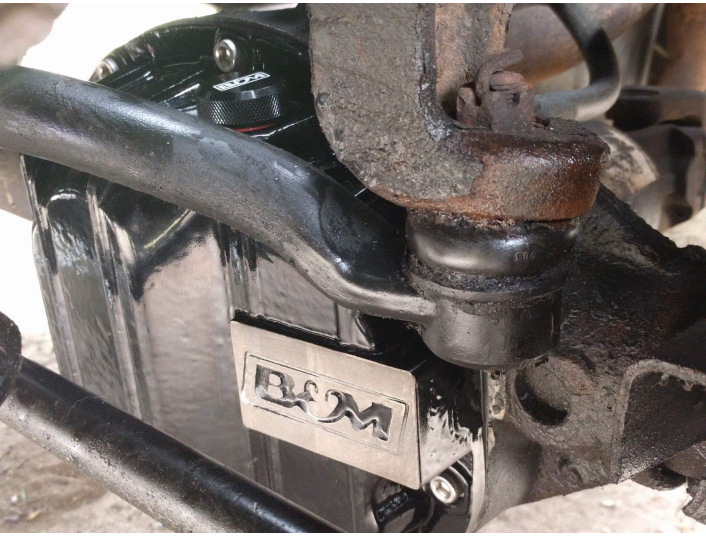
5. Install new cover using replacement gasket or RTV sealant. If using replacement gasket, it is recommended to use 2 of the manufacturer provided stainless allen bolts on opposite edges of the cover to align the gasket properly with the cover prior to install. If using RTV, apply per sealant manufacturer instructions. Then attach cover using the new stainless bolts and washers provided with your new cover. Tighten in criss-cross pattern with 1/4” Allen socket and ratchet/torque wrench to vehicle spec torque.
6. Fill differential with gear oil per vehicle spec. On Wrangler with minimal lift, top fill port on cover is easier to access by lowering Jeep off of jack/stands and using long funnel from inside engine compartment after temporarily moving coolant overflow tank out of the way. On lifted Jeeps/Other vehicles this may be easier to access under the vehicle at the fill port directly. Picture for reference in fill-port location.

7. After filling with vehicle/axle manufacturer recommended quantity of gear oil, install orange o-ring on dipstick and insert in cover to find location of “Full” point on dipstick. Mark dipstick prominently at oil line with awl/scribe/sharp tool to set your future check point.
8. Verify no leaks from differential/cover and tighten/replace any other vehicle components that were loosened/removed during installation. Enjoy your new cover!
Installation Instructions provided by ExtremeTerrain Customer Robert Stai 05/22/2018
