 FREE 1 to 3-Day Delivery on Orders $149+ Details

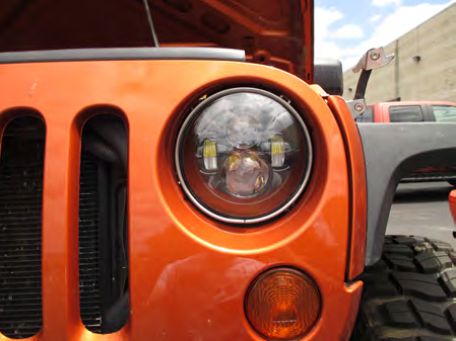
How to Install Axial Spider LED Headlights w/ Amber DRL & Angle Eye Halo on your Wrangler

Shop Parts in this Guide
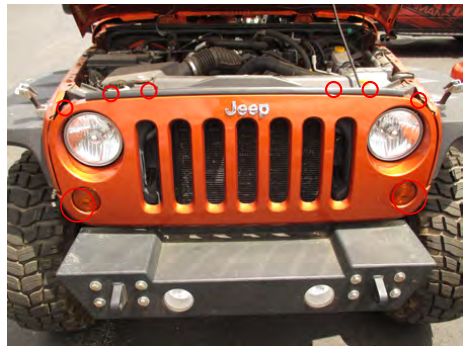
Step 1:
Open Hood and remove the six (6) plastc clips holding the grille to the vehicle. Disconnect the turn signal plugs and remove grille from vehicle.
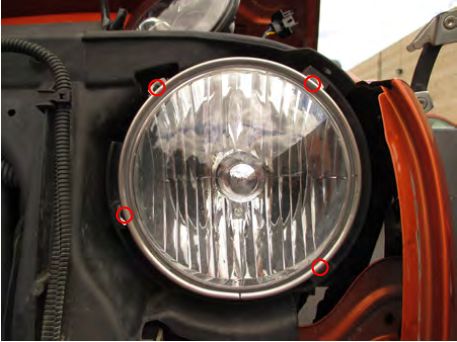
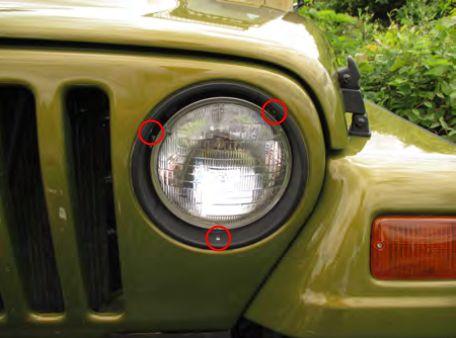
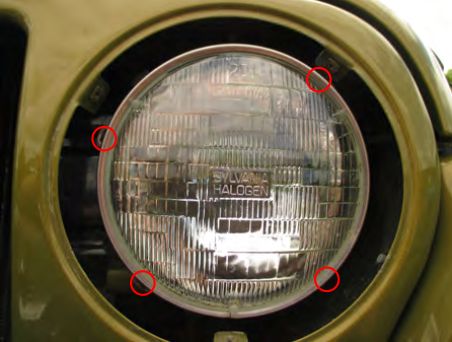
Step 2:
Remove the 4 T15 Torx screws holding the headlight bezel.
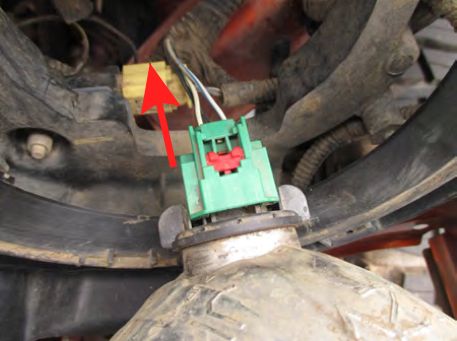
Step 3:
Slide the red retaining clip away from the plug. Then disconnect the plug from the headlight.
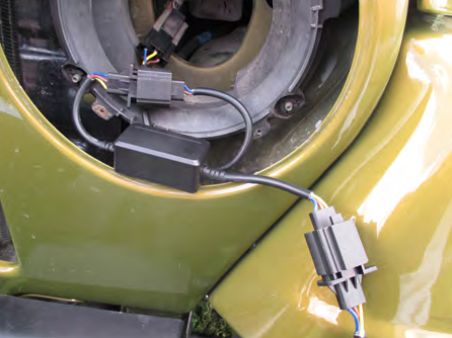
Step 4:
Connect the LED Headlight using the supplied jumper harness. **Note: firmly press the plugs together and push the retaining clip from the factory harness back into the plug.
Step 5:
Splice the wire coming out of the headlight to the vehicles 12volt marker light power supply. Locate the factory side marker wiring harness. Using factory wiring diagram or test light, determine which wire is the 12volt power supply.
Step 6:
Reinstall the headlight bezel and repeat the process in reverse to reinstall the grille.
Installation Instructions for Axial LED Headlights
Step 1:
Remove the 3 T15 Torx screws that hold the headlight trim bezel.
Step 2:
Remove the 4 T15 Torx screws that hold the headlight bezel.
Step 3:
Unplug factory headlight. Connect the LED Headlight using the supplied jumper harness. **Note: firmly press the plugs together and push the
retaining clip from the factory harness back into the plug.
Step 4:
Splice the wire coming out of the headlight to the vehicles 12volt marker light power supply. Locate the factory side marker wiring harness. Using factory wiring diagram or test light, determine which wire is the 12volt power supply.
Step 5:
Secure wiring components and reinstall the headlight bezel. Reinstall the trim bezel.


