 FREE 1 to 3-Day Delivery on Orders $149+ Details

How to Install Axial 7 in. LED Headlights (07-18 Jeep Wrangler JK) on your Jeep Wrangler
Installation Time
60 minutes
Tools Required
- Torx T10 Driver
- Plastic Molding Tool (or equivalent prying tool)
- Electrical Tape
Installation Instructions:
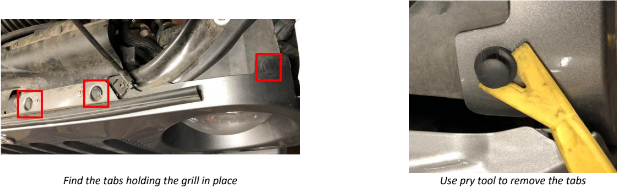
1. Open the hood of your Jeep. Using your plastic molding tool, lift the center of the 6 plastic tabs holding the grill in place, then remove each tab.
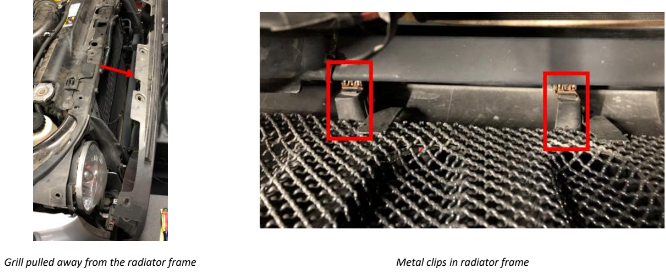
2. Pull the top of the grill back slightly. Gently push on the inside bottom of the grill to release the 4 metal clips from the radiator frame. The grill will be free now, aside from the wires connecting the turn signals.
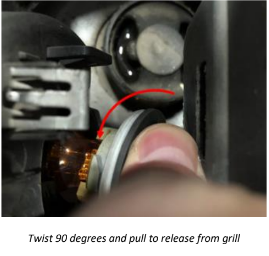
3. Twist gently 90 degrees to remove each of the turn signal bulbs from the grill. Let them rest on the frame, just below each headlight.
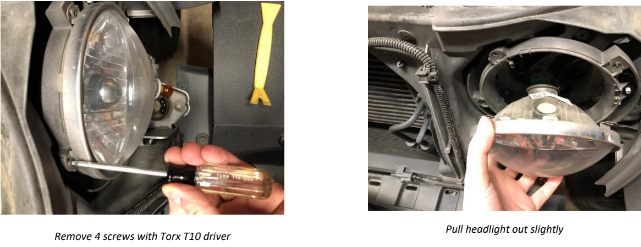
4. Using your Torx T10 driver, unscrew the 4 screws holding the headlight frame in place. Be careful when removing the last screw to support the headlight, as it has the potential to fall out of the frame. Pull the headlight out slightly.
5. You will see a green clip attached to the back of the headlight. With your fingers, move the red tab upwards until it clicks.
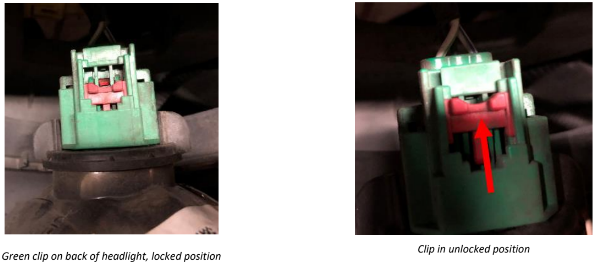
6. Pinch the green clip and pull the clip away from the back of the headlight. The headlight will now be free from the Jeep.

7. Remove the metal frame from the headlight (clean as necessary). Remove the protective film from the front of the new Axial LED headlight. Place the metal frame around the new headlight.
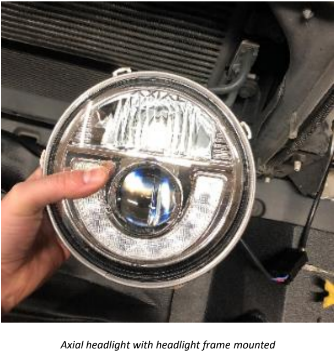
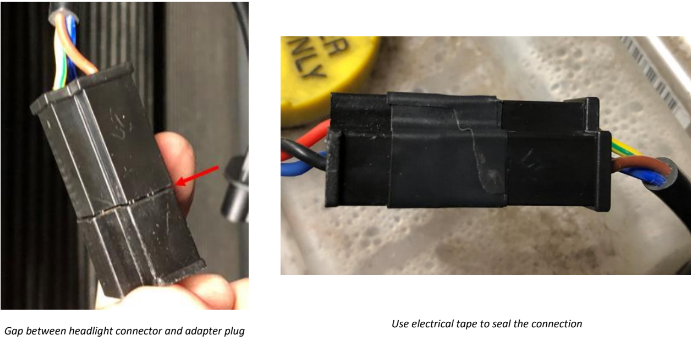
8. Attach the headlight plug adapter to the new headlight plug. The fitment between the headlight plug and the adapter plug may leave a gap. Using electrical tape, wrap the plug connection to help avoid dirt and debris from entering the plug connection points.
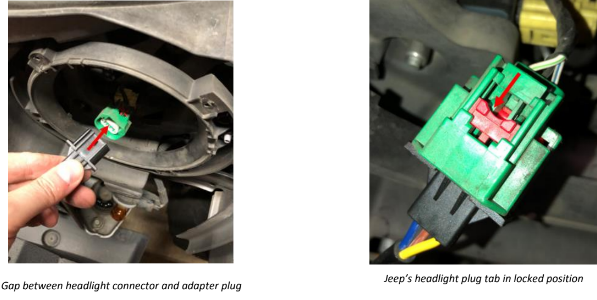
9. Connect the headlight adapter plug to the headlight plug of the Jeep. Press downward on the red clip of the Jeep’s headlight plug until it clicks.
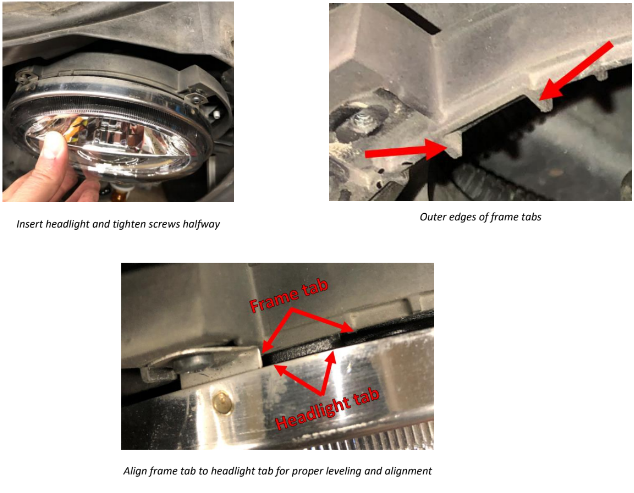
10. Tuck the cable into the hole in the headlight frame and insert the headlight. Insert and tighten screws halfway. Line up the mounting tab on the top of the headlight to the gap in the headlight frame. You will notice that the headlight does not fit flush in the headlight frame, so be sure to line up the outer edges of the mounting tab to ensure the headlight will be mounted level.
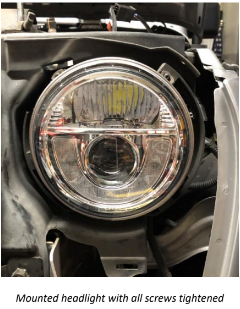
11. Fully tighten the 4 screws in the headlight frame.
12. Repeat steps 5-14 with the other headlight.
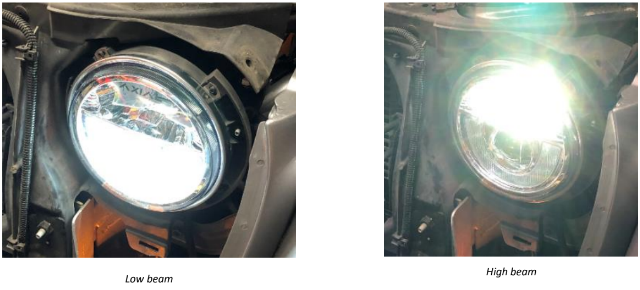
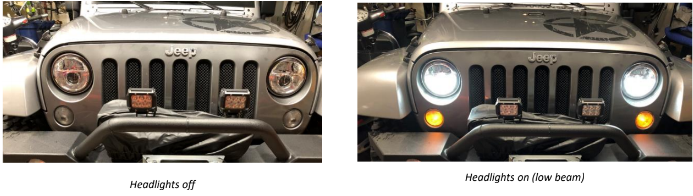
13. Turn on the headlights, both low beam and high beam, to ensure proper operation of the headlights.
14. Place the grill on the Jeep and reinsert the turn signal indicators. Ensuring alignment of the metal tabs to the radiator frame. Push in gently from the outside to seat all of the clips against the radiator frame.

15. Push the top of the grill into place, ensuring that the 6 holes line up properly. Replace plastic tabs, pressing on the inserts to secure the tabs.

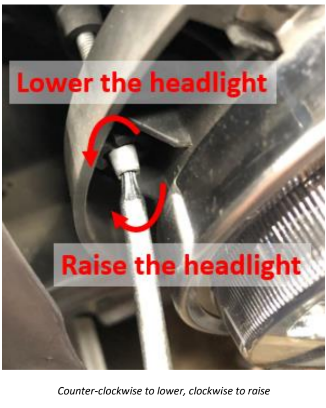
16. Using your Torx T10 driver, make headlight adjustments as needed. Turning clockwise, raises the headlight, and turning counter-clockwise lowers the headlight.
17. Here is what they look like installed!
Installation Instructions Written by ExtremeTerrain Customer Joel Schaeffer on 12/8/2018
