 FREE 1 to 3-Day Delivery on Orders $149+ Details

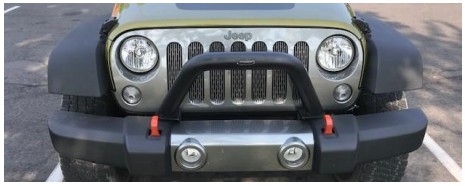
How to Install ARB 6.5 in. IPF 968 Series Round Halogen Lights - Driving/Spot Combo - Pair on your Jeep Wrangler
Installation Time
1.5 hours
Tools Required
- Phillips Head Screwdriver
- 15mm Combo Wrench
- 10mm Combo Wrench
- Zip Ties (as required)
- 3M Molding Tape (as required)
- Foil Tape (as required)
Installation Instructions:
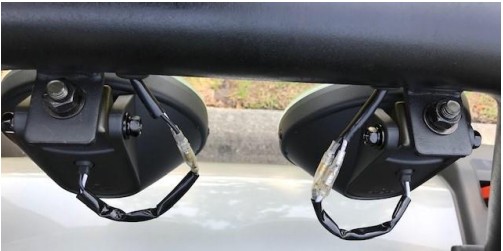
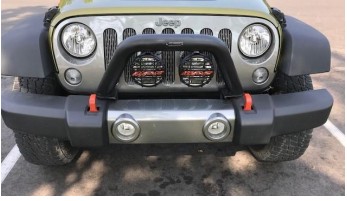
1. Select location to mount the lights, these will be mounted on an Off Camber Fab Bull Bar.
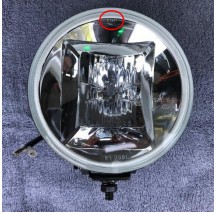
2. Lights are designed to be mounted with the bolt down. If bolt is being mounted up, flip the reflector assembly:
a. Lens has label for the Top.
b. Removed the (2) screws holding the reflector/lens into the light body.
c. Rotate the reflector/lens 180 degrees and re-install the (2) screws
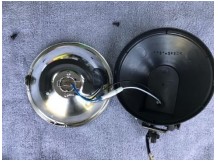
3. Lights will have the 55W bulbs that may be changed out for the included 100W bulbs:
a. Remove the (2) screws holding the reflector/lens into the light body.
b. Remove the reflector/lens assembly from the body

c. Lift the retaining wire up and out of the way and while holding the base, remove and unplug the 55W bulbs at the quick disconnect.
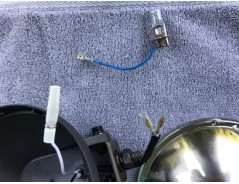
d. Replace the 55W bulb with the 100W bulb, reinstall the retaining wire, making sure the wire is in the grooves and plug in the 100W bulb.

e. Install the reflector/lens assembly back into the light body and reinstall the (2) screws removed.
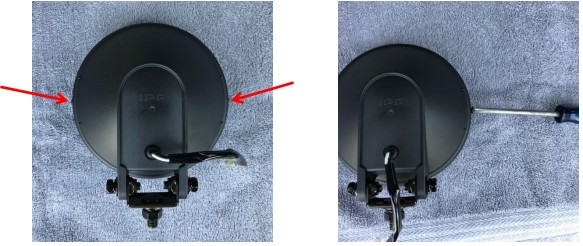
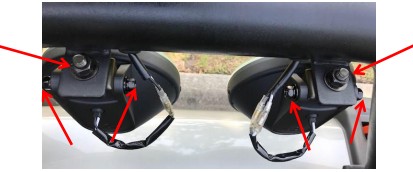
4. Install the lights on the mounting point using the supplied lock washer and nut and tighten the bolt using a 17 mm wrench.

5. Connect the light quick disconnects into the matching connections on the bundle
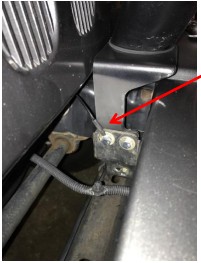
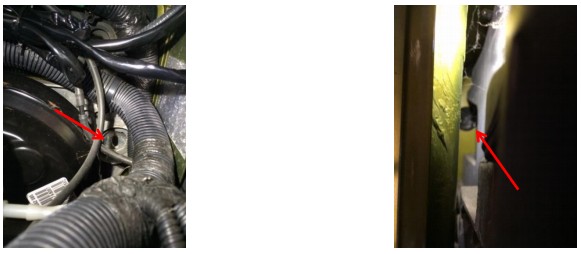
6. Ground the short black wire from the lights to a suitable body ground.
NOTE: Relay must be mounted upright.
7. Mount the relay in the engine compartment using a screw or double-sided molding tape.
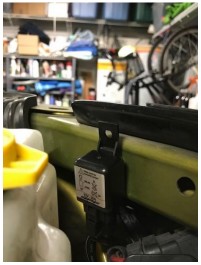
8. Ground the relay to a body ground post.

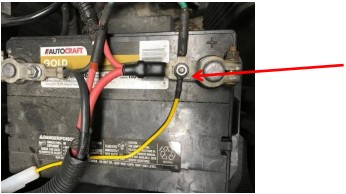
10. Route the yellow fused wire to the battery and install the wire connector to the ( ) accessory post and tighten to 62 in-lbs with a 10 mm wrench.
11. Route the wire bundle around the engine compartment to the driver’s side. Zip tie to existing wire bundle(s) where available.
12. Remove the driver’s side dash end cover and locate the foil access cover on the firewall, make a hole for the switch wire to pass from the engine compartment to the passenger compartment.
13. Route the wire bundle into the passenger compartment.
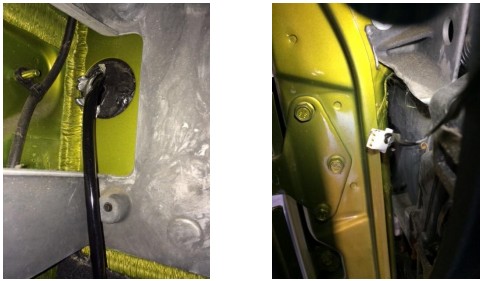
14. Foil tape over the wire to seal the hole.
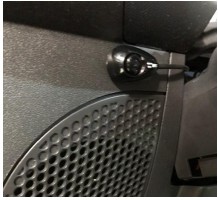
15. Connect the switch to the wire routed from the lights.
16. Route the switch to the desired location and mount if desired.
17. Function check the lights.
18. Using the adjustment points, aim lights as desired and tighten all screws and nuts on mounts.
19. Enjoy your new lights
Installation Instructions Written by ExtremeTerrain Customer Todd J Fischer 08/27/2019

