Guaranteed Free Delivery by 12/24! available on most items - Details

How to Install an AIRAID MXP Series Synthaflow Cold Air Intake on your 2007-2011 Jeep Wrangler JK

Shop Parts in this Guide
Installation Instructions
Part Number 310-276
2007-2011 Jeep Wrangler
3.8L
Full color instructions can be viewed on our web site at Airaid.com. Use the Product Search function to find your part number, and click View Details or go to http://www.airaid.com/ InstallationPDF/310-276.pdf
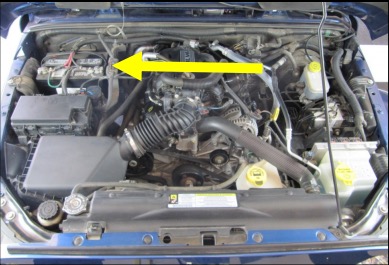
1. Disconnect The Negative Battery Terminal! It’s recommended to allow the engine to fully cool down before starting the intake installation.
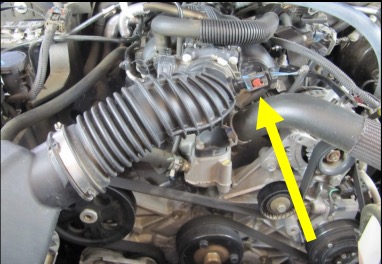
2. Disconnect the air temp sensor in the factory intake. loosen the clamps on both ends of the tube and remove it from the vehicle.
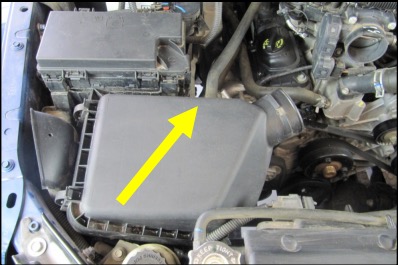
3. Disconnect the crankcase breather line fromt the top of the airbox. Remove the entire airbox as an assembly by unseating it from the mounting grommets in the inner fender and lifting upward.
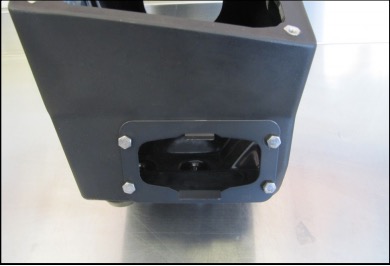
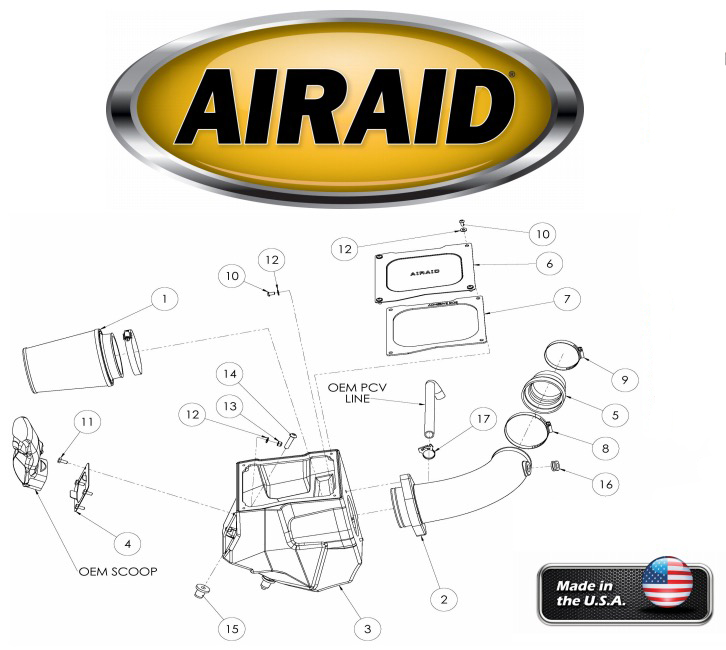
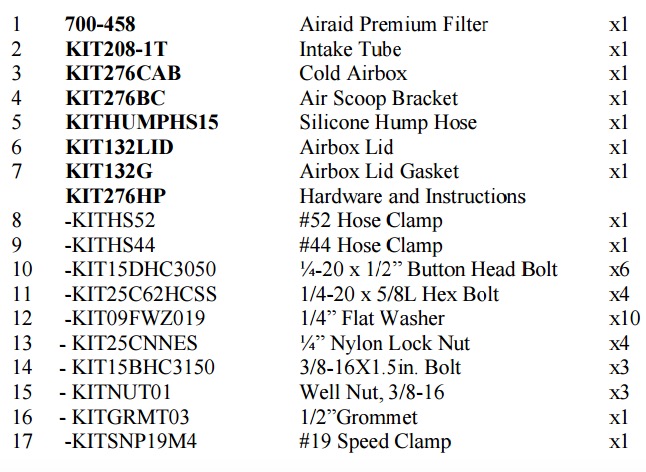
4. Install the Air Scoop Bracket (#4) into the Cold Air Box as shown by using four 1/4-20 x 5/8 Hex Bolts (#11), 1/4” Flat Washers (#12), and 1/4” Nylock Nuts (#13).
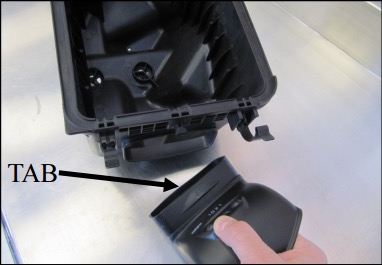
5. Depress the locking tabs holding the factory air scoop in the lower half of the airbox and remove it.
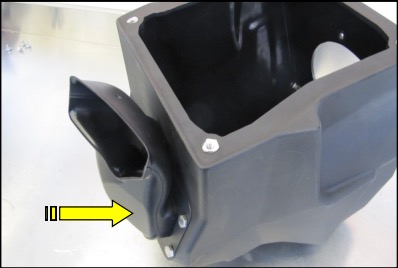
6. Transfer the factory air scoop into the Air Scoop Bracket on the Airaid Cold Air Box.
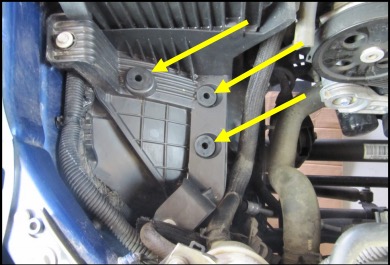
7. Replace the factory airbox grommets in the inner fender area with the three 3/8” Well Nuts (#15).
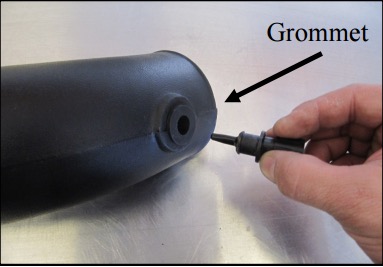
8. Install the 1/2” Grommet (#16) into the Airaid Intake Tube (#2). Transfer the factory air temp sensor from the OEM tube into the grommet in the Airaid Intake Tube.
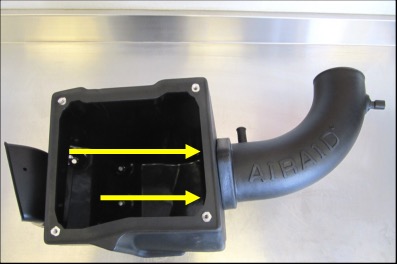
9. Create the intake assembly by joining the Airaid Intake tube to the Cold Air Box using two sets of 1/4-20 Button Head Bolts (#10) and 1/4” Flat Washers (#12).
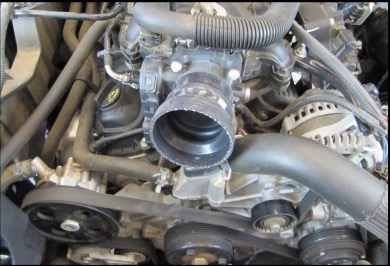
10. Slip the Hump Hose Coupler (#5) onto throttle body WITH OUT the clamps at this time.
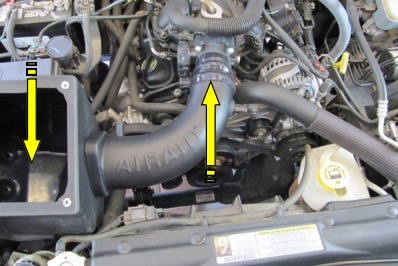
11. Insert Airaid Intake tube into the Coupler first, then rotate the Intake assembly down into the inner fender.
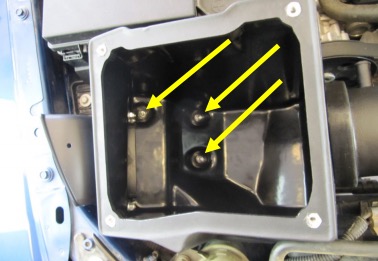
12. Mount the Cold Air Box assembly in the inner fender using the three 3/8” x 1 1/2” Button Head Bolts (#14)
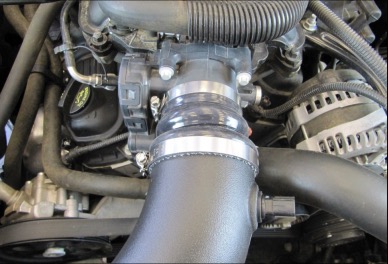
13. Open and Install the Clamps onto the Coupler as shown with the #44 clamp on the throttle body (#9) and the #52 clamp (#8) on the Intake Tube
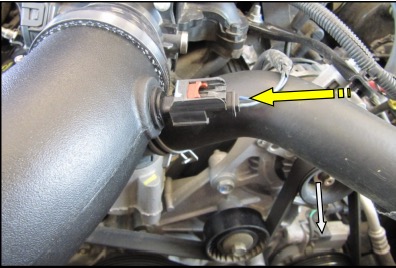
14. Reconnect the air temp sensor.
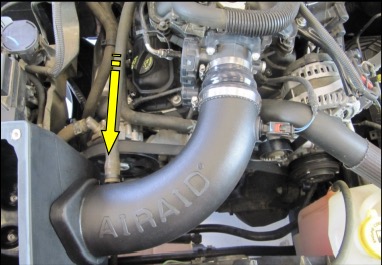
15. Reconnect the factory crank case breather line to the Airaid Intake Tube.
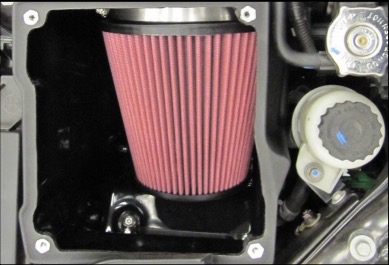
16. Slide the Airaid Premium Filter onto the Intake tube inside the Cold Air box and tighten the clamp.
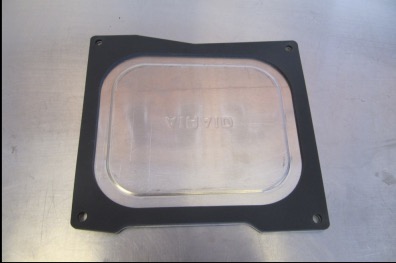
17. Mount the self adhesive Gasket (#7) onto the underside of the Air Box Lid (#6) and peel off the protective film on the top. Mount the lid onto the Air Box using four remaining 1/4-20 x 1/2” Button Head Bolts (#10), and 1/4” Flat washers (#12).
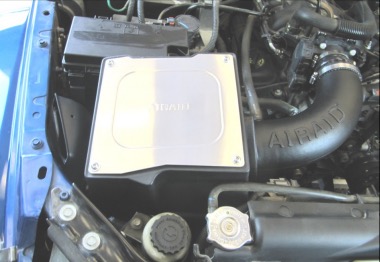
18. Double check your work! Make sure there is no foreign material in the intake path. Make sure all clamps, hoses, bolts, and screws are tight. Double check the hood clearance!
Thank you for purchasing the Airaid Intake System. Contact Airaid @ (800) 498-6951 8:00 AM - 5:00 PM MST weekdays for questions regarding fit or instructions that are not clear to you. Your Airaid Intake System was carefully inspected and packaged. Check that no parts are missing, or were damaged during shipping. If any parts are missing, contact Airaid. The air filter element is protected from direct exposure to water and debris; care should be taken not to drive through deep water. WATER INGESTION IS THE DRIVERS RESPONSIBILITY! The air filter is reusable and should be cleaned using the Airaid Filter Tune-Up Kit periodically.
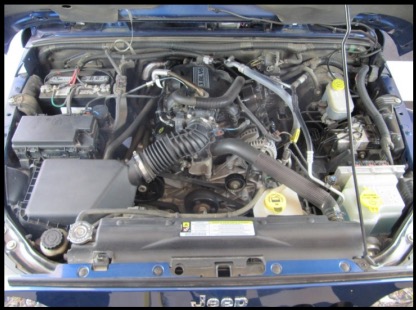
Before!
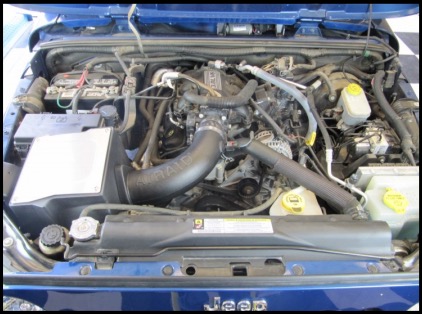
After!
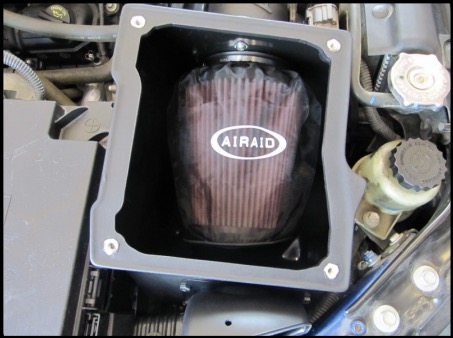
Pre Filter Option: Part Number 799-445
For maximum protection in the harshest environments
Airaid offers a slip on Pre Filter.
- Prolongs Cleaning Intervals
- Water Repellant
- Free Flowing Protection
Don’t Forget Your AIRAID Filter Tune-Up Kit!
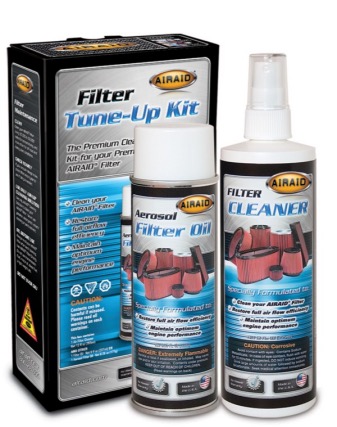
P/N 790-551 Aerosol Spray
P/N 790-550 Squeeze Spray
Airaid Filter Co.
2688 E Rose Garden Ln.
Phoenix AZ 85050
(800) 498-6951
[email protected]
www.airaid.com
