 FREE 1 to 3-Day Delivery on Orders $149+ Details

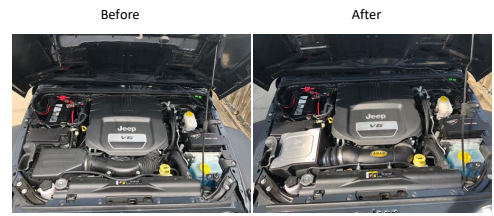
How to Install Airaid MXP Series Cold Air Intake w/ SynthaMax Dry Filter (12-18 3.6L Jeep Wrangler JK) on your Jeep Wrangler
Installation Time
2 hours
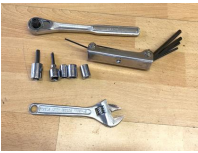
Tools Required
- Ratchet
- 11mm, 10mm and 8mm Sockets
- Adjustable Wrench
- 7/32-inch and 4mm Allen Head Socket
- Allen Key Set
- Flat-head Screwdriver (optional)

Shop Parts in this Guide
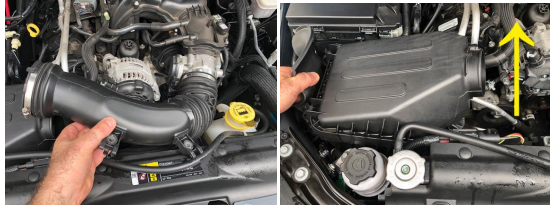
1. Start by lifting the hood, using the 10mm socket disconnect the negative terminal on the battery and remove the engine cover.

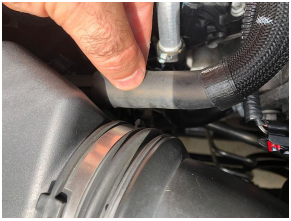
2. Using the 8mm socket, loosen the hose clamps around the airbox and throttle body.

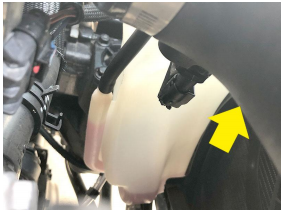
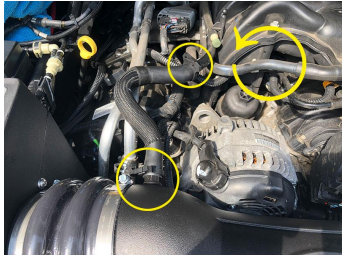
3. Using the 10mm socket, remove the (2) bolts and unclip the coolant line.
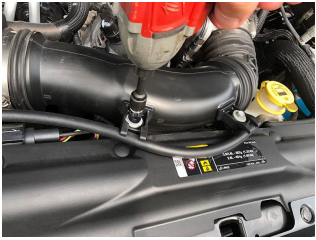
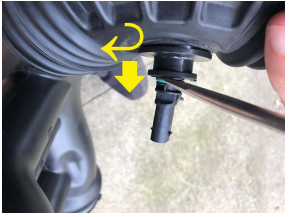
4. Unplug the Air Temperature Sensor along the bottom of the factory intake hose next to the throttle body.
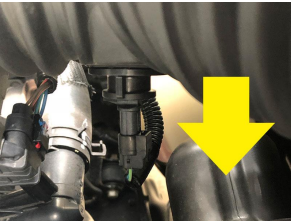
5. Disconnect the crankcase breather line along the top of the factory airbox.
6. Remove the Factory intake tube and factory airbox, by pulling the assemblies up and out of the engine bay.
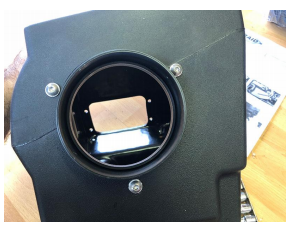
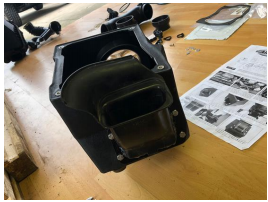
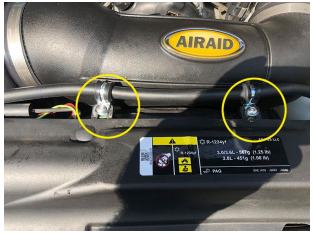
7. Moving on to the new Airaid air box, mount the air filter adapter to the new airbox using (3) 1⁄4-20 x 1⁄2-inch button head bolts and washers, using the 4mm allen head socket.
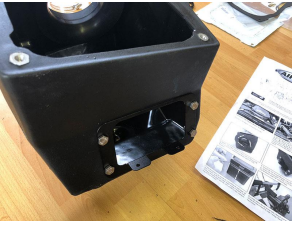
8. Next, using the 11mm socket and adjustable wrench, mount the air scoop bracket to the new airbox with (4) 1⁄4-20 x 5/8-inch Hex bolts, washers and nylock nuts.
9. Moving back to the factory airbox, drill out the rivets holding the factory air scoop.
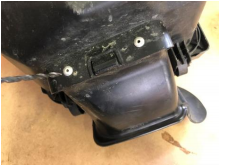
10. Next measure up 3-inches from the bottom of the scoop, mark with a line and cut.
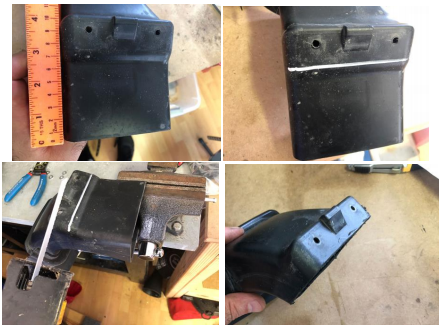
11. Mount the factory air scoop to the new air scoop bracket using (2) 8/32 x 3/8-inch button head bolts, washers and nylock nuts. (TIP: you can put a bead of silicone along the edge of the intake bracket to help seal the interior of the airbox from water).
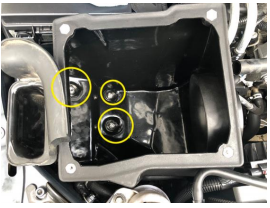
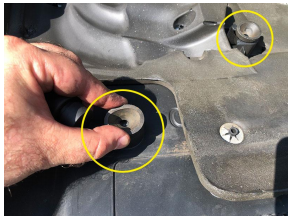
12. Moving back to the engine bay, remove the (3) factory grommets used to secure the factory airbox and replace them with the new 3/8-inch well nuts.
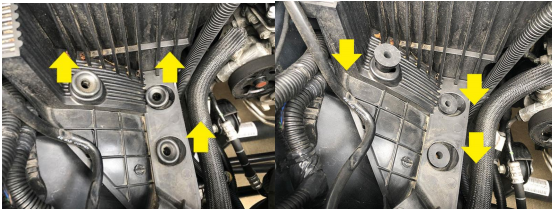
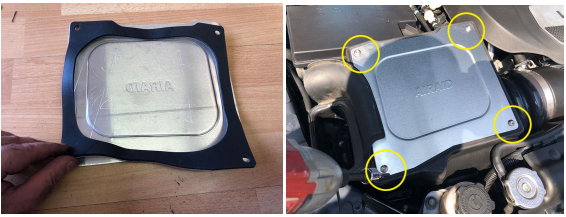
13. Place the new Airaid air box into position and secure with (3) 3/8 x 1 1⁄2-inch button head bolts.
14. Moving back to the factory air intake hose, remove the factory air temp sensor. The sensor will need to be rotated to the un-lock position and pulled out by hand or pried out with a screwdriver. Once removed install the sensor on the new Airaid intake tube with the #8-32 x 1⁄2- inch button head bolt and washer. (NOTE: depending the year of your Jeep, this sensor may/may not come with a bracket and might require modification to secure in place on the new intake tube.)
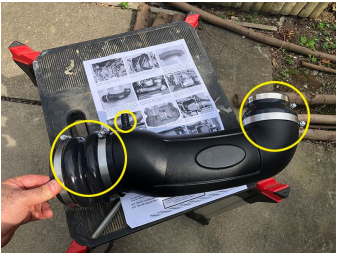
15. Moving on to the new Airaid intake tube, attach the 5/8-inch barbed fitting into the 3/8-inch threaded hole. Also, attach all the corresponding silicone adapters and clamps. Note the orientation of the clamp heads for easier tightening when mounted in the engine bay.
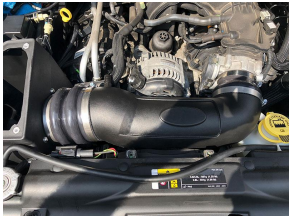
16. Mount the new Airaid intake tube into position, securing the silicone tubes to the new air box and factory throttle body. Tighten the clamps with the 8mm socket.
17. Reconnect the air temperature sensor.
18. Unplug the crankshaft breather hose from the factory hard line and flip the orientation. Next secure the ends using the provided speed clamps.
19. Secure the factory coolant line using the (2) adel clamps and 6mm bolts and washers.
20. On the factory engine cover, replace the (2) grommets with the supplied taller grommets and re-install the engine cover.
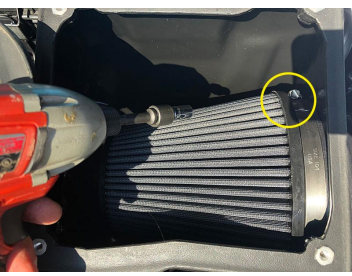
21. Install the Airaid air filter and secure clamp using the 8mm socket.
22. Finally, flip the airbox lid and apply the gasket, then secure the lid to the Airaid airbox with (4) 1⁄4-20 x 1⁄2-inch button head bolts and washers.
Installation Instructions Written by ExtremeTerrain Customer Louis Orellana 8/19/18

