FREE 1 to 3-Day Delivery on Orders $149+ Details

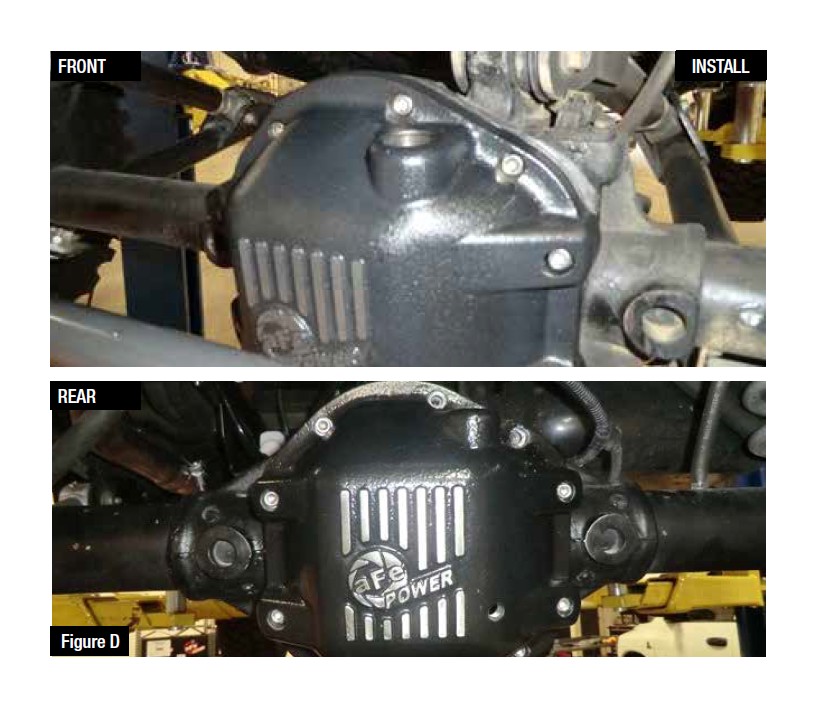
How to Install AFE Pro Series Rear Differential Cover for Dana 44 (97-18 Wrangler TJ & JK) on your Jeep Wrangler
Tools Required
- 1/2" socket
- 14mm socket
- 3/8 Rachet
- 1/2" Rachet
- 1/2" extension (3 inch)
- Panel popper
- Gasket Scrapper Sand paper or file
- Drain pan
• Please read the entire instruction manual before proceeding.
• Ensure all components listed are present.
• If you are missing any of the components, call customer support at 951-493-7100.
• Ensure you have all necessary tools before proceeding.
• Do not attempt to work on your vehicle when the engine is hot.
Attention installer / Vehicle owner:
The aFe differential cover is designed to fit the factory axle supplied as original equipment. For some applications, or due to the use of certain factory options and / or after market equipment, there may be clearance problems between the aFe differential cover and other vehicle systems. It is the responsibility of the installer / vehicle owner to ensure that no other vehicle component come into contact with the aFe differential cover. Contact with any other vehicle component, or any modification made to the aFe differential cover, automatically voids the warranty. aFe assumes no liability, expressed or implied, for damage or injury to persons or property.
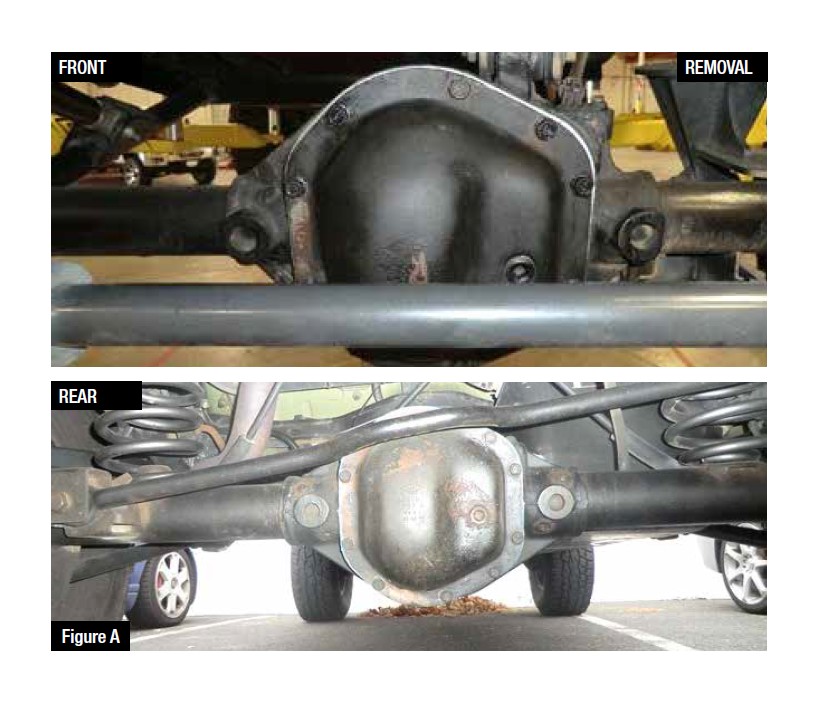
Refer to Figure A for steps 1-5
Step 1: Park your Jeep on level ground and apply the parking brake.
Step 2: Position a drain pan under the differential cover.
Step 3: Rear Axle Only: Using a panel popper, remove the electric locker wire loom (if applicable).
Step 4: Using a ½” socket and rachet, remove all but one of the top bolts from the differentail cover. Leave the bolt at the top. Loosen but do not remove.
Step 5: Using a gasket scraper, start at the bottom of the cover and carefully (so as not to gouge the housing metal) insert and pry off old cover. Allow the old gear lube to drain. Remove differential cover.
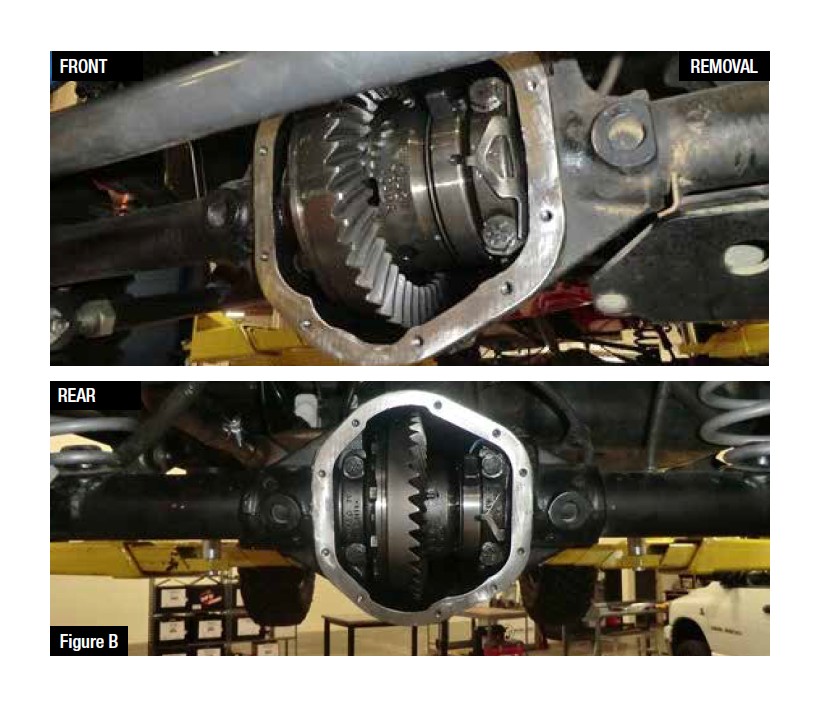
Refer to Figure B for steps 6-7
Step 6: Using a clean lint-free rag, wipe down the remaining oil from the housing and the gasket surface. This surface must be clean for the o-ring to seal.
Step 7: Before installing the aFe differential cover check the surface of the differential housing for any irregularities. Should there be any, carefully remove high spots using a smooth flat file or sand paper.
DO NOT “ROUND OFF” THE FLAT GASKET SURFACE!
Refer to Figure B for step 8
Step 8: Using some gear oil, apply a thin layer of oil to the aFe differential cover O-ring. Install the O-ring on the back of the aFe differential cover.
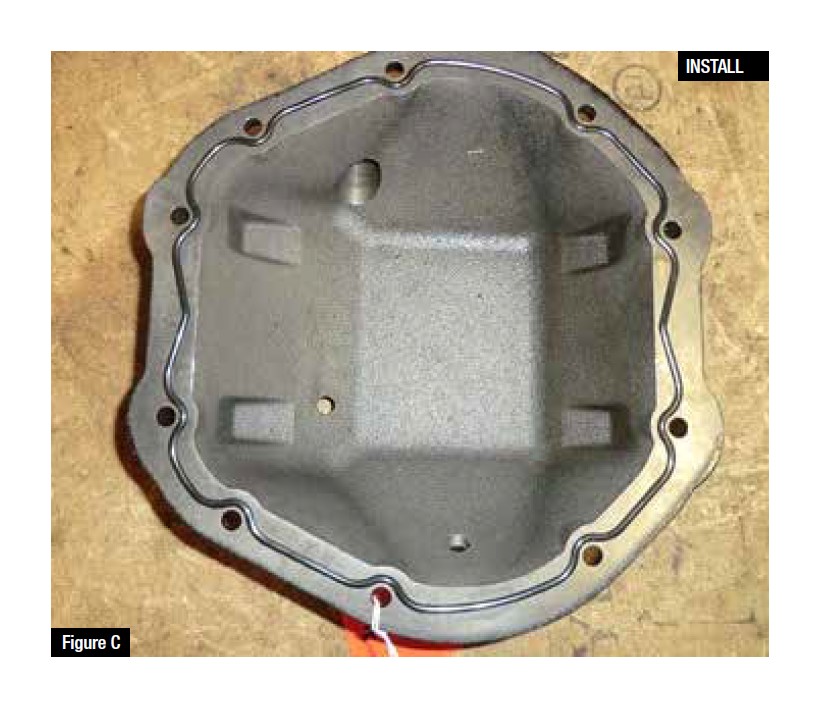
Refer to Figure C for step 9
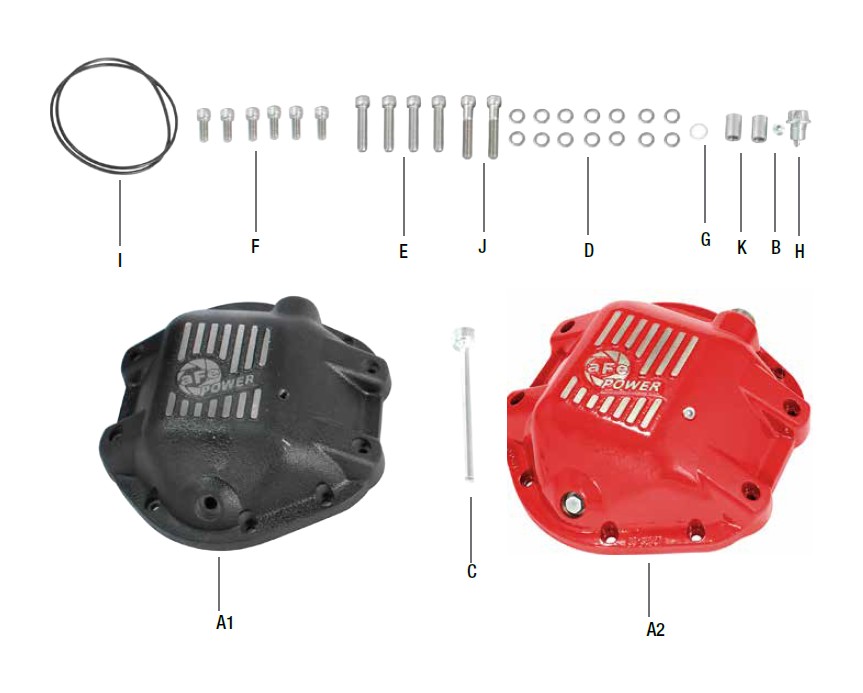
Step 9: Using the six (6) supplied 5/16 x 3/4"socket head cap bolts and washers, install the aFe differential cover by starting the top three and the bottom three bolts. Using the four (4) supplied 5/16" x 1 1/2" socket head cap bolts and washers, install them in the remainging bolt holes. Tighten all the bolts using a 1/4" allen wrench.
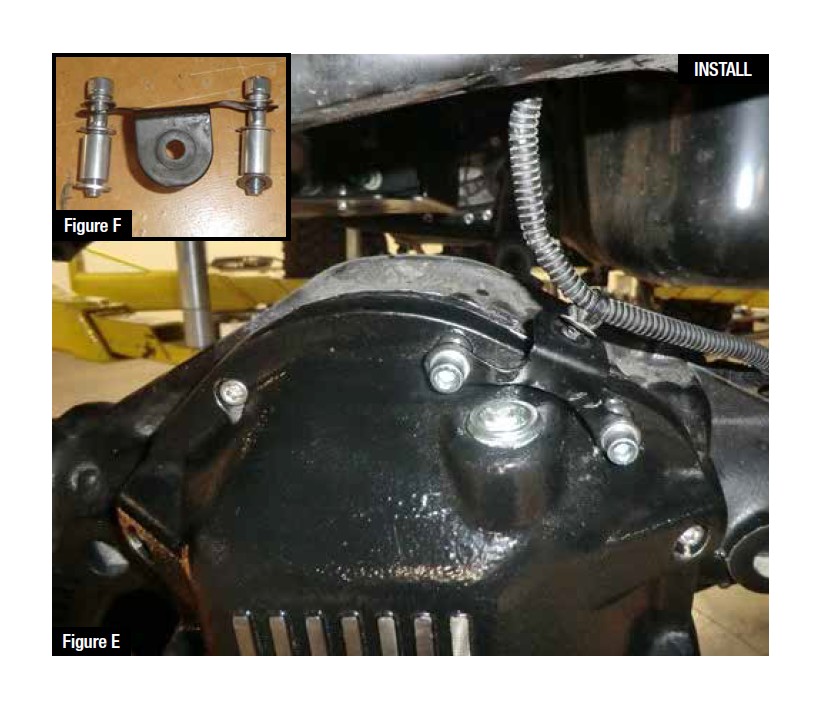
Refer to Figure E & F for step 10
Step 10 is only applicable to models with factory electric lockers.
Step 10: Remove the two 5/16" x 3/4" bolts that are close to the fill plug. Install the bracket on the differential cover using the two supplied 5/16" x 1 ¾", four 5/16 washers, and two 3/4" spacers (as shown in figure E). Push the wire on the bracket (as shown in figure F).
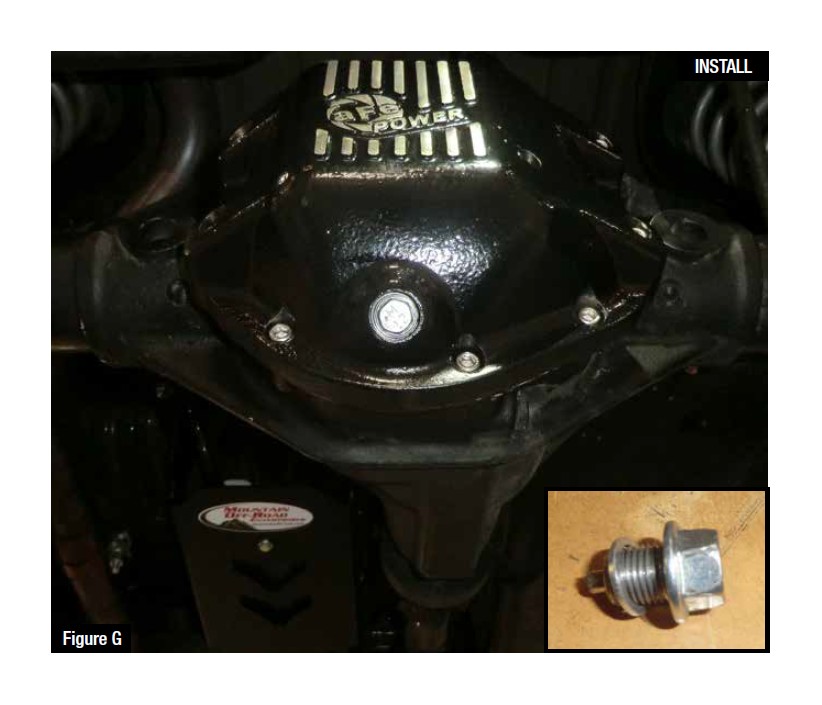
Refer to Figure G for steps 11-12
Step 11: Place the M12 aluminuim washer on the supplied drain plug.
Step 12: Using a 14mm socket, install the drain plug in the differentail cover and tighten.
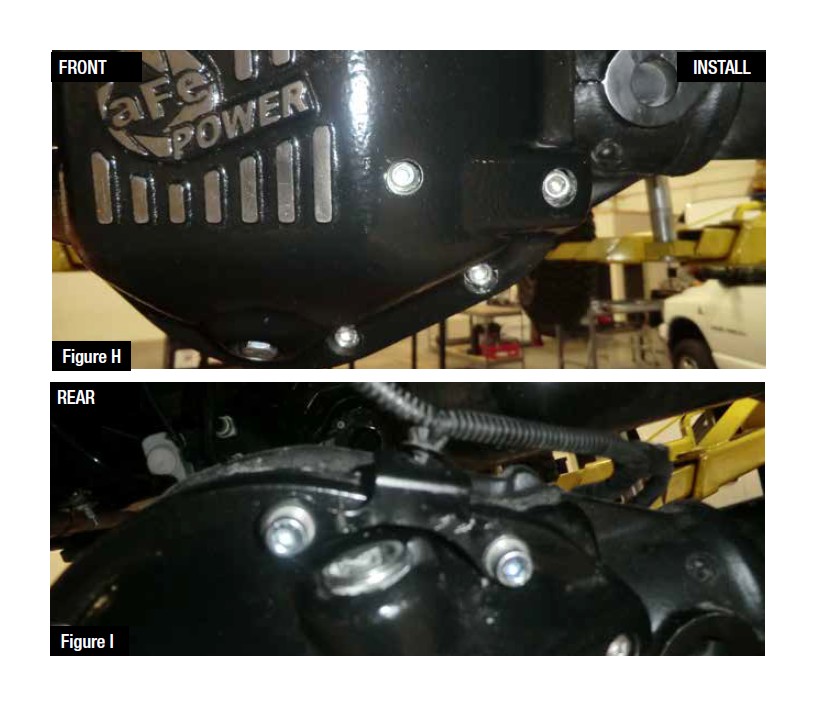
Refer to Figure H & I for steps 13-15
Step 13: Fill the differential with gear oil until the oil runs out of the 1/8" NPT hole in the front of the differential cover.
*If your axle is rotated different from stock, the 1/8" NPT will not be the full mark. Please fill to the correct level before driving.
*Install teflon tape on 1/8" NPT plug and magnetic fill plug
Step 14: Using a 3/16" allen wrench, install the 1/8" NPT plug in the front of the differential cover (as seen in Figure H) and tighten.
Step 15: Using a 1/2" drive extention, install the magnetic fill plug in the top of the differential cover (as seen in Figure I) and tighten.
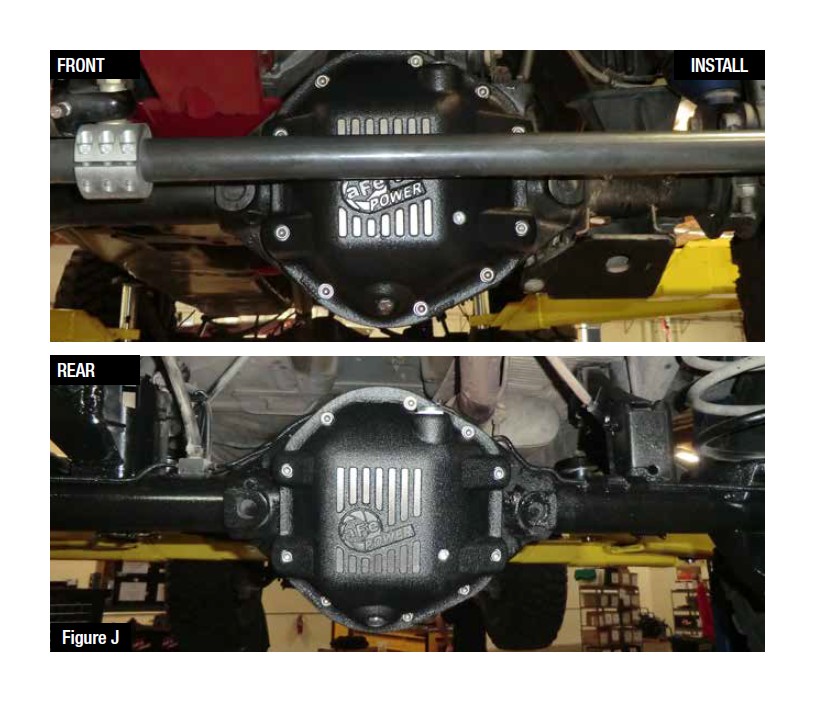
Refer to Figure E for step 16
Step 16: Your installation is now complete. Verify all connections are secure before driving. Drive at least 25 miles and check the oil level and fill if necessary.
NOTE: Retighten all connections after approximately 100-200 miles.