 FREE 1 to 3-Day Delivery on Orders $149+ Details

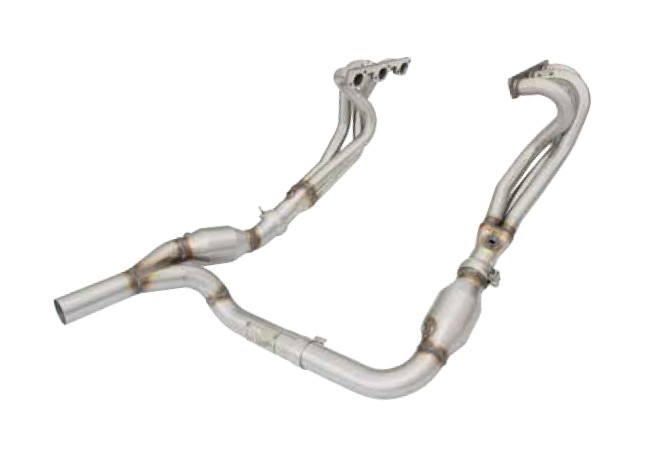
How to Install AFE 1-5/8 in. Twisted Steel Long Tube Header & Y-Pipe - Street Series (07-11 3.8L Wrangler JK) on your Jeep Wrangler

Shop Parts in this Guide
Parts Included:
• 2-1/2" SS Band Clamp (x1)
• Ball Joint Clamps (x2)
• 02 Extension Leads (x3)
• Zip Ties (x3)
•Heat Sheild (5" x 5")
•Spark Plug Boots (x6)
•Gaskets, Header (x2)
•Spacer (x2)
•Spacer (x1)
CAUTION: Allow time for your vehicle to cool down prior to installation. When working on or under your vehicle proceed with caution. Exhaust systems reach high temperatures and may cause serious burns. Wear protective safety equipment; eye goggles and gloves to ensure a safe installation. aFe recommends professional installation on our products. Note: aFe’s Downpipe recommends an aftermarket tuner to clear check engine light
1: (Read Instructions prior to installation) Secure vehicle on jack stands (Refer to your
manual for specified jack stand positions).
2: Disconnect the battery before starting work on the exhaust system.
3: Remove OE exhaust.
4: Remove OE Y-Pipe.
5: Remove the right and left side inner fender splash guards.
6: Un-Bolt the right and left side down-pipe from the stock manifolds.
7: Remove the spark plug wires from spark plugs and remove the spark plugs.
8: Remove the right side exhaust manifold heat-shield.
9: Remove the right side exhaust manifold (manifold can be removed from under the wheel well).
10: Remove the right side manifold.
11: Remove the left exhaust manifold heat-shield.
12: Remove the left side exhaust manifold be careful not to damage the spark plug wires when removing the manifold (manifold can be removed from under the wheel well).
13: Remove the transmission guard-crossmember.
14: Remove the left side exhaust manifold. (Note: Right and left side aFe headers will be installed from under the vehicle)
15: Install the right side aFe headers with provided gaskets. Using the stock bolts, tighten starting with the middle bolt and working your way out. (continue to page 2)
16: Install the left side aFe headers with provided gaskets. Using the stock bolts, tighten starting with the middle bolt and working your way out.
17: Re-install the transmission guard-crossmember. Note: Add spacers provided before
tightening down transmission guard-crossmember. (X2) Larger spacers go on the outside, (X1) spacer goes on the center. This will prevent the Y-Pipe from rubbing on the
transmission guard-crossmember.
18: Install Left 02 sensor extensions on primary and secondary 02’s.
19: Install right heat shield adhesive underneath the battery cover closest to the aFe header bend.
20: Assemble the left & right side aFe y-pipe.
21: Install the aFe y-pipe using provided ball joint clamps (Do not tighten all the way).
22: Make sure the aFe y-pipe has ½” of clearance from the transmission cross-member (then tighten).
23: Install provided 02 sensor extensions on the right secondary O2 of the aFe y-pipe. (Make sure 02 sensor harness is zip-tied away from y-pipe).
24: Install the six spark plug protector boots by inserting the spark plug lead thru the large opening of the protector boot then sliding the boot all the way in.
25: Install OE exhaust.
26: Install spark plug wires back in there original locations, Adjust spark plug wires to give adequate clearance, make sure the spark plug wires and spark plug protector boots are not in direct contact with the header tubes.
27: Install the right and left inner fender splash guards.
28: Re-connect the negative and then positive battery terminals.
29: Re-check all your work. It is recommended to re-tighten all exhaust components after the first 50-100 miles.

