 FREE 1 to 3-Day Delivery on Orders $149+ Details

How To Install a Tuffy Security Glove Compartment on your 1987-1995 Jeep Wrangler YJ
Installation Time
1 hours
Tools Required
- Phillips screw driver
- Small Ratchet
- 5/16" Socket
- 7/16" Socket
- Phillips Head Ratchet Socket (possibly required for some models)
- Flashlight

Shop Parts in this Guide
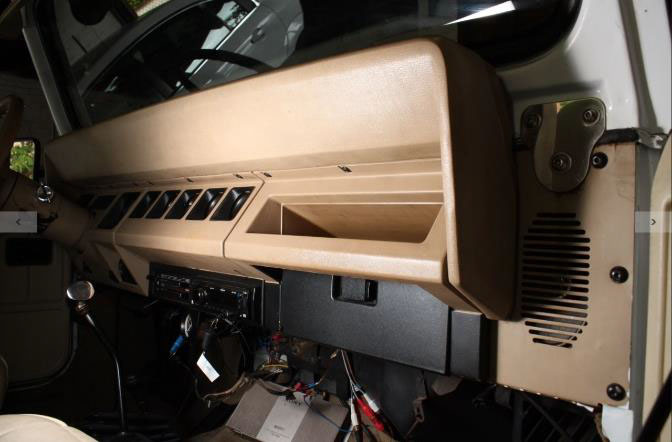
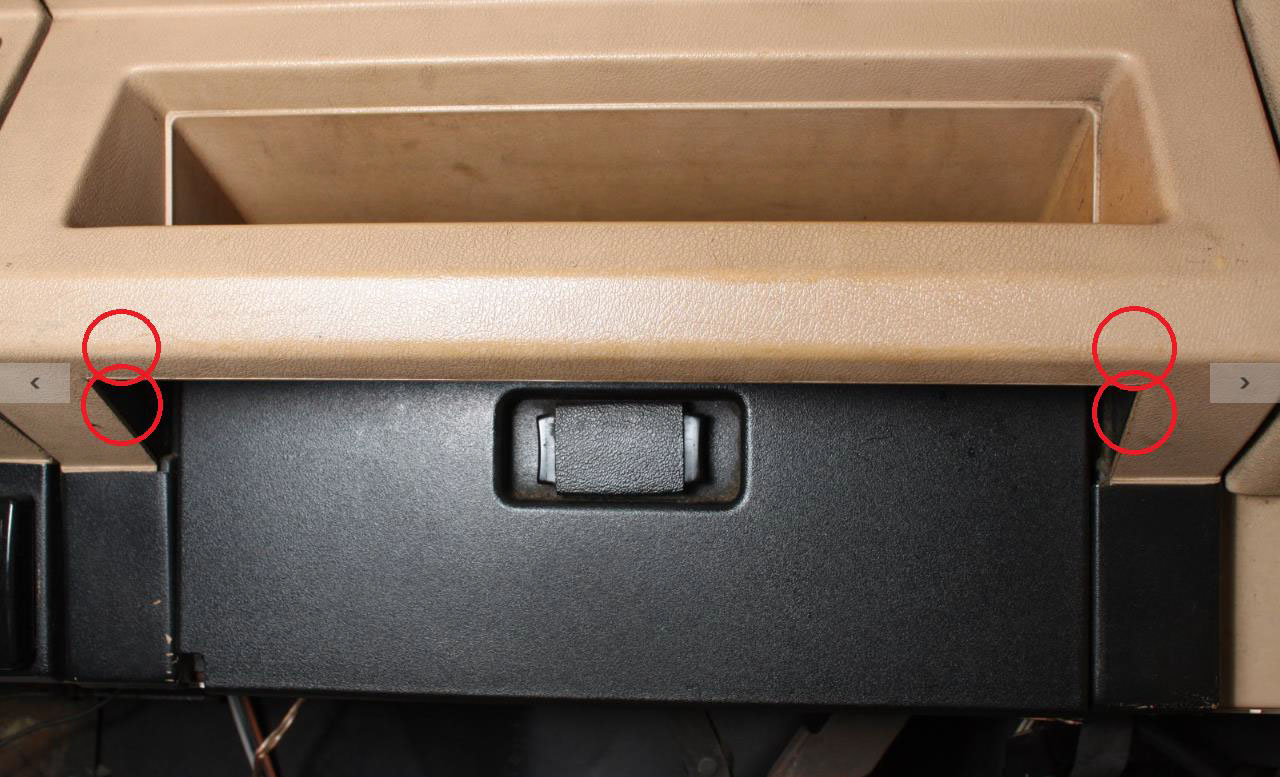
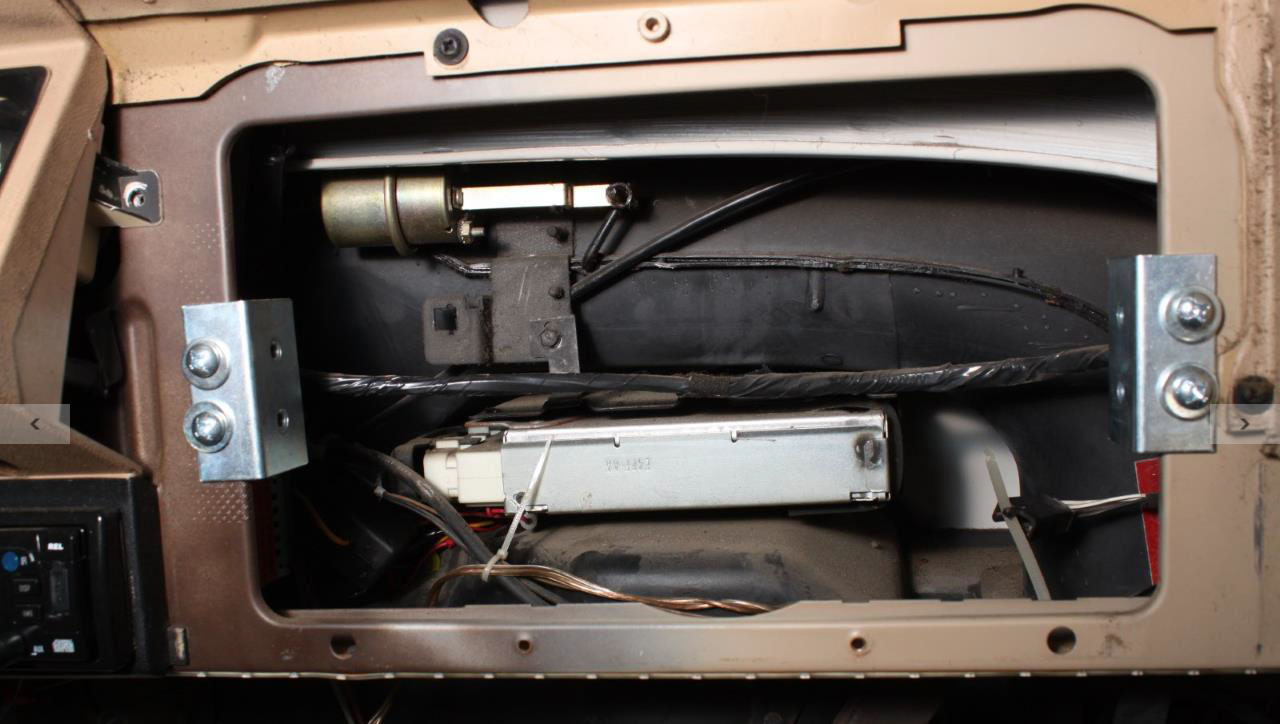
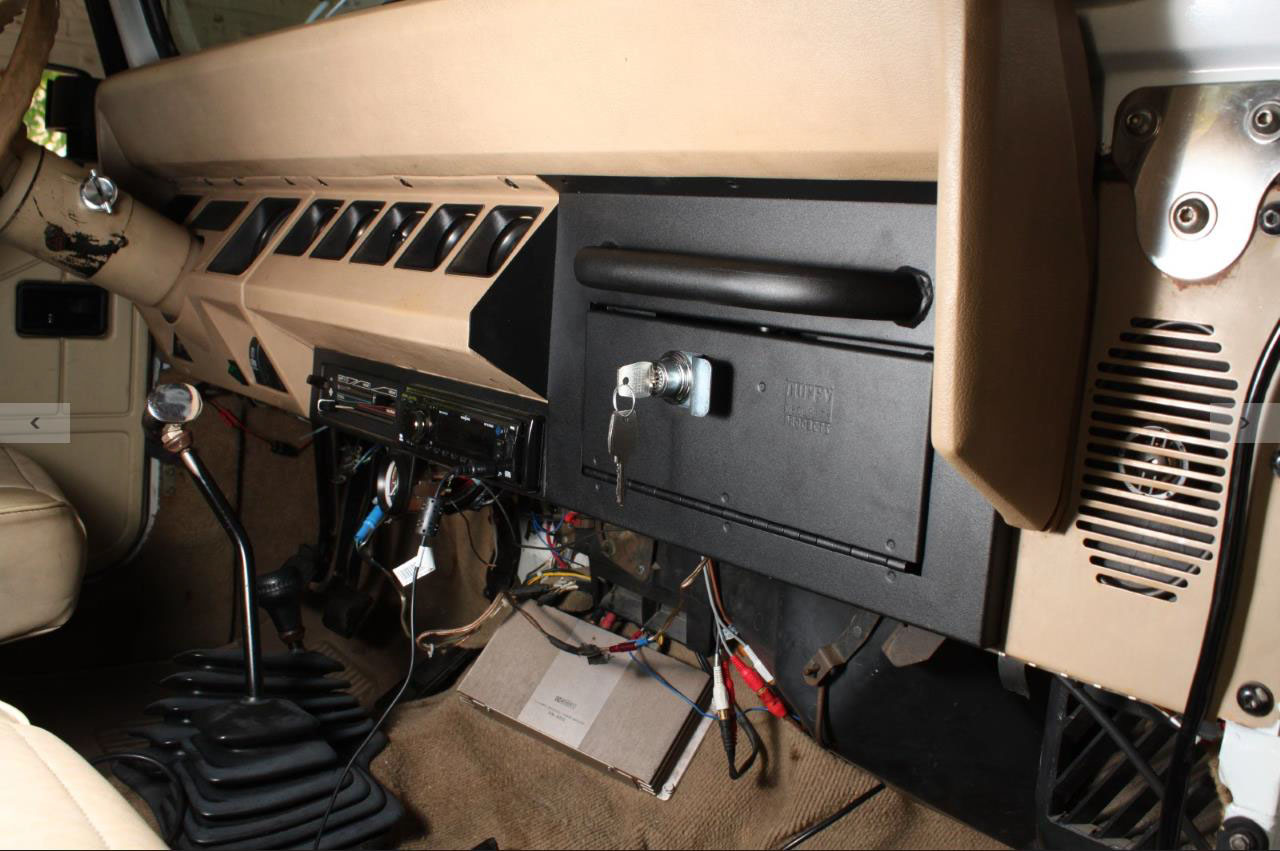
Before
After:

Pre-Installation Notes:
Many Tuffy products are designed to be installed directly into stock mounting locations. Although not difficult to install, slight variations in model years or parts which were not meant to be easily removed from the intended factory mounting locations can make these installs tedious. The Tuffy Security Glove Compartment is a straight forward install, but may require small hands and slightly odd contortions of the body to remove the factory glove compartment. The Tuffy Security Glove Compartment can likely be installed in 20 minutes by an experienced professional. Leave 45-60 minutes available for amateur installation.
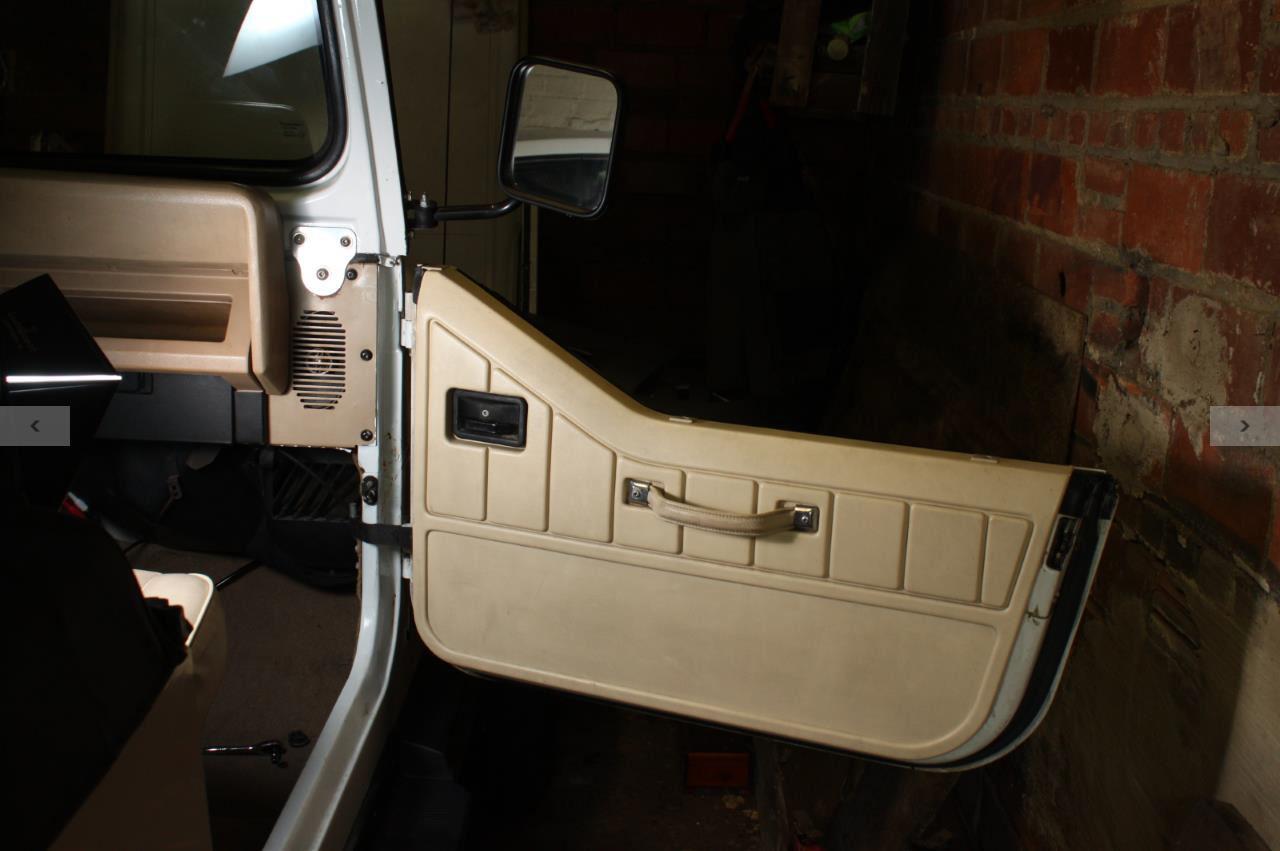
1. Open passenger door as wide as possible or remove completely if convenient to make room for installation.
2. Slide passenger seat as far back as possible to make room for installation.
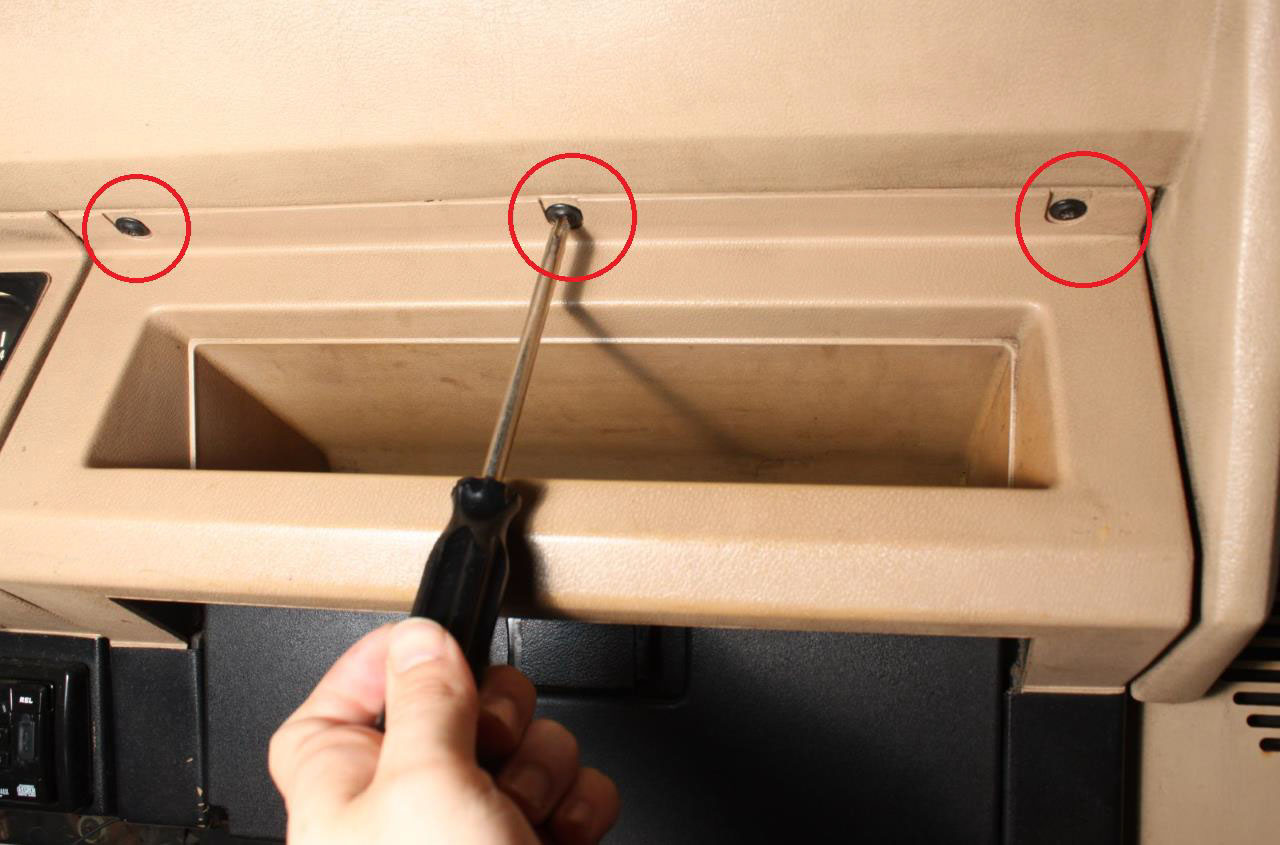
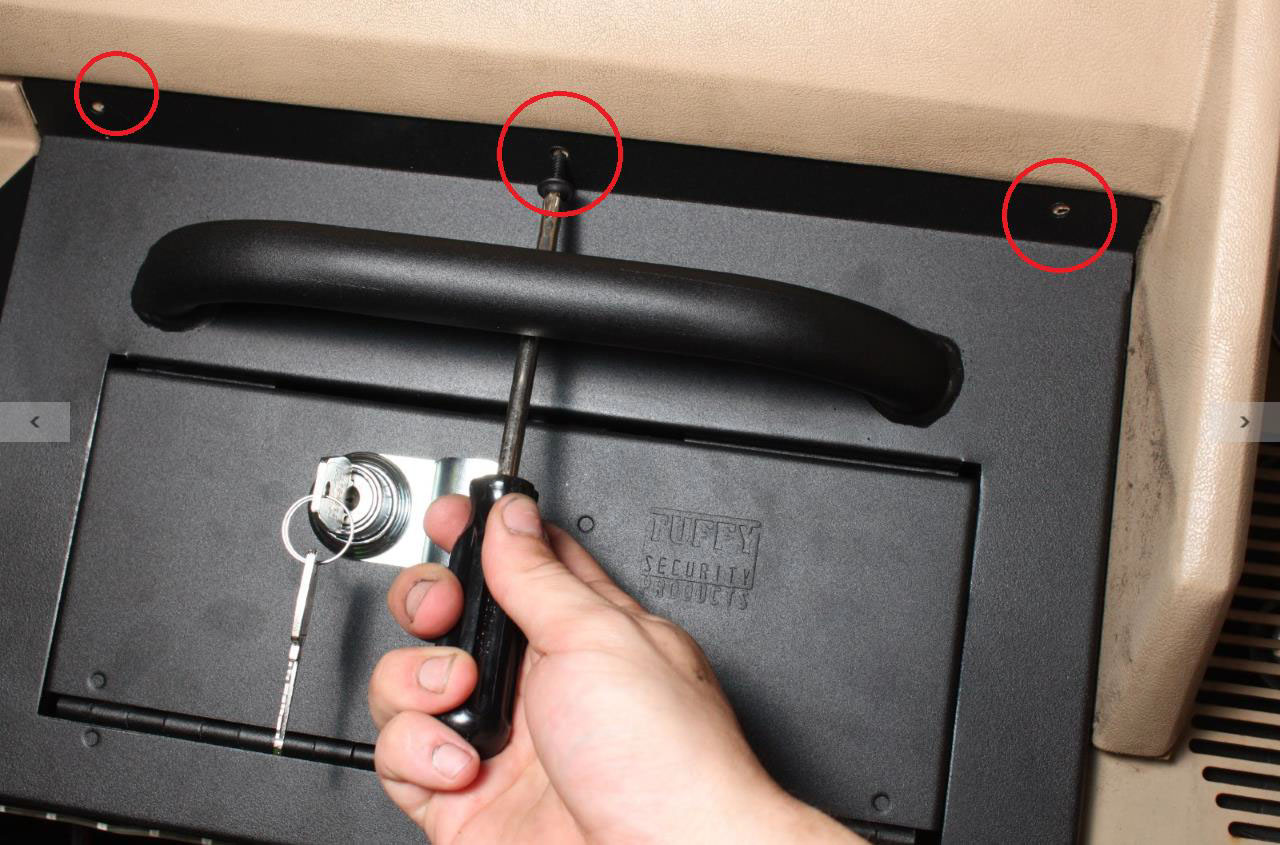
3. Remove (3) Phillips screws across the top of the grab handle above the glove compartment with a Phillips screw driver. Save these screws for reinstallation of the Tuffy Security Glovebox.
4. Open the factory glove compartment to reveal (4) bolts along the front base near the door hinge. Remove the inner (2) bolts with a 5/16” socket.
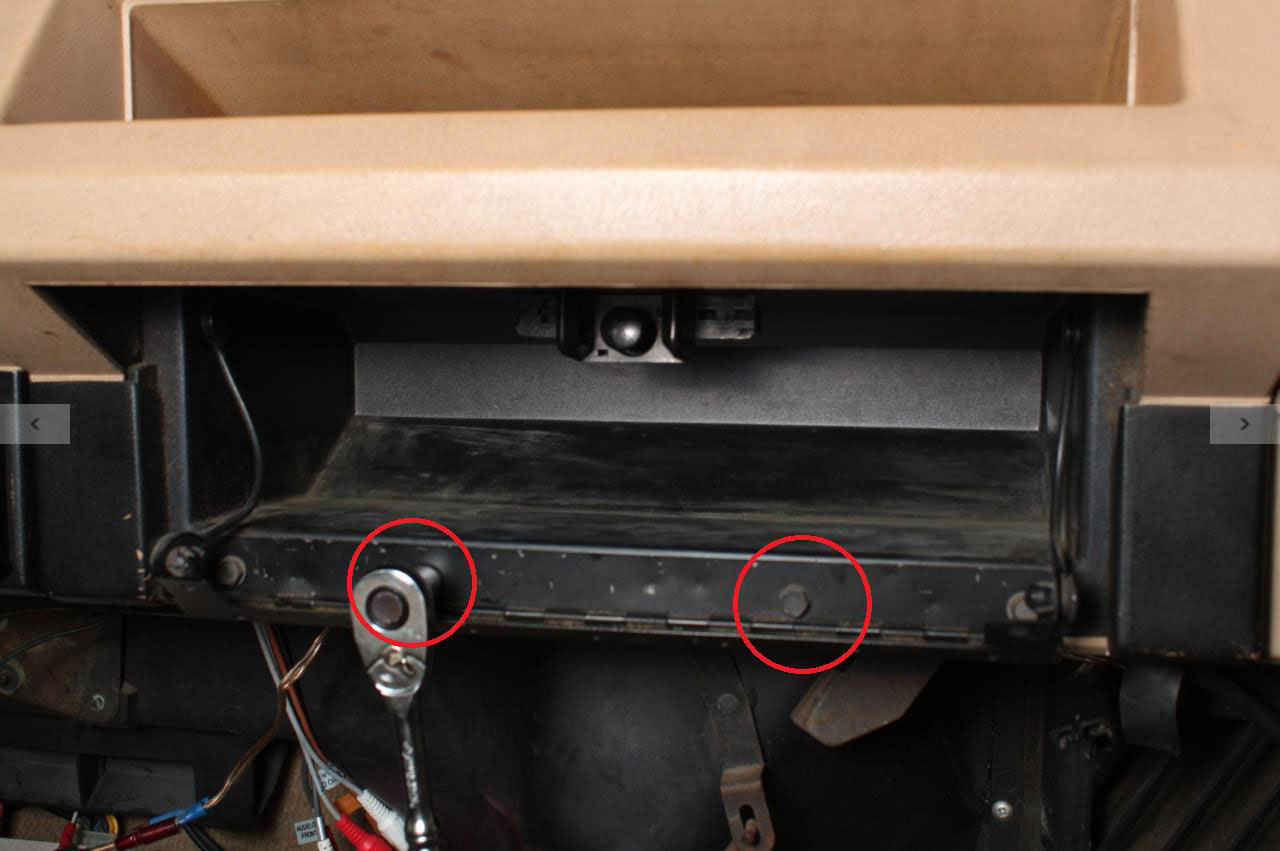
5. Remove (4) nuts holding factory glove compartment to vehicle. The (4) nuts hold the glove compartment in place from the rear of the dash panel. It can be difficult to locate these. Use a flashlight and contort the body so the head is located in the footwell looking up. The (4) nuts are located as shown in the picture, they are only accessible from the back of the dash panel:
(4) bolt locations, bolts are only accessible from the back of the dashboard) From behind, the nut configuration looks like this:
(two bolts from behind)
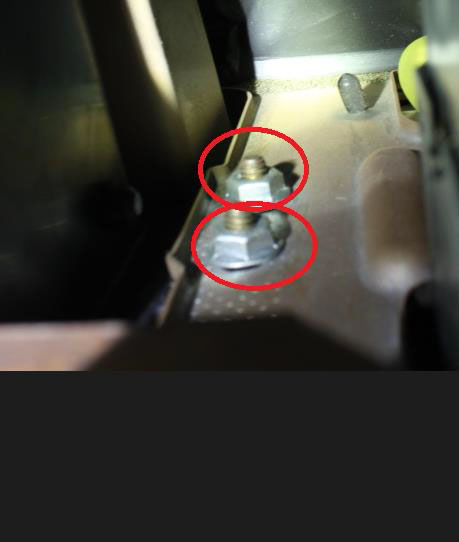
When the nuts are located, use the 7/16” socket to remove them by feel.
(Note: In some models, phillips screws were used instead of nuts. A Philips socket is recommended in place of the 7/16” socket.)
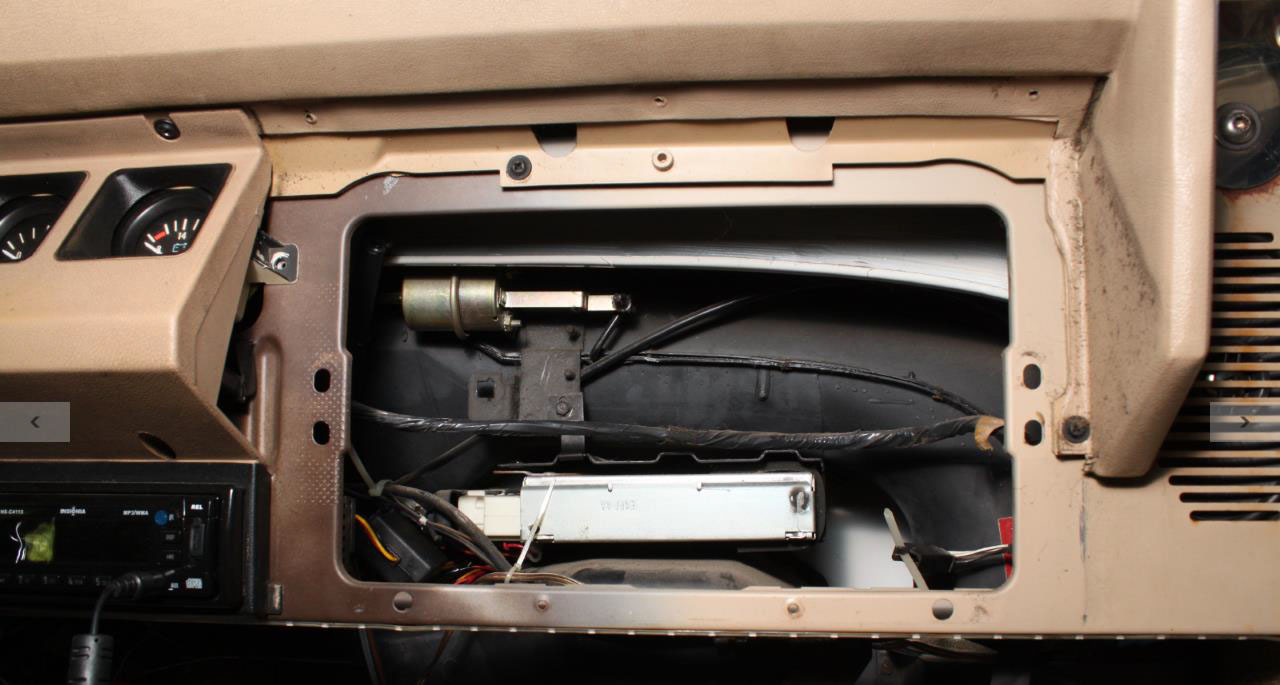
6. Pull glove compartment free from vehicle.
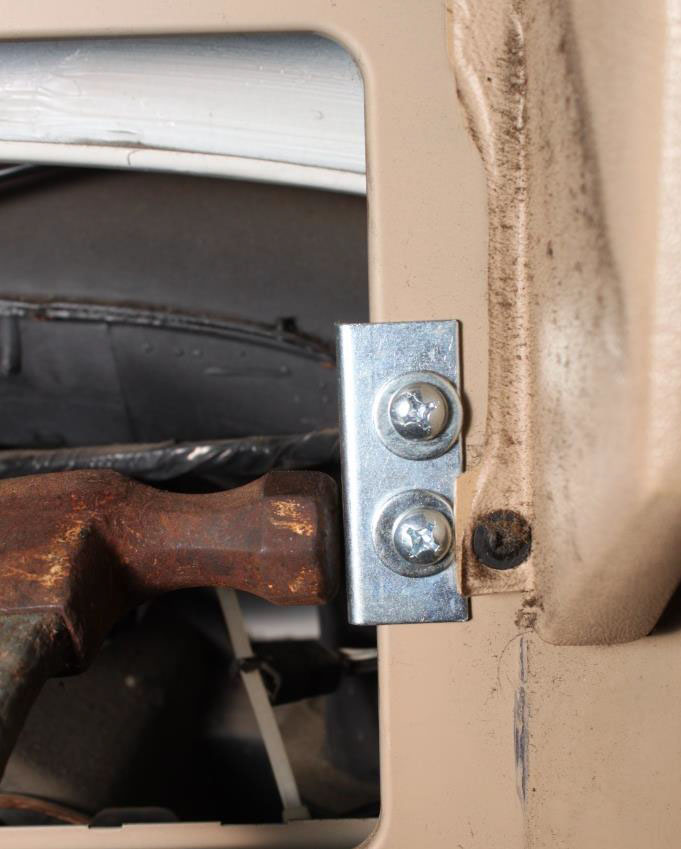
7. Install the provided L-Brackets with (2) 1⁄4”-20 phillips head screws and washers from the front, and 1⁄4- 20 nylon locking nuts from the rear with the 7/16” socket on each bracket (all L bracket hardware is provided with the Tuffy Security Glove Compartment). The pre-installed nutserts should point inward towards the glovebox when installed. Gently tap each L-brackets outward (towards the driver side or passenger side) with a hammer then tighten locking nuts if necessary.
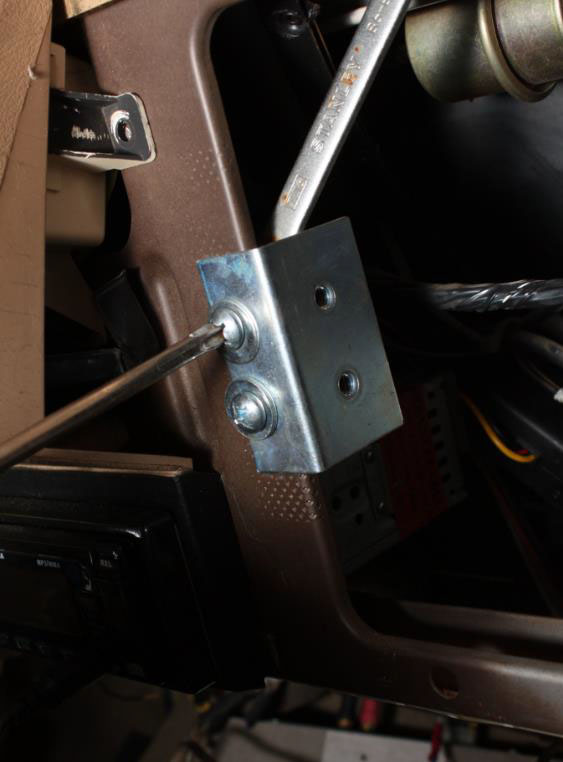
(Use Philips screwdriver and 7/16” socket to tighten L-brackets to original mounting holes. Nutserts will point inward for Tuffy Security Glove Compartment)
(The (2) included L-brackets are installed)
(Use a hammer to gently nudge the included L-brackets to fit the Tuffy Security Glove Compartment. This may require fitting, nudging, and repeating. Retighten Phillips bolts and nutserts after a good fit is made)
8. Install Tuffy Security Glove Compartment by sliding into the factory glove compartment hole. The previously installed L-brackets may need re-adjustment for proper fitting.
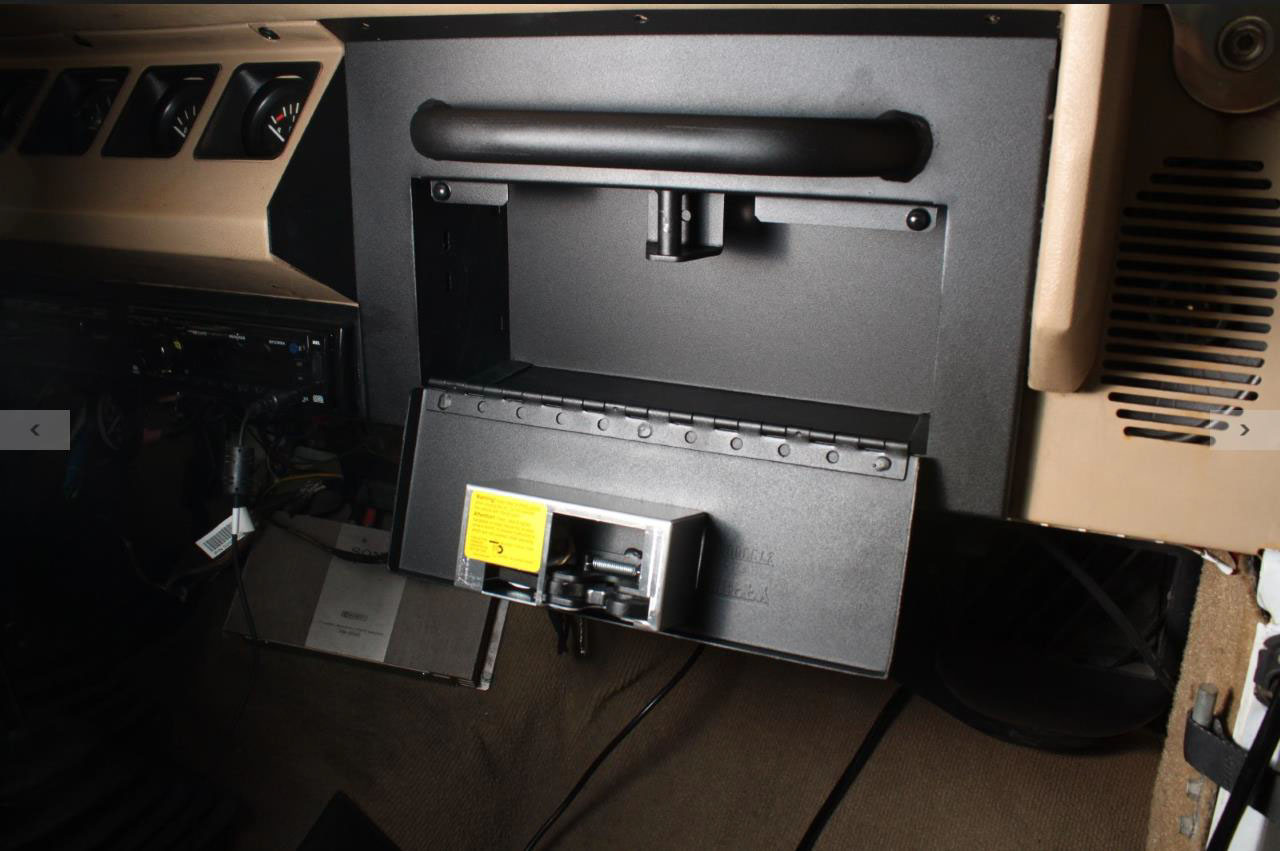
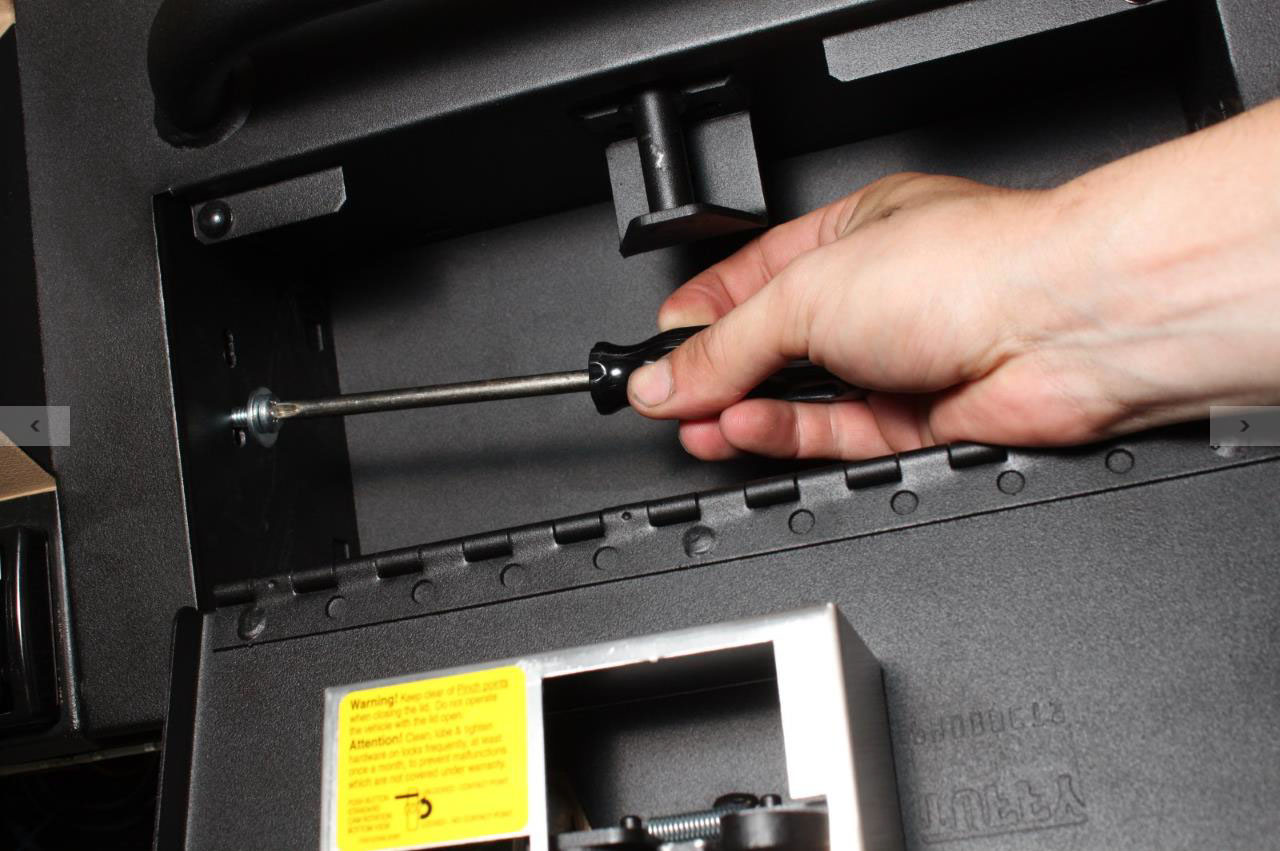
9. Install (4) provided 1⁄4”-20 phillips screws with washers into the sides of the Tuffy Security Glove Compartment through the nutserts in the previously installed L-brackets
10. Install (3) original dashboard screws along the top of the Tuffy Security Glove Compartment
11. Tuffy Security Glove Compartment is now installed!
Installation Instructions Written by ExtremeTerrain Michael Johnston 07/06/2015
