 FREE 1 to 3-Day Delivery on Orders $149+ Details

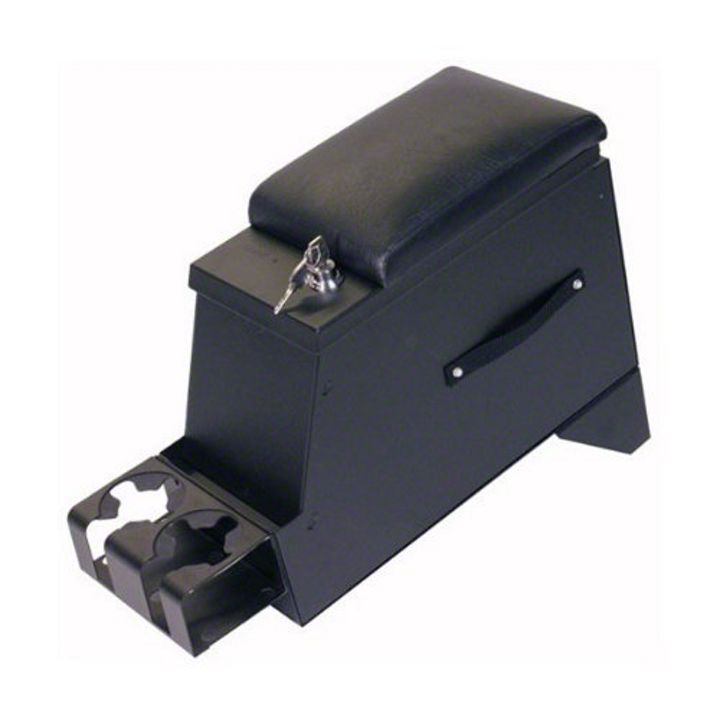
How To Install a Tuffy Deluxe Stereo Security Console - Black - on your 1991-1995 Jeep Wrangler YJ
Installation Time
1 hours
Tools Required
- Electric Drill
- 3/8” Drill Bit
- 3/32” Drill Bit (or similar size for pilot hole)
- Fabric Marker
- Center Punch
- Hammer
- 1⁄2” Socket
- 5/16” Socket
- 3/8” Wrench
- 1⁄2” Wrench
- Touch up paint or silicone sealant
- Flashlight
- (1) 5/16” x 5-1/2” Fully Threaded Bolt (Possibly needed depending on vehicle)
- Friend, Co-worker, or colleague for 10 minutes
Shop Parts in this Guide
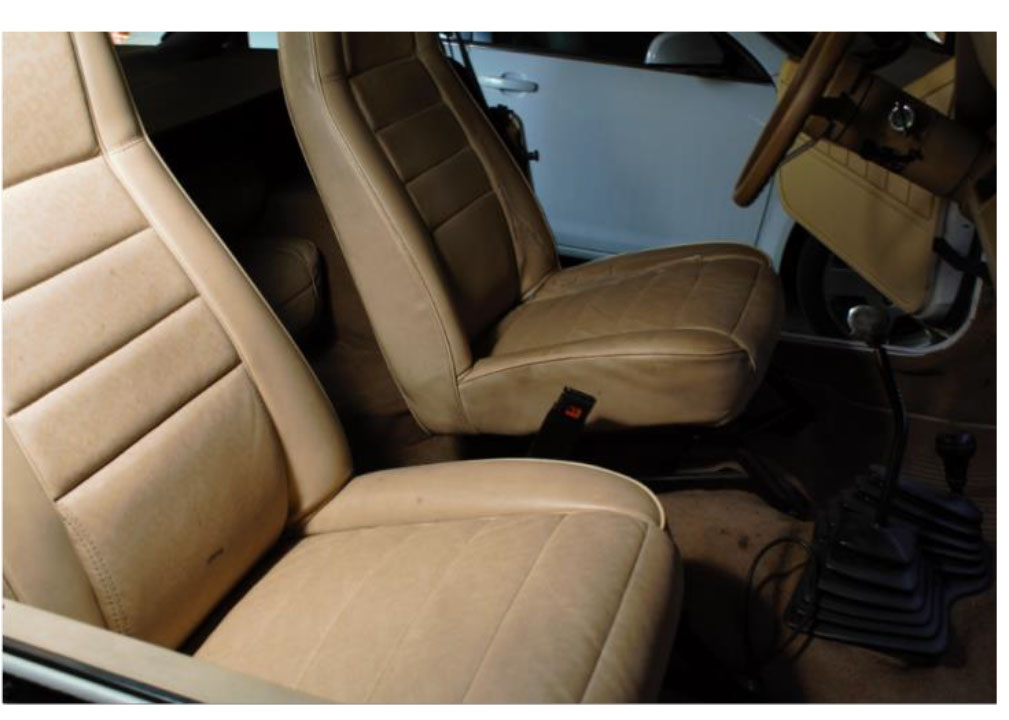
Before:
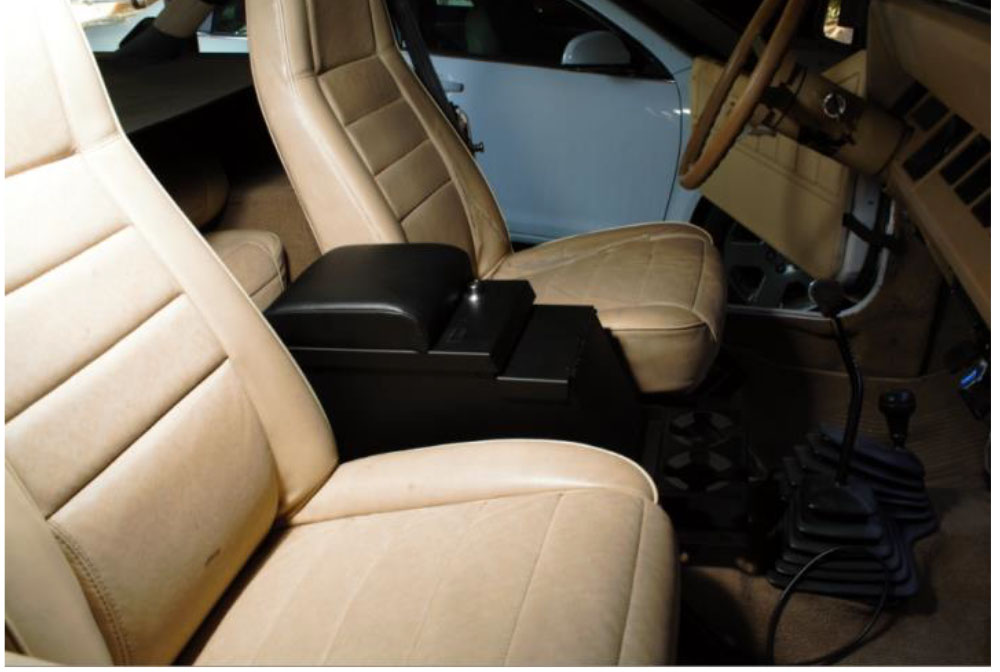
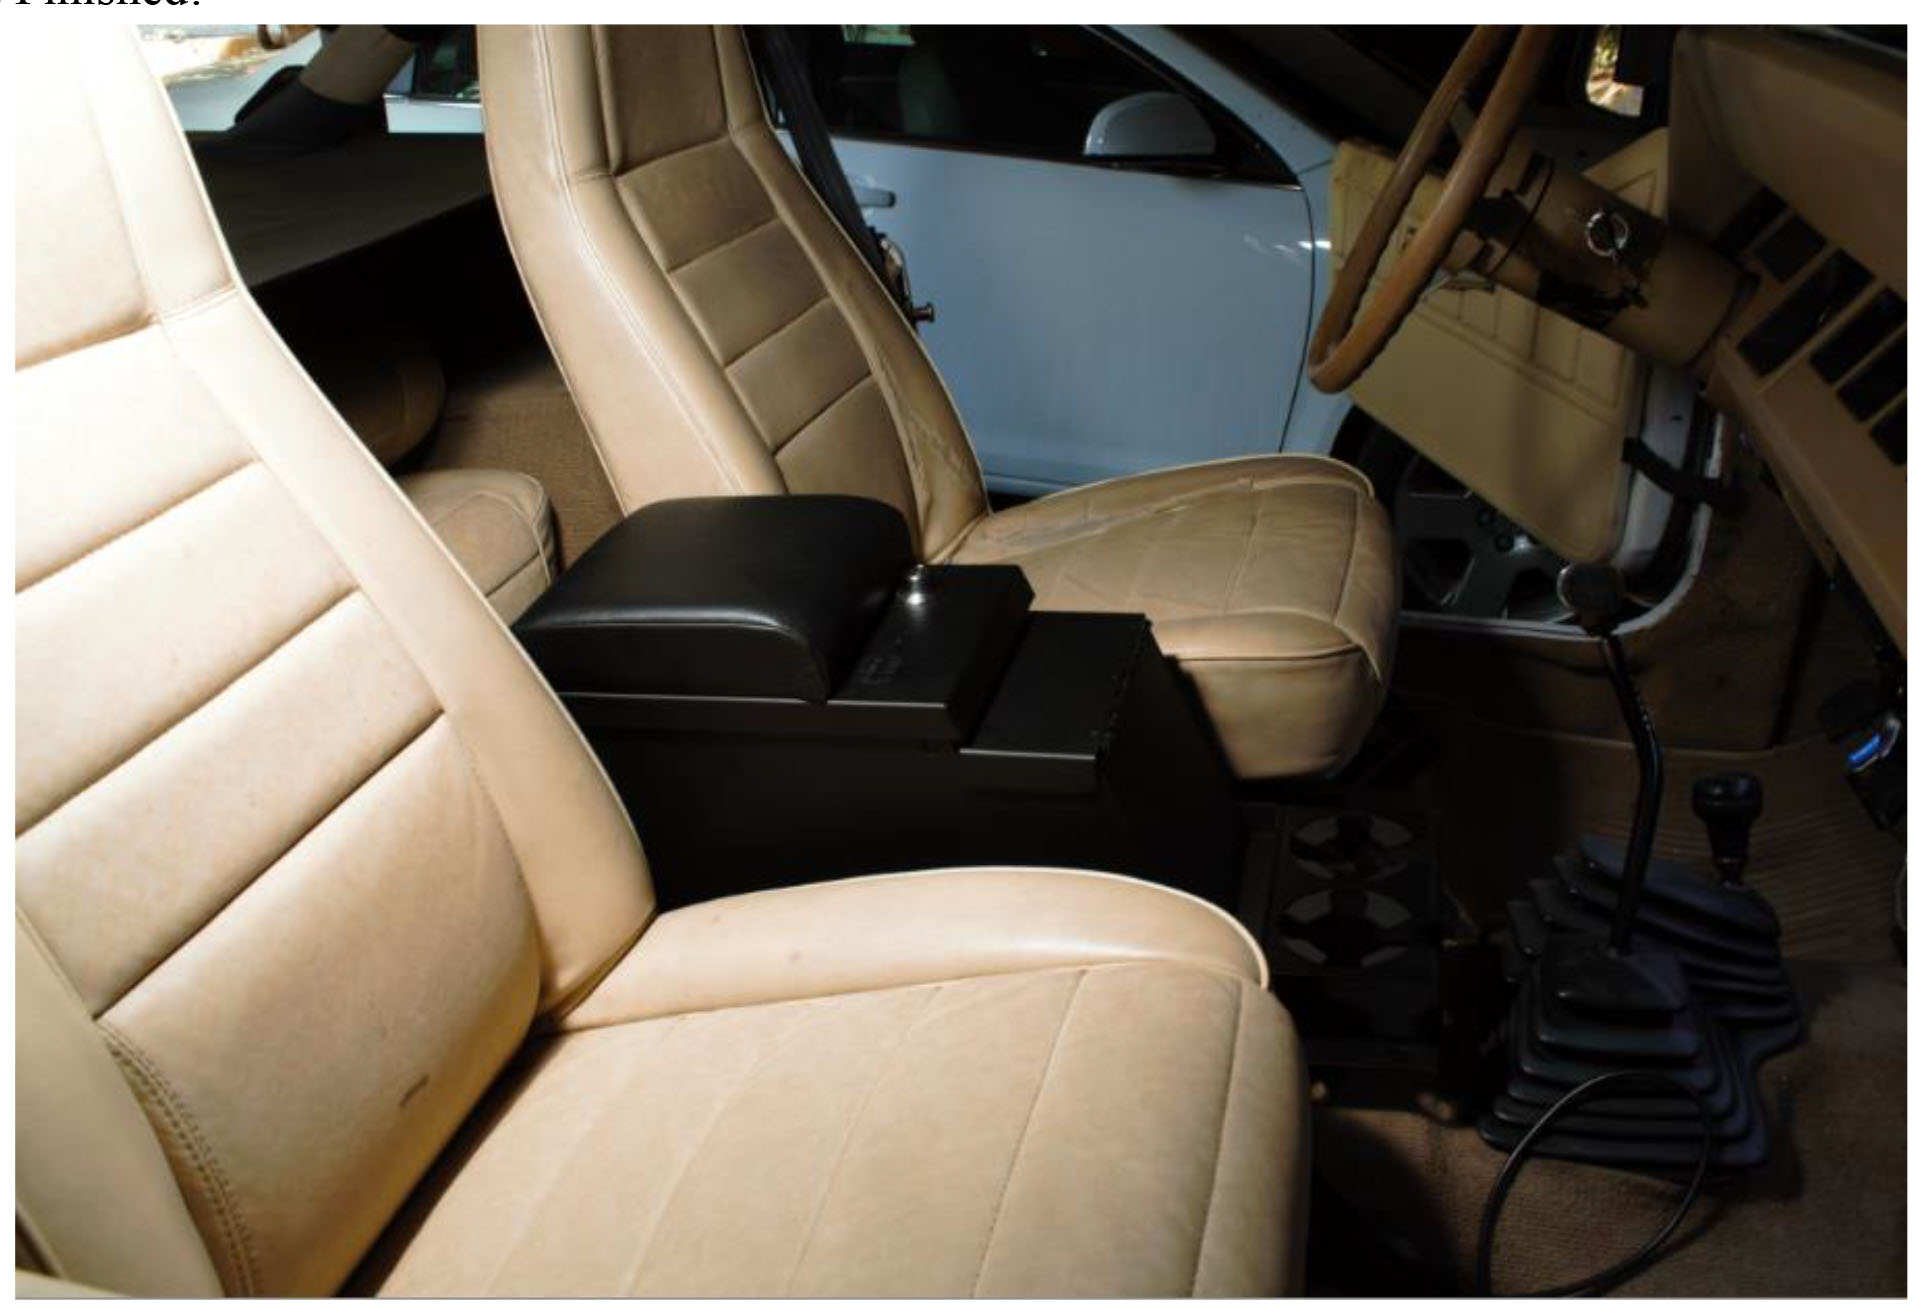
After:
Pre-Installation Notes:
Many Tuffy products are designed to be installed directly into stock mounting locations. Although not difficult to install, slight variations in model years or parts which were not meant to be easily removed from the intended factory mounting locations can make these installs tedious. The Tuffy Deluxe Stereo Security Console is a straight forward install. The console can likely be installed in 20 minutes by an experienced professional. Leave 45-60 minutes available for amateur installation. The Tuffy Deluxe Stereo Console was designed with the Jeep Wrangler in mind, but is considered a ‘universal fit’ item. There were changes in the seat configurations and gap distances between the YJ model years. If in doubt on which console to order, measure between the seats and consult with the ExtremeTerrain. A console with tight clearances can be difficult to align and install and can interfere with the comfortable operation of the console lid. Model years prior to 1990 will be the most difficult to align due to the unsymmetric nature of seat placement. The driver’s seat is placed further inboard than the passenger seat. Take the extra time during the alignment steps and view from all angles until completely satisfied before drilling.
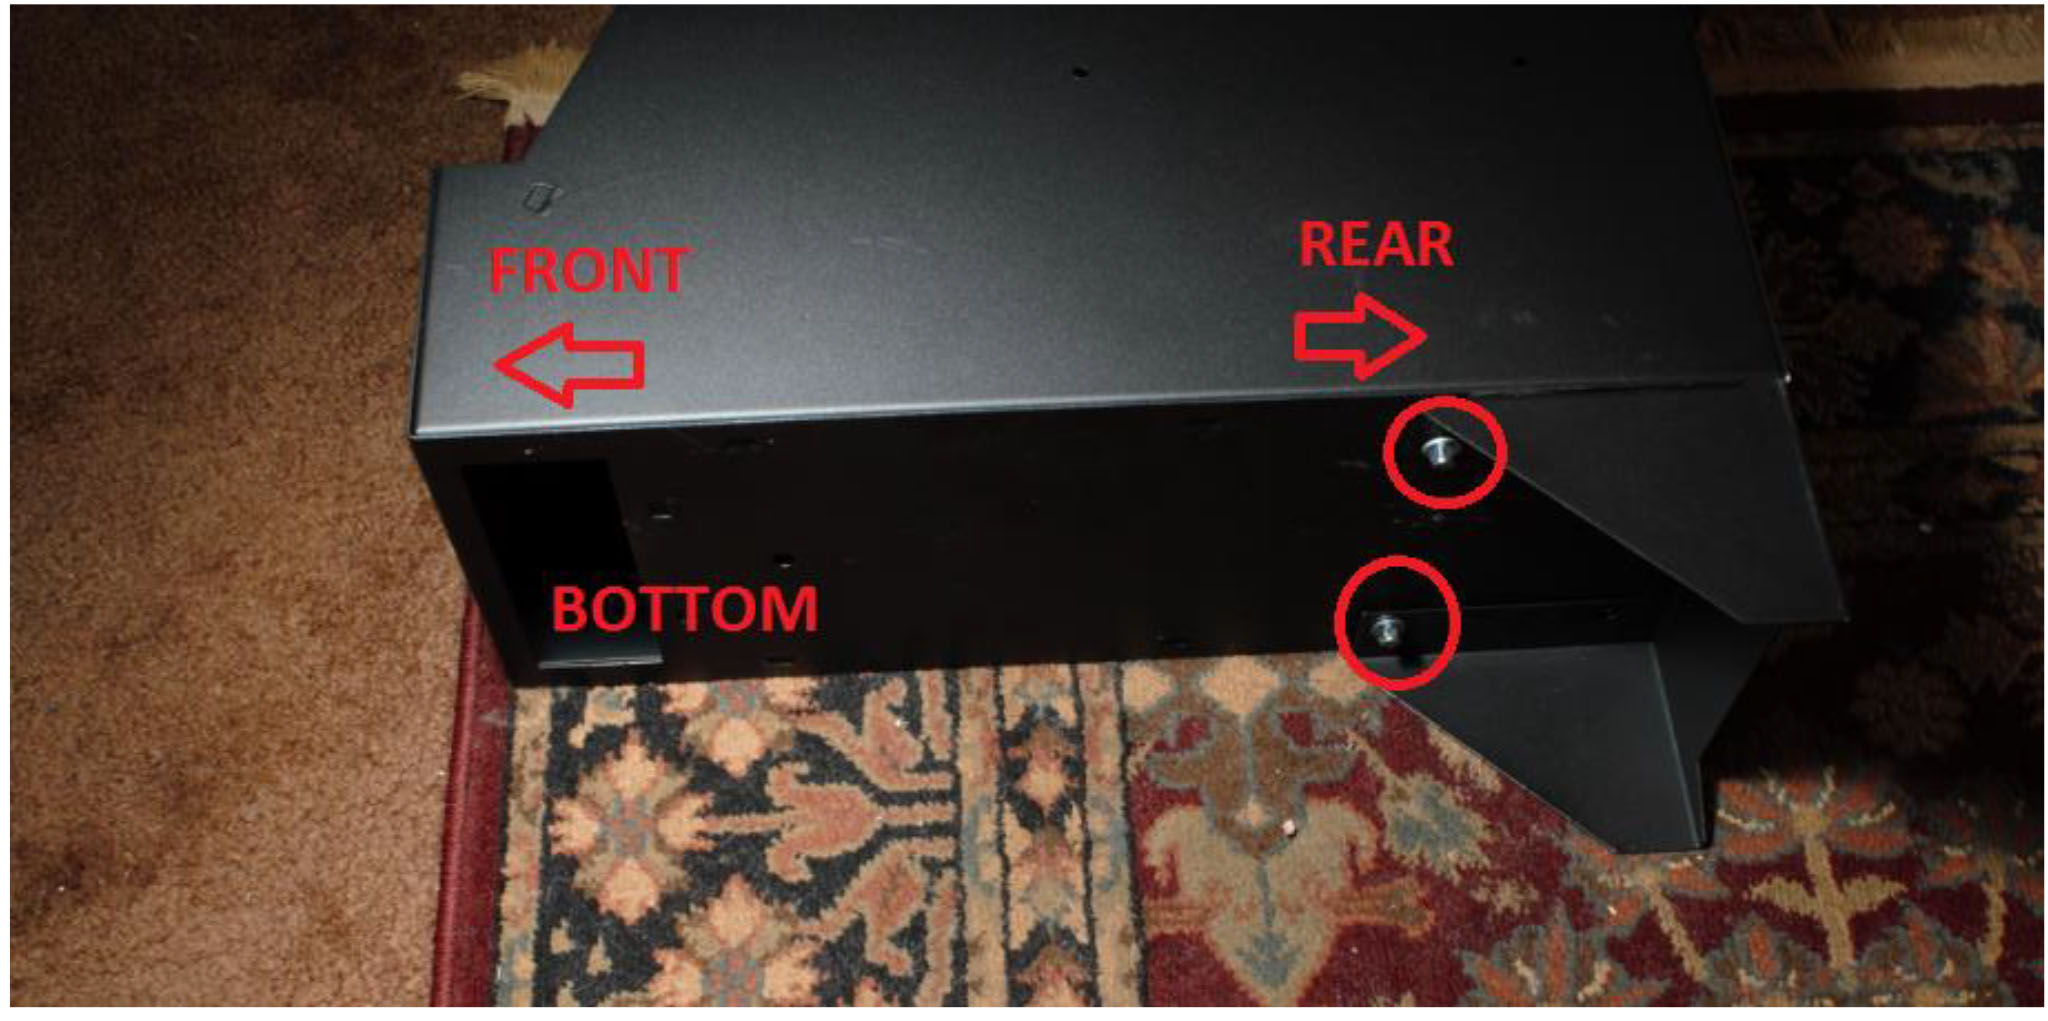
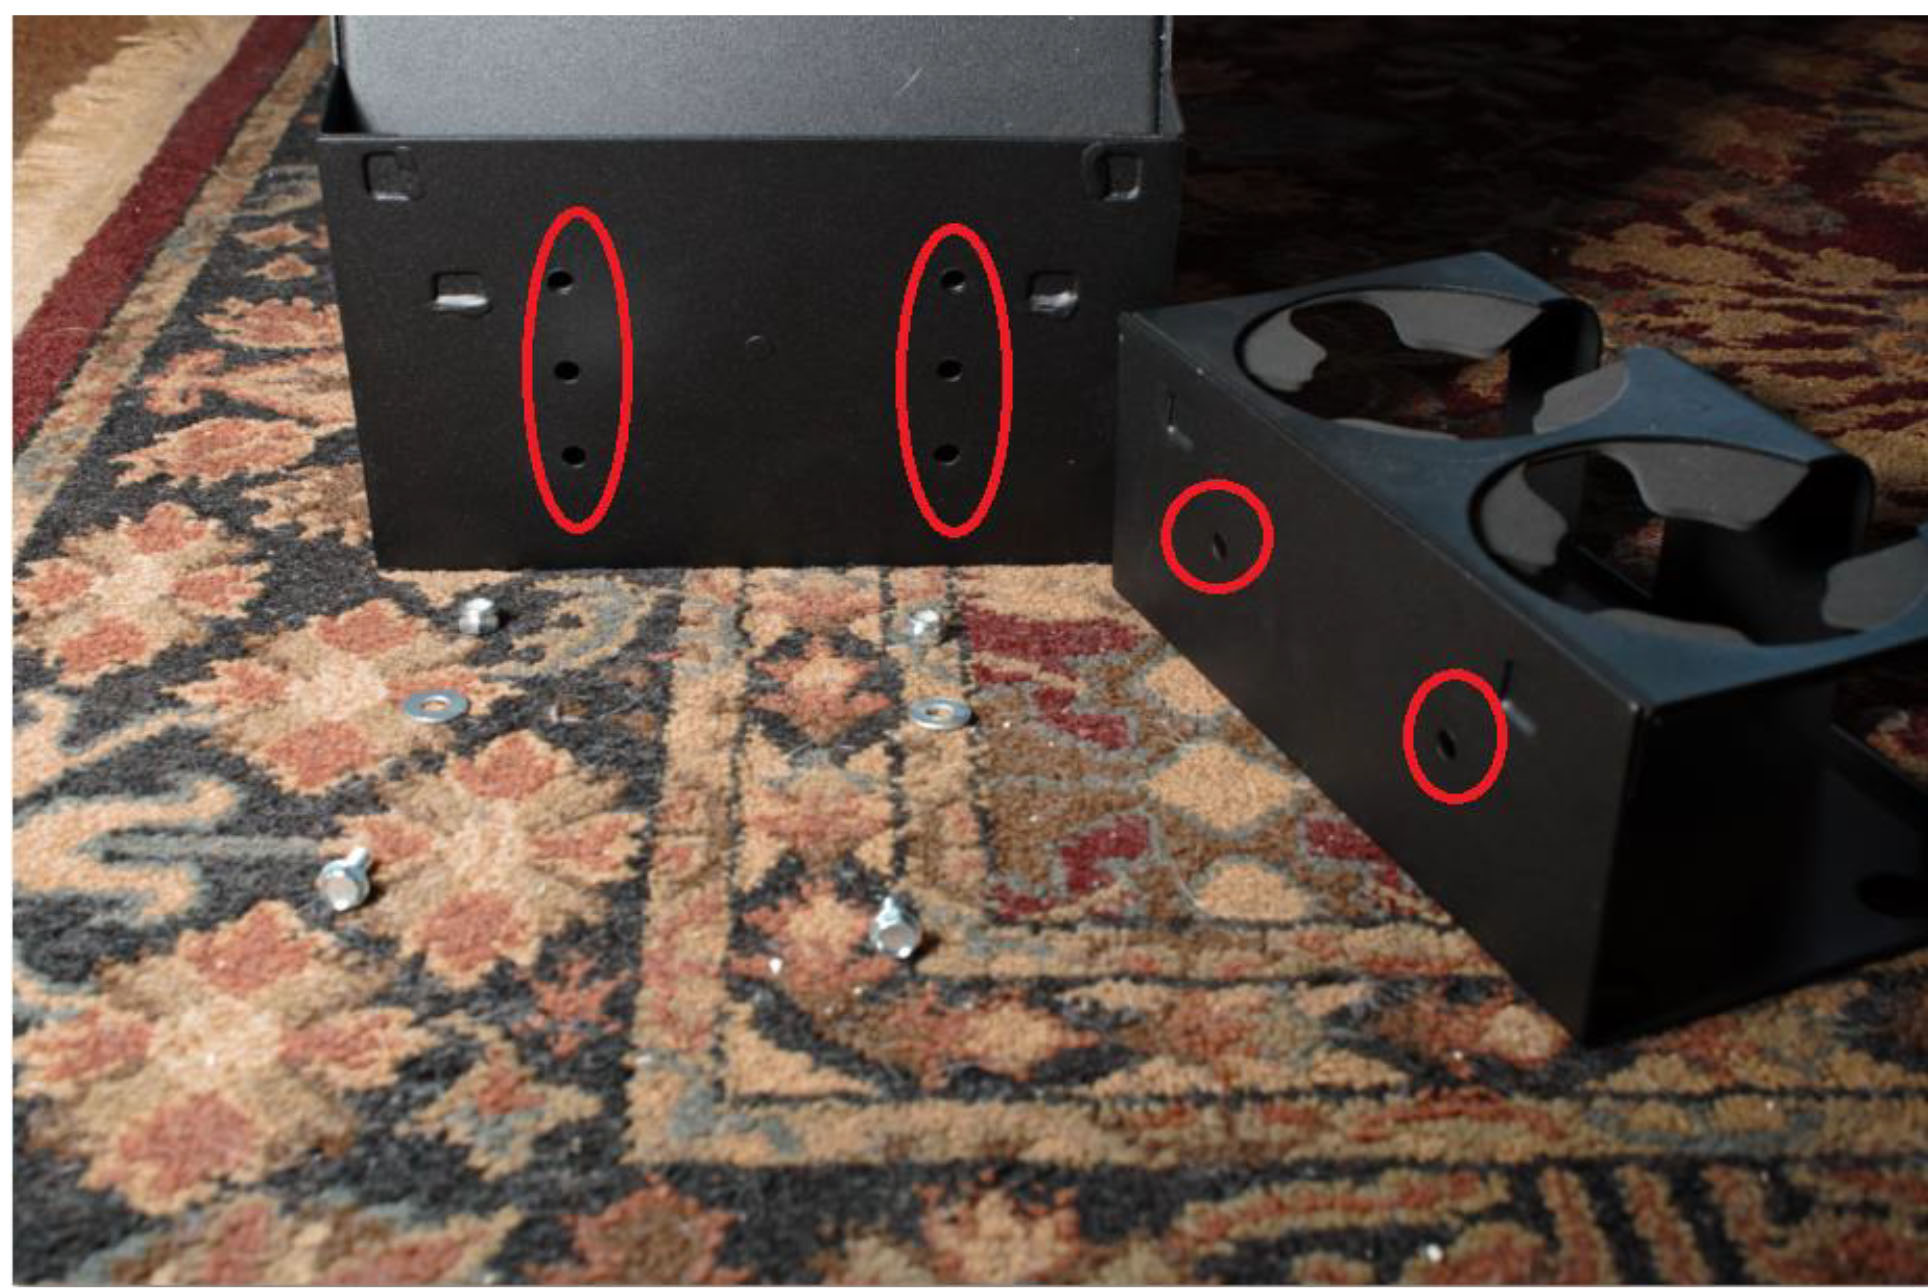
Tuffy Security Console Assembly – Attach mounting bracket to holes on the bottom rear of the security console using (2) 10-32x1/2” bolts, (2) 10-32 Locknuts, and (2) 3/16” washers and a 3/8” wrench, 5/16” socket, and ratchet.
2. Attach beverage holder to front or rear of security console with (2) 10/32x1/2” bolts, (2) 10-32 locknuts, and (2) 3/16” washers using a 3/8” wrench, 5/16” socket, and ratchet. If front mounted, choose the proper height for installation. Test fitting the console and drink holder height in the vehicle is suggested. Here, I chose the top mounts so I could wedge maps and pamphlets between the bottom of the drink holder and the floor.
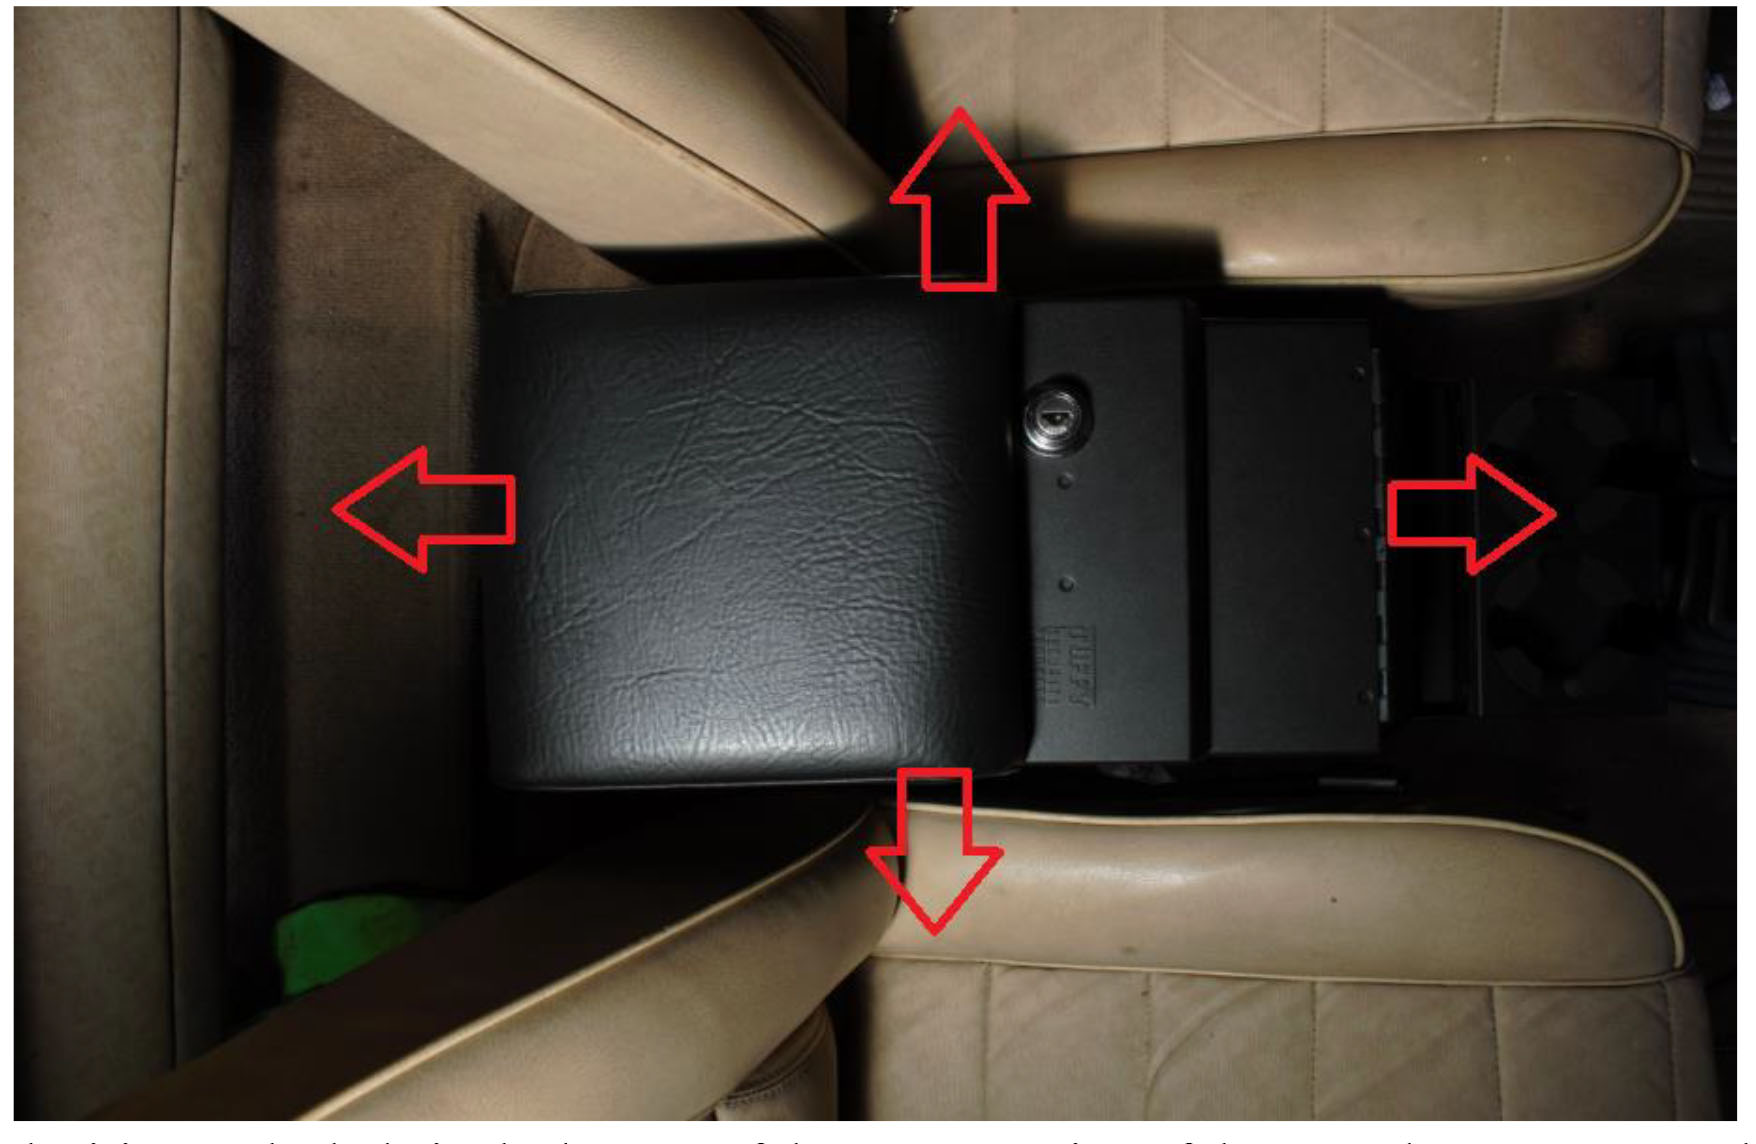
3. Test fit security console in vehicle between the seats. Move the console around to various locations to optimize a stable mounting location, symmetric appearance, and best elbow pad location. Sit in the driver’s seat and test the elbow pad. View from many angles, including from above and from the passenger’s seat until satisfied with location. Ensure the lid opens and a mega gulp sized beverage can fit in the beverage holder without interfering with shifter knob.
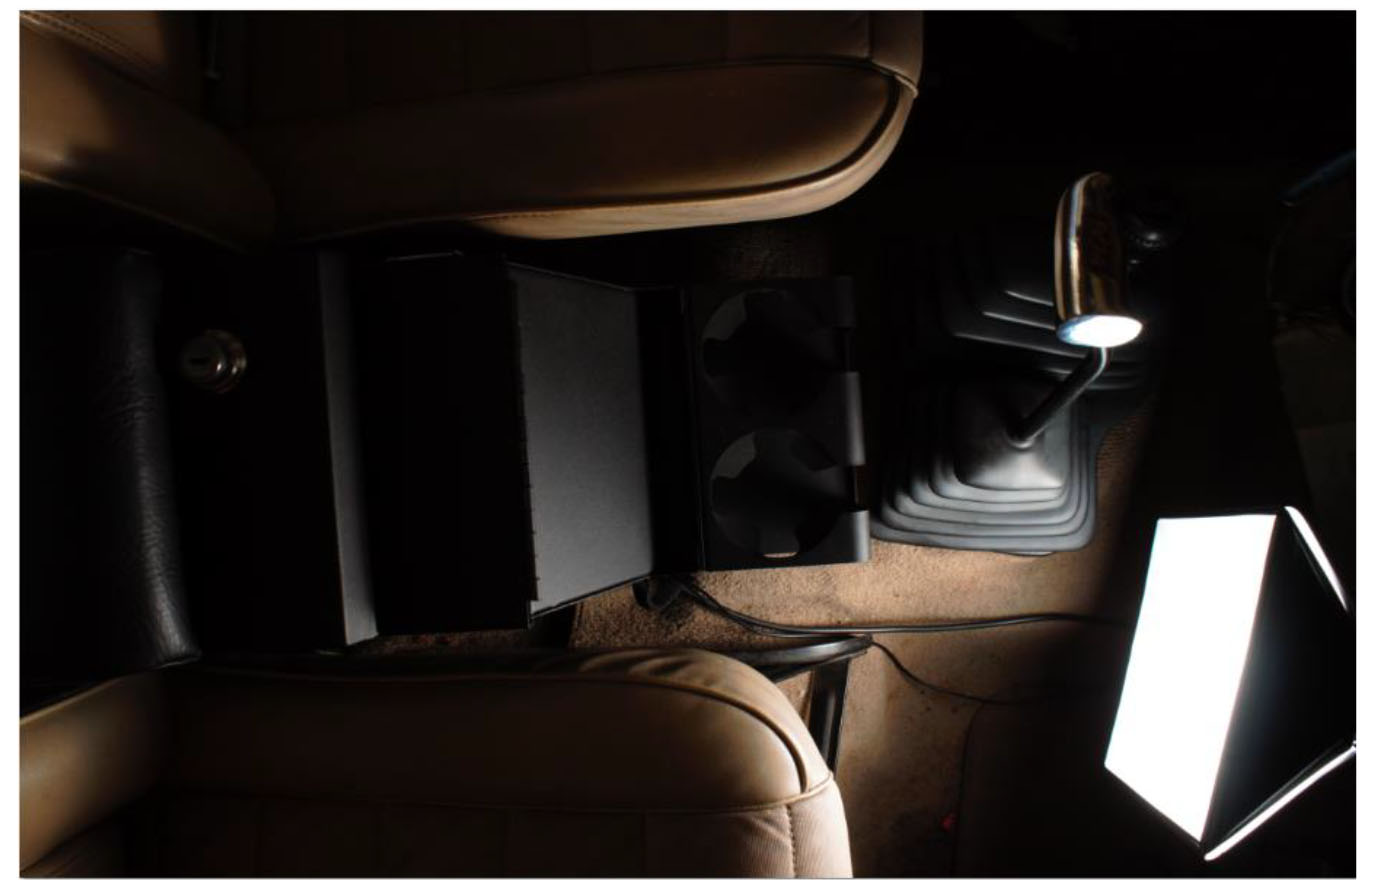
4. Run desired wiring to the hole in the bottom of the stereo section of the console. For Ham and CB radios, a 12 VDC, ground wire, and antenna coaxial cable will be needed. For music stereo, a stereo wiring extension harness will be needed. In this application, the 12VDC, ground, and coaxial cable can be seen running to the console. A DIN mount CB and Ham are interchangeably slid into the DIN stereo slot depending on the offroading crowd and distance from civilization. However, music stereo systems vary considerably depending on manufacturer and model and the stereo mounting instructions should be followed. If the wiring will be permanent, it is recommended to route beneath the carpeting in a wiring loom.
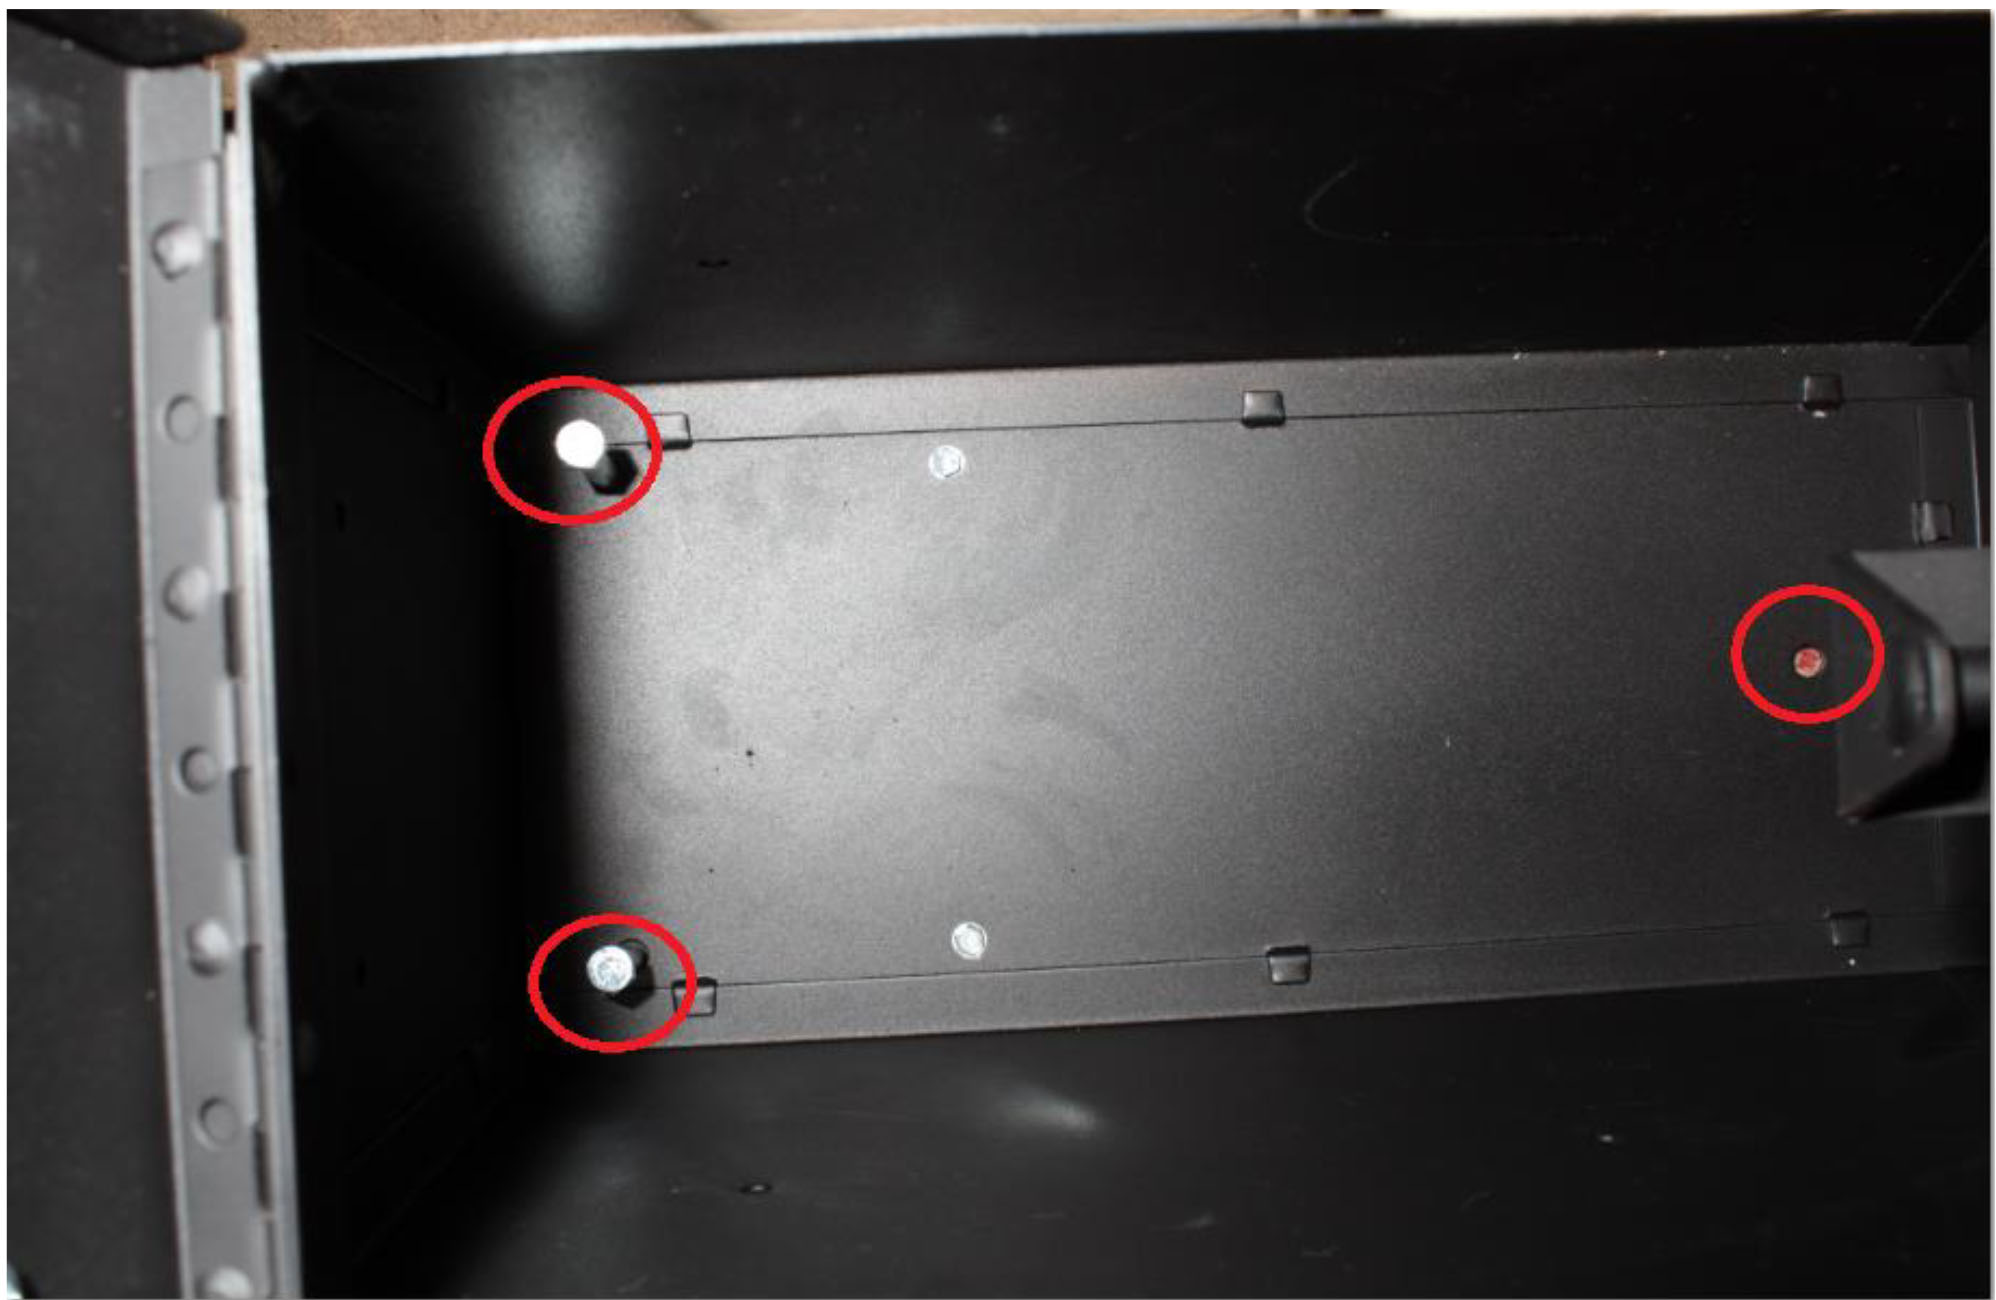
5. Open lid and look into security console. Use the fabric marker to mark the front hole location on the carpet. Place (2) 5/16”x5-1/2” bolts through the holes in the rear of the console. Ensure the bolts are vertical.
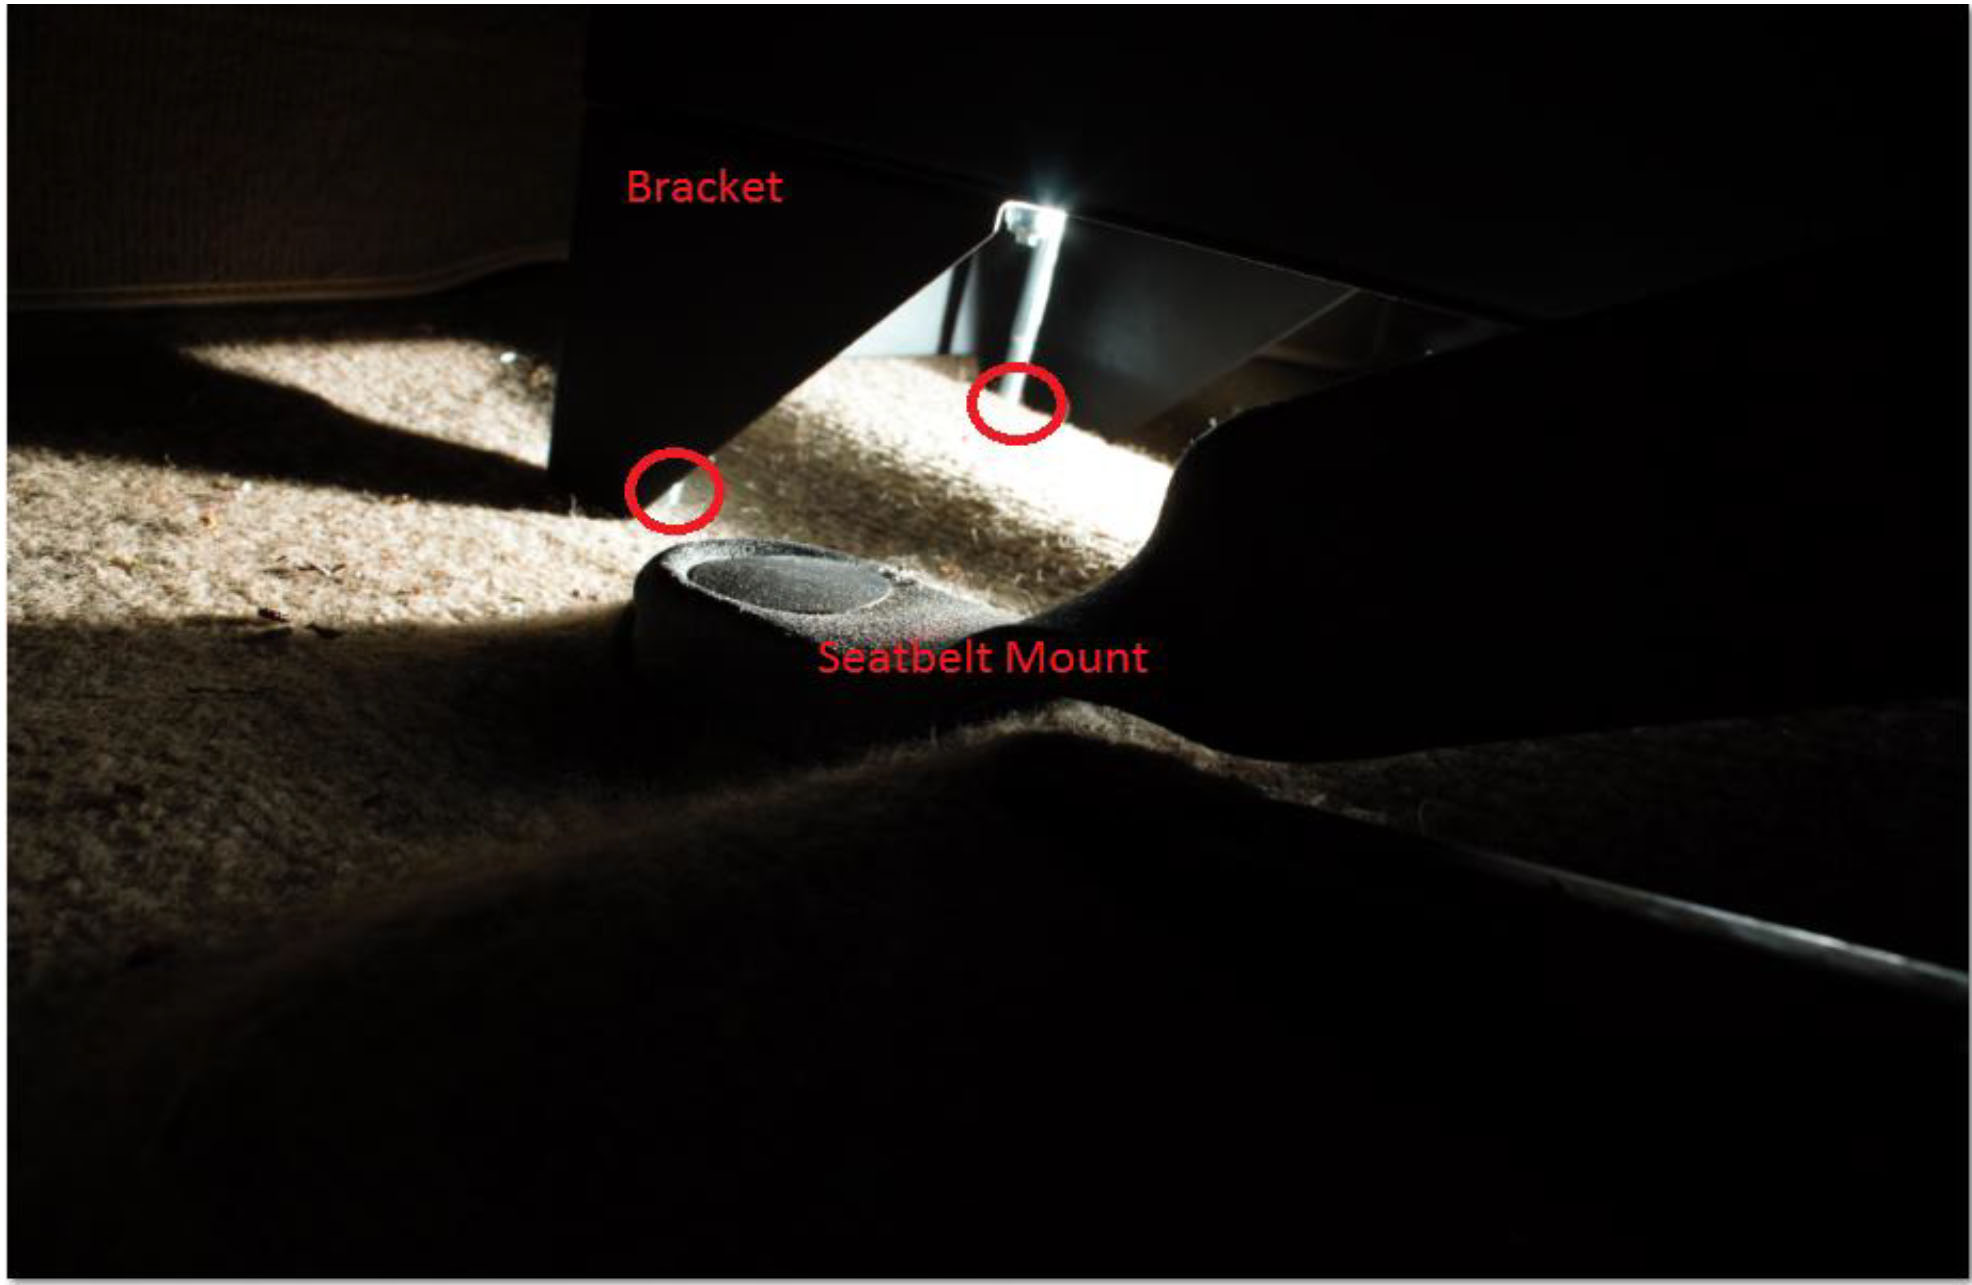
6. Move the seats forward. Use a flashlight to look beneath the security console mounting bracket. Use the fabric pen to mark the locations where the 5/16”x5-1/2” bolts touch the carpet or floor.
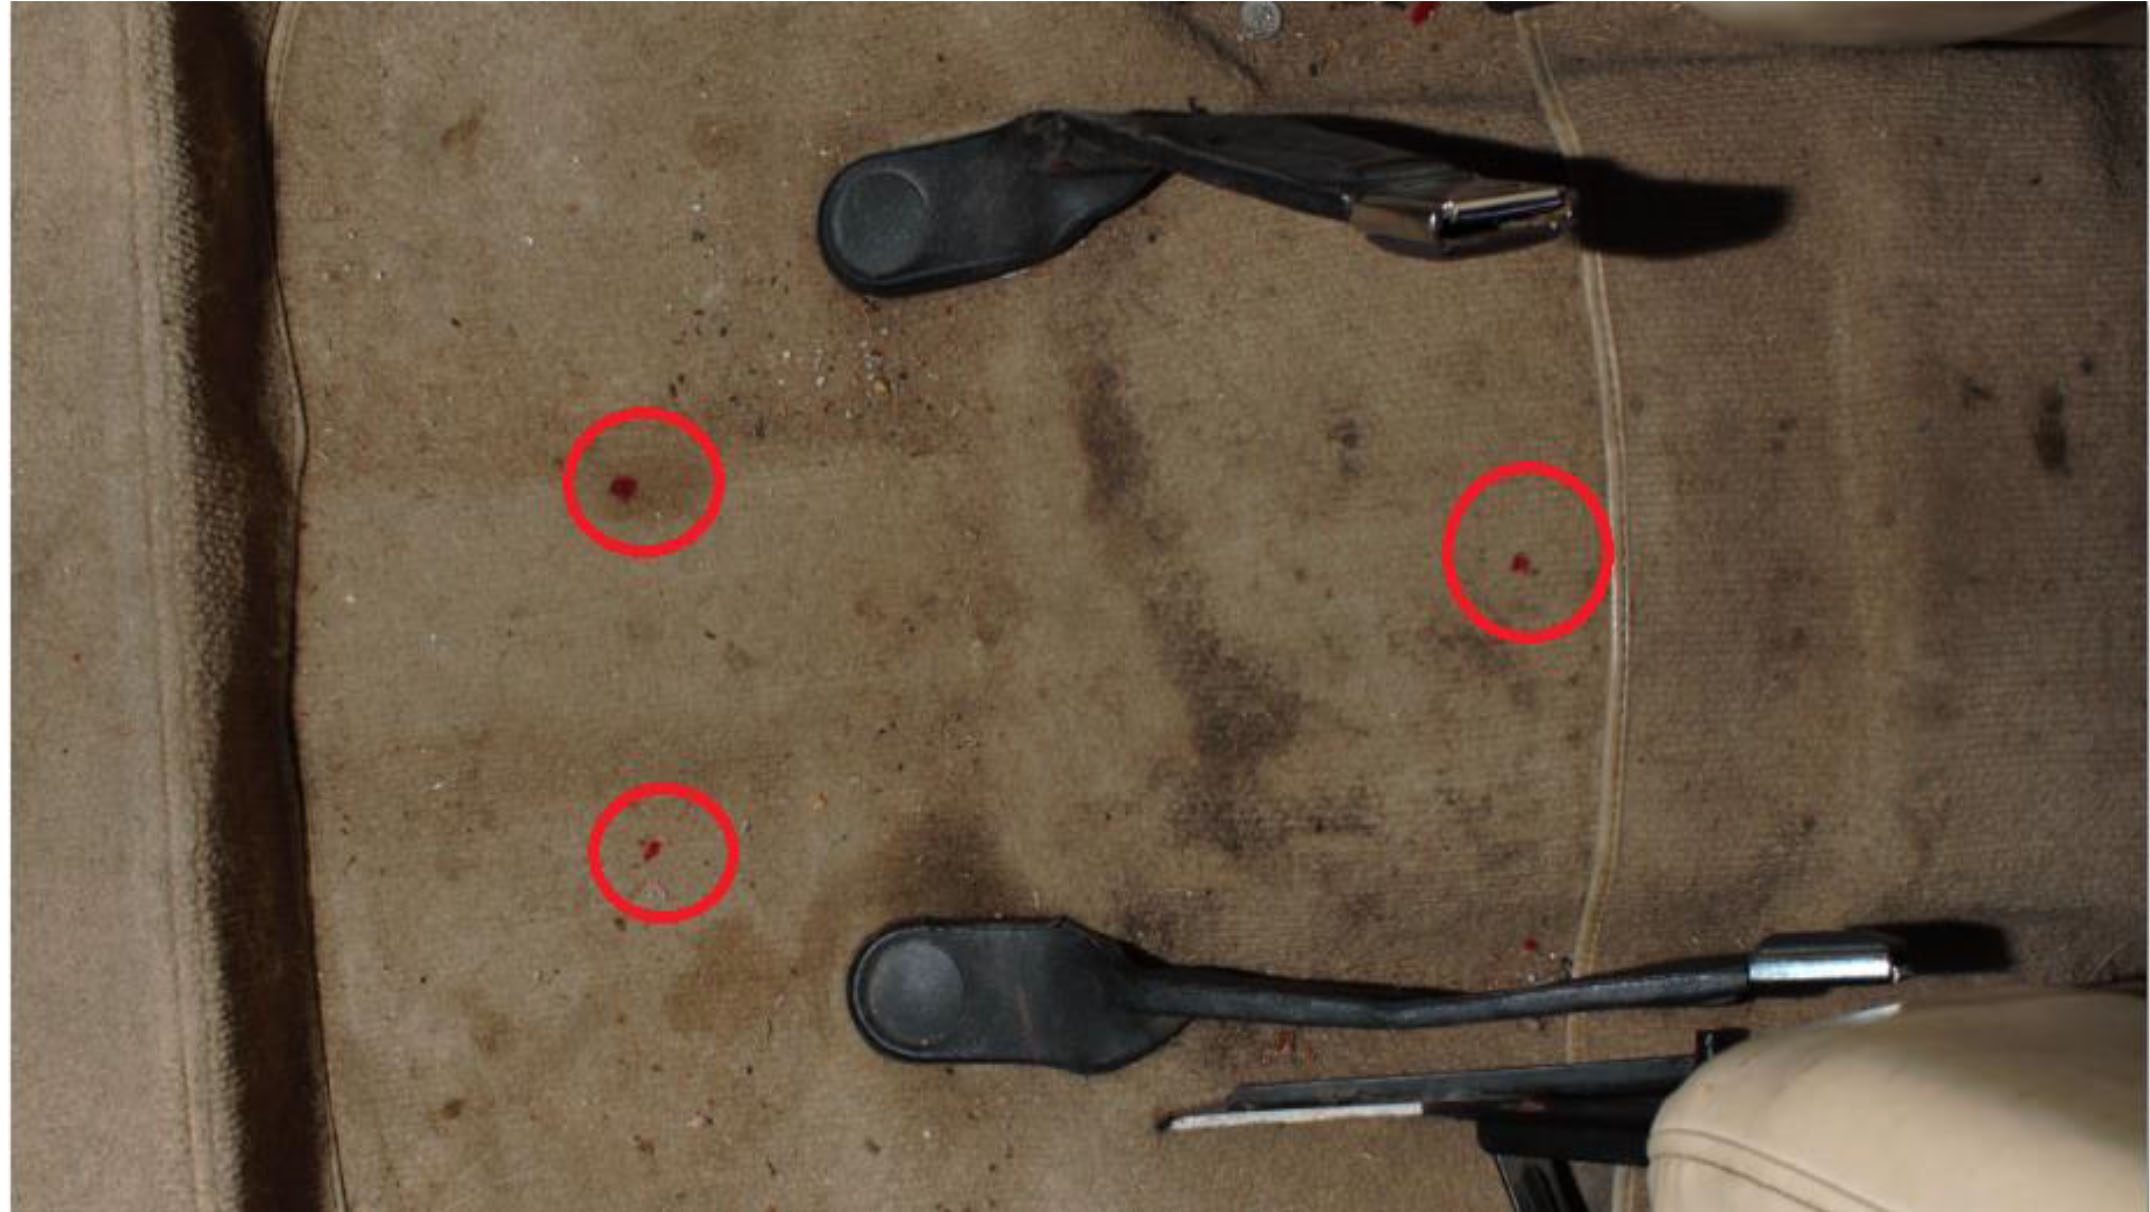
7. Inspect the mounting locations marked by the fabric pen to ensure the locations are correct. You should only drill and cut once. Feel free to use this opportunity to clean your carpet and floor.
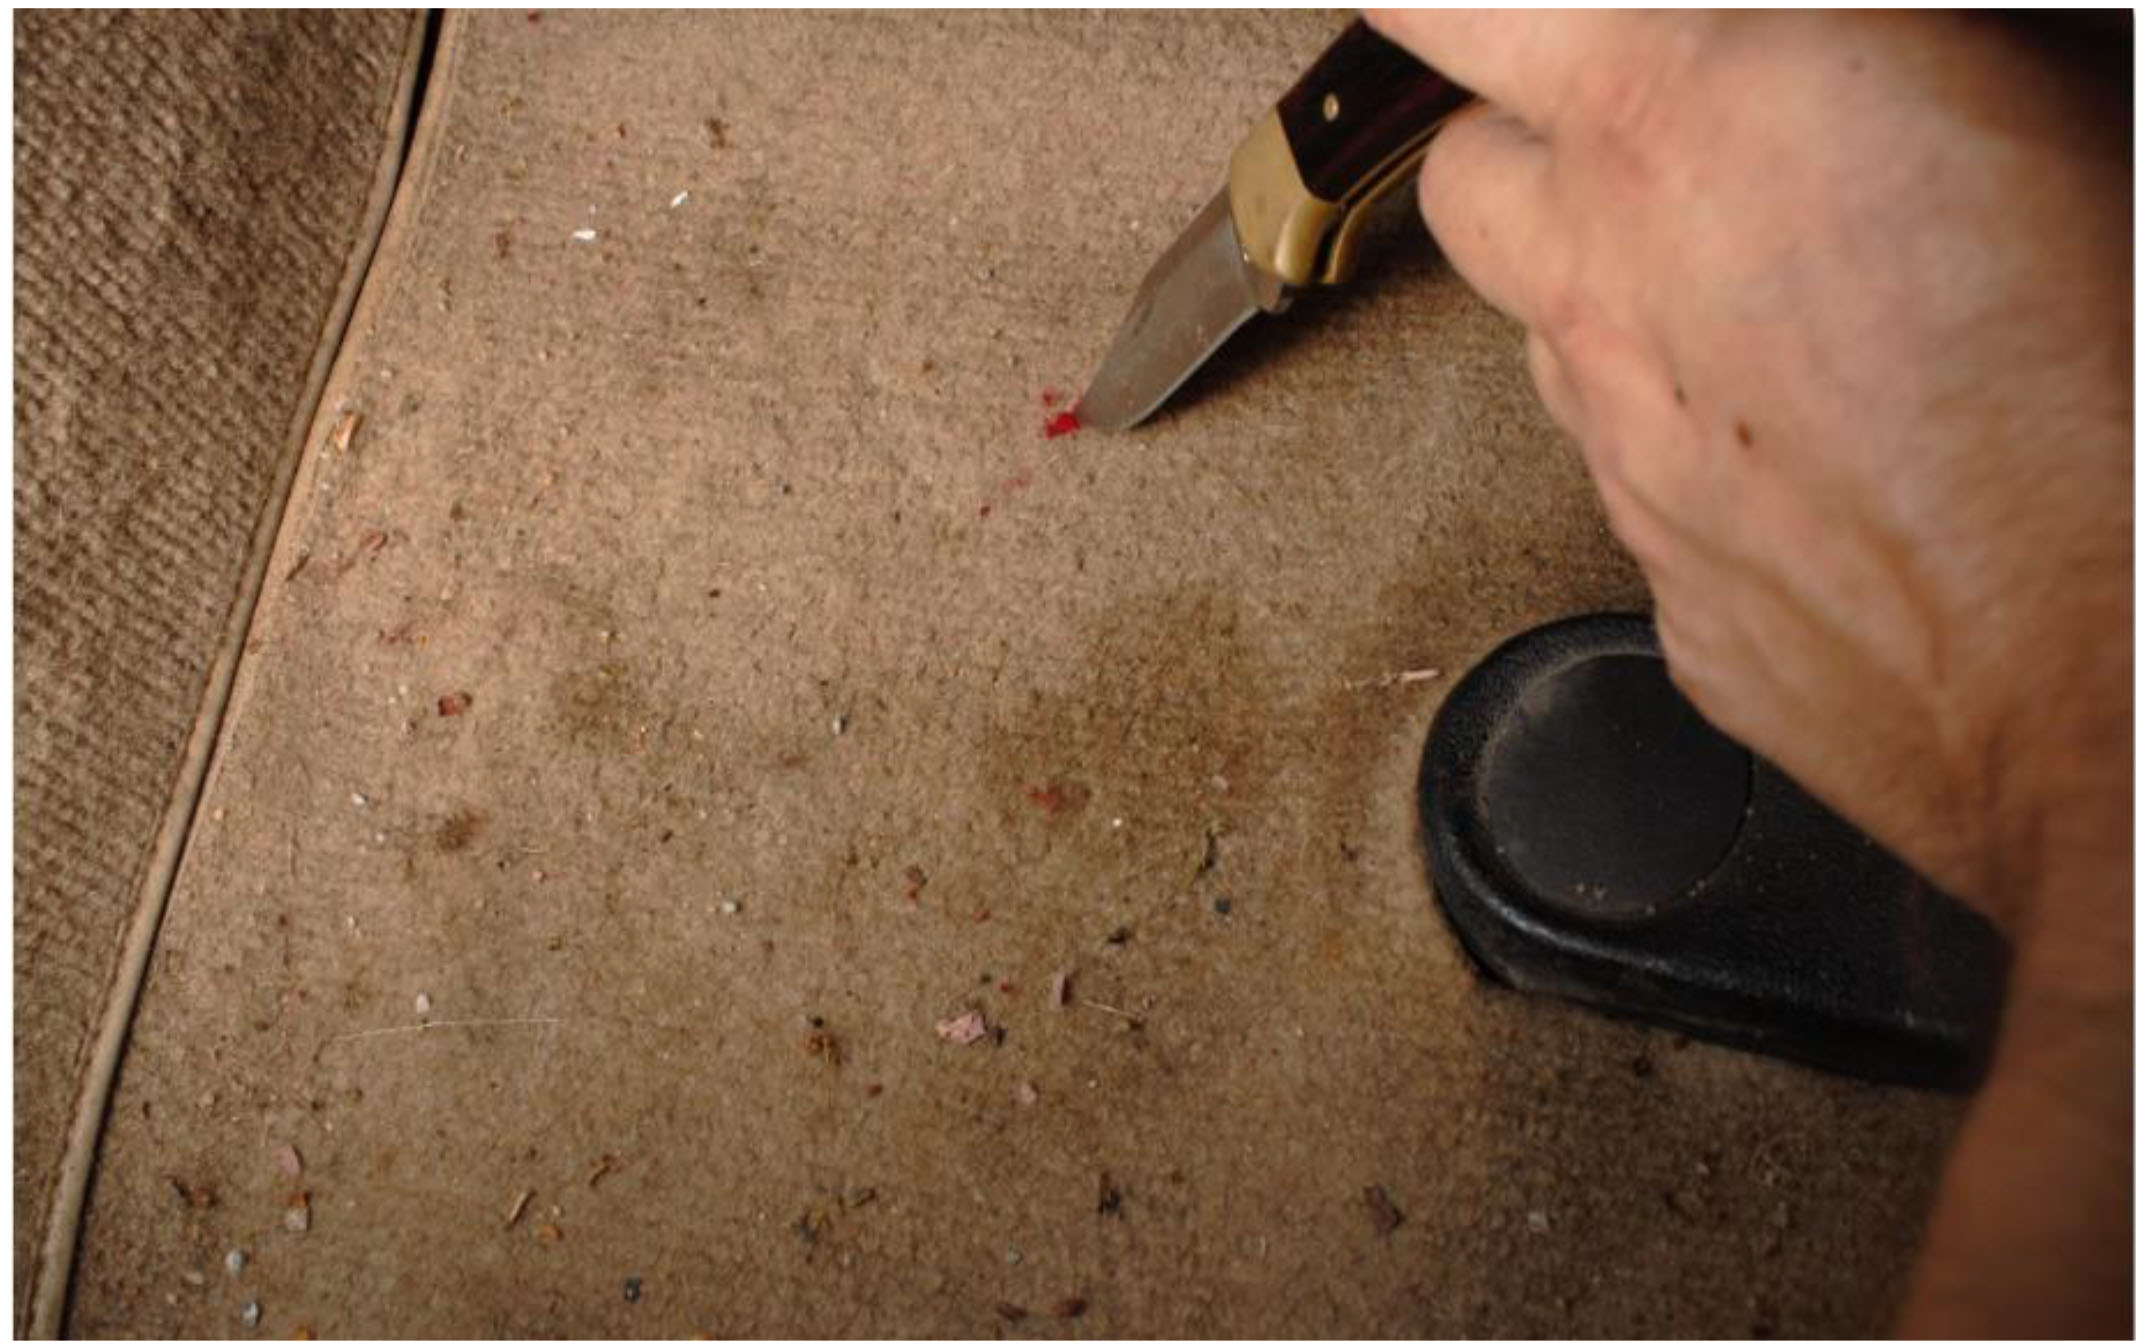
8. Use a knife to cut holes in the carpet at the three locations marked with the fabric pen.
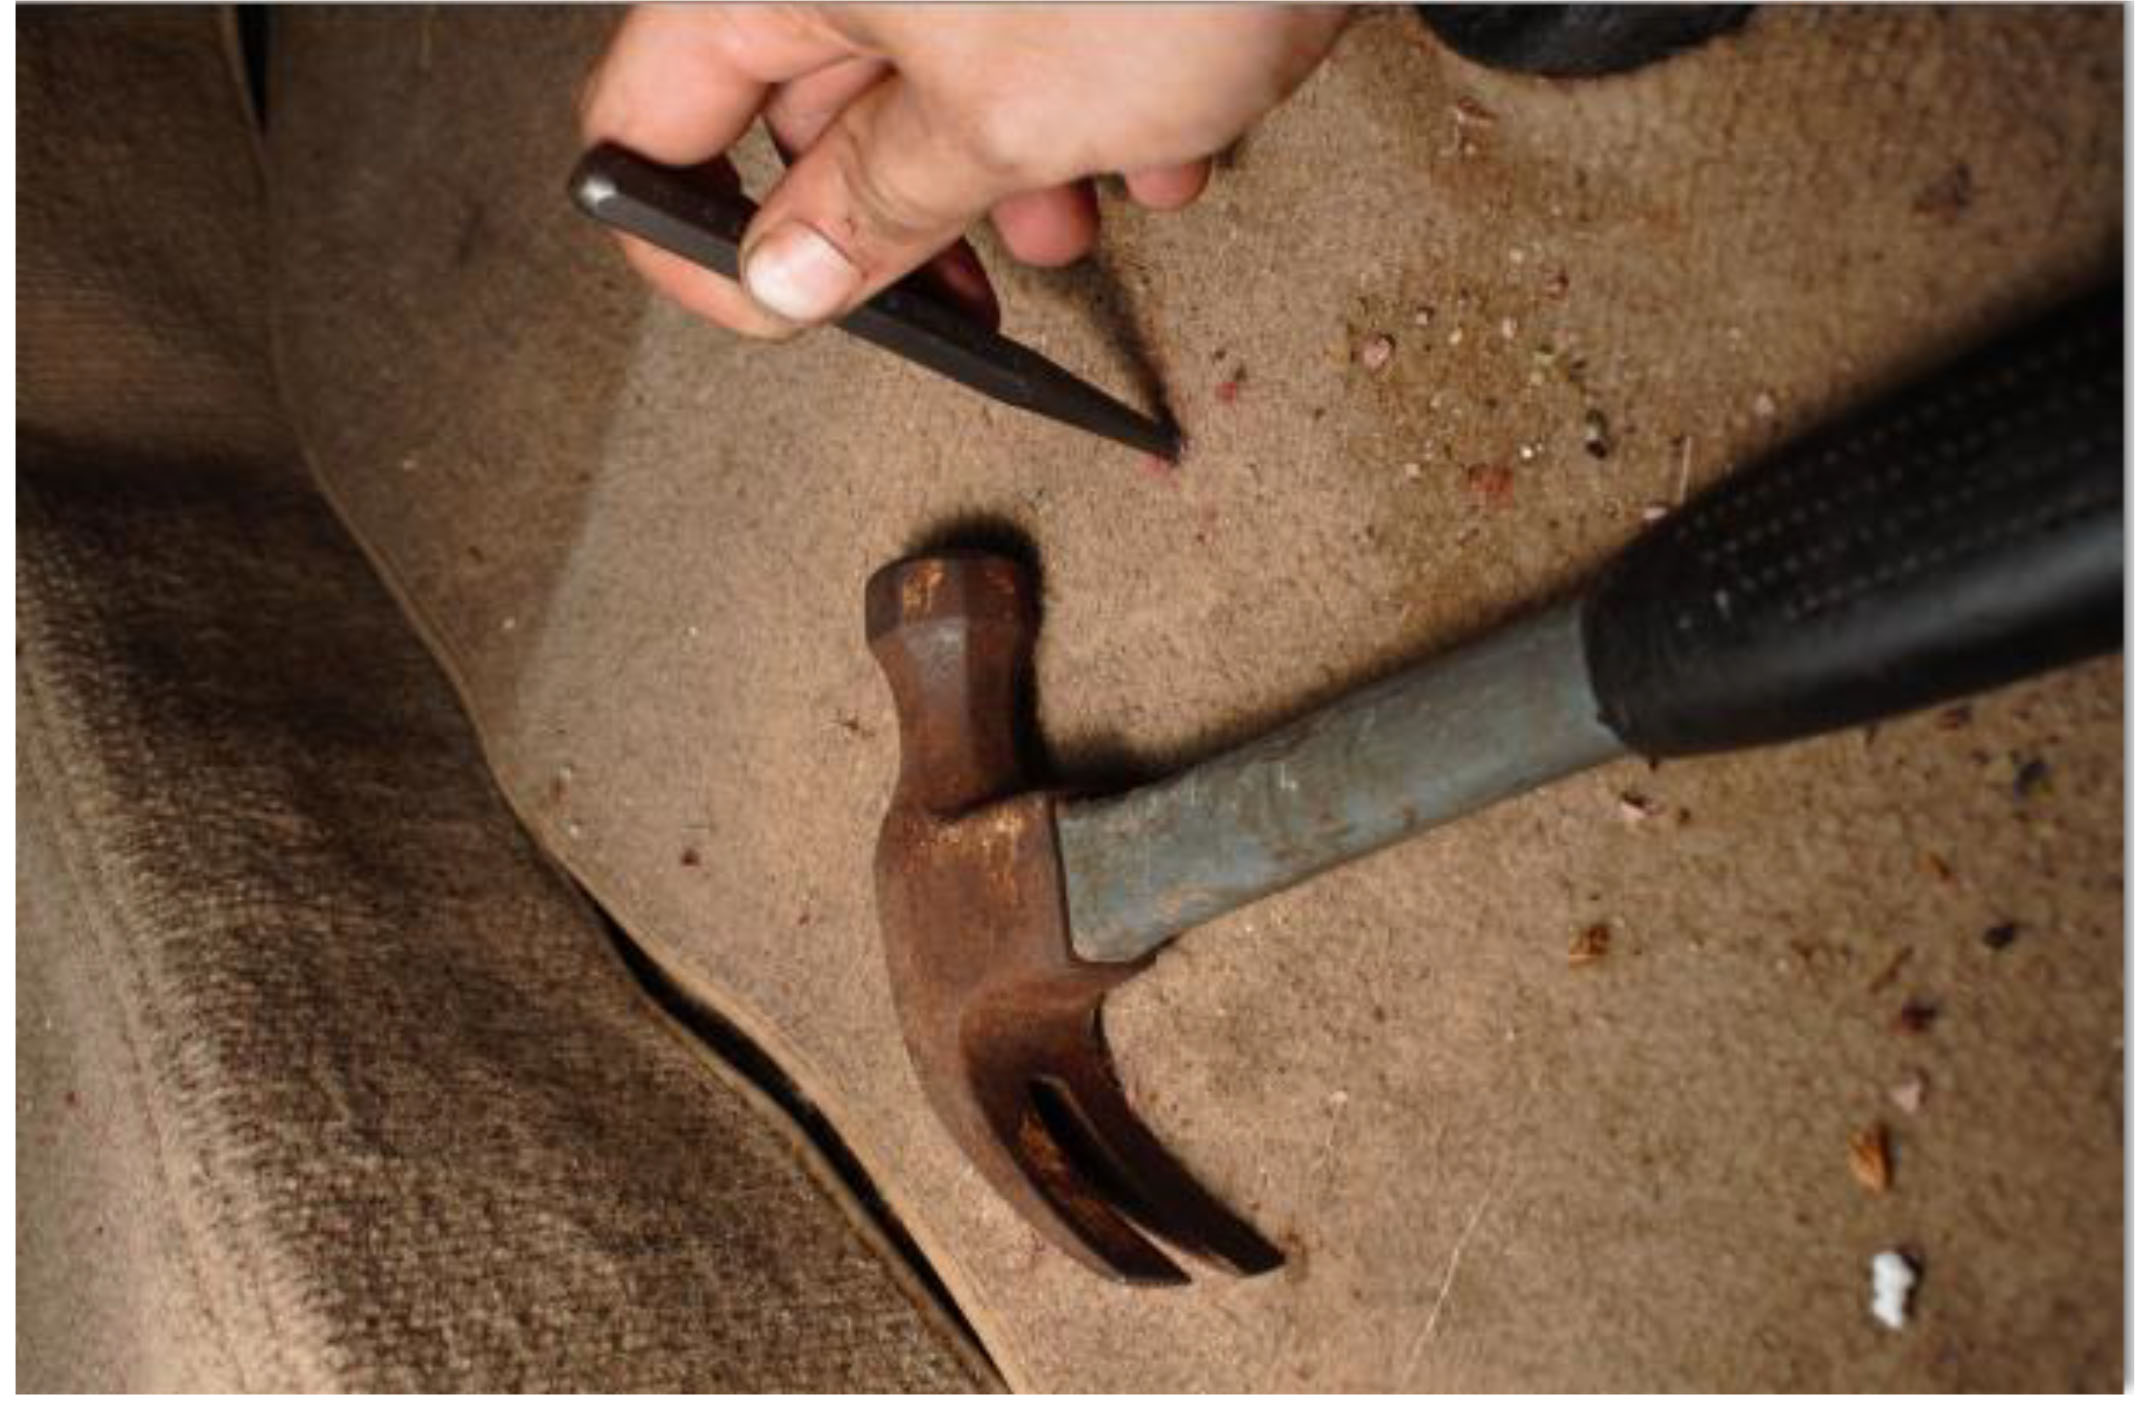
9. Use center punch and hammer to mark the locations of the three holes in the metal tub.
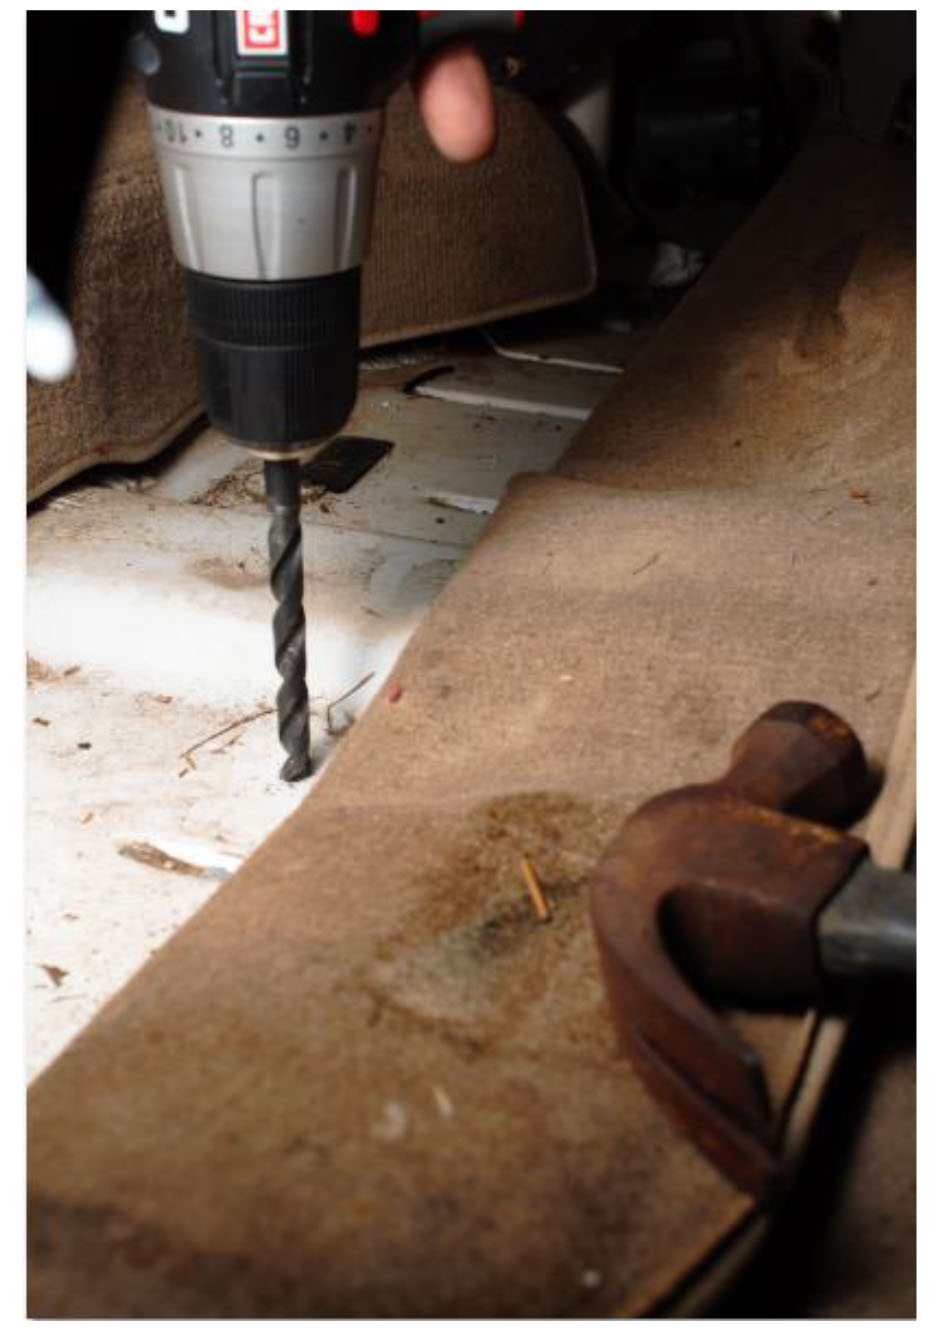
10. Pull back carpet. Drill a pilot hole using an electric drill and a 3/32” or similar sized bit in the (3) locations marked with the center punch. A hammer is used as a weight to hold the carpet out of the way.
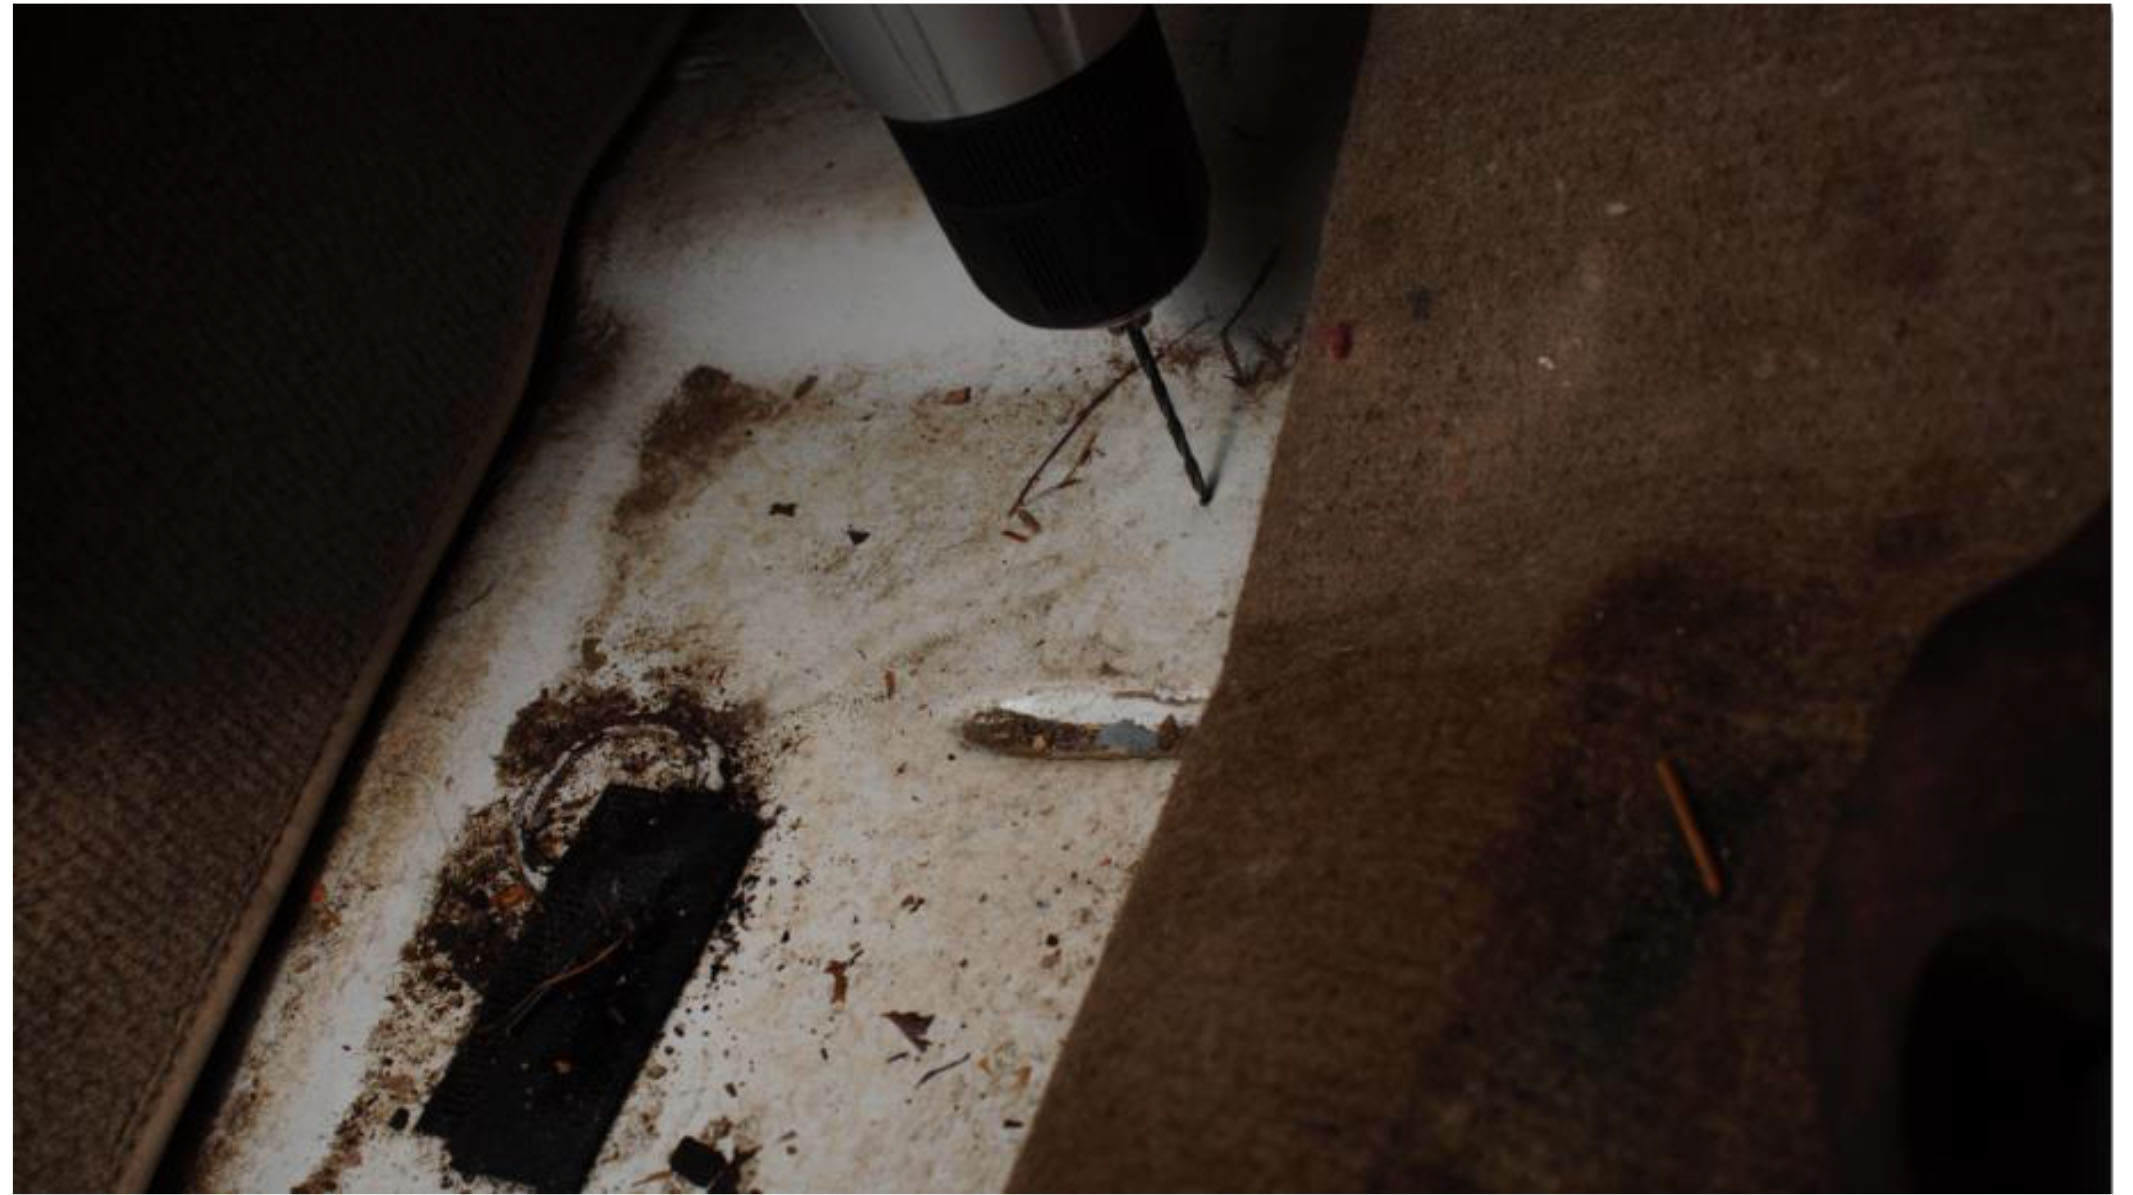
11. Use the electric drill and 5/16” drill bit to drill the (3) holes to their final size. A hammer is used as a weight to hold the carpet out of the way. Again, if desired, vacuum and clean the tub and repair any rust damage before the console is installed.
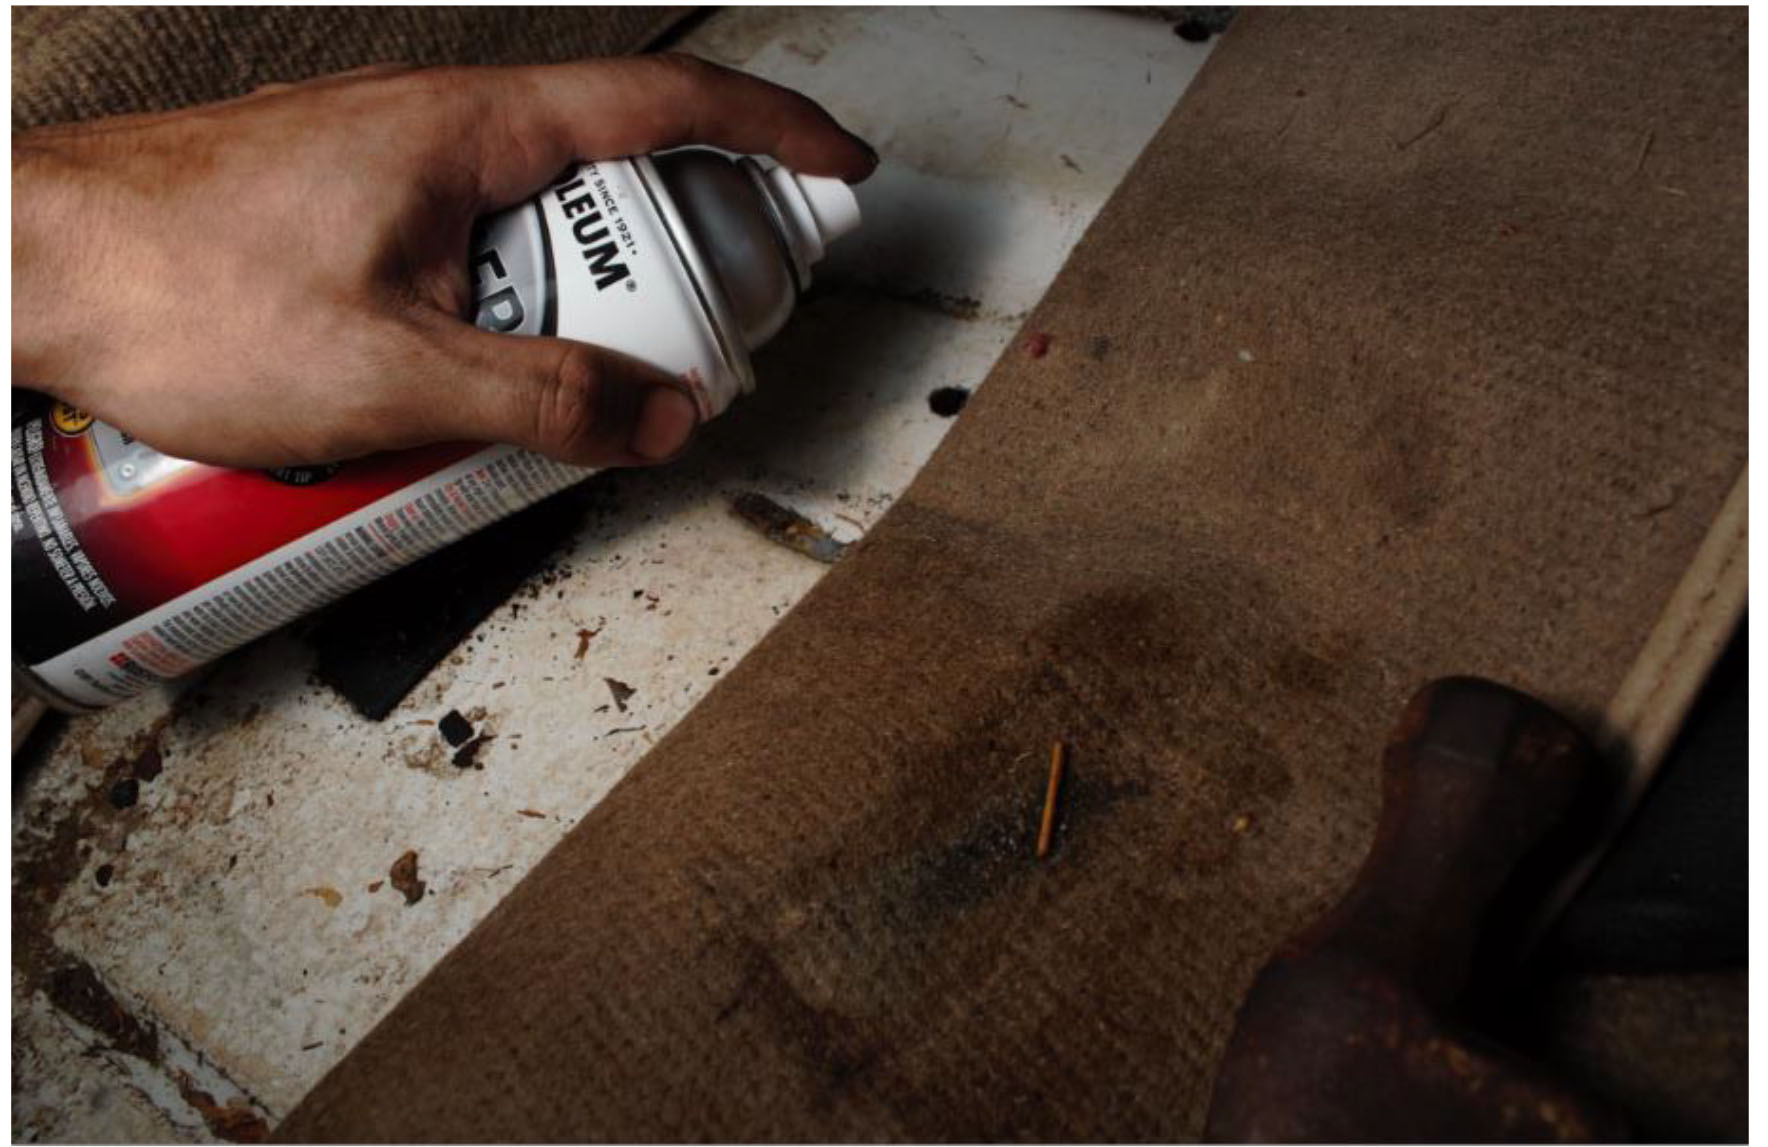
12. Use touch up paint, primer, or silicone sealant to protect the hole from rust and corrosion. In this installation, the color was not matched in this install since the hole will not be seen when the console is installed. If the center console will not be permanent, a color matched paint is recommended.
13. After the paint dries, place the console back in the mounting location. Insert the (1) 5/16”x1-3/4” bolt and (1) 5/16” washer through the front center bolt hole in the console and through the tub. Thread (1) 5/16” washer and (1) 5/16” locknut onto the 5/16”x1-3/4” bolt from under the vehicle by hand, but do not tighten until the remaining bolts are inserted.
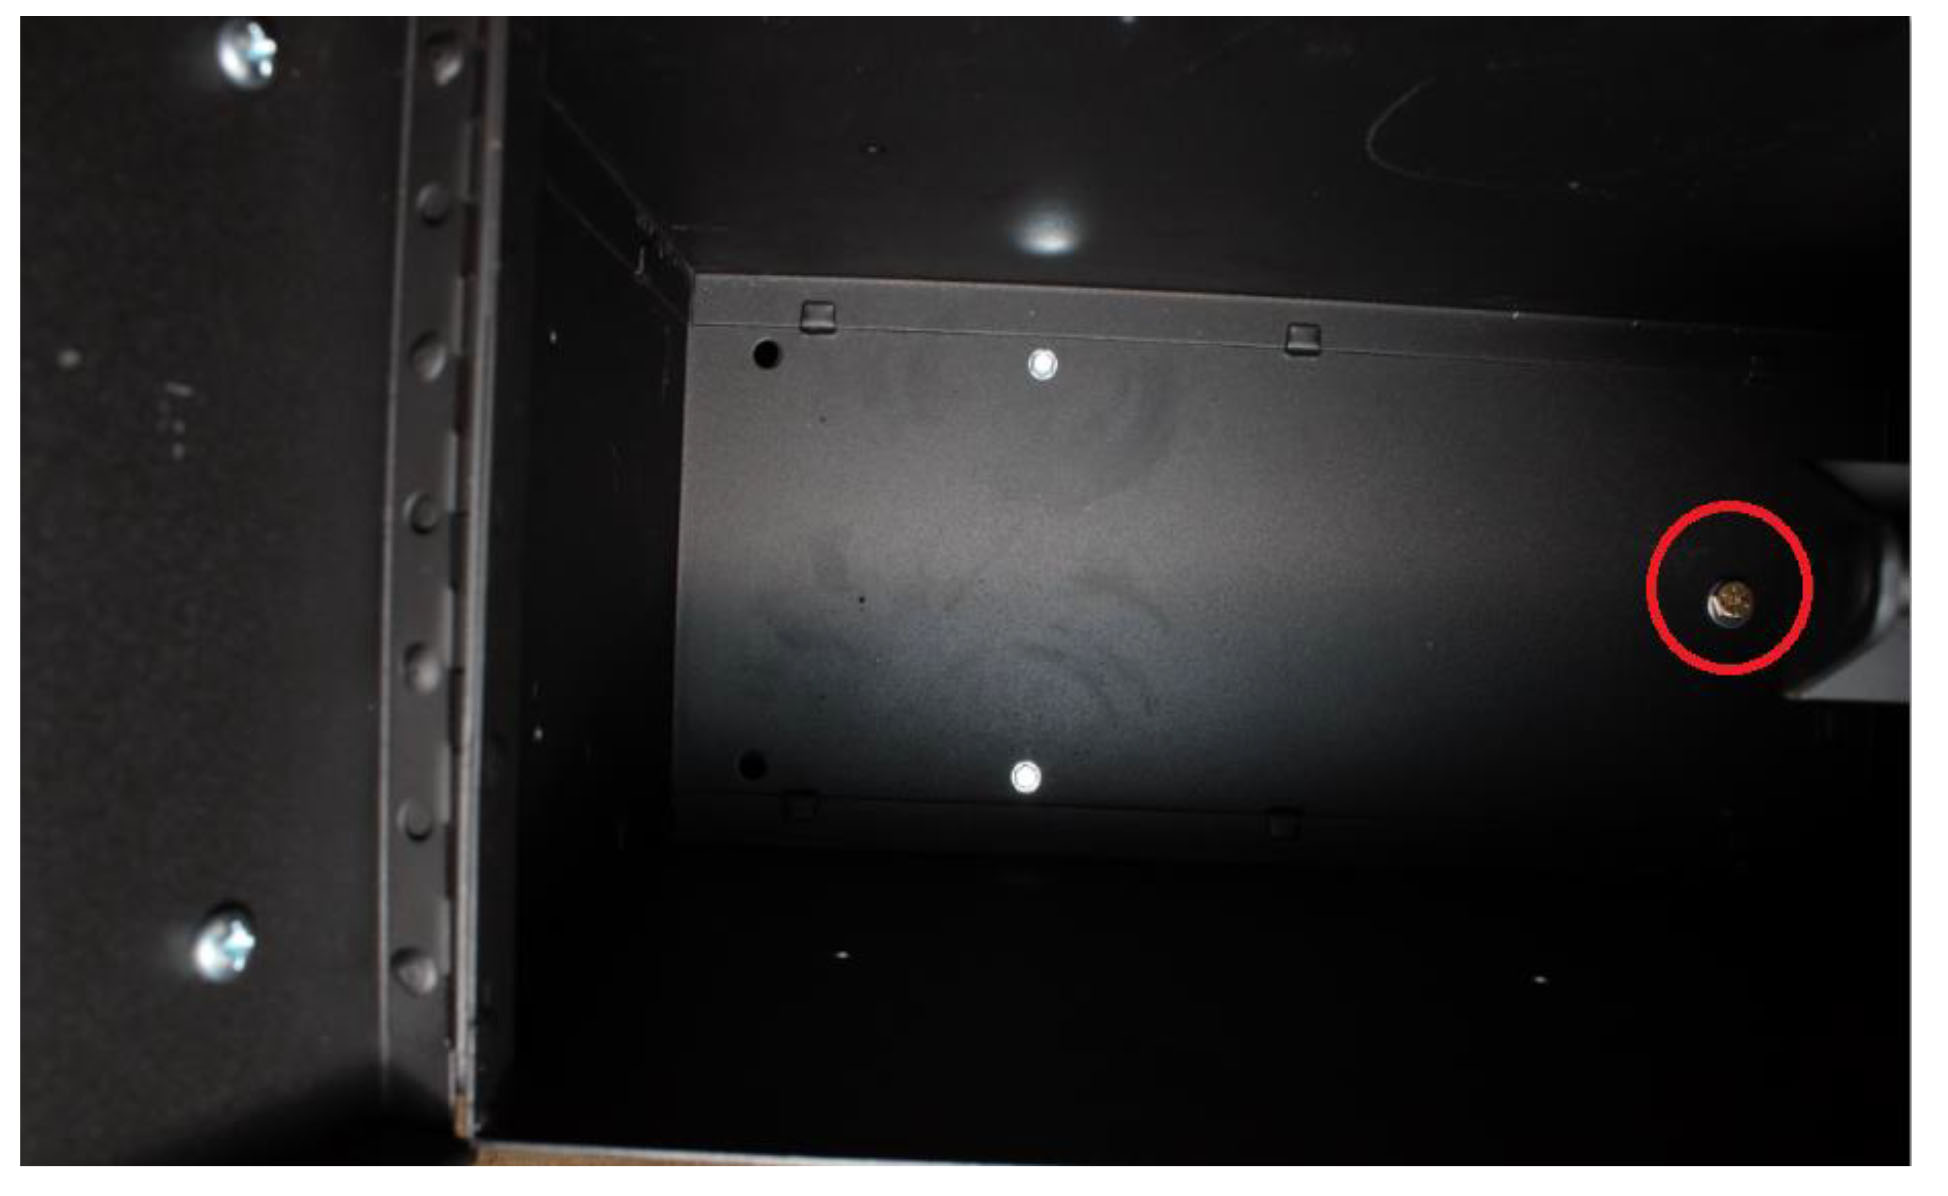
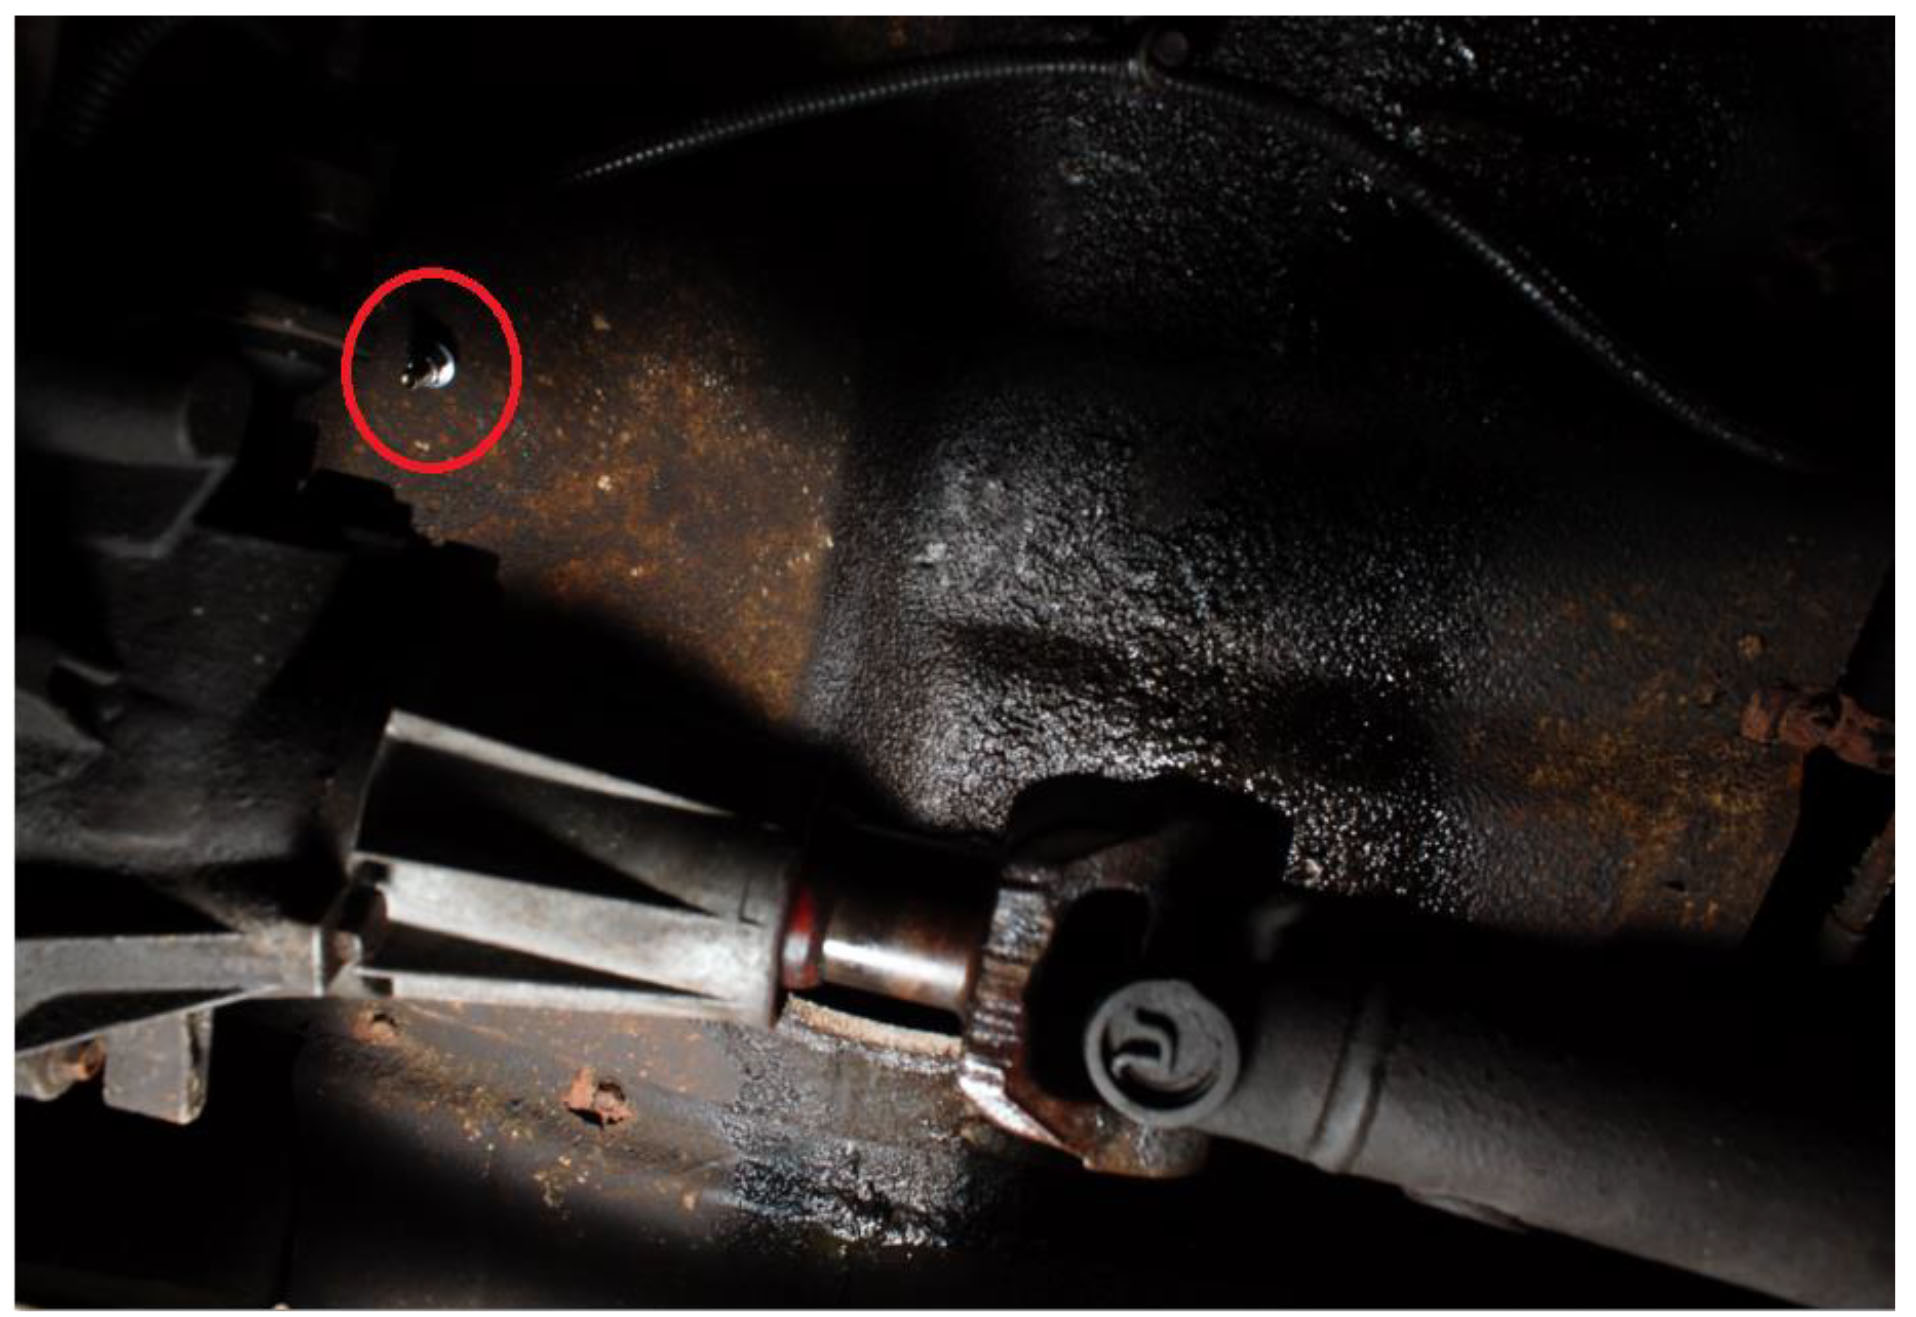
(The front mounting bolt can be seen from the driver’s side above the transfer case rear output shaft. Thread the nut and washer on but do not tighten.)
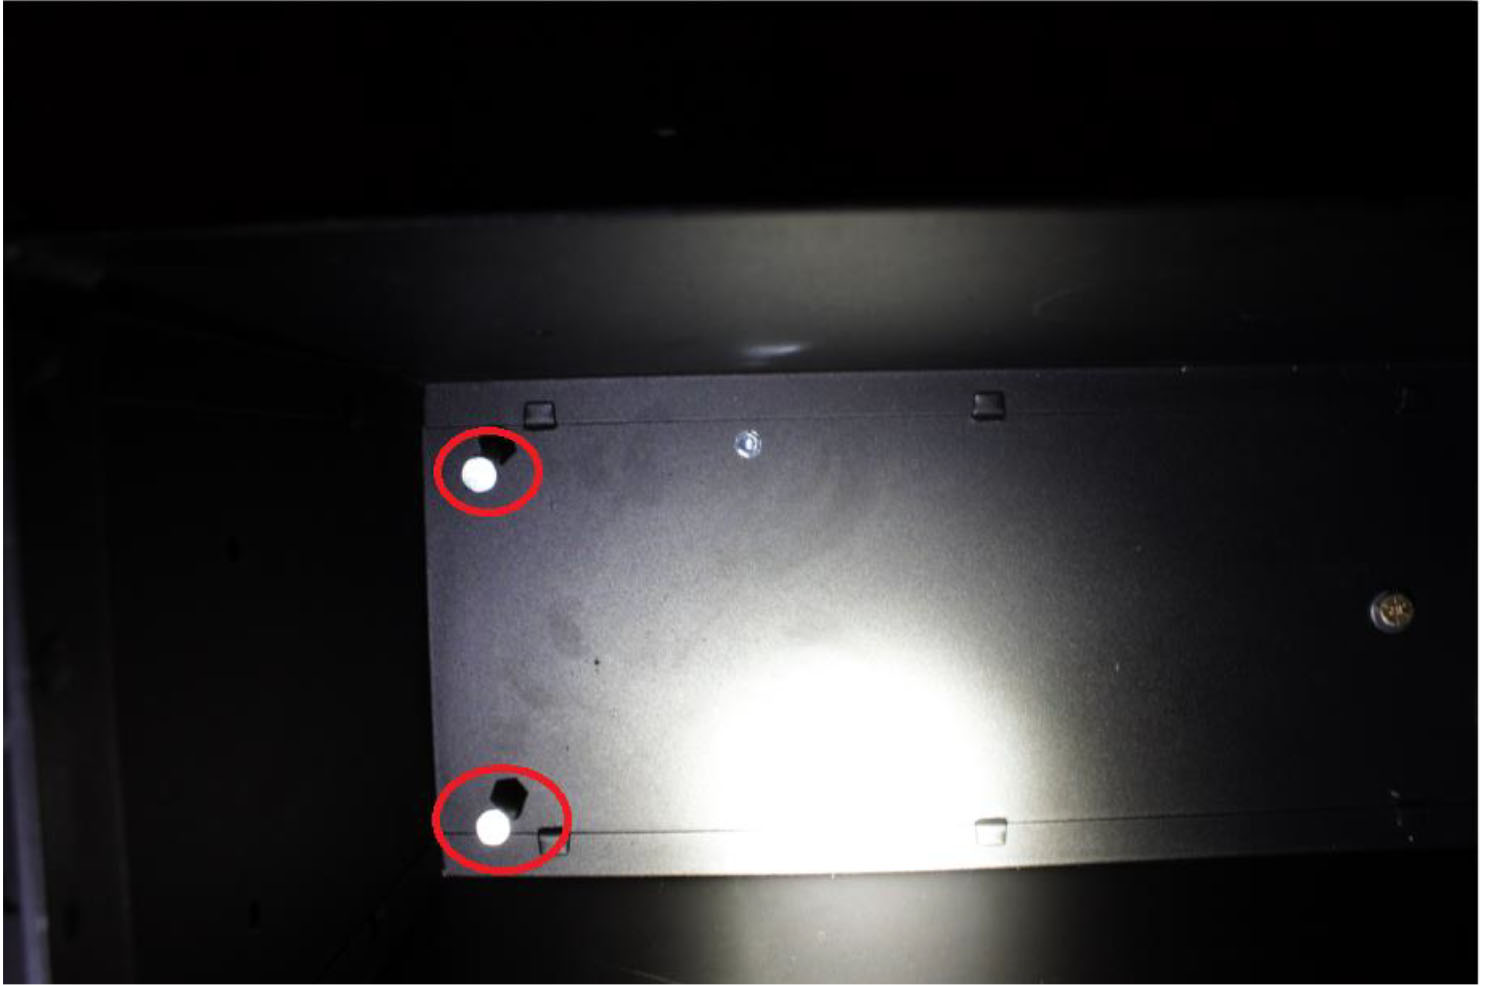
14. Insert remaining (2) 5/16”x5-1/2” bolts and (2) 5/16” washers in the rear (2) holes of the center console. Rotate the center console around the front bolt (already inserted) until the rear bolts align with the holes cut in the tub. It may be required to reach a hand beneath the rear mounting bracket to help align the (2) rear 5/16”x5-1/2” bolts. Thread (2) 5/16” washers and (2) 5/16” nuts from below by hand.
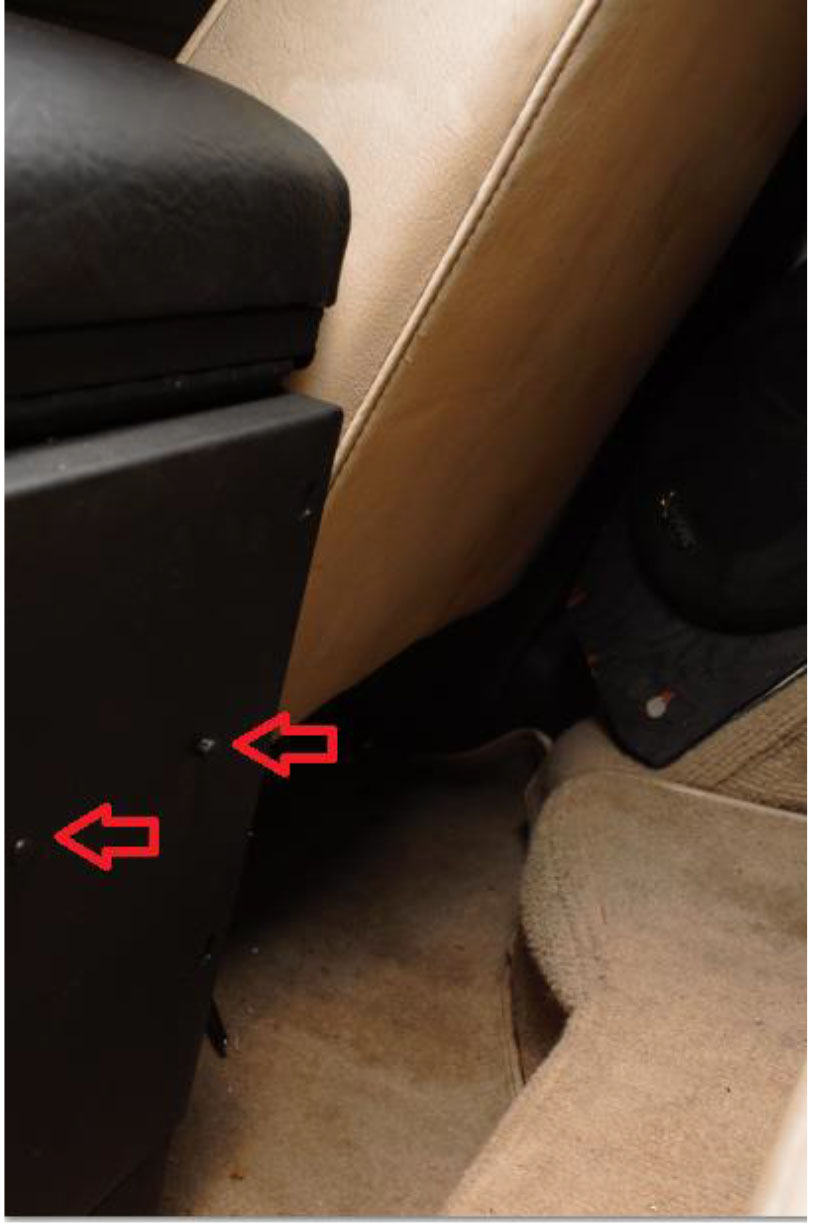
15. 10 minutes of a friend’s time may be needed to help tighten the nuts and bolts. Have a friend insert the 1⁄2” wrench from the top and hold the bolts in place. Climb under the vehicle and tighten the (3) locknuts and (3) washers with a 1⁄2” socket and ratchet. If the threaded region of one of the 5/16”x5-1/2” bolt is not long enough, use the fully threaded bolt recommended in the tools list. This will be a result of the non-symmetric mounting location of the driver’s seat in some model years.
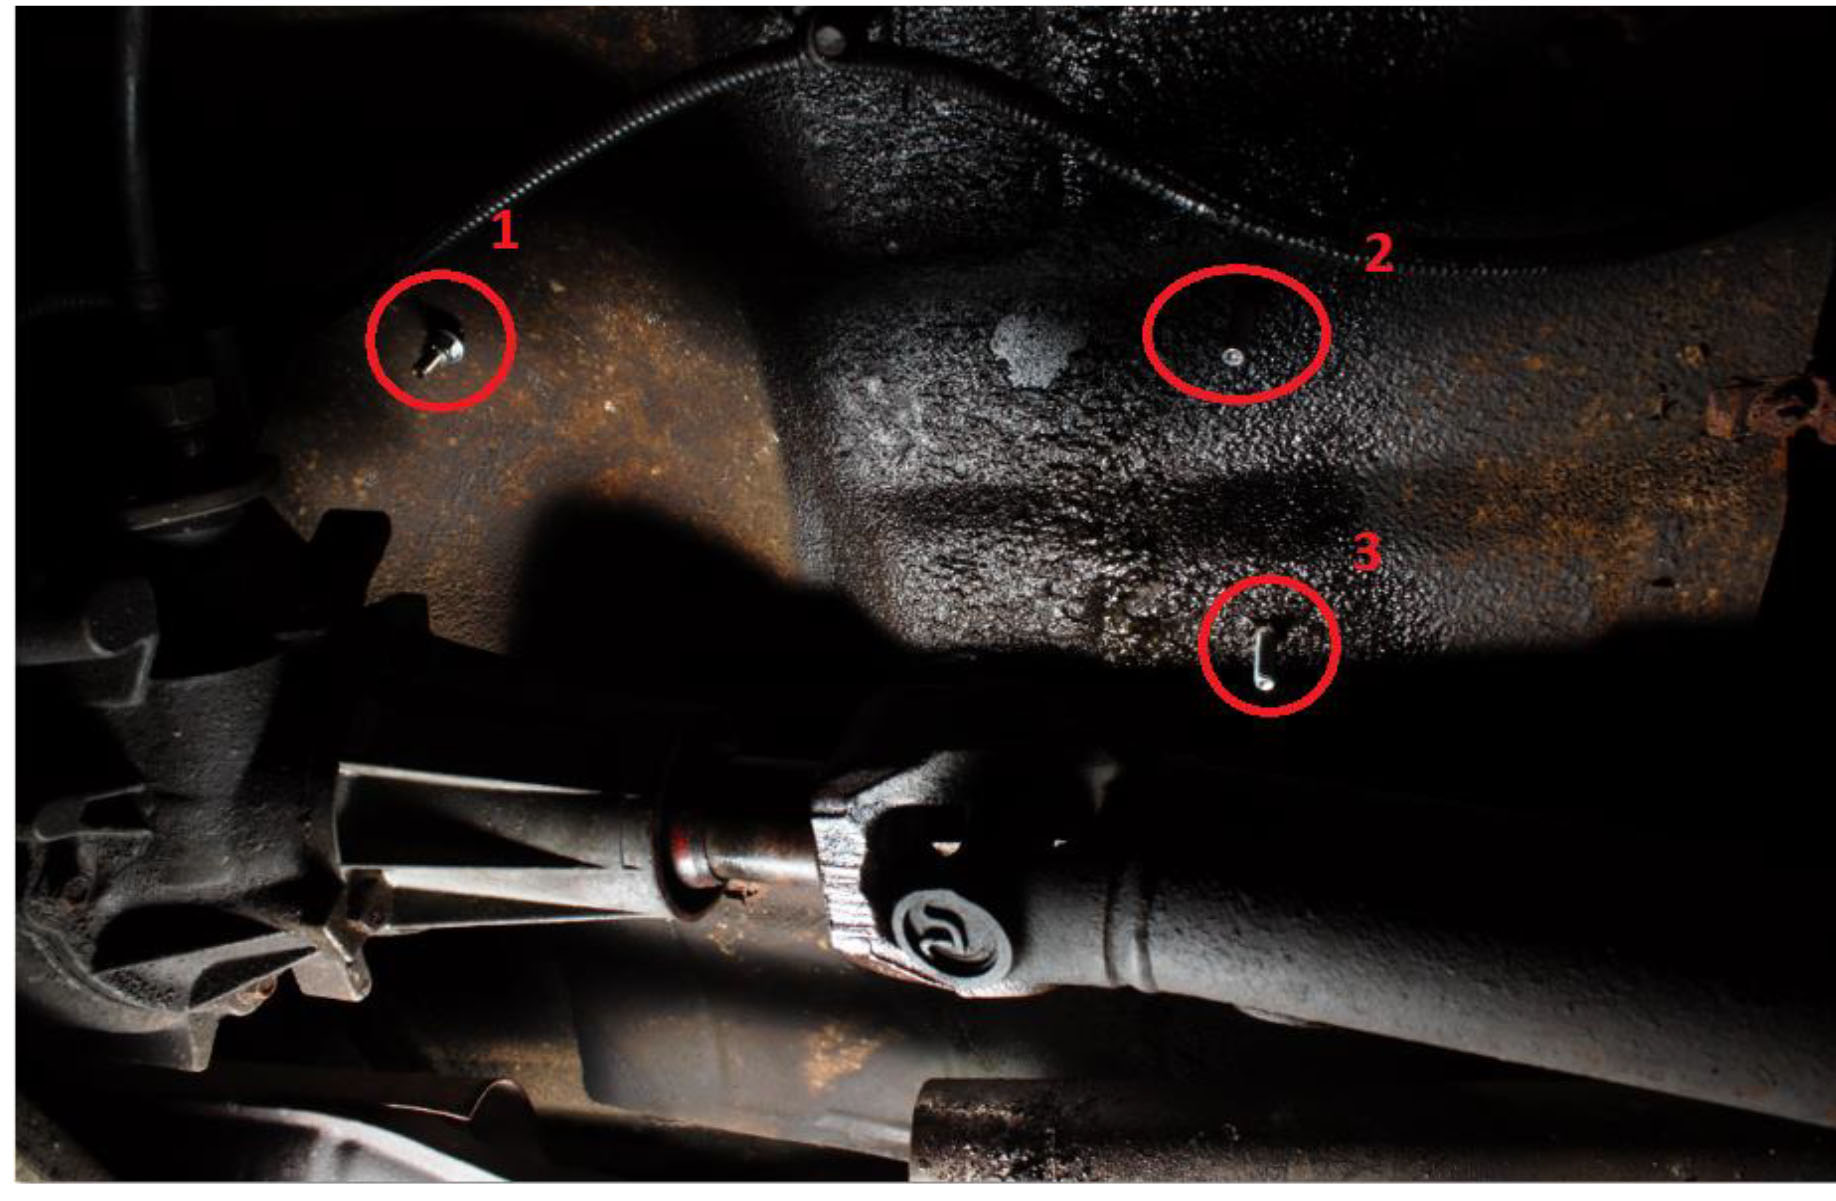
(viewed from under tub, driver’s side) Show the following picture to friend:
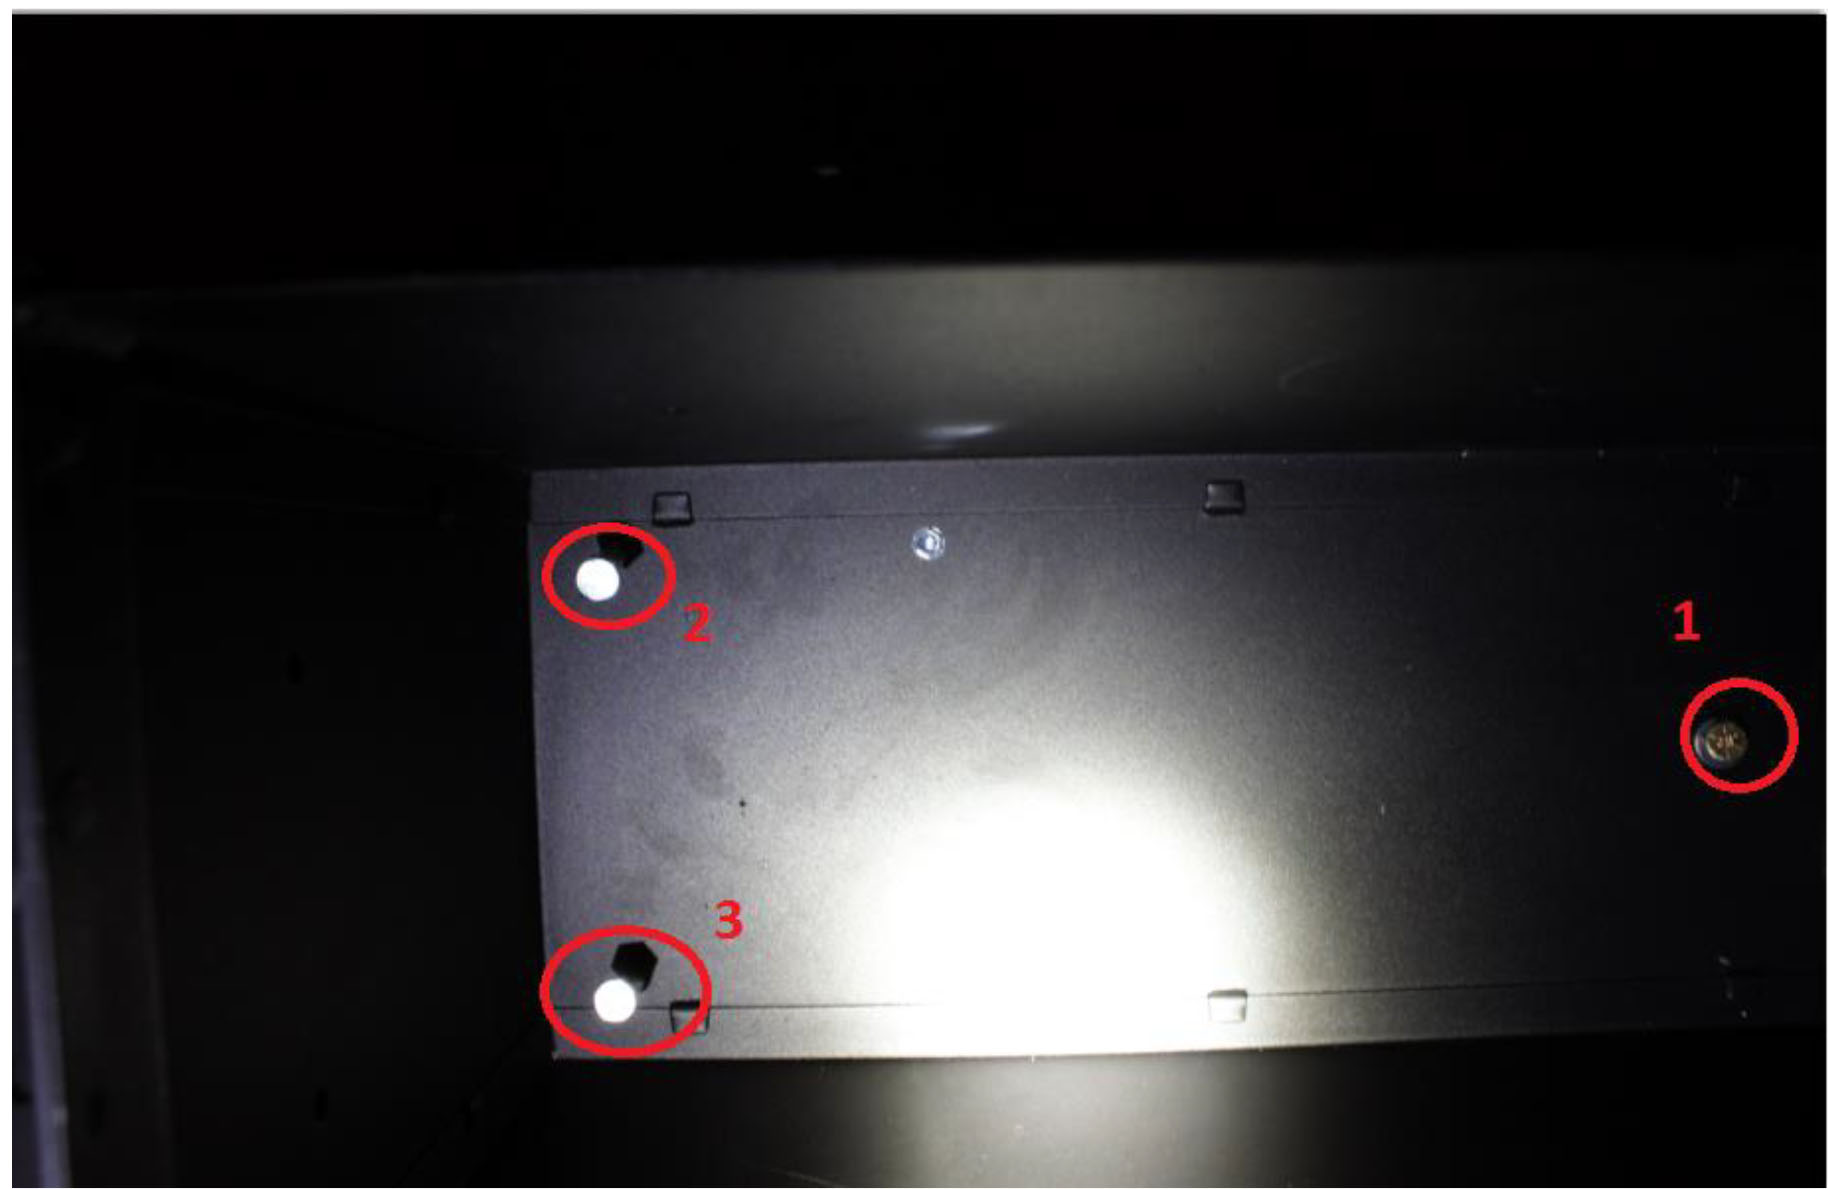
(Center Console viewed from top, lid open, from passenger side where friend will sit)
Insert (2) hole plugs in rear of center console with fingers, if beverage holder was attached to the front.
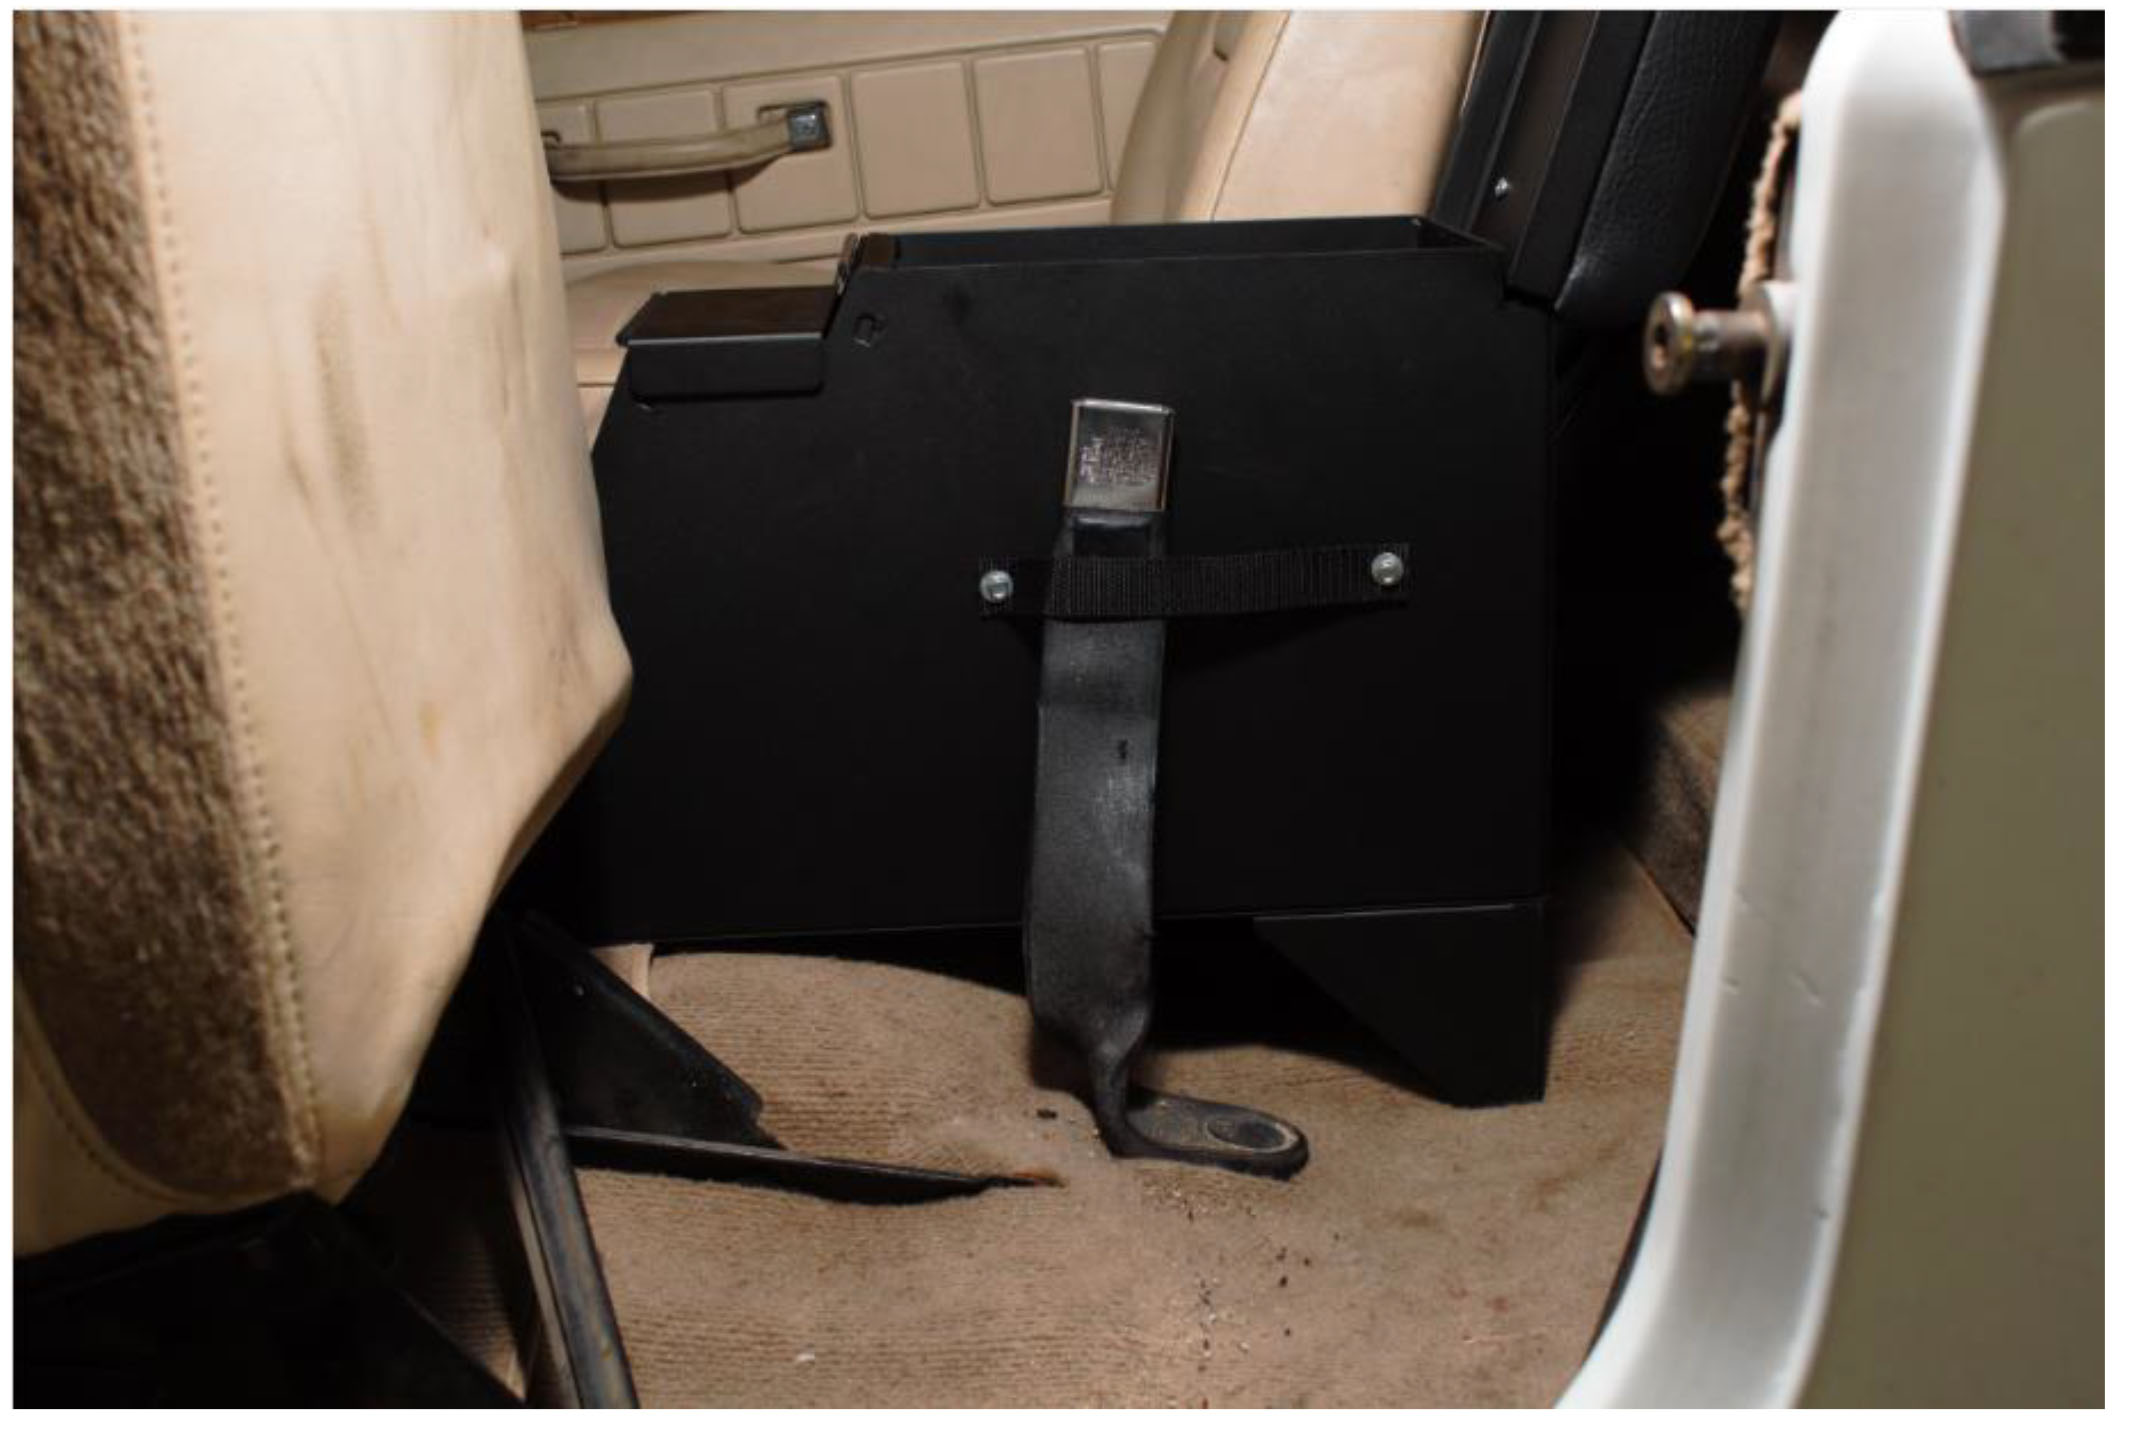
17. Install seat belt buckle retainer straps if desired. These are highly recommended if the console was tightly squeezed between the seats, as a lost buckle will be difficult to fish off from the floor with large hands. Move both seats to the forward position, Mount straps with (4) 10-32x1/2” bolts, (4) 3/16” washers, and (4) 10-32 acorn nuts using a 3/8” wrench, 5/16” socket, and ratchet. The washers should be outside the straps. Ensure the seat belt buckle is secured behind the strap before tightening the nuts.
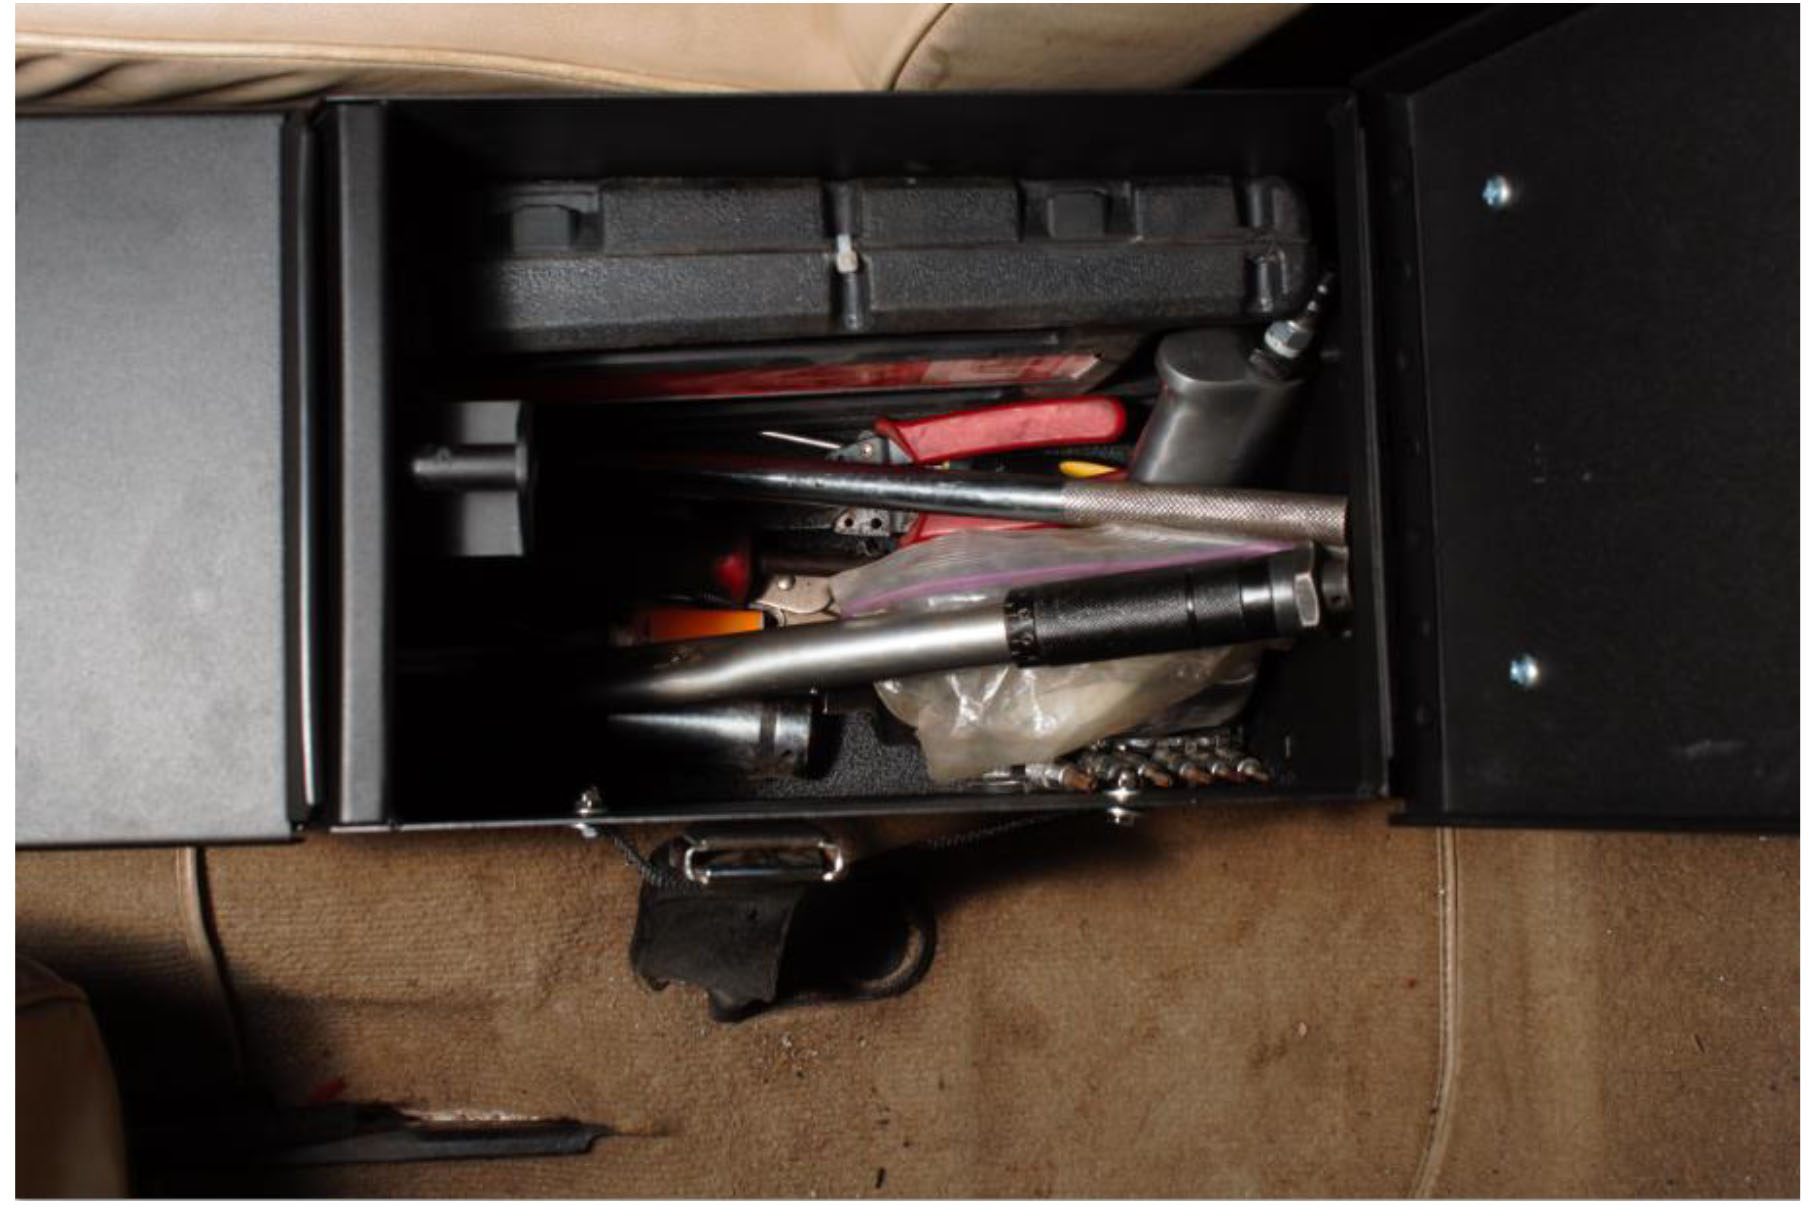
18. Place floor mat on the bottom of the console (if provided) and load center console (I loaded it with tools necessary for off road adventures). Lock center console. Enjoy beverage in beverage holder.
19. Finished!
Installation Instructions Written by ExtremeTerrain Michael Johnston 07/25/2015

