 FREE 1 to 3-Day Delivery on Orders $149+ Details

How to Install Teraflex Front Big Brake Kit w/ 13.3 in. Vented Rotors on your Wrangler
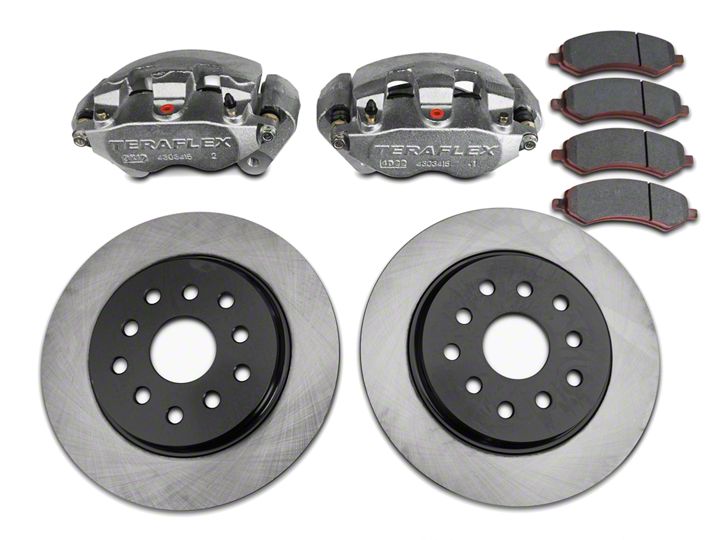
Shop Parts in this Guide

Important Notes:
Prior to beginning this or any installation read these instructions to familiarize yourself with the required steps and evaluate if you are experienced and capable to personally perform these modifications. A factory service manual should be used in conjunction with these installation instructions.
Refer to the parts list to ensure that all necessary components and hardware has been included. If any parts are missing please contact your local TeraFlex dealer for assistance.

1. Safely raise and support the vehicle. See the factory service manual for safe support locations. Remove the front tires.
Hint: Before removing the caliper bolts, loosen the 15mm banjo bolt that secures the brake line. Then snug it back down enough so that it wont leak. This will make removal and installation of the brake line easier.
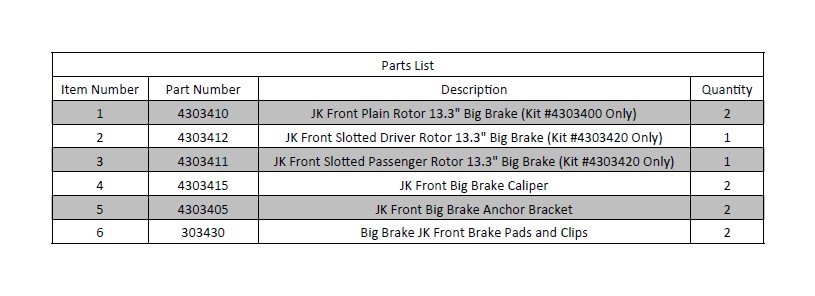
2. Remove the caliper and anchor bracket with a 21mm. Support the caliper from the frame, do not allow the caliper to hang from the brake hose. A plastic zip tie works well.
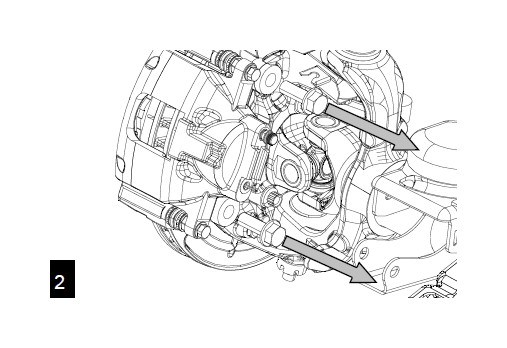
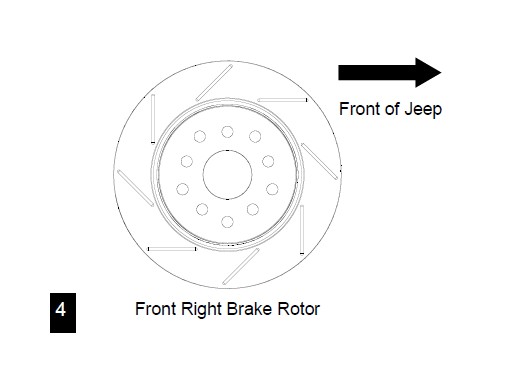
Remove the factory rotor. If the factory retainers are still present, break the retainers and discard.
Install the new rotor. If slotted rotors are being used, the slots should be oriented as shown, with opposite side mirrored.
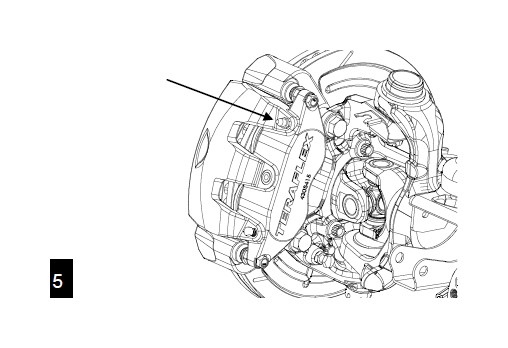
Install the anchor bracket/caliper assembly with pads onto the knuckle using the factory 21mm bolts. Torque to 120 ft-lbs (163 Nm)
Note: the bleeder valve should be in the higher position.
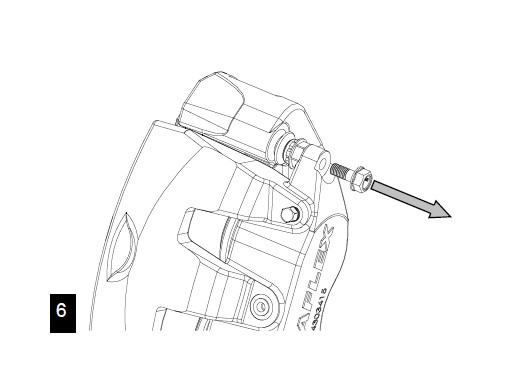
Remove one of the pin bolts from the TeraFlex caliper. Use a 14mm for the bolt and a 17mm to hold the pin.
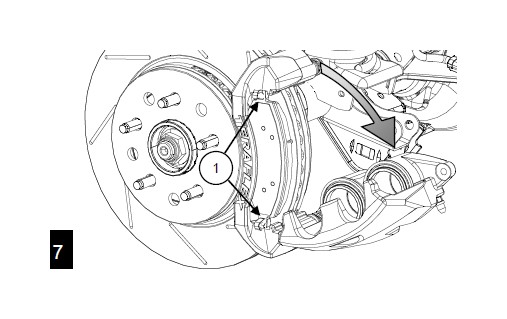
Swing the caliper away from the anchor bracket. Peel the adhesive backing off the pads. Also apply brake grease to anchor bracket where brake pad makes contact (1).
Caution: Do not allow grease to get on the rotor or the pad to rotor contact points.
Swing the new caliper back into position and reinstall the pin bolt. Torque to 26 ft-lbs (35 Nm)

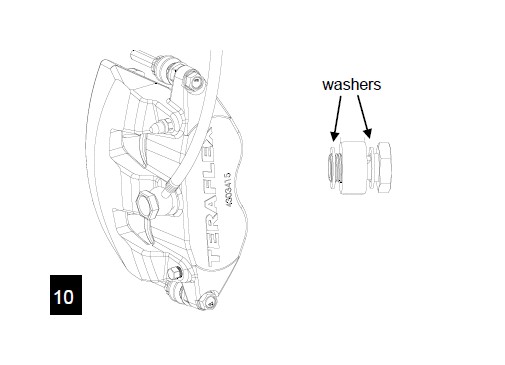
Remove the brake line from the factory caliper by removing the banjo bolt with a 15mm. Hint: Try to have your new copper washers ready so that this and the next step goes quick and easy, minimizing the mess.

Install the brake line onto the new caliper using the factory banjo bolt and 2 new copper washers. Torque bolt to 23 ft-lbs (31 Nm)
Note: Position of copper washers in relation to brake line
11. Repeat process on opposite side. Bleed brakes according to standard procedure.
Suggested Pad and Rotor Break-in Procedure:
Note: It may initially seem that excessive brake pedal travel is required to stop the vehicle. This is due to new pads and new rotors that have not yet been “seated”. This condition will improve during break-in. We recommend performing this procedure where no pedestrian or vehicle traffic is present.
1. Brake from 30mph to 10mph ten times, allowing approximately 30 seconds between each stop for cooling. Do not drag the brakes or stop completely during these stops. Allow the vehicles brakes to cool for 15 minutes. Do not apply the brake while stopped during cooling time.
2. Next, do 5 stops from 60mph to 15mph. Drive for 1/2 mile between stops. Then, let the brakes cool for 30 minutes.
3. The brakes should now feel significantly more effective, and break- In will self-complete during normal daily driving.

