FREE 1 to 3-Day Delivery on Orders $149+ Details

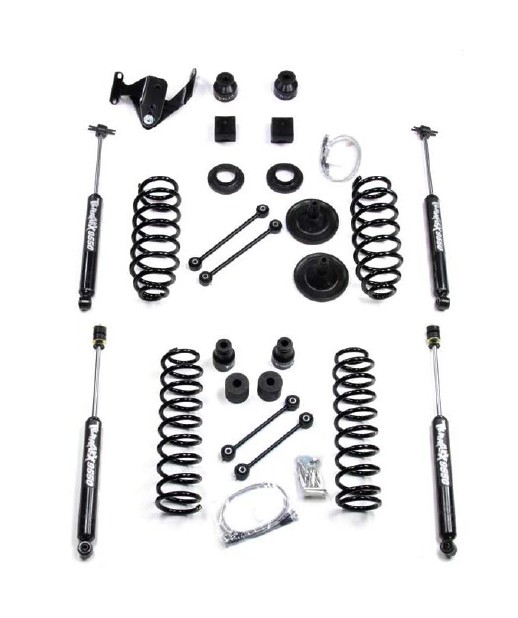
How to Install Teraflex 3 in. Suspension System w/o Shocks on your Wrangler
Installation Time
4 hours
Tools Required
- 10,14,15,16,17,18,19,21mm sockets and wrenches
- 7/16",5/8",3/4", sockets and wrenches
- 3",6",12" extensions Ft-lbs
- torque wrench
- Breaker bar
- Large crescent wrench
- Pipe wrench
- Slip joint pliers
- Floor jack
- Jack stands
- Wheel chocks
- Hammer
- Pry bar
- Pliers
- Safety glasses
Installation:
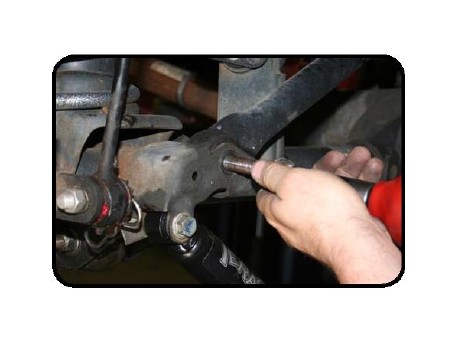
1. Remove track bar bolts using a 21mm socket, at both the front and rear axle and remove track bars.
2. Loosen all control arm bolts using a 21mm socket, DO NOT REMOVE ARMS OR BOLTS!
3. Lift the vehicle and support under the frame with jack stands. Make sure that the axle will drop far enough to remove and install the coil springs.
4. Remove the wheels.
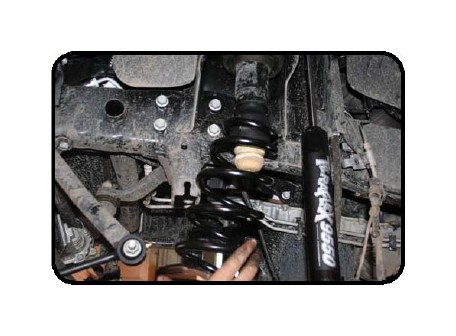
Rear Installation:
5. Support the rear axle with a jack and slightly lift one or two inches so that it is easy to remove the bolts from the shocks and sway bar links. (If you remove the nut from the bolt prior to jacking up on the axle you can put slight pressure on the bolt with your hand while jacking the axle and see where it is easiest to remove the bolts.)
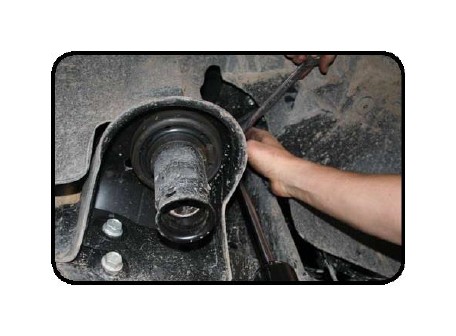
6. Remove shocks using an 18mm socket and wrench for the axle side bolt and a 16mm socket for frame side.
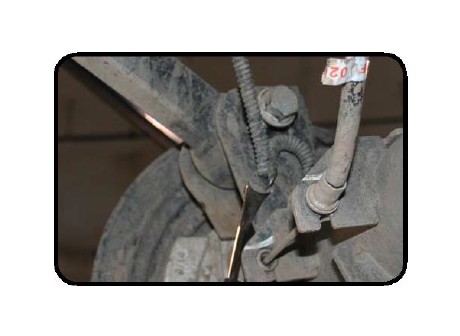
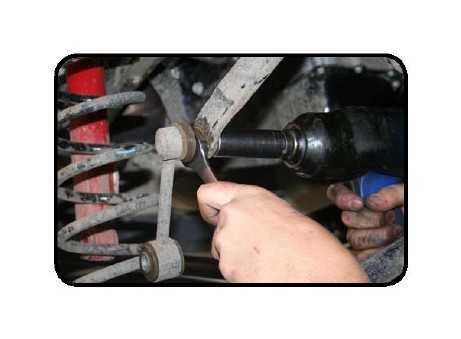
7. Remove sway bar links using an 18mm socket and wrench.
8. Remove the clips that secure the ABS wiring harness to the upper control arm mount.
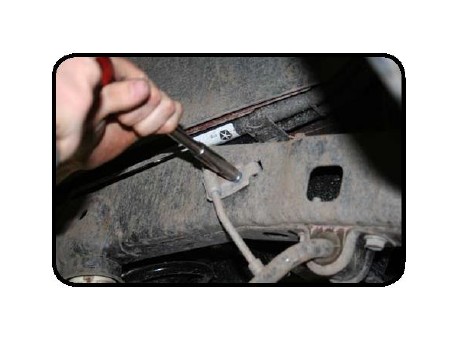
9. Disconnect the brake line bracket at the frame using a 10mm socket. DO NOT DISCONNECT THE BRAKE LINES FROM THE CALIPERS.
10. Remove the bracket that holds the park brake cables to the body using a 10mm deep well socket.
11. Carefully lower the rear axle far enough to remove the rear springs. Be careful not to let the coils fall out as you lower the axle. You will want to lower the axle far enough to install the new 3" springs in place. While lowering the axle make sure the brake lines, ABS wires and axle vent do not stretch as this could cause damage to these vital parts.
12. Use grease and install new upper spring guide spacer by popping it into the factory location.
13. Install the factory isolator on the new spring guide spacer. Don't forget to reuse the factory spring isolator. If the isolator is left out your ride height will be about 1/2 inch lower in the rear. The isolator also helps dampen noise.
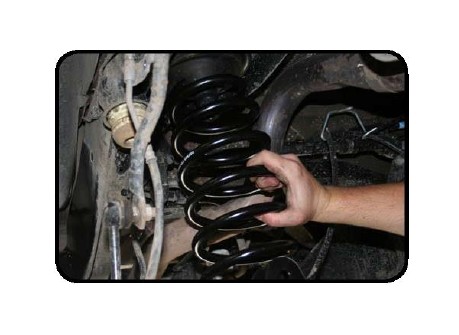
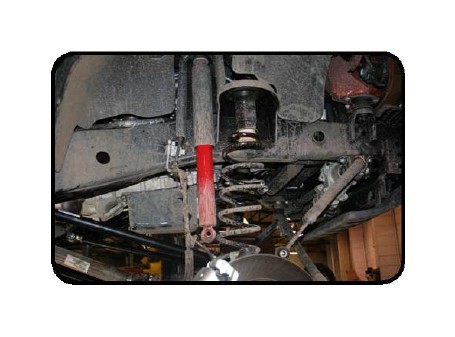
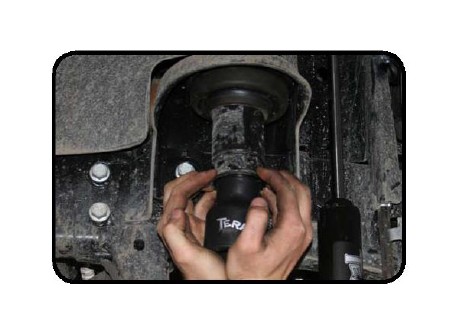
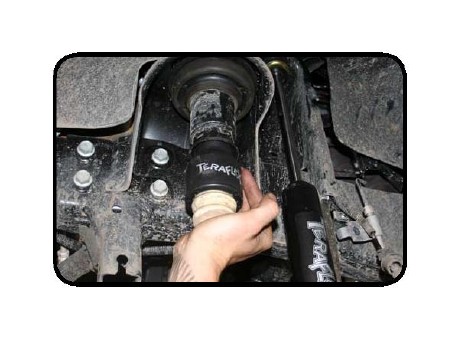
14. Install the new rear springs.
15. Install the new rear coil spring retainers on the bottom end of the coil springs. First insert the flanged nut into the provided wrench tool, insert the bolt with the lock washer on top of the flat plate, into the rear lower spring retainer. Holding the flange nut in place using the provided wrench tool and begin tightening the bolt. Remove wrench when finished.
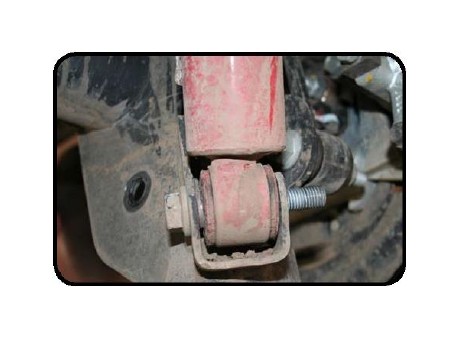
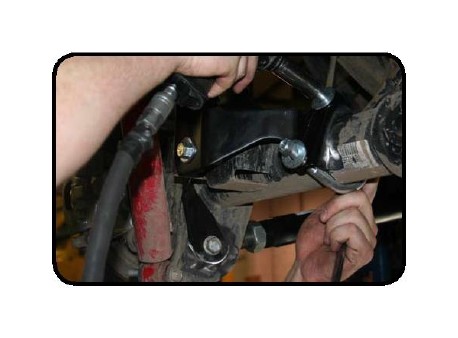
16. Install new rear sway bar links on the inside of the sway bar and the inside of the axle bracket. Use the factory bolt on the axle side with the nut on the outside so excess threads will not interfere with the shock. Use the provided 12mm bolt and washer for the top side with the 12mm nut and washer on the inside to give the most possible room for tire clearance. Torque to 75 ft-lbs.
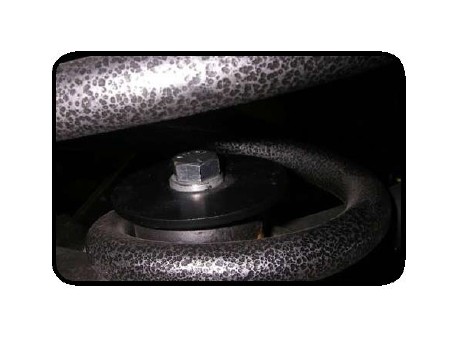
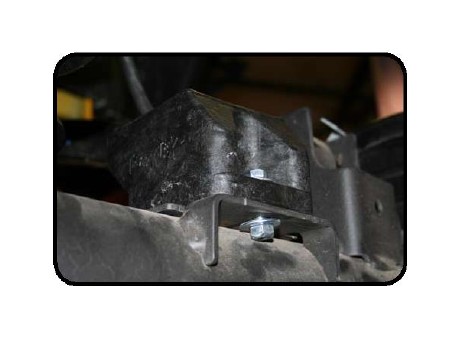
17. Install new rear bump stop spacer by placing the spacer on the axle pad. The extended part of the pad facing forward. Use the provided 5/16" x 1 1/4" bolts with 5/16" washers and 5/16 nuts. Tighten with 1/2" wrenches.
18. Install rear brake line extensions provided in the kit. Bolt the bracket to the factory brake line bracket by removing the 10mm bolt and installing the bracket in that location with the bend of the bracket going flush with the frame. NOT STICKING OUT AWAY FROM THE FRAME. Torque to 14 ft-lbs. (If bracket gets installed the wrong way it will rub on your tires) Then use the supplied hardware to attach the factory bracket to the drop bracket by using 1/2" socket and wrench.
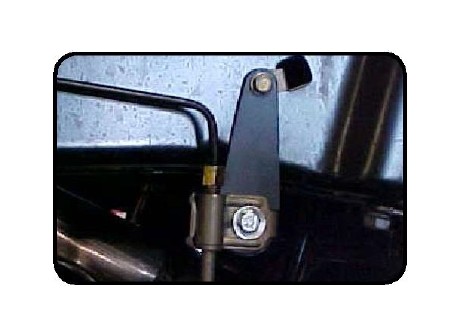
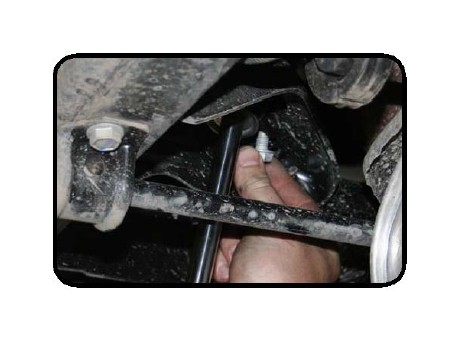
19. Install the new rear track bar bracket by removing the lower control arm bolt. Place the bracket into place, reinstall the control arm bolt. Install the supplied bolt and sleeve into the factory track bar location. Using the supplied u-bolt and nuts install the u-bolt around the axle tube. Torque the u-bolt nuts to 85 ft-lbs and the supplied bolt to 75 ft-lbs.
20. You can choose to add welds to this bracket for additional strength.
21. Remove jack from under axle.
22. Rear installation complete.
Front installation:
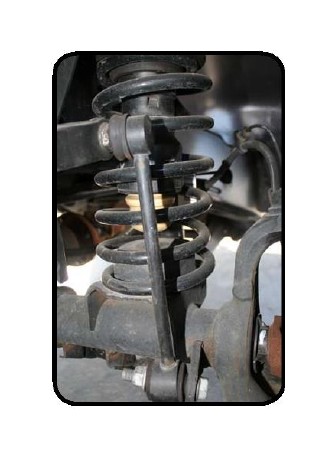
23. Place jack under the axle and slightly lift the front axle so you can easily remove factory hardware form shocks, sway bar links, and track bar bolt at axle.
24. Remove the front shocks by using a 18mm wrench and socket at the axle side and a 16mm wrench for the frame side. (If the shock spins with the top nut you can use a 5/8 wrench to hold the shock just below the shock mount. Ratchet wrenches are best for the top nut)
25. Remove sway bar links using 18mm socket and wrench at the axle and 18mm socket and 20mm wrench at the sway bar. Lower the jack enough to remove the springs.
26. Remove front coil springs.
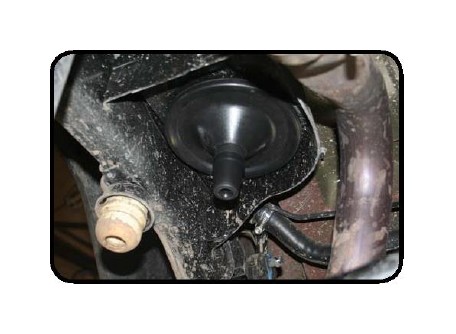
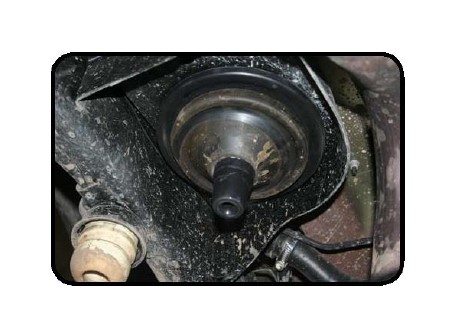
27. Remove the stock yellow bump stop with a pair of channel lock pliers. Using grease, lube the bump stop extension to install it into the spring tower. (You may need a piece of wood or equivalent to put in between the extension and the coil perch and jack up the axle to install extension. Do one side at a time.
28. Use grease to lube the yellow bump stop and pop it into the extension.
29. Install new 3 inch coil springs. Do the drivers side first.
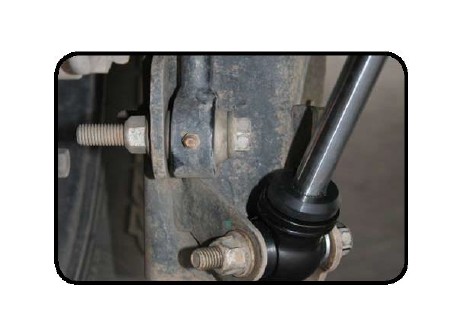
30. Install the new sway bar links, on the outside of the sway bar and inside of the axle mount. Torque to 75 ft-lbs.
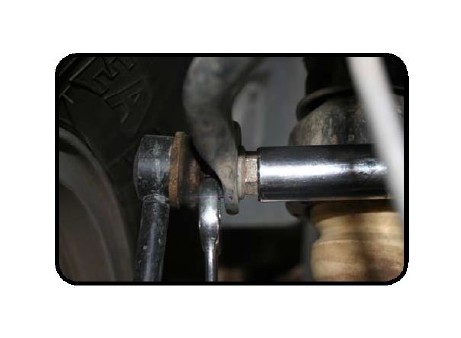
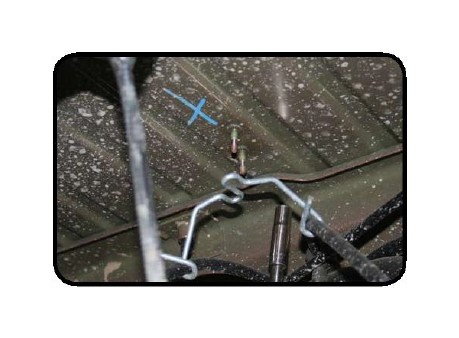
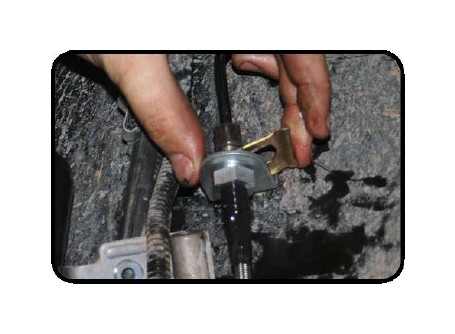
31. Remove the factory brake lines and replace with the supplied brake lines. Use the factory bolt to mount the new tab to the frame. Insert the retaining clip into the brake line as shown.
32. Bleed the brakes.
33. Reinstall wheels, torque lug nuts to 95- 115 ft-lbs, Remove jack stands, lower the vehicle onto its own weight, and torque all the control arm bolts. Torque the uppers to 75 ft-lbs and the lowers to 125 ft-lbs.
34. Install the rear track bar. There are 3 hole locations on the new track bar bracket, the lowest hole is for 2"-3" of lift. The second hole is for 3"-4" of lift and the top hole is for 4"-6" of lift. This is just a starting location alignment adjustments may have to be made to properly align the vehicle. To align the rear track bar to the axle have someone push on the body of the jeep until the bolt hole lines up. Torque to 125 ft-lbs.
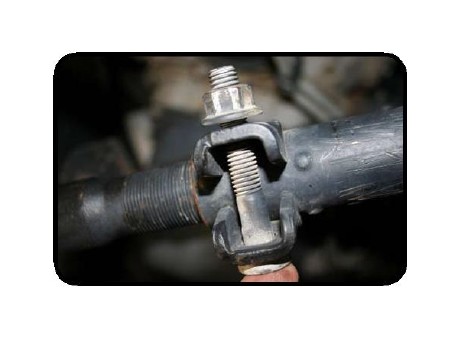
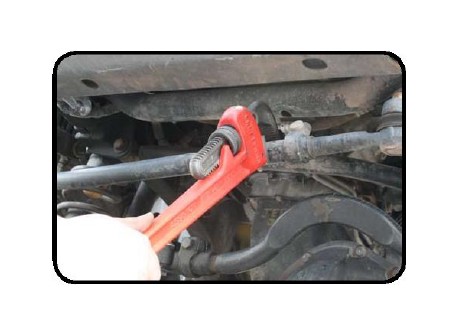
35. To straighten the steering wheel, loosen the adjuster sleeve on the drag link by using 15mm sockets. Mark the position by making a line across the sleeve and the threads this line will indicate the original position. Looking from the drivers side rotate the adjuster sleeve counter clockwise 3/4 of a turn. This should get your steering wheel close to center. Every vehicle is different so test drive yours and determine if yours needs further adjustment. Once steering wheel is straight torque pinch clamp bolts to 45 ft-lbs.
36. Re-torque all fasteners after 300 miles.