 FREE 1 to 3-Day Delivery on Orders $149+ Details

How to Install Steer Smarts YETI XD Steering Damper Bracket (07-17 Wrangler JK) on your Jeep Wrangler

Shop Parts in this Guide
Requirements & Special Considerations for 41035001 – Yeti JK Extreme Damper Bracket Fit and Function
1. The Yeti Damper Bracket is designed to be attached to a 1 - 5/8” diameter tie rod tube. Installation of this bracket on a tube diameter other than 1 - 5/8” could cause premature bracket slip.
2. Given the numerous aftermarket configurations, damper bracket orientation will need to be checked for interference by turning the wheels from full left to full right turn. If interference is found adjust the bracket as needed, without compromising damper function, to eliminate interference.
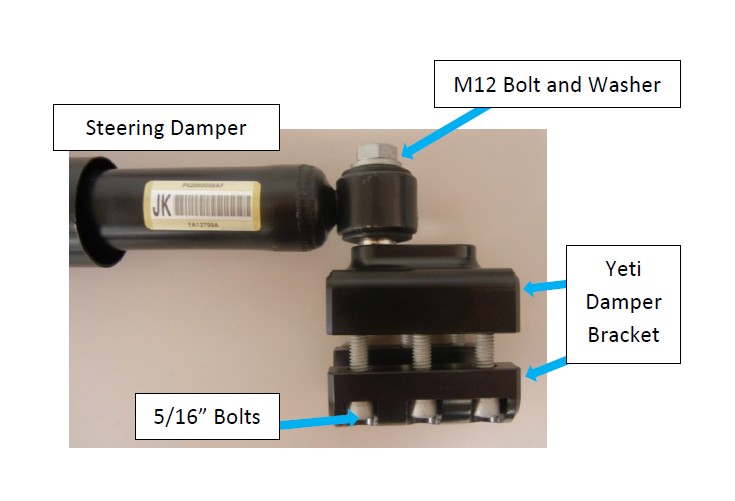
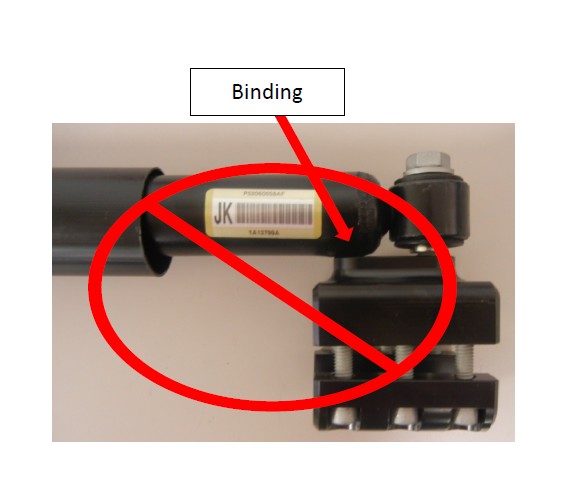
3. Caution: Be sure to orient the bracket so that the hole being used is closest to the damper as show in Error! Reference source not found.. Do not orient the bracket as shown in Figure 2; this can cause binding and damage to the damper cylinder.
4. Torque all damper bracket bolts as specified in the instruction. Excessive over torque or under torque could cause bolt failure or bracket slip.
5. There are two different threaded holes on the bracket for attaching a damper/hydraulic assist. One threaded hole is M12 x 1.75 for use with the stock damper, while the other threaded hole is ½”–13 for various aftermarket dampers or hydraulic assists. An M12 x 1.75 bolt is provided for attaching a stock damper.
Caution: The provided M12 x 1.75 bolt will turn approximately 2 complete revolutions into the incorrect ½”-13 threaded hole before the threads lock up and begin cross threading. Make sure to use the correct threaded hole for the correct bolt. The M12 bolt will thread easily and completely into the M12 hole by hand. Failure to use the correct bolt in the correct threaded hole will cause cross threading and bracket damage. If using an aftermarket damper or hydraulic assist use the bolt that came with it for best fit and function.
6. If installing an aftermarket damper or hydraulic assist, use its installation instructions for bracket positioning and supplied damper attachment bolt torque. Only use the torques supplied in this instruction for the bolts supplied with this damper bracket. Caution: When using a bolt other than the supplied M12, make sure the bolt does not bottom out against the tube when installing. If the bolt bottoms out additional washers can be used to prevent contact from occurring.
IMPORTANT: READ PAGE 1 BEFORE INSTALLATION
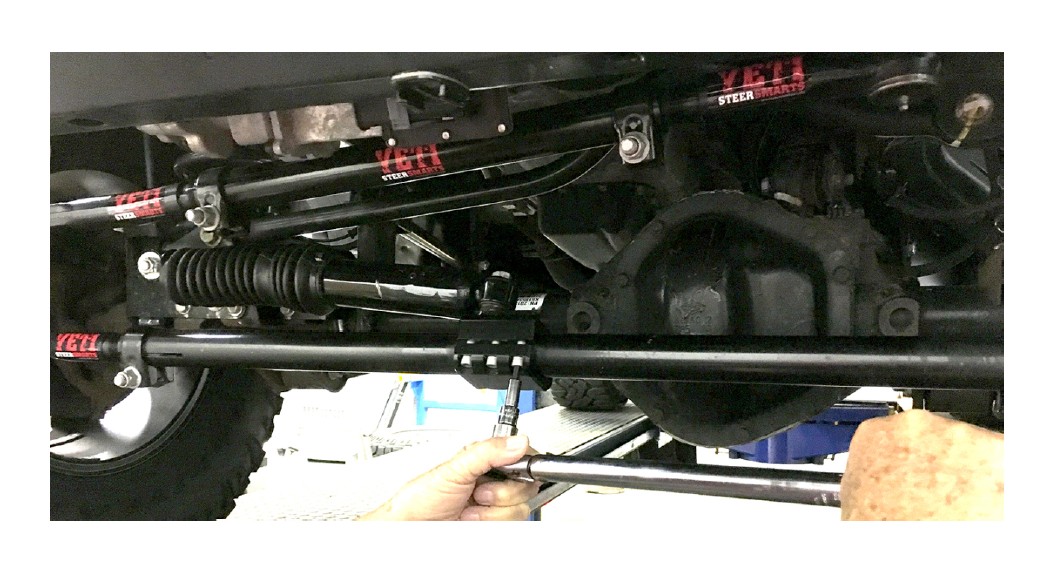
1. To install the Yeti damper bracket turn the wheels all the way to the right lock and hold them there.
2. Completely compress the damper shock and then pull it back out approximately ¼”. This damper length will correctly position the damper bracket on the tie rod adjusting tube.
3. Loosely attach the damper bracket to the tie rod tube making sure that the threaded hole to be used is orientated closest to the damper (see caution on page 1).
4. Loosely attach the damper to the damper bracket using the correct threaded hole for the bolt being used (see caution on page 1).
5. Tighten all six of the 5/16” damper bracket bolts in an alternating cross corner pattern followed by the center bolts until the bolts have reached a torque of 25-30 ft.-lbs. Check the gap between the bracket halves and tube on both sides of the bracket to make sure it is tightened down evenly.
6. If using the stock damper and supplied M12 bolt, tighten the M12 bolt to 70-75 ft.-lbs. If using a ½” bolt supplied with an aftermarket damper, tighten to manufactures recommended torque.
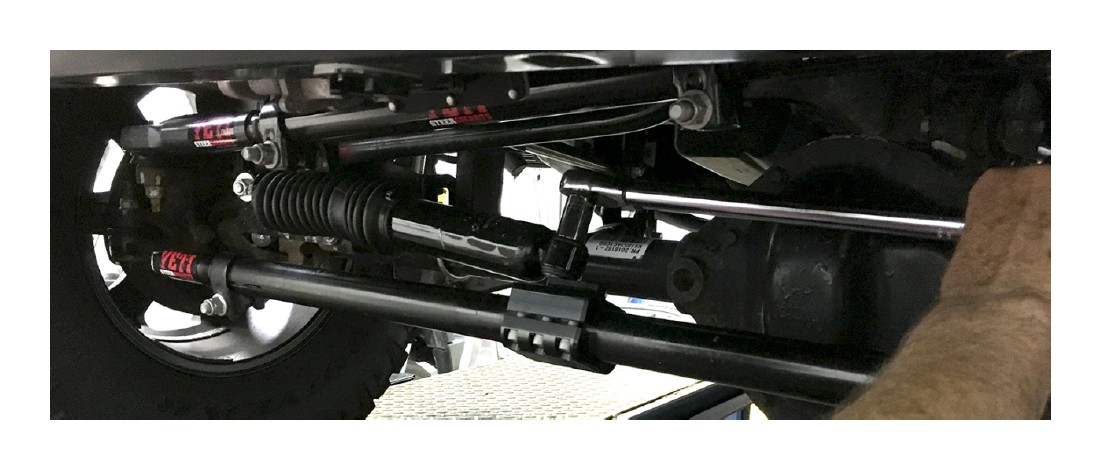
7. Rotate the steering wheel from lock to lock to verify that the damper is centered and does not limit the steering wheel travel. Be sure to confirm that neither the damper nor damper bracket cause interference with other components when being turned from lock to lock.


