FREE 1 to 3-Day Delivery on Orders $149+ Details

How to Install a SkyJacker 2 in. Poly Value Lift Kit w/o Shocks on your 1997-2006 Wrangler TJ

Shop Parts in this Guide
Before beginning the installation, read these instructions and the enclosed driver’s “WARNING NOTICE” thoroughly and completely. Also affix the “WARNING” decal in passenger compartment in clear view of all occupants. If any of these items are missing from this instruction packet, do not proceed with installation, but call SKYJACKER® to obtain needed items. If you have any questions or reservations about installing this lift kit, call SKYJACKER® at 318-388-0816 for Technical Assistance or Customer Service departments.
PRE-INSTALLATION NOTES:
• A professional mechanic is recommended to perform the installation.
• Read the instructions carefully and study the photo illustrations before attempting the installation.
• Secure and properly block the vehicle on a level concrete or asphalt surface.
• Always wear safety glasses.
Important Note:
If after installation a rear driveline vibration occurs, a transfer case lowering kit, or rear adjustable cambolts can be installed to correct vibration.
Transfer Case Lowering Kit:
1997-2002 Models Part # TCL101
2003-2006 Models Part # TCL103
Rear Adjustable Cambolt Kit:
1997-2006 Only, Part # CAM500
ACCESSORIES:
• Heavy Duty OEM steering stabilizer # 7009
• Dual steering stabilizer kit # 7219
• Front sway bar extended double disconnect end links # SBE120
• Rear sway bar extended end links # SBE500
• Heavy-duty steering box skid plate # SSP10
Component Listing:
• 4- 2" polyurethane isolator pads . . . . . . . . . .Part# TJ2P-S
• 4- 1" bump stop spacers . . . . . . . . . . . . . . . .Part# BPS10-S
• 4- 10mm X 50mm bolts . . . . . . . . . . . . . . . .Part# 10x50MMB
• 4- 10mm flat washers . . . . . . . . . . . . . . . . . .Part# 38SAEW
FRONT:
1. Secure and properly block the tires of vehicle on a level concrete or asphalt surface.
2. Jack up front of vehicle and install jack stands under frame behind the lower link rear brackets. Remove tires and front shocks.
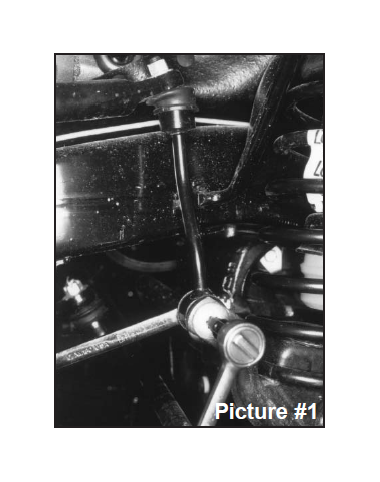
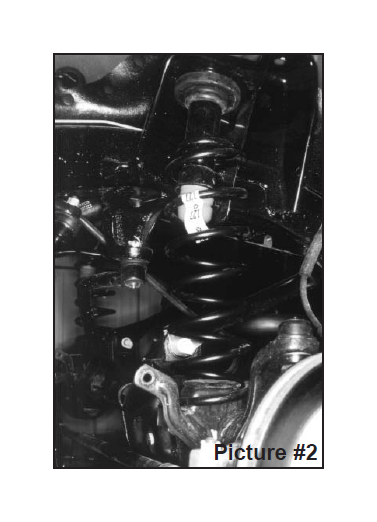
3. Loosen, but DO NOT remove the sway bar end link's lower bolts at axle housing on both sides (see picture #1). Lower
front axle down until coil springs become loose. Remove the bottom bolt and clip from left front coil spring (see picture #2).
4. Now remove both coil springs. Remove upper bump stop (use channel lock pliers working bump stop back and forth).
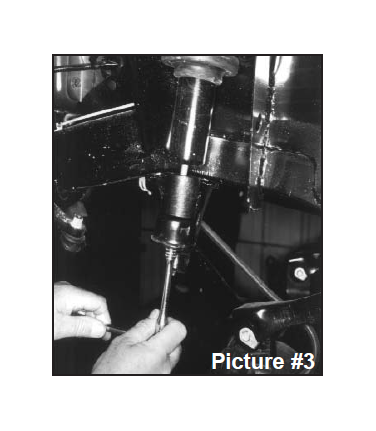
5. Remove bolt from inside bump stop cup. Install bump stop spacer and original cup using 10mm x 50mm long bolts furnished. Reinstall factory bump stop. (See picture #3.)
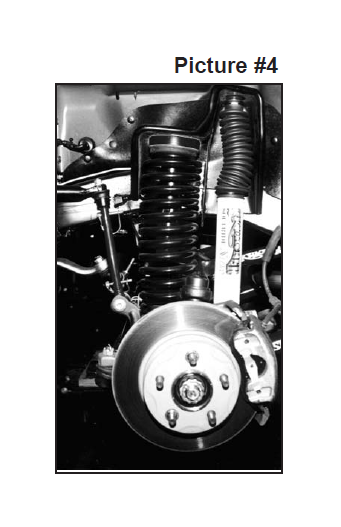
6. Install 2" coil spring isolator pads on top of the factory pads. (See picture #4) Raise jack up so that enough load is applied to hold coil springs in place. Reinstall spring bolt and clip at bottom of left front coil. Install new shocks.
7. Completely lower vehicle to the ground. Now tighten the sway bar endlink’s lower bolts loosened from step #3.
NOTE: Repeat steps 1 - 6 from above to complete rear installation