 FREE 1 to 3-Day Delivery on Orders $149+ Details

How to Install Rugged Ridge XHD Read Bumper Tire Carrier on your 2007-2013 Wrangler
1. If installing with a new XHD Rear Bumper, Install bumper brackets and place bumper on brackets, but do not install D-Rings.
If installing on an existing XHD Rear Bumper, remove D-Rings. It may be necessary to loosen brackets to help with hole alignment.
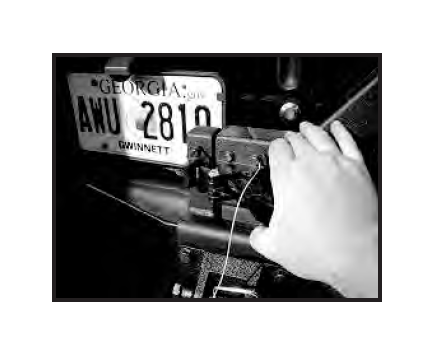
Remove spare tire and spare tire mount. Unplug third brake light wiring and set to the side. Remove third brake light from spare tire mount.
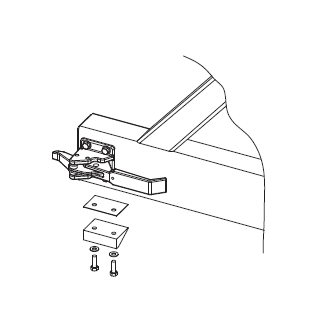
2. Place Pivot Mount (#2) on the right side of the bumper. Install using M12 Hex Bolts (#7) in the top holes, and place the D-Rings and its corresponding bolts in place on the rear holes. Leave all bolts loose. Note - (2) bolts that are closest to the tailgate do not get washers. All other bolts do.
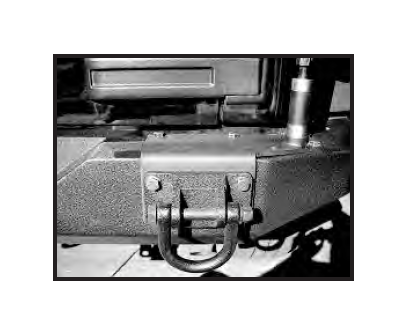
3. Place Latch Mount (#3) on the left side of the bumper. Install using M12 Hex Bolts (#7) in the top holes, and place the D-Rings and its corresponding bolts in place on the rear holes. Leave all bolts loose. Note - (1) bolt that is closest to the tailgate does not get a washer. All other bolts do.

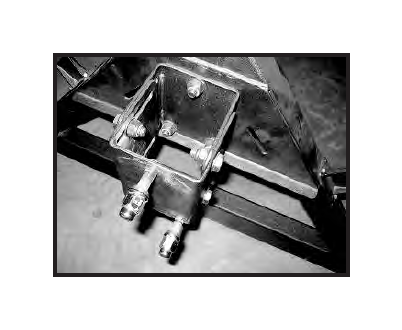
4. Pre-assemble Spare Tire Mount. Spare Mount Plate (#13) and Spare Adjuster Plate (#15) nest inside one another. Fasten together with (4) M12 Hex Bolts (#7), (8) M12 Washers (#6), and (4) M12 Lock Nuts (#14) as shown. Leave fasteners loose.

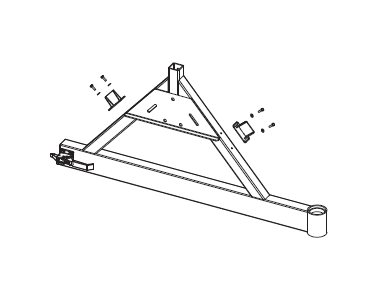
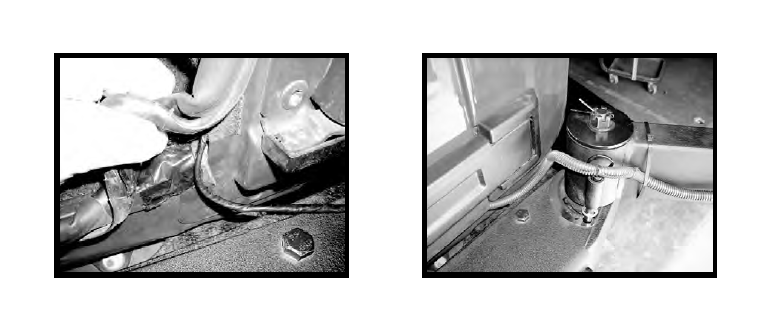
5. Fasten Spare Tire Mount Assembly from Step 4 to the Frame (#1) using (3) M12 Hex Bolts (#7), (6) M12 Washers (#6), and (3) M12 Lock Nuts (#14) as shown.
6. Install Ramp (#22) onto Frame (#1) using (2) M6 Socket Cap Screws (#21) and (2) M6 Washers (#20) as shown. Shims (#25) may have to be added later during adjustment.
7. Install (2) Bumper Stops (#24) onto Frame (#1) using (4) M6 Hex Bolts (#27) and (4) M6 Washers (#20) as shown. Leave fasteners loose, as they will need to be adjusted to the vehicle later.
8. Pack (2) Bearings (#12) with all purpose grease. Install (1) Bearing onto spindle of Pivot Mount (#2).
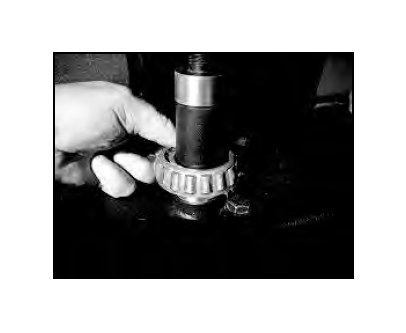
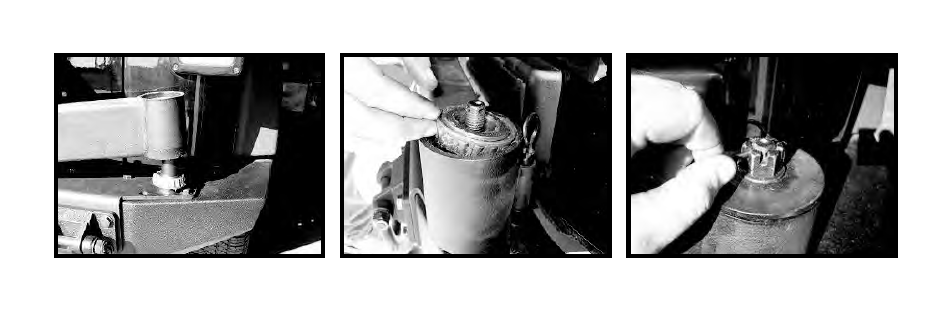
9. Lift Frame (#1) onto vehicle, setting the pivot end on the spindle as shown and resting the latch end on the opposite end. Install second Bearing onto spindle. Install Bearing Cap (#16), M16 Washer (#32) and Castle Nut (#17) onto spindle. Tighten Castle Nut until all slack is removed from pivot assembly, but frame still pivots freely. Install Cotter Pin (#18).
10. Tighten bolts on the Pivot Mount Plate (#2). Latch the Latch (#11) to the Catch (#19). Ensure that the Latch swings freely into place to engage the catch. It may be necessary to adjust the Latch, the Catch, and/or the Latch Mount to achieve this. Once adjusted, tighten the Latch Mount into place.
11. Adjust Bumper Stops (#24) so that the OE rubber bumpers on the tailgate compress approximately 1/2" when the Tire Carrier is latched.
12. If the Latch (#11) has room above it when it engages the Catch (#19), it may rattle on bumpy terrain. This gap can be eliminated by installing Shims (#25) between the Ramp (#22) and the Frame (#1) until the gap is closed.
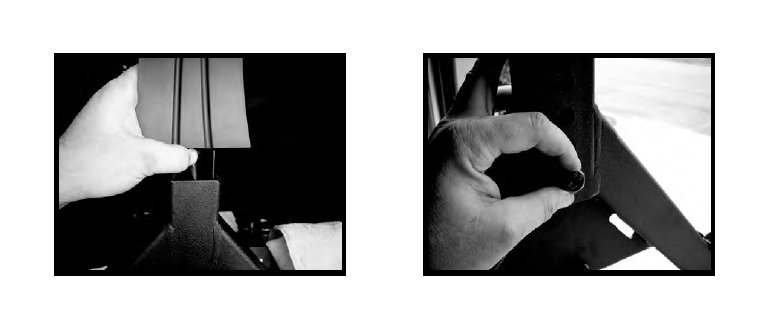
13. Remove tape backing from Rub Strip (#10) and place around spindle. The hole should line up with hole in Pivot Mount (#2), and the curve should wrap around spindle as shown.
14. Install spare tire using provided (3) Lug Nuts (#4). It will be necessary to adjust the Spare Tire Mount Assembly to achieve proper fit. Spare tire should be vertical, and should rest against Frame (#1) when properly adjusted.
Note: At this point, Tire Carrier is installed and adjusted. Remaining directions refer to installation of third brake light.
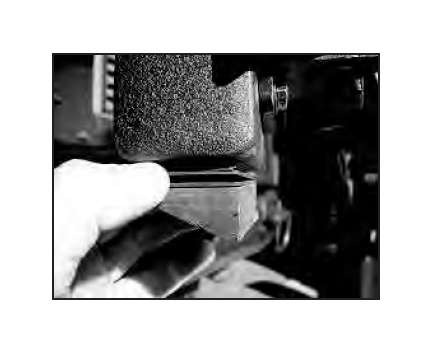
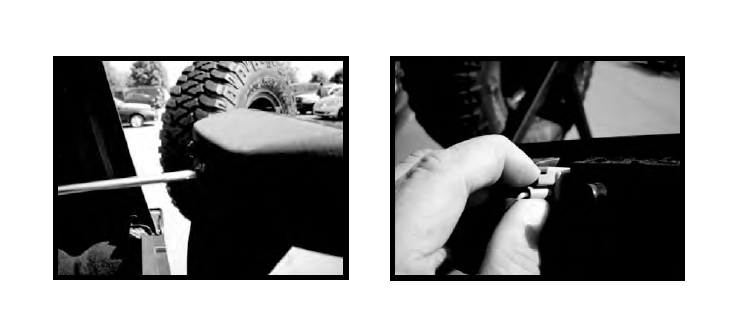
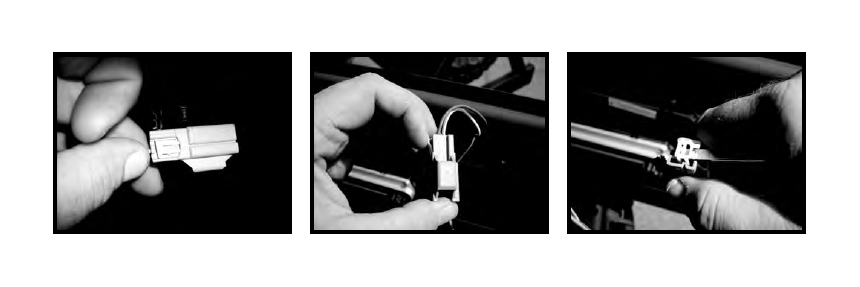
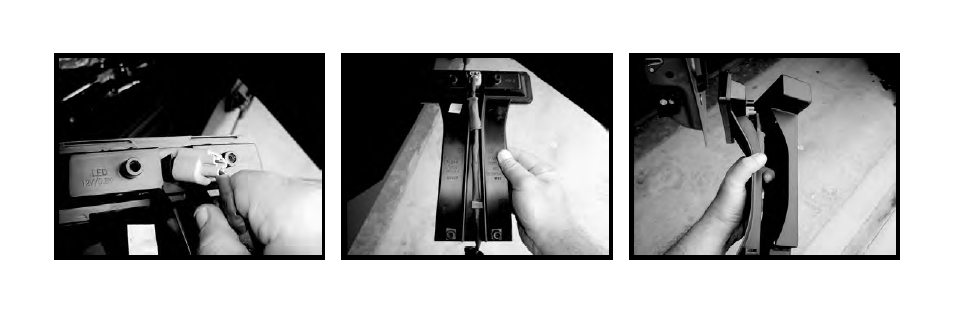
15. Remove the 4 torx head screws that attach the light to the factory tire mount. Pull the light away from the tire mount. Remove the connector by pushing down on the tab and pulling. Set the light aside, it will be used later during the installation.
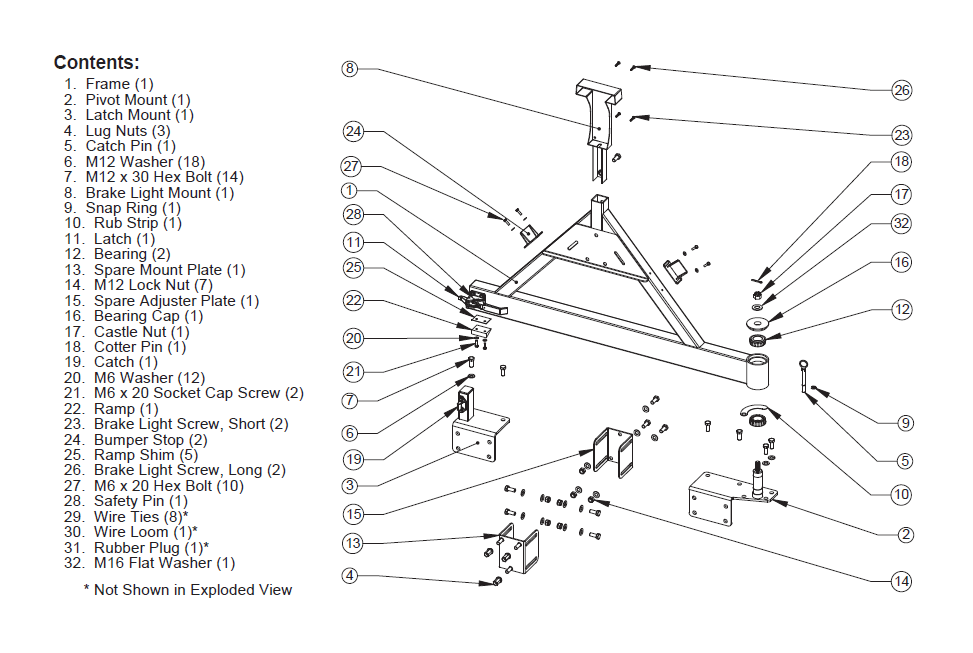
16. Open the tailgate and remove the tailgate vent. Pull out along the left edge first and pull. Locate the 2 wire brake light connector located in the opening. Push the tab in and pull to remove the connector.
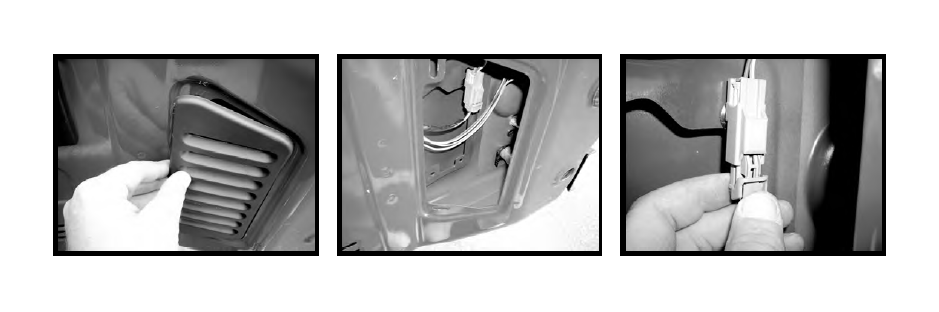
17. Remove the rubber grommet with the wiring on the outside of the tailgate by grabbing it and working it out of the hole. Pull the wiring through being careful not to damage it. Set this small harness aside, it will be reused later. Insert Rubber Plug (#31) into the empty hole.
18. Remove the other portion of the third brake light connector from the tailgate. Locate the wiring going to the tailgate latch. It should run just above the third brake light wiring going towards the right. Follow it to the latch and remove the connector in the same method as mentioned earlier.

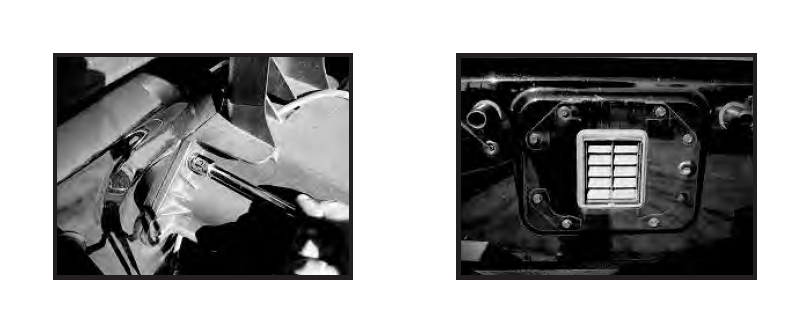
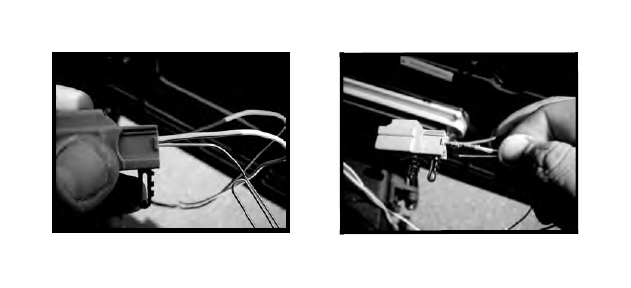
19. Remove the long plastic cover that runs almost the length of the upper portion of the tailgate. This is done by pulling out along the bottom edge of the cover first. You should now see the wiring harness. Carefully pull the harness through the small access hole that is to the right. The connectors will need to be guided through the hole one at a time.

20. Once the wiring and connectors are removed from inside the tailgate, remove the third brake light wiring and connector from the short piece of loom.
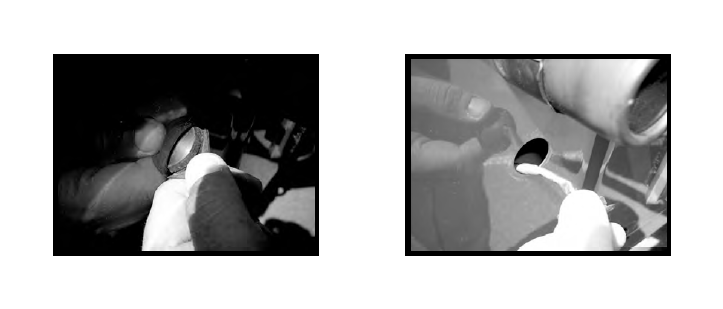
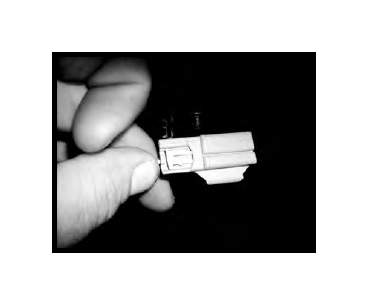
21. Brake light connector can now be disassembled. Note the location of the wires before removal. Holding the third brake light connector, carefully pull out on the two white tabs of the terminal lock that are on each side of the connector and push them into the grey connector. With a small screwdriver pry the terminal lock out of the connector. This will now allow both terminals and wires to be removed from the connector. Set the terminal lock aside it will be reused a little later.
22. With the terminal lock removed you can now remove the two wires and terminals. Using a paper clip, slide it under the wire and push in. It will feel like it snaps in place when pushed all the way in. Holding both the wire and paper clip, pull them both out of the connector. Do the same with the other wire.
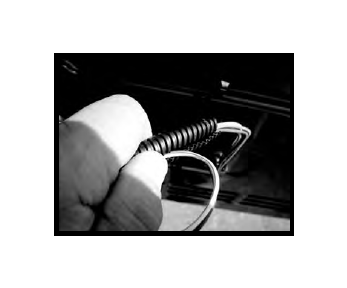
23. Carefully pull the 2 wires all the way through the insulator. It is recommended that these wires be wrapped in electrical tape to better protect them from weathering and becoming worn. Then wrap them with Wire Loom (#30).
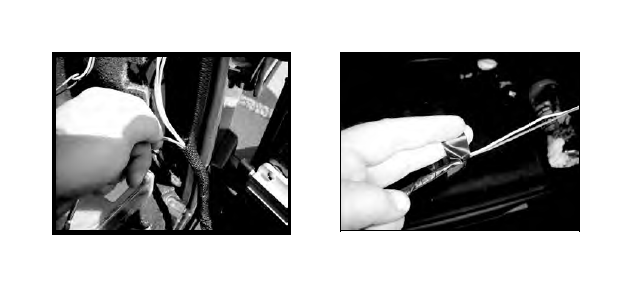
24. Pull the carpeting away from the tailgate seal. Route the wiring for the third brake light wiring along the tailgate seal. You do not have to tuck it behind the seal, as it will be concealed by the carpet. Route the wiring under the lower right hand corner of the tailgate seal.
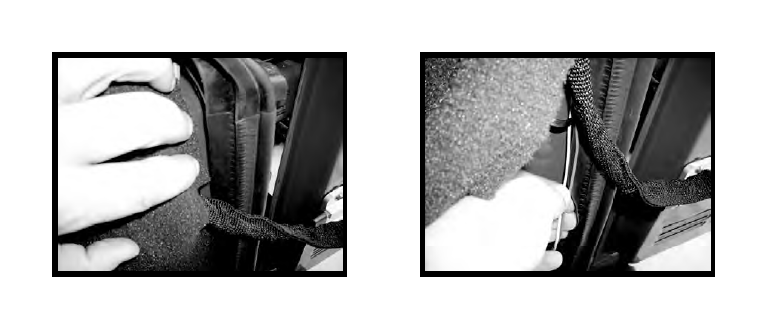
25. Wrap the wiring with the provided Wire Loom (#30) beginning inside the vehicle. Pass the wrapped wire between the body and the tailgate seal. Close the tailgate and continue to route the wiring to the tire carrier. Route the wiring along the tire carrier as shown. Secure wiring to Tire Carrier with Wire Ties (#29).
25. Reinstall the harness removed in Step 17. Install the third brake light assembly into the new light bracket that was provided with your new tire carrier. Install the 4 provided phillips head screws (#23 ) and tighten. Be careful not to over-tighten these screws.
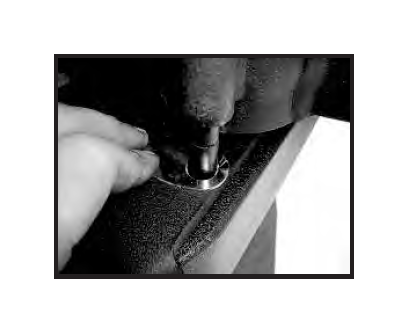
26. Install the light and bracket assembly into the provided square hole in the tire carrier. There are 4 holes provided for adjustability. Install it in the hole that provides best visibility above the spare tire. Install the provided M12 Bolt (#7) and Washer (#6) and tighten.
27. Reassemble the connector. Assembly is just the reverse of disassembly. When reinstalling the terminal ends the paper clip that was used will not be needed. Be sure to push the terminals in until they snap into place.
28. Connect the wire coming from vehicle with the wire coming from third brake light. Wrap all exposed wiring with provided wire loom. Secure loose wiring to the tire carrier with provided wire ties. Finally, test the operation of the third brake light.

Installation is complete. Should tire carrier rattle as it ages, it can be adjusted as indicated in steps 11 and 12. Congratulations on your purchase of another quality Rugged Ridge product.
