Installation Time
(approx) a Day
Difficulty Level:
Light to Moderate mechanical skill required.
FREE 2 or 3-Day Delivery on Orders $119+ Details
$1,024.99 (kit)
FREE Shipping + $149.00 Oversized Item Fee Market Price $1,198.99 You Save 15% ($174.00)Saved - View your saved items
We're sorry. We couldn't save this product at this time.
Ryan: This Rubicon Express 2.5 inch Super-Ride Suspension Lift kit with shock extensions is for those of you that have the 4-door 2018 and up JL that are trying to run a set of 35-inch tires on your Jeep and need the suspension clearance to do so. Of course you could run a set of 33s with 2.5 inches of lift but, on a JL, it's a pretty big lift for 33s. And you could probably go up to a set of 37s but you're not going to have a ton of suspension travel and articulation ability unless, of course, you're installing this lift kit on a Rubicon that has those slightly higher fenders. This is going to be a pretty easy two out of three wrenches, although there's a tiny little bit of drilling to do. Tony's gonna show you exactly how to get this installed in just a second.So again, you're going to be wanting to install a lift kit on your Jeep if you wanna run some larger tires, those larger tires and taller suspension are going to give you a different look to your Jeep but maybe more importantly are going to give you a lot more function, especially when you're off-road. You're gonna have a lot more clearance and those bigger tires are going to make it a lot easier to roll over obstacles when you're in an off-road scenario. This lift kit is one of the first ones to come out for the JL, there are still a ton of options out there, but this is going to be a pretty good one. This is going to include a coil spring lift kit, so you're going to get all new coil springs, all four of them. You're going to get all the accessories that you need to lift your Jeep and have the suspension geometry stay intact, things like new longer sway bar end links, you're also going to get new longer front-lower control arms. You're going to get shock extensions in this lift kit, and what that allows you to do is keep those factory shocks, helping to keep the cost down, and helping to keep that factory ride, but allows you to basically extend those shocks so that they'll work with your new 2.5-inch taller lift. So some really high-quality components with this lift kit and really all the components that you need to throw a set of 35s on your Jeep, roll down the road, or take it off-road.So one of the things that I really do like about this kit, again, are these lower control arms, and that's something that we're seeing with a lot of JL lift kits, even at a fairly small height, 2.5 inches, which, in the past, hasn't been a ton of lift. A lot of companies are still including some sort of geometry correction even with that size lift kit. And in this case, it's a set of fixed lower-front control arms. So when you lift the Jeep, you're actually rolling the axle a little bit, and that can change things like your pinion angle and your caster angle. A bad pinion angle can mean vibrations or premature driveline wear, and a bad caster angle can give your Jeep a little bit of a flighty feel on the highway because the steering wheel isn't going to wanna self-center. So by adding new longer lower control arms, you are helping to fix that pinion, fix that caster angle, and get them a little bit closer back to factory and keep the Jeep riding and performing how you would expect it to.So again, a lot of really nice components here and they all come in at a price right around that $650 mark. I do think that's a pretty good deal for a lift kit that includes the lower control arms. If it didn't have the control arms, I'd say you're paying too much, but because this does have those to help correct the geometry, I think this is a pretty fairly-priced lift kit for the JL. I mentioned before, this is a two out of three wrenches with just a little bit of drilling to do. Let's have Tony show you how to get this installed.Tony: Tools used for this installation are as follows. You're gonna need yourself a good set of sockets, ranging from anywhere from 10-millimeter all the way up to 24. A good set of wrenches, ranging also from 10-millimeter all the way up to 24. Couple pry bars, an 8-millimeter Allen key, good few ratchets, some extensions, a drill, and a 1/2-inch drill bit, a hammer, a good impact gun, and a ratchet strap, and a pair of pliers.All right. Now, let's begin with the installation of our lift kit on the rear of our Jeep JL Wrangler. And to begin, we're gonna have to get our old stuff out of the way. Now we're gonna leave our shocks in place, we're just gonna disconnect the lower bolts and let them hang because we're gonna reuse those, so there's no reason to take them completely out of our vehicle. After that, we have to disconnect our parking brake cables from the back of the rear, we're gonna get our sway bar end links off and out of the way because we do have new ones that come in the kit. Lower the rear down, and pop our springs out, get our new ones into place, and reassemble everything. So follow along, we'll show you how this gets done.All right. Now, with the use of an 18-millimeter socket and wrench, we're gonna go ahead and remove the lower bolts on our shocks. Now with the same 18-millimeter socket and wrench, we're gonna go ahead and get our lower end link bolt out of the way. Now, with our same 18-millimeter socket, we're gonna go ahead and get our upper end link bolts off. Now they're actually a nut, sometimes you can luck out using an impact tool to spin them right off, sometimes you gotta use the Allen key in the center of the stud, and then hold the nut in place using your 18-millimeter wrench. We're gonna see if we can get it off with just our impact gun now.Now, with a 10-millimeter socket, we're gonna go ahead and disconnect our brake line brackets off the side of our frame. This would give us a little extra slack in our rear so when we drop it down to get the springs out, we're not putting too much pressure on our ABS line or our brake line. And just go ahead and slide the bolt back in there just so you don't lose it. Just do that on both sides. Now with a 21-millimeter socket, we're gonna go ahead and get the bolt out that secures our track bar to our rear differential. That way, we have that little bit of extra room when we lower the rear down and we're not fighting the track bar.All right. Now, the last thing we have to disconnect before pulling our springs out are our parking brake cables. Now we just have to take these off, just to give that little bit of extra room once we lower it down to get the new springs in. These are relatively simple. With your e-brake off inside your vehicle, go ahead and give it a pull. I like to use a pair of pliers here on the little eyelet side that goes behind our dust cover and slowly pull out, take the pressure off the cable, then you can pull the hook out of that, just as so. With that hook out, it's gonna make getting this clip off a lot easier. Now all you gotta do is push in through three tabs, and they slide right out. Just repeat that on both cables.Now, if you'll notice, I have a set of pole jacks under my rear differential. Now if you're doing this at home without the use of a two-post or four-post lift, you're probably on the ground with a couple of jack stands and a floor jack, so this is where we're going to lower our rear down and pop our springs out, and then begin to install our new springs and lift kit parts.Now, when removing your springs, you wanna make sure that both of your rubber isolators are in place. Our upper one will probably be sitting on top of the spring, your lower one will probably sit on top of the axle still. Okay, now with our rear completely disassembled, we can move on to assembly of our new lift kit. But first, we gotta make a few modifications and they're relatively simple, we just have to open up the hole in the sway bar to accommodate the new bolt that comes in the kit. Now, it's not much, it's just enough to get that bolt in there. You're moving up to a 1/2-inch drill bit to drill that out and, essentially, you're just knocking the powder coat out of the inside of the hole. Now, just repeat that on the other side.All right, now we're ready to begin by putting our springs in first. One thing you wanna watch out for is that you grab the correct side spring, these are marked left and right, so you have LR for left rear, RR will stand for right rear, and so on, and so on. Now, make sure that you put your isolator on top of your spring before you get it inside the rear of your Jeep.Now that our springs are installed, we're gonna go ahead and get our shock extensions in so we can get our factory shocks hooked back up and we don't have to have our rear sitting on our jack anymore. Just take your shock extension and the short bolt that comes in the kit, that goes up through the bottom. Don't forget to use your washers and the lock nut. Next, we're gonna get in our crush spacer, this is so we don't suck the bracket in too far and our new through bolt. Now, to tighten this all down, we're gonna use two 19 millimeters. Now, your bolt that goes through you're not gonna wanna tighten up completely until we get our shock into place. That way we don't close the bracket up too much and block ourselves.All right. Now, we're gonna carefully lift our rear up until our shocks are aligned with the holes and we can get that bolt in. Then, our rear will be hanging back on our shocks. All right, now we can go ahead and finish tightening up all our hardware. Remember, we're using two 19s on the new hardware, and then two 18s on our factory hardware. Now, when installing our sway bar end links, there's a couple different ways to do this. Now, it all depends on what wheel you're running. Now, if you're running your stock wheels with larger tires on them, you're gonna wanna run your end link to the inside of your sway bar. Now, if you're gonna be running it with aftermarket wheels and tires, gonna run it to the outside of your sway bar. Since we're gonna be running a aftermarket wheel and tire on this one, we're gonna put it on the outside. And, on the bottom, we're just gonna run our factory hardware.Now, to tighten up our hardware, we're gonna use our two 18s on our factory hardware. And to tighten up our new hardware, on the top, we're gonna use an 8-millimeter Allen key and a 19-millimeter socket. All right, now the last few things we have to do is we tightened up our track bar, we have to get our bump stop extensions in. Now, they're just gonna bolt down to the top of the bump stop pad on our rear axles. After that, we'll go ahead and tighten up our brake line brackets, get our parking brake cables back on, and we'll move to the front.Just line up the two holes with our new bump stop extensions with the factory holes on our differential. Secure it down with the hardware in the kit. We can get our parking brake cables, they go in the same way they came out, just in reverse.All right, now we're ready to start on the front end of our Jeep JL lift kit. And to do that, it's pretty much the same as the rear. We're gonna disconnect our lower shock mounts, we're gonna get our end links out of the way, pop our springs out. The only difference is, on the front, we're gonna do our lower control arms. All right, we're gonna use our 10-millimeter, get our brake bracket off. Now, with our 18-millimeter, we're gonna get our lower shock mount off. With our lower shock mount out, we can go ahead and get our sway bar end link out still using the same 18 millimeters. Now, with a 21-millimeter, we're gonna go ahead and get our track bar bracket disconnected. With everything disconnected, we can go ahead and start lowering our front axle assembly down and get our front springs out.All right. Now, to remove our lower control arm, we have a few bolts to take out, first one being the bracket that holds our brake lines. It's 15-millimeter, you remove the nut that's on the end of it, pop that off, let the brake lines dangle, they'll be fine. Now we're gonna use a 21 and a 24 to take the two bolts out that secure our control arm to our frame and our differential housing.All right. Now, before we get our springs into place, we're gonna go ahead and get our new lower control arms in, and we're gonna use the same hardware that comes in the kit. Now, the kit also comes with camber adjustment plates. We'll wait to put those in once we take it for an alignment. If they're needed, you can have the alignment shop install them and set them where they need to be. You can run them straight up to zero, you can run them a degree and a half negative and a degree and a half positive, that's up to your alignment shop once they check your pinion angle, once you're done with your installation. Let's go ahead and get these installed and we're just gonna use our factory hardware for now.Now, before you install your control arms, make sure you get your grease fittings installed. Tighten them down with a 3/16. Now we're gonna reinstall our brake line bracket using the small nut and bolt and washers that come in our kit.Okay. Now, with our lower control arms installed, we can go ahead and move on to getting our springs in and the rest of our bracketry and hardware. But you'll notice that I'm not tightening up my control arms yet and the reason for that is is once you get it down on the ground and the weight of the vehicle sitting on the suspension, then we'll go ahead and tighten those up. This way, it doesn't tear the bushings.Now we're ready to go ahead and get our new springs installed. You wanna make sure that you put your bump stop extensions inside of the spring with the countersunk part facing up. We're gonna put the bolt in afterwards. Slide this up into place.All right. Next we're gonna get our shock extensions in so we can get our shock reconnected and we can get our pole jacks out of the way. Just like on the rear, line up the holes and install it with the hardware supplied.All right. Now we're gonna go ahead and tighten up all of our hardware, the 18 millimeters on our factory bolt, our 19 millimeters here on our through bolt, and our 13-millimeter down here on our small bracket bolt.Now, I still have all this open space here before I get in my end link, I'm gonna go ahead and get my bolt in to bolt down my bump stop extension here inside of our spring perch. And follow that up with the nut underneath our spring perch. It's gonna be a little bit more difficult to get to. Now with two 14s, go ahead and tighten that bolt up. Our sway bar end link, just use the hardware that comes in the kit for your upper mount, and your factory hardware for your lower. Now, use your 18 millimeters on your bottom and our 19 millimeters on our top.Next we're gonna go ahead and get our final bolt in for our track bar mount. Now, I might need the help of a friend to do this.Now, with everything tightened up, we are done the installation of our lift kit. Now, go ahead and get your wheels and tires back on. And don't forget to tighten up your control arms, once you get it back down on the ground. Now, that's still just your 21 and your 24 millimeters. So for more parts and videos like these, make sure you visit us right here at extremeterrain.com.
Subscribe to our YouTube Channel
Features, Description, Reviews, Q&A, Specs & Installation
Brand | Rubicon Express |
Lift Height | 2.50 Inch |
Lift Kit Type | Suspension Lift |
Lift Kit Includes Shocks | Shocks Included |
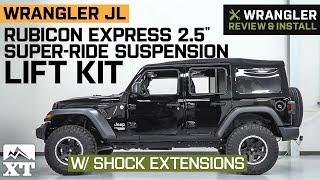
Give Your Ride a Boost. It’s time to take your Jeep to new heights. This Rubicon Express 2.50-inch Super-Ride Suspension Lift Kit, which comes with high-quality shock extensions, is guaranteed to improve your Jeep’s performance and handling, whether on or off the road. This easy-to-install, expertly tuned system can accommodate tires up to 37 inches in diameter. The included shock extensions, on the other hand, will help ensure that your ride will be smooth and comfortable, regardless of the kind of terrain you’re driving on.
Carefully Crafted Lift Coils. The included coil springs in the Rubicon Express 2.50-inch Super-Ride Suspension Lift Kit were meticulously designed for optimum bump compliance and to maximize their load handling capabilities. These coil springs come with shock extensions to further enhance the safety and convenience of your ride.
Durable Front Lower Arms. The Rubicon Express 2.50-inch Super-Ride Suspension Lift Kit also features a pair of 1.75-inch diameter 4130 chromoly Super-Ride front lower arms with ample range for enhanced performance. In addition, the kit also comes with extended sway bar end links and extended bump stops, improving your Jeep’s off-road capability.
Hassle-Free Installation. Rubicon Express designed this 2.50-inch Super-Ride Suspension Lift Kit for an efficient and convenient installation. However, it is still recommended that a professional be left in charge of installing this suspension lift kit system on your Jeep.
Covered by Limited Manufacturer’s Warranty. Rubicon Express warrants its full line of products, including the 2.50-inch Super-Ride Suspension Lift Kit, to be free from workmanship and material-related defects during their lifetime. The manufacturer will repair or replace the defective products, provided that the claim falls within the warranty’s terms and conditions. For more information on warranty specifics, you may contact the manufacturer directly.
Application. The Rubicon Express 2.50-inch Super-Ride Suspension Lift Kit with Shock Extensions was made for 2018-2023 4-Door Wrangler JL models.
Fitment:
Rubicon Express JL7100E
CA Residents: WARNING: Cancer and Reproductive Harm - www.P65Warnings.ca.gov
Installation Info
Installation Time
(approx) a Day
Difficulty Level:
Light to Moderate mechanical skill required.
What's in the Box
10 More Questions