 FREE 1 to 3-Day Delivery on Orders $149+ Details

How to Install Rugged Ridge XHD Front Bumper Kit w/ Striker Bar & Stubby Bumper Ends (07-18 Jeep Wrangler JK) on your Jeep Wrangler
Installation Time
1 hours
Tools Required
- 13mm Socket
- 19mm Socket
- 10mm socket
- Angle Grinder w/ cut-off disk
- Rust-preventing spray paint
- Flat-head and Phillips-head screwdriver
- Drill w/ 1/4" bit
Assembly Instructions:
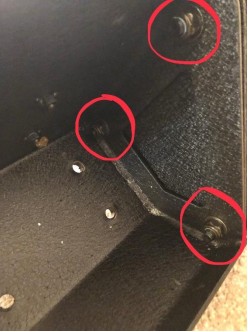
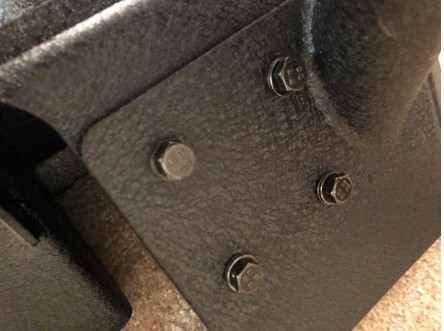
1. Flip XHD Bumper base upside down to access interior nuts. Remove the 3 nuts attaching the flat end pieces to the base on either side using the size 19 socket.
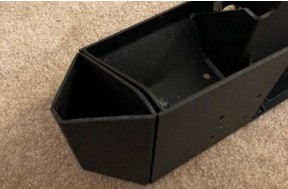
2. Remove the flat end pieces and replace them with the stubby bumper ends; the open portion of the stubby bumper end should align with the underside of the bumper. Place the washers then the nuts on each bolt. Hand tighten all 3 nuts before using the size 19 socket to finish. Repeat for the other side.
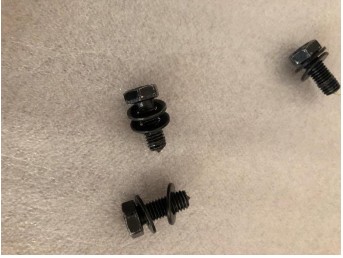
3. Collect the bolts and washers included in the striker bar box. Place 2 washers on each of the 8 bolts. The nuts will not be needed as there are nuts welded to the underside of the base.
4. Flip the XHD base and stubby bumper ends back over. Align the 8 mounting holes on the Striker Bar with the 8 holes in the top of the XHD base.
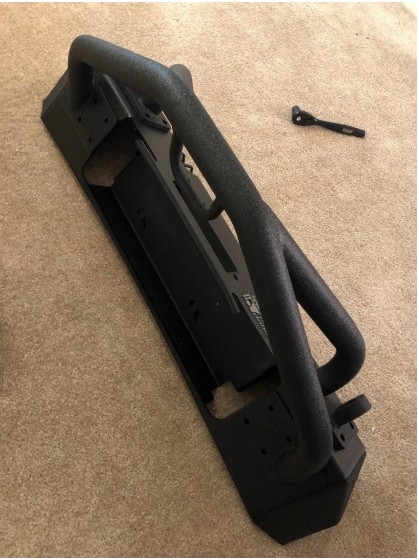
5. Insert all 8 bolts and washers hand tightening only. Once all bolts are inserted, completely tighten all of them with the size 13 socket.
Installation Instructions:
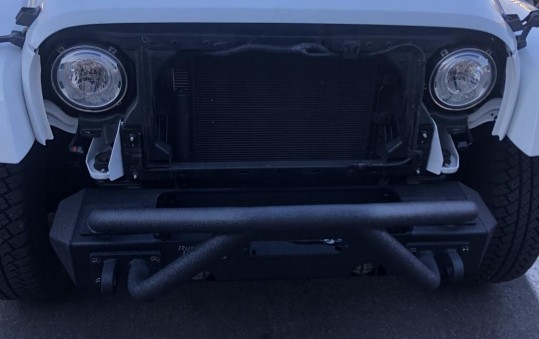
1. Pop hood and remove front grill to prevent damage. To do this remove plastic pop tabs with the flat-head screwdriver. Unplug turn signal wiring and pull outwards on grill at the bottom (the bottom of the grill is still connected). You will hear the plastic connectors pop as the grill comes out.
2. Remove pop tabs for plastic front skid plate located under the front bumper. One set are located directly under the bumper at the front, while the others are connected to the metal frame underneath.

3. Remove the plastic screws connecting the upper liner to the front bumper. These screws strip easily and may need to be drilled out.
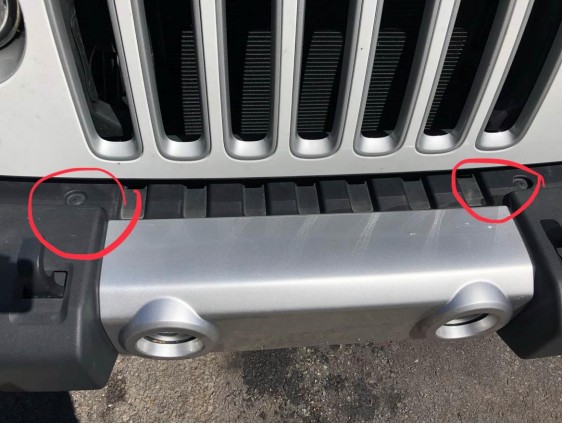
4. Disconnect fog light wiring from lights. These can be accessed easily from under the bumper. Remove the 8 nuts connecting the bumper to the frame. Some of these can be accessed from above while others will need to come from below.
5. Pull the bumper out after removing all bolts without removing it completely. Cut the zip ties connecting the fog light wiring to the bumper and then finish removing the bumper.
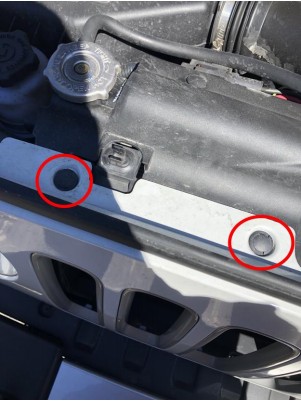
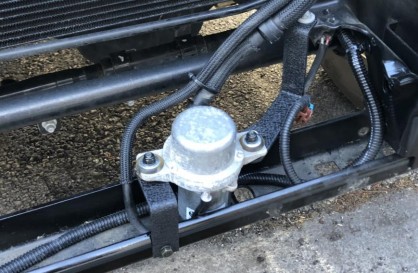
6. Remove bolts holding vacuum pump with 10mm socket. Use the angle grinder to chop the front mounting bracket about 2.5”. (Do not cut the back bracket as this will still be used) Spray paint exposed metal with rustpreventing paint.

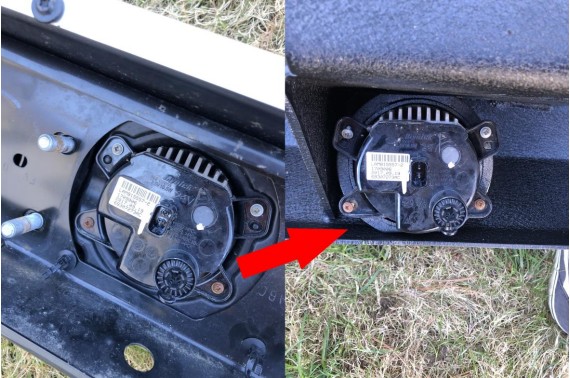
7. Attach provided bracket hardware as shown. Remove cable ties attached to vacuum tubing within engine block to allow movement of the pump. Position as shown below and drill hole with 1/4" bit. Spray hole with rustpreventing paint and remount vacuum pump.
8. Remove fog lights from factory bumper using a Phillips-head screwdriver to remove the 4 screws holding them in place. Insert the fog lights into the XHD bumper using the same hardware.
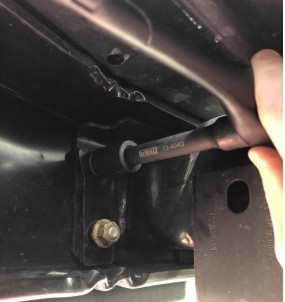
9. Mount XHD bumper to frame using either provided hardware. 8 Bolts and nuts are used with two 19mm sockets.
10. Reconnect fog lights to wiring harness, zip tie wires as needed, and re-insert front grill by pushing back in until all tabs are popped in place. Then re-insert pop tabs at the top of the grill and reconnect turn signals.
*Note: Final install picture includes new fenders not included with bumper. License plate is mounted with a standard license plate mount available online or at any auto parts store.
Installation Instructions Written by ExtremeTerrain Customer Ryan Burrow 03/31/2019

