 FREE 1 to 3-Day Delivery on Orders $149+ Details

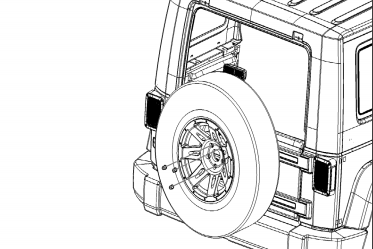
How to Install Rugged Ridge Spartacus HD Tire Carrier - Wheel Mount on your Wrangler

Shop Parts in this Guide
Step 1: Take off the spare tire by removing the 3 lug nuts using a 3/4” deep socket.
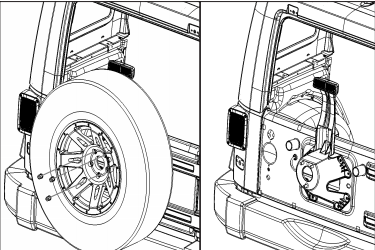
Step 2: Open the tailgate. Using a T-20 Torx bit, remove 4 torx head screws that attach light to factory tire mount. Pull light away from tire mount.
Step 3: Remove connector by pushing down on tab and pulling. Set light aside, it will be used later during installation. Place connector and wires off to side to not interfere with Tire Carrier installation.
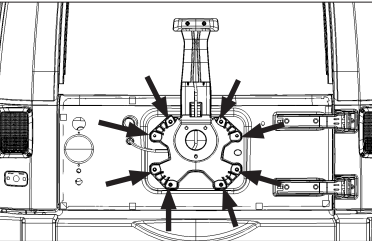
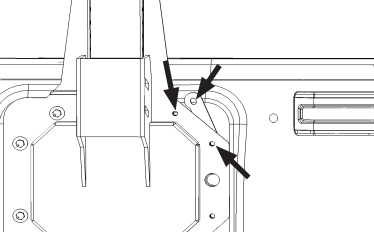
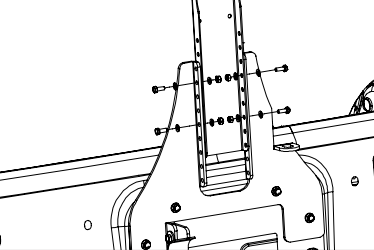
Step 4: Remove the stock tire carrier and brake light holder by removing the 8 bolts indicated using a 13mm socket.
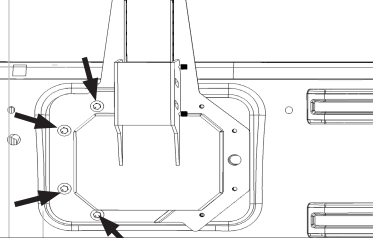
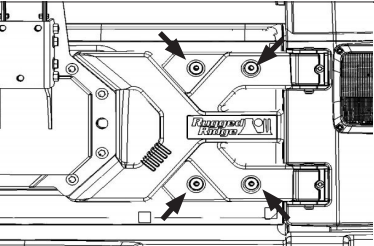
Step 5: Position Wheel Mount Main Plate in place on the tailgate. Use a 13mm socket to loosely thread 4 of the supplied M8 bolts and washers on the left side of the Wheel Mount. Do not fully tighten.
Step 6a: If using the stock tailgate hinges, slide spacer plate between tailgate and top right corner of Wheel Mount. Loosely install M8 bolts and washers with a 13mm socket. Repeat for bottom right corner. Fully tighten all 8 bolts.
Step 6b: If using with the HD Hinge Casting (part# 11546.51), no spacers are required. Position Wheel Mount and install and fully tighten all 8 M8 bolts and washers in steps 5 and 6A with a 13mm socket. Then, with the 13mm siocket, install the 4 hex bolts and washers, included with the HD Hinge Casting, at indicated areas to fasten the hinge body to tailgate. Use red thread locker on bolt threads prior to installation, and fully tighten bolts before thread locker dries.

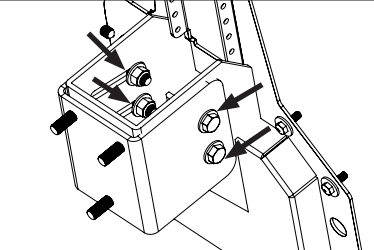
Step 7: Slide Lug Plate onto main carrier plate.
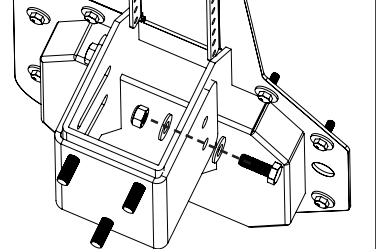
Step 8: Using a 19mm wrench and socket, loosely secure the Lug Plate to the Main Plate with the supplied M12 Hardware. Do not fully tight yet. Bolts shouls be tight enough to prevent Lug Plate from moving freely, but loose enough to manually adjust it’s position and orientation.
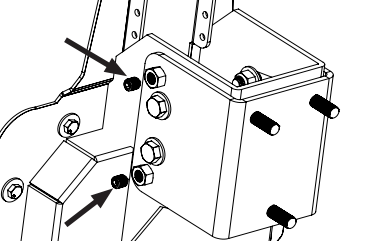
Step 9: Install spare tire and lug nuts onto Lug Plate. Manually adjust position/angle of the spare tire. Install and tighten 2 set-screws using a 6mm allen wrench to hold Lug Plate in position.
Step 10: Using a 10mm wrench and socket, install Brake Light Extension using supplied M6 bolts, washers, and nylon lock nuts.
Step 11: Gently remove spare tire, making sure lug plate does not change position. Fully tighten all four M12 bolts/nuts to secure lug plate to Main Plate using a 19mm wrench and socket.

Step 12: Once Tire Carrier installation is complete, before installation of spare tire, reconnect wires to factory third brake light by pushing connector until it clicks.
Step 13: Install factory third brake light to Brake Light Extension using provided #10 screws and phillips head screwdriver. Long screws are for top two holes. Short screws are for bottom two holes.
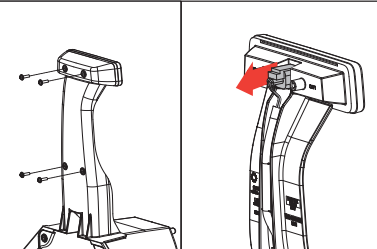
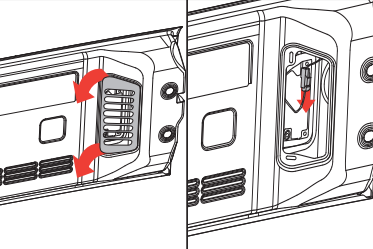
Step 14: Open tailgate and remove plastic vent by pulling on left side until clips release.
Step 15: Unplug connector by pushing in tab and pulling down.
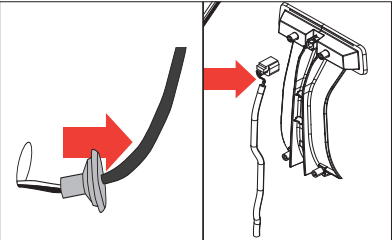
Step 16: Remove rubber grommet in tailgate. Hold grommet tightly in one hand, and pull the wire through the grommet to increase the length of wire that is coming out of the grommet.
Step 17: If the wire is still not long enough, additional wire must be spliced in using the supplied wire and connectors. In the section of wire between uppermost connector and mesh cover, use wire cutters/ crimpers to cut and splice in additional wire length.
Step 18: Reinstall rubber grommet in tailgate. Reconnect wire connector inside tailgate. Reinstall plastic tailgate vent.
Step 19: Install spare tire and supplied lug nuts back onto tire carrier. Use a torque wrench with a 3/4” deep socket to tighten the lug nuts to 80 lb/ft.

