FREE 1 to 3-Day Delivery on Orders $149+ Details

How to install a Rugged Ridge Soft Top Spring Assist Assembly on your 2007-2012 Jeep Wrangler JK
Installation Time
30 minutes
Tools Required
- T27 Torx driver
- T20 Torx driver
- 5mm Hex key and 2.5mm Hex key
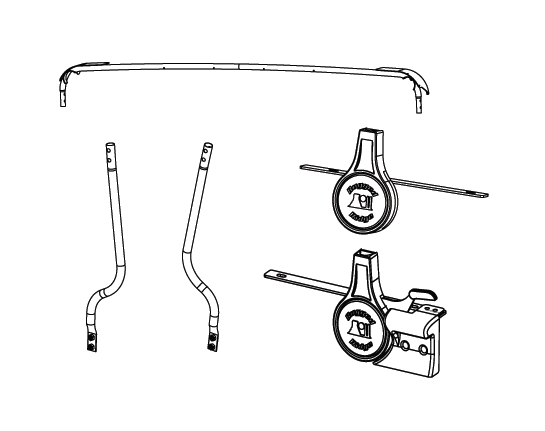
Contents:
• Bow (1)
• Right-hand Arm (1)
• Left-hand Arm (1)
• Right-hand Spring Assembly (1)
• Left-hand Spring Assembly (1)
• Hardware Bag (1)
4 x M8 Flathead Bolts
8 x M8 Buttonhead Bolts
4 x M8 Locknuts
4 x M8 Nut Plates
4 x Flat Washers
4 x Self Tapping Bolts
1. Remove fabric side windows and rear window from soft top. Unlatch front header to remove tension from soft-top
2. Remove screws attaching soft-top flaps to rear-most bow.
3. Flip soft-top fabric towards the front of the vehicle to expose the C-Pillar bow.
4. Drill out rivets attaching nylon support strap to bows using a 1/8” bit.
5. Unscrew C-Pillar bow from soft-top fabric.
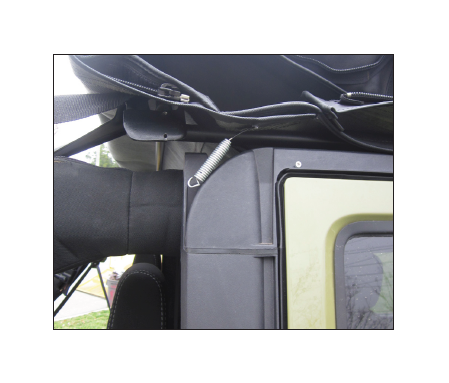
6. On 2010-2012 model year vehicles, remove the fabric cover and disconnect the soft-top’s cable by unhooking the spring.
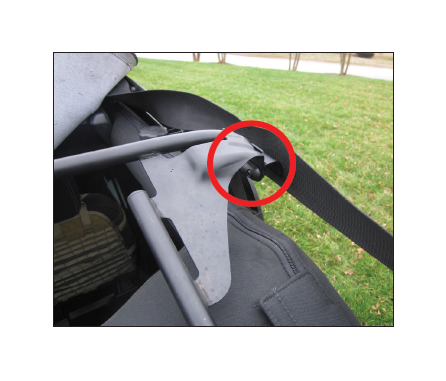
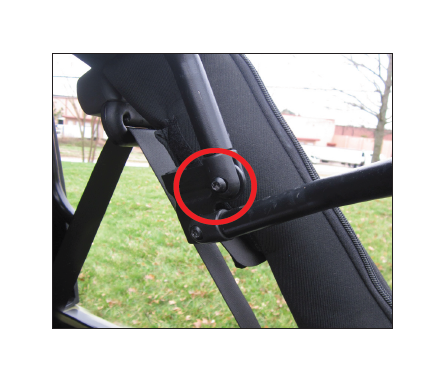
7. Disconnect the C-Pillar bow from the tube ends using a T-27 Torx bit. Retain factory fastener which will be reused in step 14.
8. Disconnect the C-Pillar bow from the roll bar attachment bracket.
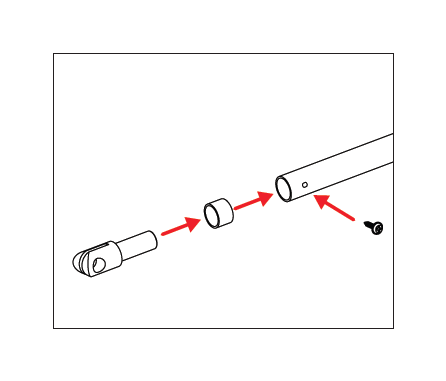
9. For 2007-2009 model year, remove the bar ends from the soft-top tubes . There is a small self tapping set screw that must be removed first. Insert the spacers onto the bar end and reinstall into the tube. Screw the set screw back in into the tube.
9. Attach Left-Hand arm to the Left-Hand assembly using the supplied M8 flat head bolts. Repeat for right side with right-hand assembly and right arm.
Note: The arms should bend towards the front of the vehicle.
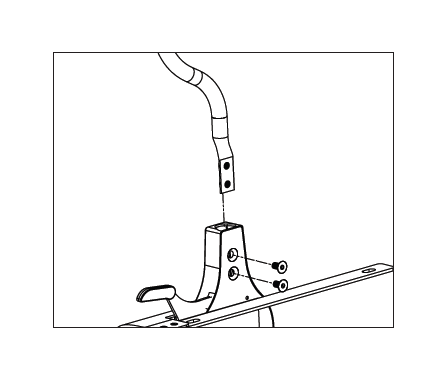
10. Remove Pawl Housing from the Left-Hand assembly.
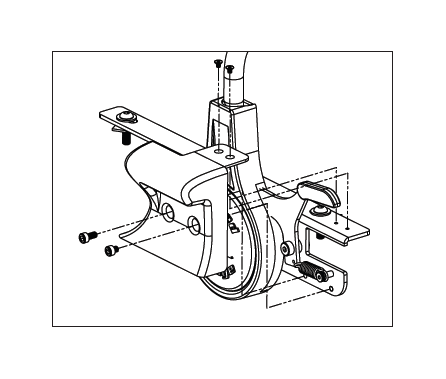
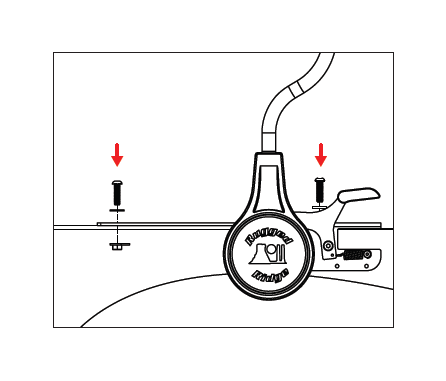
11. Install Left-Hand assembly to the body tub using M8 button head bolts, washers, and nut plates. Repeat for the right-hand side. Re-attach the pawl housing to the left hand assembly.
Note: It may be useful to hold the nutplates with a wrench to ease installation.
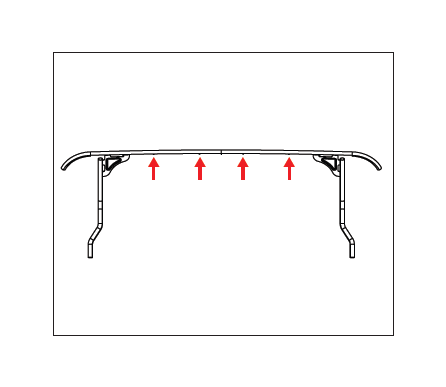
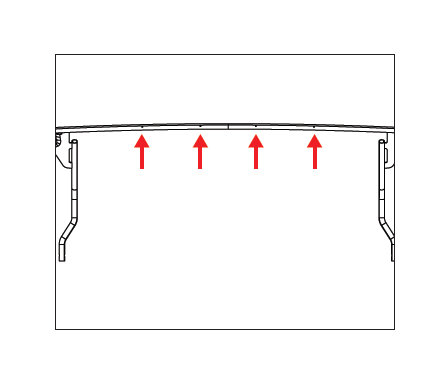
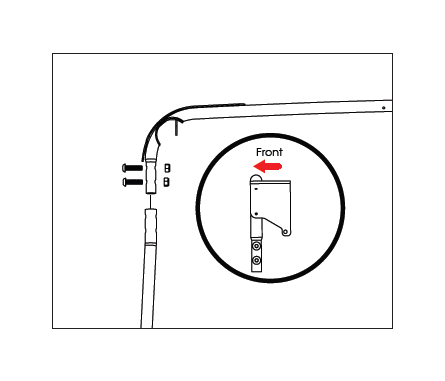
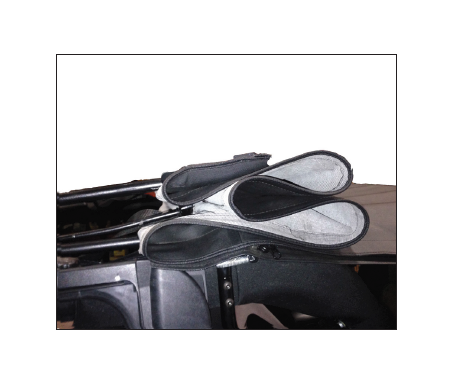
13. Attach bow to the left and right arms using the supplied M8 button head bolts and lock nuts.
Note: Ensure the nylon support straps in step 4 are over the bow. The tube portion of the bow should face the front of the vehicle as shown in the image.
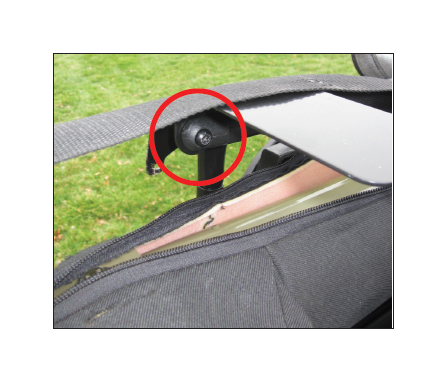
14. Attach the new bow to the tube ends disconnected in Step 7 using retained factory T27 fasteners.
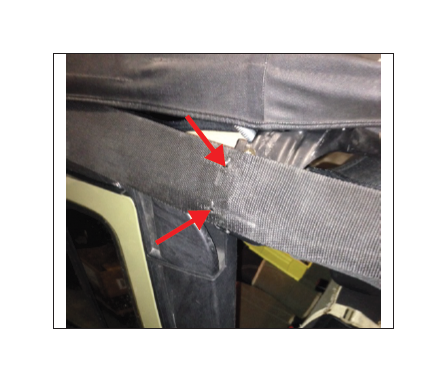
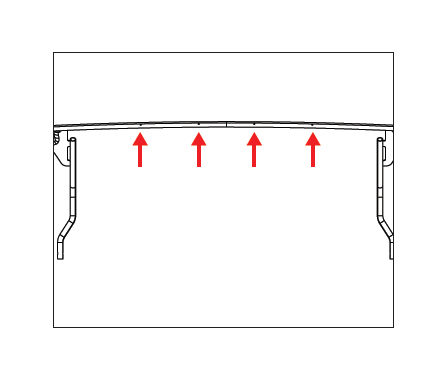
15. Using the supplied self tapping bolts. Secure the nylon support strap to the sides of the bow. The bow has pilot holes already drilled in the correct locations. However new holes will have to be made into the nylon support strap. Use a punch to create pilot holes into the strap.

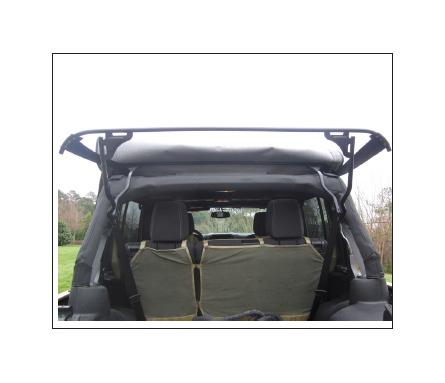
16. Fold soft-top back into correct position and attach the fabric to the spring assist bow and rearmost bows the same way as they were removed in steps 2 and 6 using the supplied self-tapping screws.
Note: The holes in the fabric and bow may not align perfectly. It may be necessary to stretch the fabric or to punch new holes to match the pre-drilled holes in the bow.
Spring Assist Top Operation: The soft-top functions the same as a factory top; side windows must be removed, rear corners disconnected, rear window unlatched, and header unlatched before lowering the top. Refer to your Jeep’s user manual for correct prodecures. Also, ensure
the fabric is folded correctly in the sun-rider position. binding will occur otherwise.
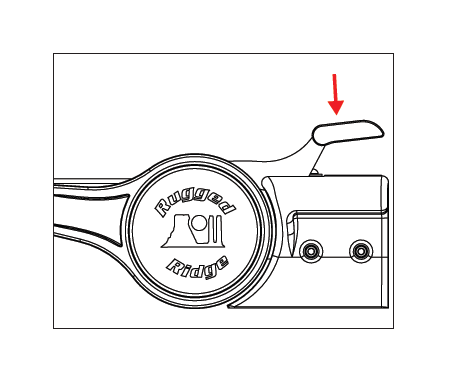
When in the down position, ensure the mechanism locks into place. To unlock the mechanism push down on the pawl lever.
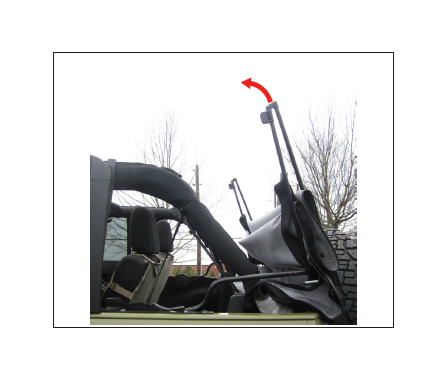
With the system unlocked, rotate the frame into the position shown and pull the soft-top over the roll bars. Ensure the factory bars slide correctly into the plastic surround
channel and lock into place.