 FREE 1 to 3-Day Delivery on Orders $149+ Details

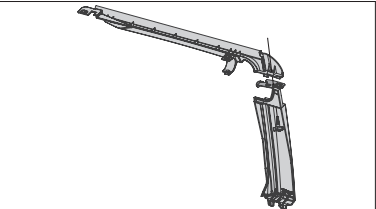
How to Install a Rugged Ridge Exo Top on your Jeep Wrangler
Installation Time
4 hours
Tools Required
- Phillips head screw driver
- Torx bit socket wrench (T30)
- 5mm, 6mm Allen Keys
- 13mm Socket
- Torque Wrench
- Sealant (black Permatex, or similar)
- 6mm Allen Key
- 13mm Socket Wrench
- Marker
- Hobby Knife
- Flat head screwdriver
- Phillips head screwdriver
NOTICE: Carefully read and understand all instructions before proceeding. We recommend you save all parts and hardware if you ever choose to re-install the factory top.
Section A - Preparing for Installation; Removal of Factory Top
1. Soft Top owners: Refer to owners’ manual for instructions on lowering factory top. Once lowered, unscrew shoulder bolts fastening it to vehicle’s roll bars. Remove canvas from assembly.
Hard Top owners: Refer to owners’ manual for instruction on removing factory hard top. Skip to STEP 4 once hard top is removed.
Hardtop owners will need to purchase a factory header, tailgate bar, and tailgate bar retainers (LH, RH).
NOTICE: These factory parts are required:
Header - 68049276AB
Tailgate Bar - 55395757AC
Tailgate Bar Retainer, RH - 55395760AB
Tailgate Bar Retainer, LH - 55395761AB
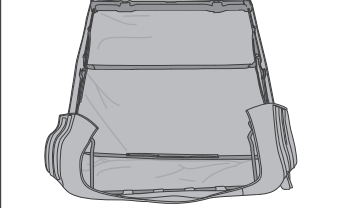
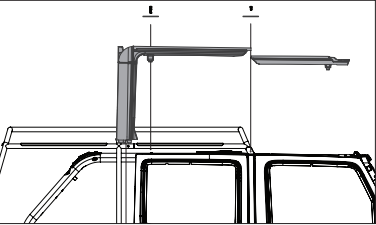
Note: After removing header and factory soft top, place assembly on ground as shown on right.
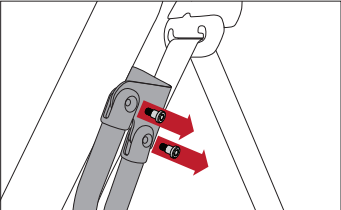
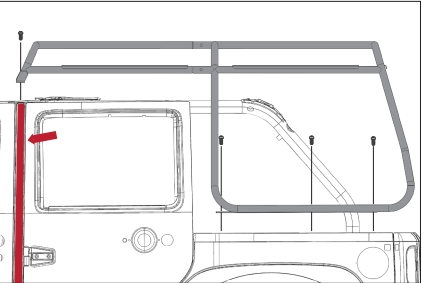
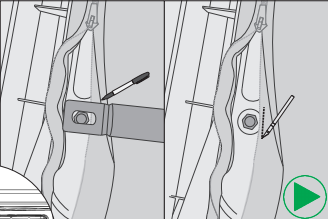
2. Remove front and rear door surrounds from each side of vehicle.
3. Remove metal soft top mounting brackets attached to roll bar in cargo area.
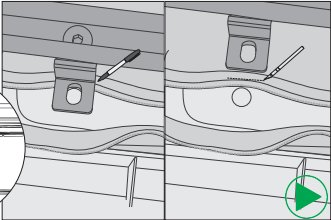
4. Remove screws from underside of header at each end that attaches fabric tabs.
NOTICE: Do not discard screws, they are reused in later steps.
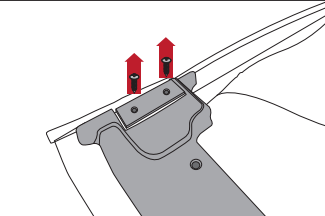
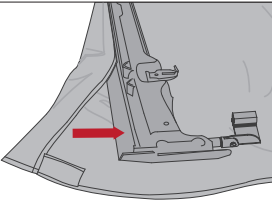
5. Flip header and fabric and remove screws from top of header at each end. You will now be able to remove OE soft top frame.
6. Loosen all screws from top side of header. Do not remove completely.
7. Release fabric from header. Keep header and all hardware for soft top installation.
NOTICE: Carefully read and understand all instructions before proceeding. Ensure all components and hardware are provided before beginning. We recommend two people for this installation.
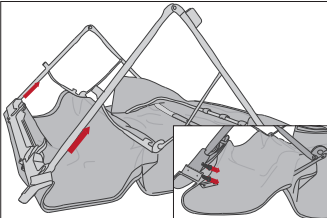
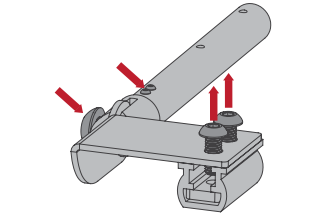
1. Assemble cage as shown in diagram above, adding sealant to all joints, as shown on right.
2. Insert M8 bolts to joint areas, securing with M8 Nylon Hex Nuts
NOTICE: Do not fully tighten bolts at this time to allow for adjustments fir correct fitment to vehicle.
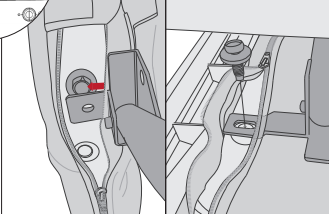
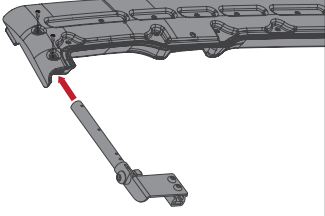
3. Align rear cage brackets with bolt holes on tub.
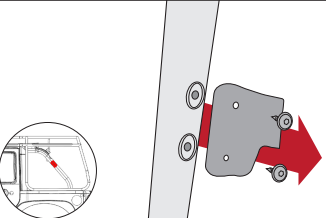
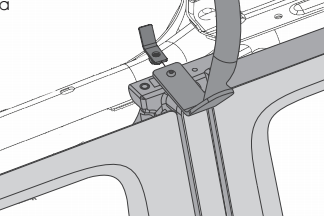
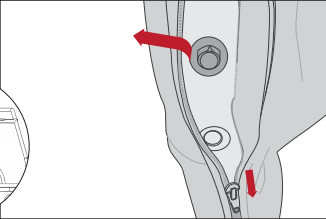
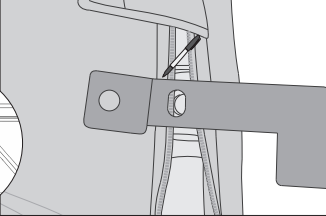
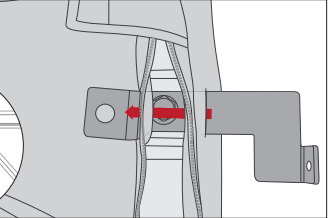
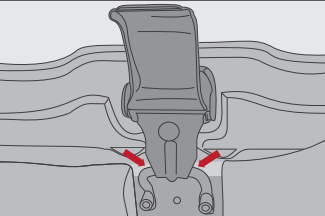
4. Center Side Bar brackets with B pillar, indicated by arrow on right.
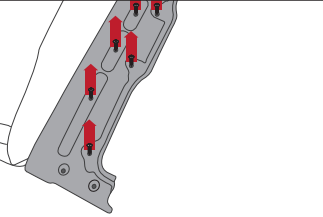
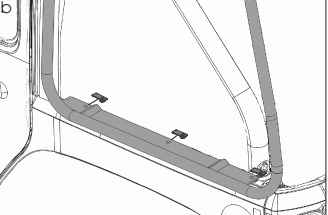
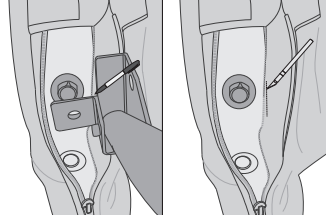
5. Attach cage to frame using provided M10 bolts and nutplates. Angled nutplates will be used at B pillar as shown in figure a; fiat nutplates will attach to cage, as shown in figure b. Fully tighten bolts to 25 lbs.
CAUTION: Nutplates can fall down B pillar, use tape to cover hole when installing this bolt.
Section C - Surrounds Assembly and Installation
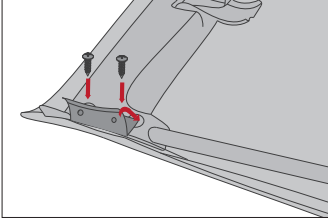
1. Attach rear upper surround to rear lower surround, placing seal in between; secure with provided M8 knob. Repeat for other side.
3. Install front and rear surround assembly onto frame. Front surround will go on first.
4. Bolt rear using long M8 bolt and M8 washer and mid-point using short M8 bolt and M8 washer. Front bolt will be installed later.
5. Repeat for other side.
Section D - Bow and Slider Installation
NOTICE: Carefully read and understand all instructions before proceeding. We recommend two people for this installation.
2. Align rear bow assembly, as shown on below, with mounting bolts on rear roll bar, mark line approximately 2” on fabric, and make cut to accept mounting tab of rear bow assembly. Repeat for other side.
3. Align front bow assembly, as shown below, with mounting bolts on front roll bar, mark line approximately 2” on fabric, and make cut to accept mounting holes of front bow assembly. Repeat for other side.
4. Install front and rear bow assemblies to rollbar using factory bolts.
NOTICE: Test quick release function on bow before moving to next step.
NOTICE: For right hand drive vehicles, front bow assembly can be reversed so quick release is on right side for ease of operation.
7. Align rail brackets with correct side and placement on rails and loosely attach with M8 Flathead bolts. The distance between front and middle holes will be greater than middle to rear.
5. Align rear rail bracket on rear rollbar mounting bolt, mark line approximately 2” on fabric, and make cut to accept rear mounting holes of rail assembly. Repeat for other side.
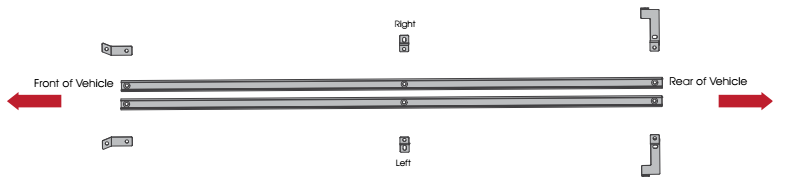
8. Align mid-rail bracket with middle mounting bolt on rollbar, mark line approximately 2” on fabric and cut middle points for rail installation.
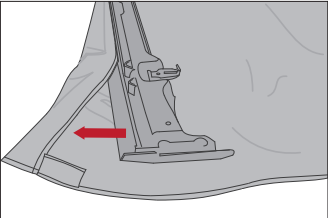
6. Install rail assembly. Slide brackets through rollbar pad from outside of vehice as shown on right and attach using provided M8 Long Socket Cap Bolt.
9. Install front moutning hole of rail using provided M8 Short Socket Cap Bolt.
10. Loosen Allen bolts to allow for testing of fitment. Bolt on side will need to be tightened.
CAUTION: Two small bolts on carriage tube need to be checked for tightness before installation
11. Install slider carriage to rail. Cycle slider carriage through rail and adjust bolts as necessary to ensure easy sliding.
12. Install slider carriage assembly to header using factory screws from top of header; slider carriage assembly will face inward as shown. Do not install lower factory screws.
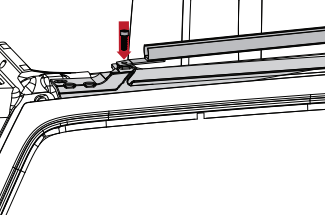
13. Install header-slider carriage assembly to rails from rear of vehicle.
14. Slide header-slider carriage assembly to front of vehicle and latch header hooks. Latch should be centered in middle of loop.
15. Ensuring cage is centered between front and rear surrounds, tighten all surround and rail bolts.
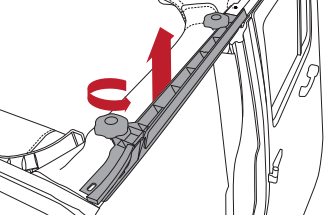
16. Cycle header-slider assembly to ensure smooth operation and correct assembly. Remove header-slider carriage assembly to prepare for soft top installation.
Section E - Soft Top Assembly and Installation
NOTICE: Carefully read and understand all instructions before proceeding. We recommend two people for this installation.
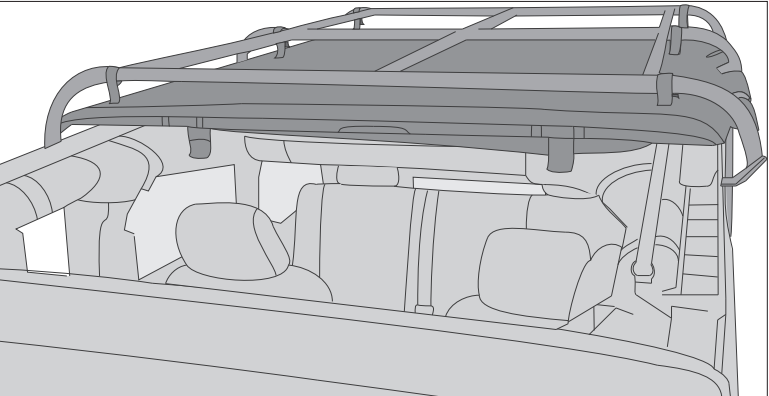
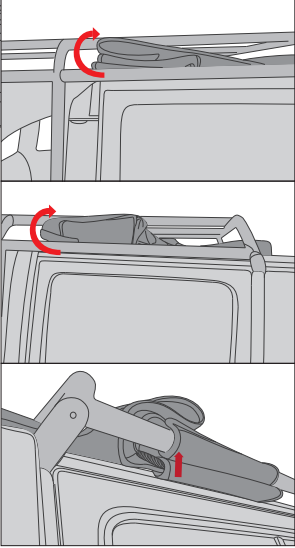
1. Install Soft Top Fabric to Header, tighten all remaining header screws.
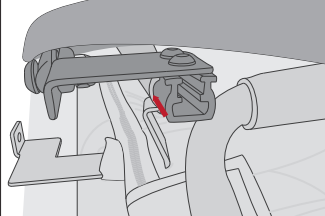
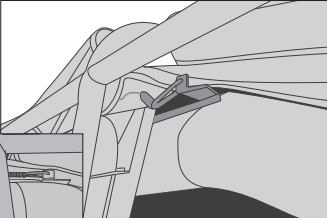
NOTICE: Ensure channel in soft top has cleared lip in header. Tab on header will remain on outside of fabric as shown on right.
2. Fold fabric flap over metal tab (connected to cable) and attach to header using factory header screws.
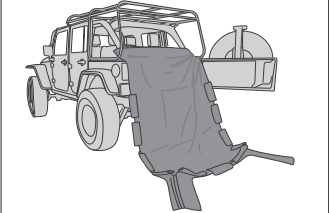
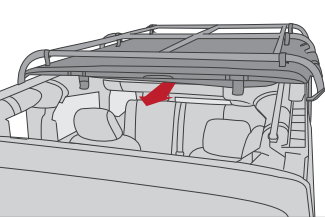
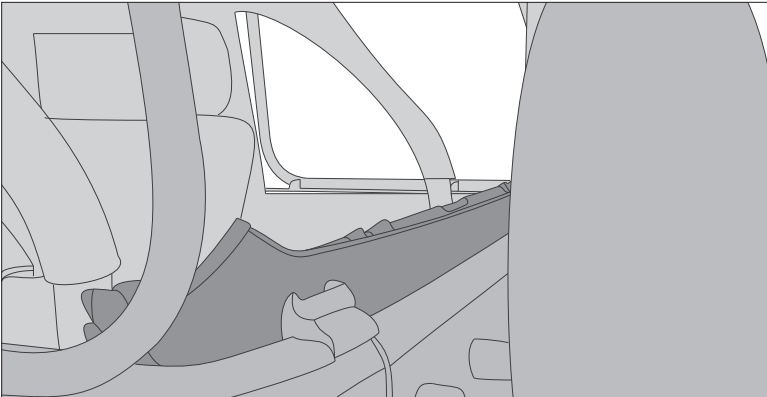
3. With help from second person, position header and soft top fabric in rear of vehicle, as shown on right, to prep for installation.
4. Loosely attach rear Velcro flaps to lower rear bar of cage.
4. Loosely attach rear Velcro flaps to lower rear bar of cage. 5. With help of second person, slide header-slider carriage assembly into rail.
6. Carefully slide entire assembly to forward to soundbar. Slide fabric carefully to avoid snagging.
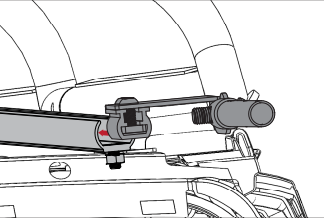
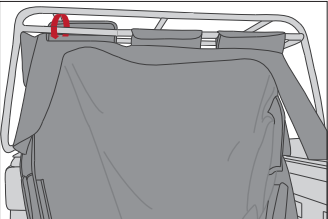
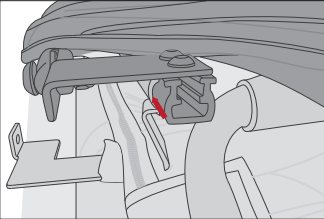
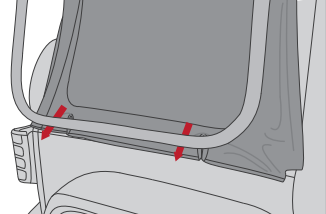
6. Attach carabiner and spring cable to rear slider bracket. Ensure cable is positioned outside the slider rails, near the rear door, as shown below. Header can now be locked into place. Ensure attachment ring is tight by squeezing ring with pliers
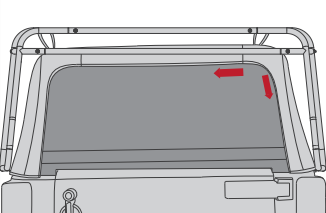
7. Pull header forward and secure to windshield.
8. Loosely attach side Velcro straps.
9. After tightly securing rear Velcro, flip and lock front and rear bow assemblies in upright position. Secure center Velcro strap.

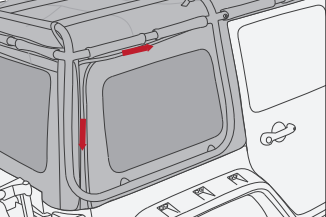
10. Lock rear fabric into corner of body tub as shown. Tighten top rear Velcro loops to secure fabric.
To install side windows:
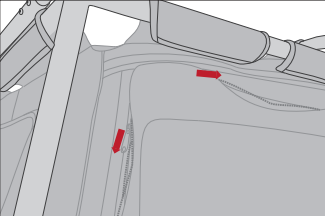
11. Start rear zipper first, then top zipper, only zipping 3-4 inches.
12. Slide window toward front of vehicle between cage and surrounds. Lower cutouts over support bracket.
13. Insert side rail plastic retainer by rear door.
14. Fully zip top zipper, then fully zip rear zipper.
15. Insert bottom plastic retainer in body tub.
16. To install rear window:
Zip top zipper first, then sides.
Install Tailgate Bar to channel in rear window.
17. Attach top Velcro loops.
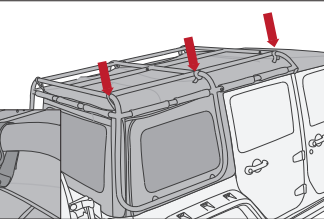
18. Walk perimeter of vehicle and fully tighten all large side Velcro straps to ensure top is tensioned correctly.
Operating Procedure
CAUTION: Do not attempt to operate the Rugged Ridge® Exo-Top while vehicle is in motion.
All operating instructions can be found in further detail in Instructional Video.
SUN SLIDER
1. Unlatch hooks from front header bar.
2. Lower front sound bar bow.
3. Slide header bar to sound bar.
4. Tuck fabric under first cage bar and header.
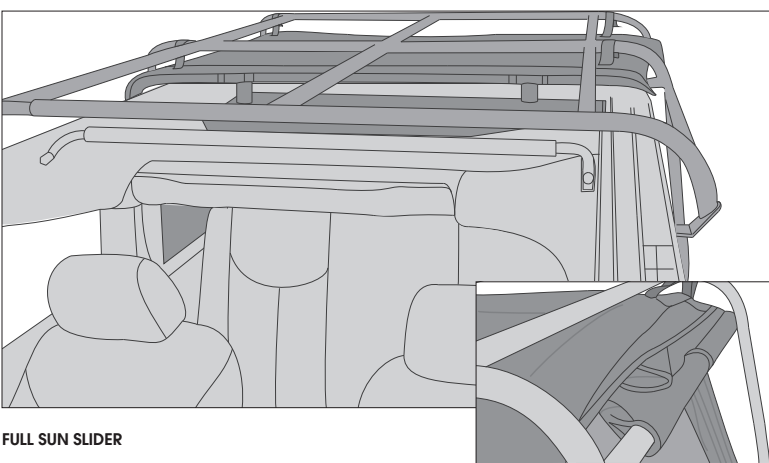
FULL SUN SLIDER
1. Undo first and middle row of top vel- cro and first two side velcro flaps from cage. Release carabiner and cable.
2. From Sun Slider position, slide header back to second cage bar.
3. Tuck excess fabric under second cage bar and header.
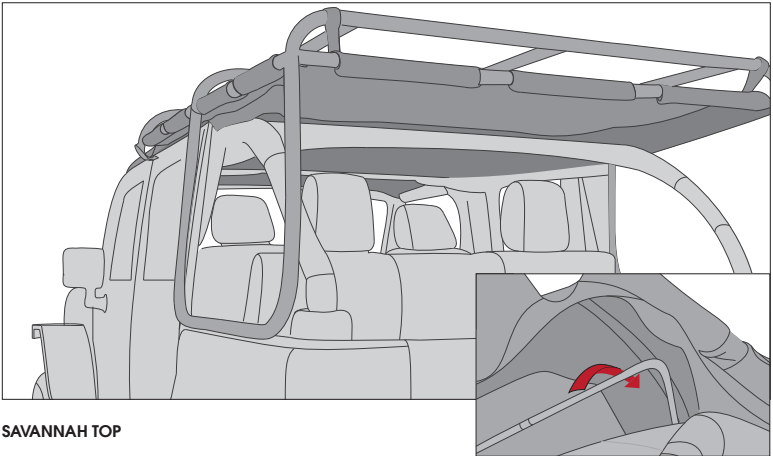
SAVANNAH TOP
1. Keeping header bar attached in front, remove windows
2. Rear corner panels are tucked above rear soundbar.
HALF SAVANNAH TOP
1. Remove rear windows.
2. From Full Sun Slider position, slide header to rear-most position. Do not allow header assembly to slide out of rails.
3. Fold fabric to rear cage bar.
4. Front velcro straps may be attached to rear cage bar for security.
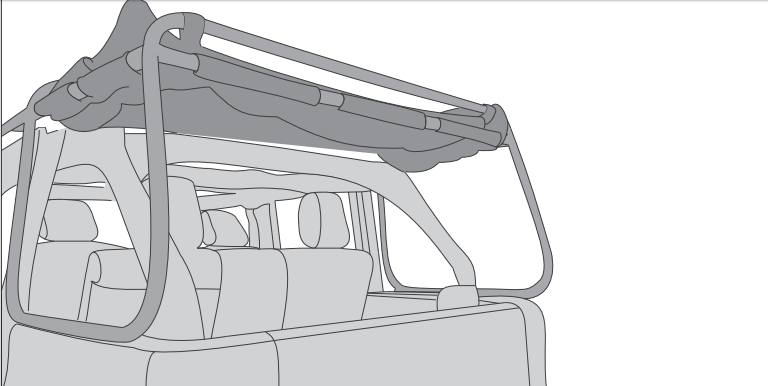
FULL ROLL OVER SOUNDBAR
1. Remove all windows and Velcro straps.
2. Slide header back to front seat sound bar and disconnect carabiner and spring.
3. Undo rear bow strap, do not lower bow.
4. Begin folding rear fabric to front of vehicle.
5. Once folded, spring and carabiner can be tucked into side flap.
6. Rear side flap can be attached to cage as shown on bottom right.
FULL ROLL OFF RAILS
1. Remove all windows and Velcro straps.
2. Undo rear bow strap, do not lower bow. Disconnect carabiner and spring.
3. Slide header back and over rear bow, off slider rails.
4. With tailgate open, fold fabric.
5. Close tailgate and rest header on tailgate or rear rollbars.
Care and Maintenance
In order to maintain its appearance and increase longevity of use, your Rugged Ridge® EXO-Top will need periodic cleaning and maintenance.
Slide Assemblies, Bows, and Arms: Regularly clean all slide assemblies, bows, and arms. Regularly clean and lubricate all joints with WD-40®.
Fabric: To preserve a quality fit, do not keep EXO-Top in a folded position for extended periods of time. When cleaning EXO-Top, fabric should be washed with mild soap, warm water, and a soft bristle brush. Use clear water to rinse to ensure all soap has been removed. If a rip or tear occurs in fabric of your cnavas, repairs can be made with Bondex®. On the inside of your canvas, iron on Bondex® where rip or tear occurred. For further information, read instructions provided with Bondex®.
Windows: Ensure windows are kept clean to avoid scratching. Do not wash with brush, as this will cause scratching. Wash windows with a watered-down cloth or sponge. Do not clean windows while they are dry, this will cause scratching. Use caution while cleaning in low temperatures as windows will be more susceptible to scratching and cracking. Do not roll up windows in low temperatures as this will cause windows to stiffen and crack. Windows should be clean when rolled up.
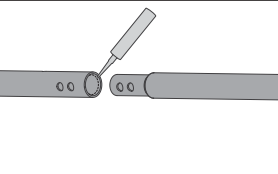
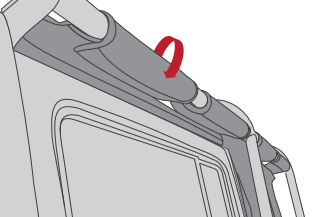
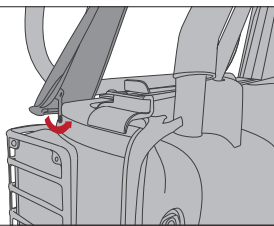
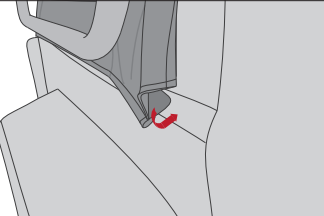
Zippers: Keep zippers clean and lubricated to provide smooth operation. If a zipper opens after fully zipping your EXO-Top, a slider may be defective, but repairable. In this case, pull slider to the end and open position. Using a pair of pliers, carefully clamp down on your slider as shown on right and close zipper again. If problem persists, try clamping down on slider more firmly, then closing your zipper again.
Water: If water begins to seep through fabric seams, use 3-M Scotchgard® on inside of fabric to prevent further seeping.
