Installation Time
(approx) 3 Hours
Difficulty Level:
Mechanical expertise or professional installation required.
FREE 2 or 3-Day Delivery on 10,000+ Items. Details
$99.95 (kit)
FREE Shipping on orders over $119 Market Price $116.99 You Save 15% ($17.04)Saved - View your saved items
We're sorry. We couldn't save this product at this time.
or use
Hey, guys, it's Sara with extremeterrain.com. And today, we have a review and install of the Rough Country 2.5 Suspension Lift Kit, fitting your 2020 and newer Jeep Gladiator JT. This kit will work well for the Gladiator owner who wants a budget-friendly leveling solution to give them some more room for wheels and tires and level out that factory rake. This kit provides 2.5 inches of lift, thanks to the 2.5-inch spring spacer you see here. This will give your Gladiator a more level appearance and maintain factory ride quality. Now, depending on your model or year, stock tire sizes may vary. Our Gladiator has a 31-inch tire stock, which is what you will see in this video. And with this kit installed, the manufacturer notes you can fit up to a 35-inch tire. However, you may see some rubbing when you take your Gladiator off-road. We have installed 33s as well as 35 so you can see both sizes and get a better idea for yourself. These spring spacers feature durable polyurethane construction with a nice black finish and utilize your factory springs and shocks to maintain that ride quality. They also include all the mounting hardware you need for installation.So, as far as price goes, this kit comes in at around $150, making it one of the most budget-friendly ways to get a more level appearance to your Gladiator and make some more room for wheels and tires. And as far as the install goes, I'm giving this one a three out of three wrenches on the difficulty meter. It does feature a direct bolt-up install and can be done within three hours, but make sure you get that professional alignment afterwards. With that said, let's check out our install. For this install, we used an impact gun, but a regular hand ratchet will work just fine. You'll also need 14 and 18-millimeter wrenches, 22, 21, 19, 18, 15, and 14-millimeter sockets. You may want a small extension. You'll need a small flat-head or a pop clip removal tool, a pair of cutters, and a pair of needle-nose pliers. All right, so we have our Gladiator in the air and we're supporting the axle with pole jacks. You can use a jack and jack stands as well if you do not have a lift. As long as you're supporting that axle for when we start to disassemble, that's all we're looking for. Next up, we also have the wheel turned slightly towards the passenger side so we can have access to this track bar bolt. There's a 21-millimeter bolt that holds on the track bar. With our socket and a small extension, we're going to get this removed. Next up, what we're going to do is remove the sway bar end link. We're going to start with the nut up top. Grab an 18-millimeter socket and go ahead and get this removed. Next up, on the other end of our end link, grab an 18-millimeter socket and get this bolt removed. You may need to hold the flag nut in place on the other side to continue to loosen it. And now with the bolt out, you can go ahead and remove this end link.Next up, we're going to remove the lower shock bolt. With an 18-millimeter wrench and an 18-millimeter socket, go ahead and get this removed. Now what we can do in order to get this bolt out a little bit cleaner is go ahead and raise up on the axle and the bolt should come right out. And after the shock bolt, we're also going to remove this nut here for this brake line bracket to give our brake line enough room to drop down. Grab a 15-millimeter socket and get it removed. Next up, we're going to unplug and disconnect both of these pop clips holding on our 4 by 4 actuator connector and line. With a pop clip removal tool, go ahead and remove both of these pop clips. And with both of those pop clips disconnected, we can disconnect the four-wheel-drive actuator connector. I'm just using a flat-head to pull back on this clear or white tab. You can use your hand or nail if you like as well. Press down and pull to disconnect. And now we moved over to the driver side. We're right above the pumpkin here and we need to disconnect this breather line. So with a set of needle-nose pliers, we're just going to pinch this clamp and wiggle the line off. All right. So because this is a straight axle truck, it may be easier to do both sides simultaneously. At this point, catch up the other side where this side is at, and then we'll lower down the axle, both sides at the same time, until we can remove our spring. Because our sway bar is completely disconnected, we can grab it and push up so it's out of the way. Lower the axle as much as we need to. Again, keep an eye on those brake lines. Make sure you're not putting too much tension. Lift up on the spring and go ahead and remove it. And you're also going to remove the rubber isolator from on top as well.Now, before we can get the spacer installed, we do need to modify this rubber isolator slightly. So, as you can see, when this sits on here, it can't really sit well with these two nipples in place, so what we're going to do is cut these off. You can use just a regular pair of cutters, or if you happen to have a pair of flush cutters lying around, that will get a lot cleaner and flatter of a cut. So I'm going to go ahead and use the flush cutters. Basically, all you're doing is taking this down to as flat as you can get it with the rubber isolator. Repeat that with the second nipple. And now we can get the spacer installed. The spacer sits on top of the rubber isolator and the spring will go back into its factory location right under that isolator. Follow it up with the spring. You may need to lower a tiny bit more in order to clear that factory bump stop. Now that we have the spring seated in place, before we tighten anything down, we're going to make sure to get the bump stop extension in there. I did this in two steps just because it is a little bit easier than trying to do it all at once, but basically, pop your spring off the bottom, slide that bump stop extension in the center there, then go ahead and let your spring rest back down.Now we're going to use the included hardware. You want a washer as well as your hex bolt through this bump stop extension. And I'm using a 14-millimeter wrench to go underneath and line up the bolt. Then with 2/14 or 9/16 wrenches, go ahead and tighten this down. And now that we have the bump stop extension in place and tightened down, we can install the shock mount extension. Go ahead and slide the bracket over top of the factory shock mount, and with your 3/8 hardware, go ahead and thread it in. Now, if it doesn't want to go in cleanly, you can drill this hole out, but it looks like our hardware is going to go in just fine. And then once you have that bolt in, go ahead and install a washer and the nut on the bottom. And then we can install the factory hardware into where the factory bolt would mount. So what you're going to do is install that crush sleeve in between, grab the factory bolt, line it up all the way through, and install the factory nut on the other side. Now, first, we're going to tighten down this lower bolt using a 14 or 9/16 socket and wrench. Go ahead and tighten it down. Then tighten down your factory bolt as well with an 18-millimeter wrench and socket. Now, at this point, make sure your other side is caught up to this point and you have both spring spacers installed, both bump stops installed and tightened down, and both shock mount extensions installed. And now you can raise your axle simultaneously on each side and start to line up your factory shock. So you're going to be lining up your shock with that opening in the extension. Let's go ahead and line it as you raise up. And once you have it fully lined up, grab the included hardware with a washer and the included nut, and get it installed through your shock. Then with an 18-millimeter wrench and a 19-millimeter socket, tighten it down.And before we can get our new end link installed, I want to check it out side-by-side with your factory so you guys can see the differences. Now most obvious is that this one is longer than your factory. So this doesn't actually provide any lift but it is a nice feature to have over kits that don't offer one that's longer. It also features metal sleeves, as well as bushings on both ends and it gets rid of that ball joint. So, with that said, let's go ahead and finish up our install by installing this end link. Go ahead and pull that sway bar back down if you did have it up to clear the spring. Go ahead and install that end link. Ensure that you have the proper side that lines up with both the factory mounts and the top sway bar. Go ahead and reinstall your factory hardware on the bottom and install the included hardware up top with your washer and lock nut. Then with your 18-millimeter socket, you can tighten down that factory bolt, and then with your 18-millimeter socket and wrench, go ahead and tighten down the hardware on the top. Once everything is fully installed, make sure you reinstall the brake line bracket with the factory nut. And with your 15-millimeter socket, tighten it down. Also, reattach the pop clips for the four-wheel-drive actuator line, then plug the four-wheel-drive actuator back in and make sure you press in that white tab. And make sure you also reinstall your breather line on the driver side. We're using our needle-nose to compress the clamp and then we're just sort of working it in place.All right. So we have our Jeep on the ground. We have the wheels on it, and the last thing that we're going to do is install the bolts into the end of our track bar. Now we have a friend helping us inside the Jeep so we can line this up. So we're going to go ahead and have them turn the wheel. And once your track bar is lined up, go ahead and slide your bolt through. And make sure that you're lining it up with the factory nut as well. Go ahead and thread it in. And once that's fully installed, you can grab a 21-millimeter socket and tighten it down. And now that we have our passenger side all buttoned up, if you haven't been doing them simultaneously, make sure you catch your driver's side up to this point as well. Make sure all of your bolts are torqued to spec and you get a professional alignment straight afterwards.But that is going to do it for the review and install of this leveling kit, and remember for all things Gladiator, keep it at extremeterrain.com.
Subscribe to our YouTube Channel
Features, Description, Reviews, Q&A, Specs & Installation
Brand | Rough Country |
Leveling Kit Location | Front |
Leveling Kit Lift Height | 2.50 Inch |
Leveling Kit Includes Shocks | Shocks Not Included |
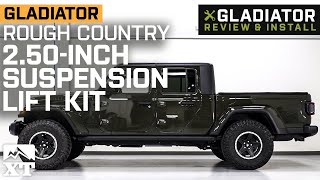
Improved Off-Roading Capabilities. Boost your Jeep Gladiator’s stance and handling by means of the Rough Country 2.50-Inch Leveling Kit. This suspension upgrade includes high-quality coil spacers, suspension links, sway bar links, and bump stops to ensure a commanding stance and enhanced off-road performance with factory-ride driveability.
High-Quality Coil Spacers. This 2.50-Inch Lift System comes with heavy-duty coil spacers for reinforced ground clearance, while maintaining a comfortable ride. Made of premium steel, this pair of durable spacers is built to withstand the elements and the harshest of off-road hazards. It also allows enough ride height to run larger tires for a bolder off-road experience.
High-Strength Bump Stops and Sway Bar Links. To ensure superior stability, this lift kit includes high-strength, CNC-machined bump stops and sway bar links. The sway bar links keep your vehicle from leaning too much and provides superb stability, especially during turns. The bump stops were designed to limit the upward movement of the axles and keep the larger tires from rubbing the fender. In addition, they also absorb the rebound energy that is created when the suspension compresses and bottoms out.
Professional Installation Recommended. The installation of this Leveling Lift Kit requires mechanical expertise for optimum results. The components bolt to your vehicle’s factory mounting locations and include all the necessary hardware for a hassle-free process.
Limited Warranties. This 2.50-Inch Leveling Lift Kit is backed by a limited lifetime warranty. This warranty covers manufacturing defects in materials and workmanship under normal use. Some exclusions may apply; please check the terms and conditions for full details.
Application. The Rough Country 2.50-Inch Spring Leveling Lift Kit is specifically designed to be used on all 2020-2023 Jeep Gladiator JT, excluding Mojave models.
Fitment:
Rough Country 63400
CA Residents: WARNING: Cancer and Reproductive Harm - www.P65Warnings.ca.gov
Installation Info
Installation Time
(approx) 3 Hours
Difficulty Level:
Mechanical expertise or professional installation required.
What's in the Box
10 More Questions