 FREE 1 to 3-Day Delivery on Orders $149+ Details

How to Install RedRock 4x4 Stubby Front Bumper w/ LED Fog Lights & Winch Mount (07-18 Jeep Wrangler JK) on your Jeep Wrangler
Installation Time
2 hours
Tools Required
- Ratcheting Wrench or Impact Wrench
- T25 Hex Bit
- T30 Hex Bit
- T40 Hex Bit
- Socket Extension
- 8mm Socket
- 13mm Socket
- 16mm Socket
- 18mm Socket
- Flathead screwdriver or plastic Pry Bar
- A good friend or 2 helps tremendously
Pre-Install Note: My install is on a Rubicon which does not have the factory air guards between the bumper and fenders like other models do. If you have these please see how to remove those prior to removing the bumper.
Step 1: Removing the air dam from under the bumper. To do this you first need to use the flathead screwdriver or ply bar to pop the 8 tabs located at the top of the air dam out. Next use an 8mm socket to remove the 2 bolts located on the lower sides of the air dam and then pull to remove the piece.
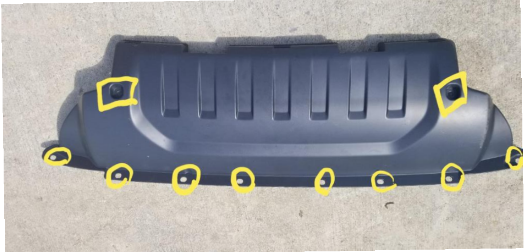
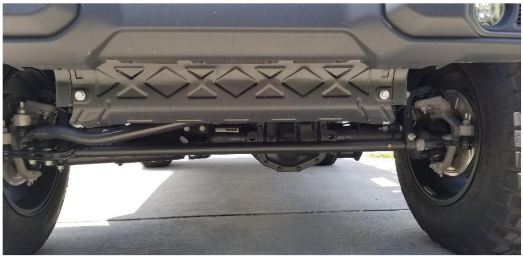
Step 2: Remove the lower crossmember using a 16mm socket. This is the metal bar running behind the air dam previously removed. There are 2 bolts holding this piece on. Just lift up after removing the bolts to pull the piece away and off.
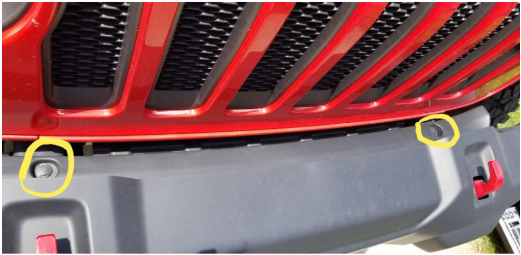
Step 3: Next is removing 2 clips that hold the filler panel between the bumper and grille. To do this again use the flathead screwdriver or pry bar to pop the clips out.
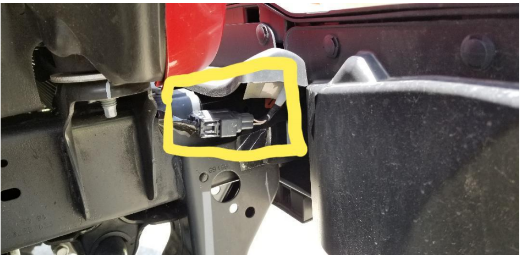
Step 4: Disconnect the fog light harness. The Jl has only 1 harness on the passenger side. Simply press and pull the 2 pieces apart to disconnect the factory fog lights.
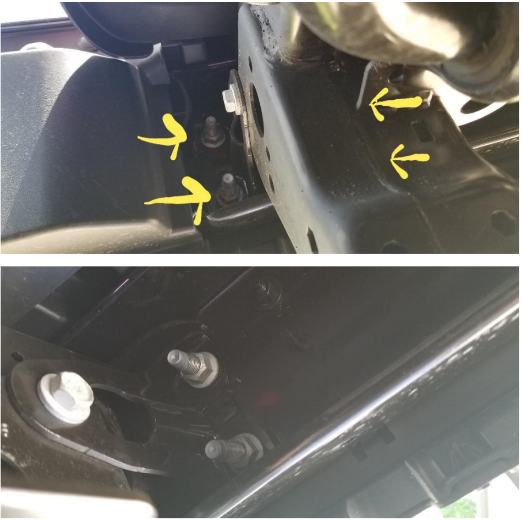
Step 5: The last step to remove the stock bumper is to remove the 8 nuts (4 on each side) holding the bumper to the frame. This requires the 18mm socket and it helps to have an extension to get a better reach on them. I did these by hand but having an impact wrench wouldn’t hurt if yours are on very tight. There are 4 bolts on each side, 2 on the inside and 2 on the outside. Once removed, simply lift and pull the stock bumper away from the frame.
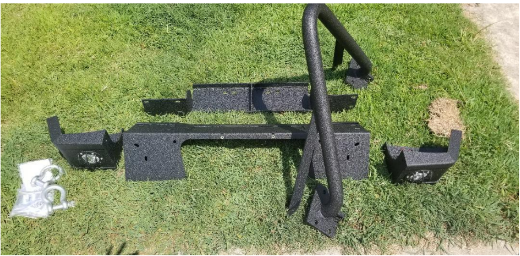
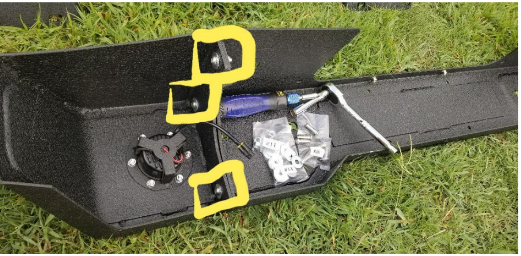
Step 6: Now gather your new RedRock bumper to assemble the pieces and prepare for installation. You will have a box of hardware, 1 bumper body, 2 end caps with fog lights, winch plate, winch wire guide, stinger, and 2 U hooks.
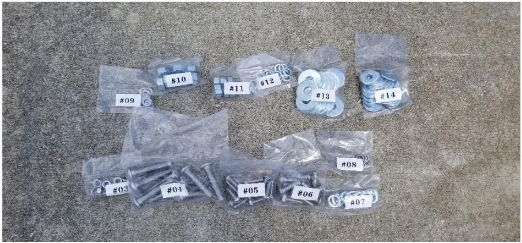
Step 7: I laid out all of the hardware to make it easier to find and keep organized during the assembly process. There is a lot more hardware included than you will be using to install the bumper so don’t freak out when you have some left over as these are for mounting winches and other pieces to the bumper later.
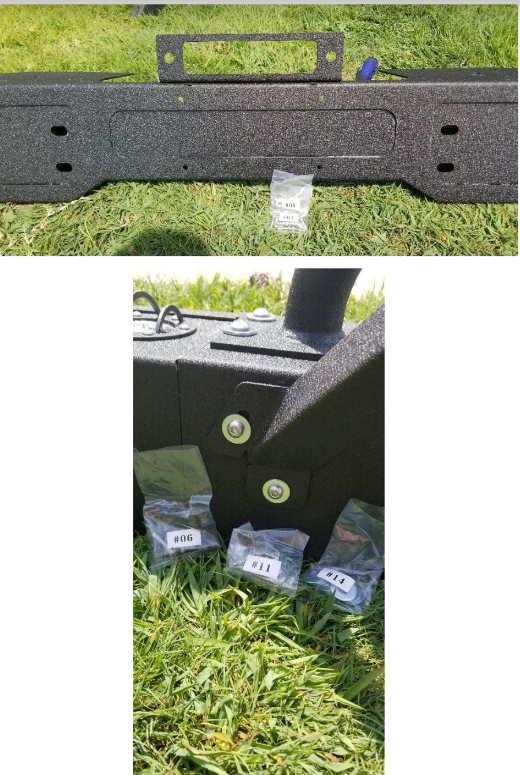
Step 8: Install the winch guide bar to the top of the bumper body. This requires Bolts #5 and washers #9 along with a T25 Hex bit to tighten. There are 2 bolts to assemble this part. Make sure the bar is facing the front of the bumper as pictured. You can also install the stinger to the main bumper using a T30 hex bit and a 13mm socket. The stinger uses Bolts #6, Washer #14, and Nut #11. The front has 4 bolts on each side along with 2 bolts on the top on each side.
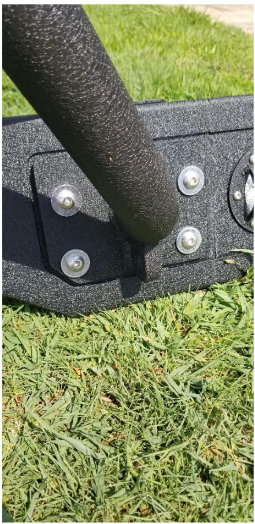
Step 8: Next you will install the 2 end caps to the main body of the bumper. You will need the T30 Hex bit and the 13mm socket for this step. Each end piece has 3 bolts that need to be installed. You will you the Bolt #6, Washer #14, and nut #11 for each of these 6 holes.
Step 9: Next you need to line the winch plate up with the body of the bumper to prepare to install on the jeep. On this step I went ahead and lightly put the nuts on the bolts to keep them from falling out when we lifted the bumper to install. This is not completely necessary but it made it a little easier on me. Make sure the top of the winch plate is aligned with the top side of the bumper so that it is not upside down. You will be using Bolts #4, Washers #13, Washer #7, and Nuts #10 to mount the bumper to the Jeep.

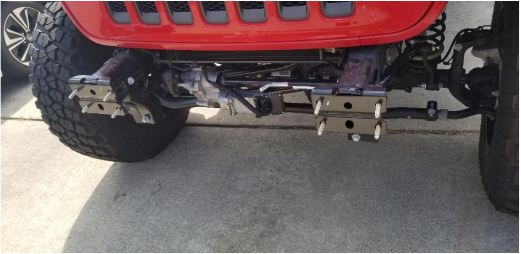
Step 10: This can be the tricky part. It is definitely easier to have a friend or 2 help with lifting the bumper to get it on the frame of the jeep, but if you have to do it alone I suggest using 2 jack stands to keep the bumper from moving too much on you. I had my 2 friends hold the bumper along with the winch plate in place and I removed the 8 #4 bolts and inserted the from the rear of the original mounting holes in the frame of the jeep as pictured. Now you will just have to move the bumper forward and make sure to line up all 8 of the holes onto the 8 bolts you previously inserted through the frame as pictured below.
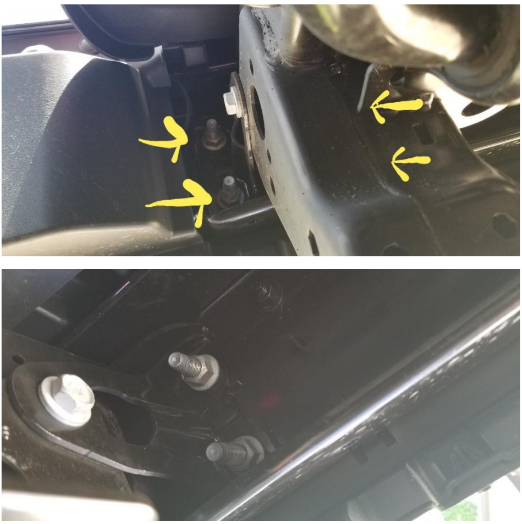
Step 11: Now that the bumper is on you will need to tighten the 8 Bolts to the frame of the jeep. For this you will use the T40 hex bit and 16mm socket. These are in the same positions as the original 8 you removed from the factory bumper. Use the hex bit to hold the bolt while you tighten the nuts from the inside of the bumper. Again, there are 2 inner and 2 outer on both sides of the bumper.
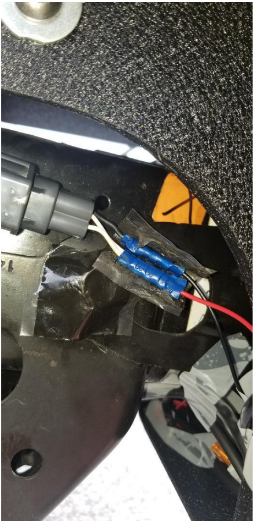
Step 12: Now you will need to wire up the fog lights. The bumper comes with a wiring harness that has 2 connectors (1for each of the fog lights). Plug the long connector into the driver's side for light and the shorter 1 into the passenger side for light. The harness includes a fuse and a red and black raw wire you will connect to the factory wire. You can do this several ways, but I found the easiest was to cut the factory male adapter off of the factory bumper that I just removed and to crimp the wire to the wire from the bumper fog lights. There are 3 factory wires, a black, red and white, and yellow and white. You will simply crimp the black wire from the included bumper harness to the black wire from the factory connector and crimp both the red/white and the yellow/white wire to the red wire from the included harness. I find this the easiest way and it also leaves you with the factory disconnect capability in case you need to unhook it in the future. To keep it safe, wrap the connections with electrical tape or another barrier to keep out water and road debris. Then just tuck the extra wire in the bumper. I used a zip tie to keep it all together and connected to the bumper.
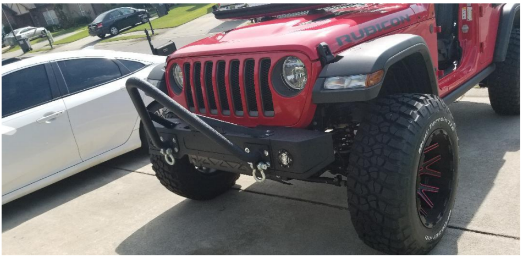
Step 13: You are done. The bumper is on and the lights are wired. Make sure that the lights work by turning the engine on and flipping the fog light switch to ON. The U rings just have a screw you pull out and then line them up with their holes and put the screw back in and they are ready to go. After a few hundred miles make sure to go back and check all the nuts to be certain that they are all nice and tight. When done it should look like my picture below.
Installation Instructions provided by ExtremeTerrain Customer
