 FREE 1 to 3-Day Delivery on Orders $149+ Details

How to Install an Off Road Only Hop Stopper Hood Latch System on your 2007-2015 Jeep Wrangler JK
Installation Time
30 minutes
Tools Required
- Power drill with 1./4” bit
- #2 phillips screwdriver
- 7/16” Combo wrench
- small regular screwdriver
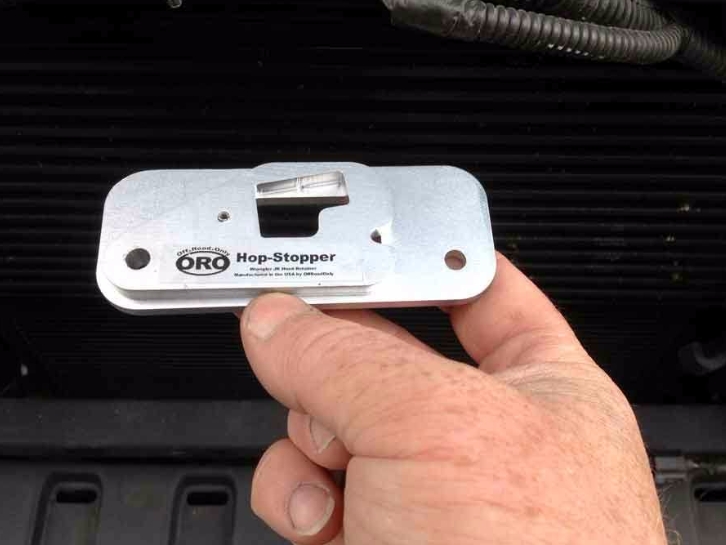
The ORO Hop-Stopper is a secondary latch mechanism, designed to retain the hood in the closed position by capturing the secondary hood hook. This product contains the parts as shown below. Note that the one part that appears to be floating off the surface has a roll pin that protrudes thru on the lower side. If your roll pin is not as shown, you will need to adjust it so that it is.

The Hop-Stopper will be mounted underneath the steel surround which the grill mounts to. Open the hood on your Jeep, notice where the secondary hood hook is positioned, the Hop-Stopper will mount below the steel structure that the hook locks into.
Installation Preparation:
The installation of this component will require the removal of the grille shell. Open the hood and position it on the prop rod. Then set about removing the grille shell. The shell removes quickly and easily, and instructions are included to facilitate this.
To remove the grille shell, locate the 6 plastic retainers across the top of the shell, under the lip of the hood. With a small regular screwdriver, gently pry the smaller, inner button outward appx ½” These may also pull out if you pull just a bit farther. This does not leave them unusable simply reassemble.
Next, using the same screwdriver, gently pry the larger plastic base up from the grill shell, they should come out with very little resistance.
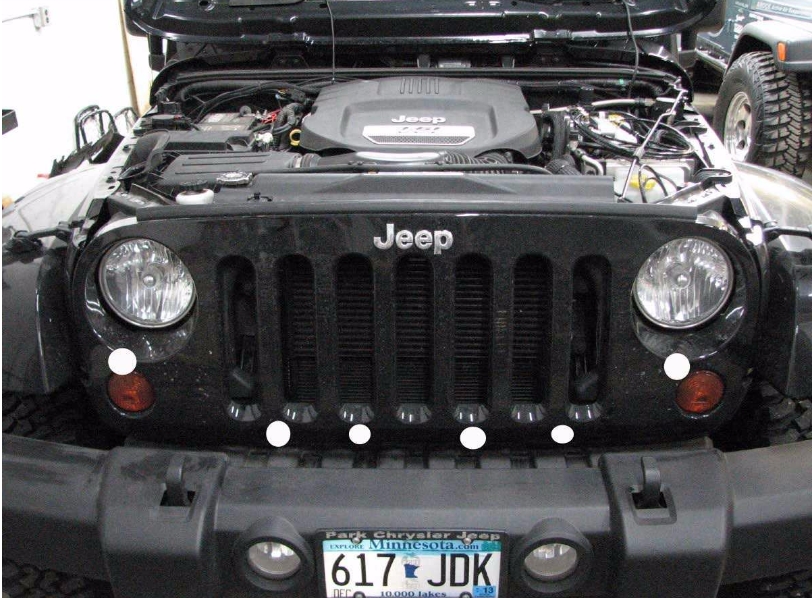
Once the buttons are removed, then the grille is held on now by only by 6 push clips, 4 across the bottom and one behind each turn signal indicator. Remove the turn signals first, reach behind the grill and locate the turn signal housings and wire harness. Note that the harness exits towards the outsides of the vehicle, this will remind you how to place them into the housing and which way to rotate to reinstall them. Rotate the housings/harness downward and you’ll notice that they become free. Simply remove the socket housing from the lamp assembly, leaving the harness in place. The socket housing may dangle while the process is done. In the following photo, the white dots reflect the approximate position of the clips, with a firm grip on the grille shell in these areas, a quick, firm tug should release the clips. One position at a time, unplug the grille clips. The grille shell will literally pop off in your hands once the last clip pops. Be prepared for the release, try to not drop it or cause any cosmetic damage.
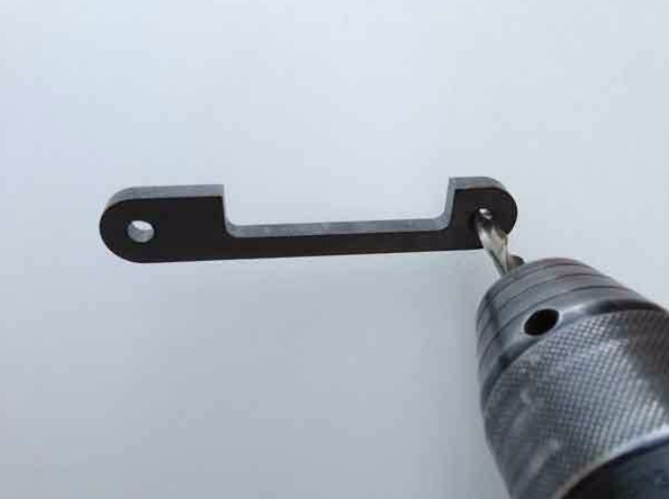
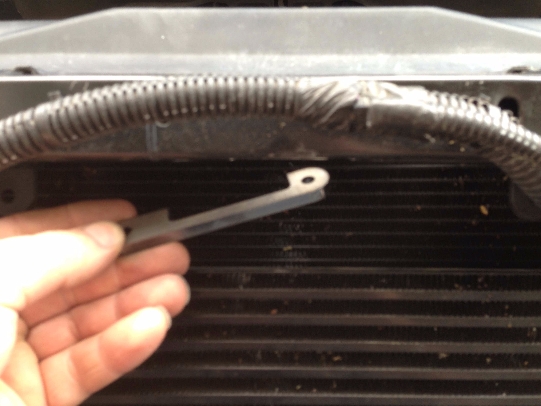
Next, we are going to use the raw steel piece (the fixture) included in the kit to position the ¼” drill bit to drill the lower part of the steel structure to pass the mounting bolts thru the structure.
First, lets make sure your drill bit fits in the fixture. The bit should pass thru the lazer cut opening, however depending on cut, there may be a small inclusion that may result in needing to drill the fixture. Simply use the drill bit to open the holes so that the bit spins freely.
Now, there are 2 holes, ¼” in diameter, to either side of the square opening for the hood hook. We are going to use these 2 holes on the top of the steel structure. The raw steel piece included in the kit will be inserted inside the steel structure from the bottom as shown. When positioned properly, with the cut out in the raw steel fixture will match the opening on the bottom of the steel structure and the 2 ¼” holes will be directly below the upper holes.
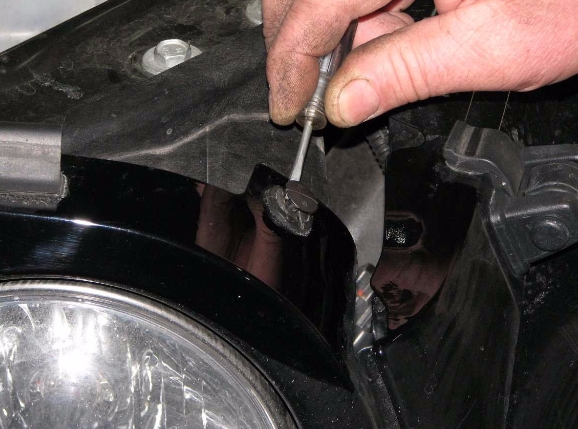
Insert the fixture from the side as shown, into the steel structure opening. Note; Match the fixture rotation to the photo as this will position the fixture forward into the opening and allow the 3 edges to line up.
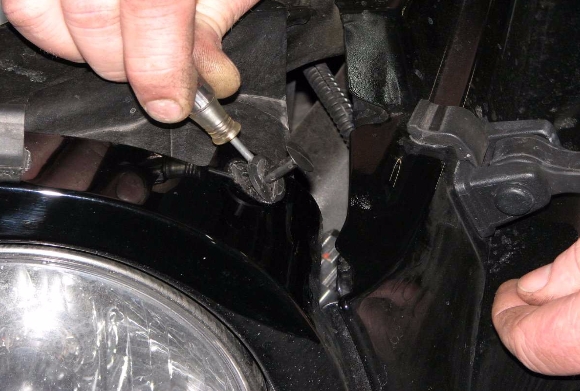
Use your fingers, inserted from the bottom, to keep the fixture in place against those 3 edges and gently mark the steel structure with the drill bit. Don’t drill thru the structure yet, but rather just leave enough of a dimple so you can remove the fixture and your hand and properly drill thru the steel structure.
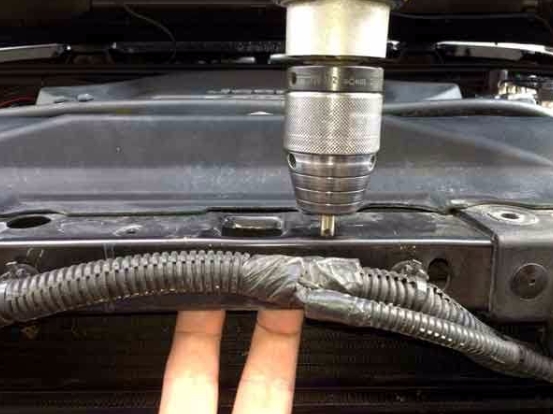
When done, the 2 supplied machine screws should pass straight thru the steel structure. With a blow gun if necessary, blow all of the drill shavings away from the work area. If left near the area, these shavings will work down between the moving parts and may result in difficulty to operate the Hop-Stopper.
With the 2 machine screws in place, locate the two parts and assemble them as shown in the next picture. Also have a lock washer and lock nut close. It may be a good idea to test fit the large square base over the machine screws, to ensure that the holes you drilled are in the proper spot.
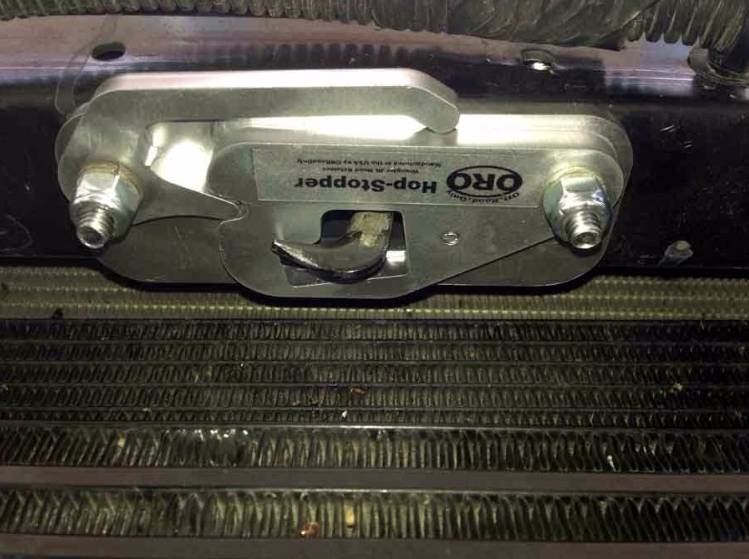
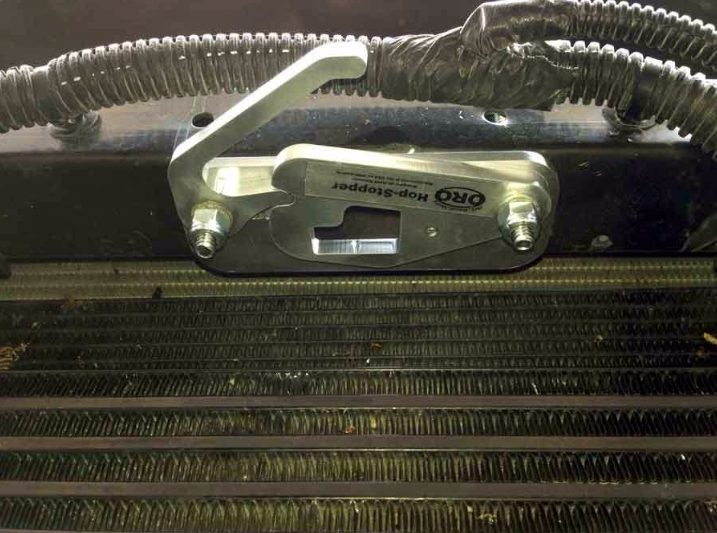
With these two parts positioned as shown, with the roll pin in the small slot in the larger square base, you are ready to invert these 2 parts and pass them over the 2 machine screws. The left side, as shown, will slide on the drivers side machine screw while the base slides over both screws at the same time. Install the lock washer and lock nut to hold the parts in place.
Next, install the lever part on the passenger side machine screw. Notice how the tip of the lever engages the sliding part of the mechanism. With these 3 parts in place as shown, tighten the nylock nuts. You will want to tighten them up until the lock washer starts to compress. With both of the nylock nuts at that point, you will be able to adjust the tension on the latch mechanism by continuing to tighten the nylock nuts a bit more. You will want the latch to be easier to move than the rotational part that grabs the hook. You can adjust the tension as you wish, the tighter it is the less likely it will be to work itself from the position you leave it. We have found that adjusting the drivers machine screw until you can barely move the engagement lever with a single finger, and then adjusting the engagement lever a slight bit looser than that, will allow the latch to stay in place but allow most anyone to get in there with a finger, or two, and pull it open or push it closed.
Unlatched, the roll pin will prevent the lever from opening past this position. Make sure that whenever your hood is open, you have the lever in this position. Closing the hood with the lever in the latched (Closed) position may cause the hood to push the moving latch mechanism downward enough to prevent the latch from grabbing the hook and closing.
Now, close the hood, perform a couple of test open/closes. If your drilled holes are not quite in the correct position, you may need to adjust the square base a bit to allow the hook to pass freely when in unlocked positron. If you can’t get enough movement to adjust it to clear, you may need to disassemble and adjust the holes you drilled in the lower structure slightly. Either drill them 1 step oversize, or with a dremel tool massage the drilled hole to allow you to shift the assembly to get the hook to clear freely.
We do not recommend any type of lubricant to be used on this part, in this location. However, if you do wish to use something, our thoughts are a dry lube, like a bicycle chain lubricant, may perform the best.
Thank you for your purchase of the OffRoadOnly Hop-Stopper!
