 FREE 1 to 3-Day Delivery on Orders $149+ Details

How to Install Lange Hoist-A-Cart (07-18 Wrangler JK; 2018 Wrangler JL) on your Jeep Wrangler
Installation Time
3 hours
Tools Required
- Box Cutter/Knife
- Pliers
- 7mm Socket
- 14mm Socket
- 19mm Socket
- Socket Wrench
- Philips Head Screwdriver
Note: Each item is labeled (HAC-xxx) and should be installed accordingly.
Installation Instructions
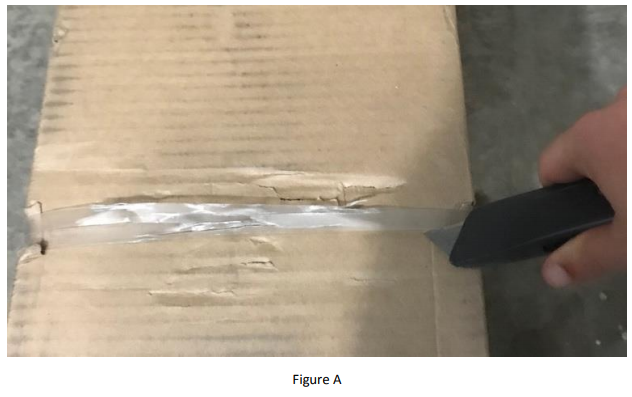
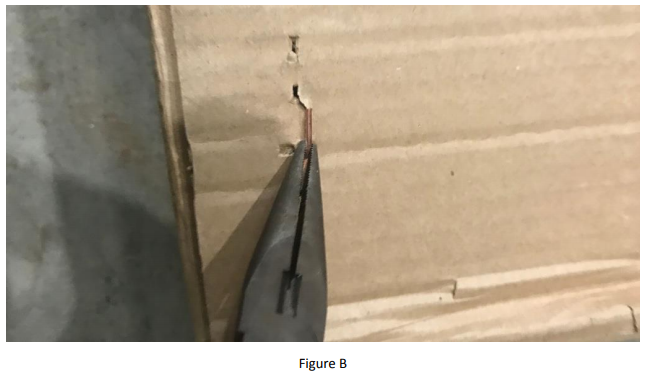
1. Carefully open the package using a box cutter or knife (Figure A). Then use pliers (Figure B) to open the packaging to ensure all parts and hardware are included and undamaged.
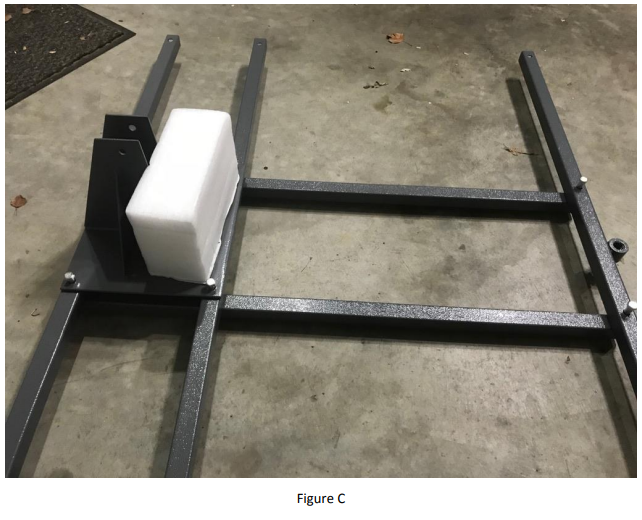
2. Place cross beams HAC-005 down then place HAC-003, HAC-004 and HAC-029 over. Sit HAC-008 over the HAC003 & HAC-004 layer using HAC-024 bolts and HAC-015 nuts (Figure C). Hand tighten only.
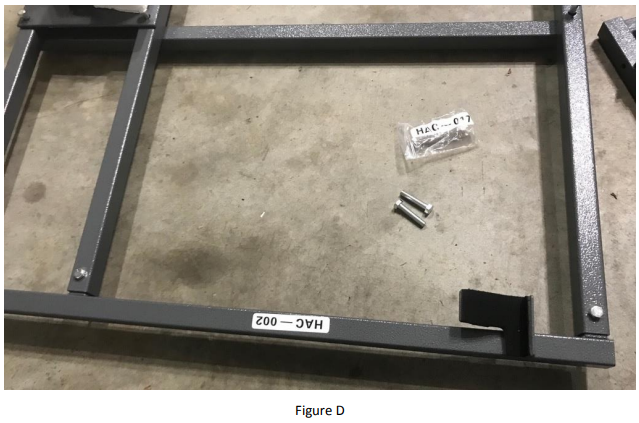
3. Place HAC-001 and HAC-002 on the sides of the platform, ensuring the hole is facing outward (Figure D).
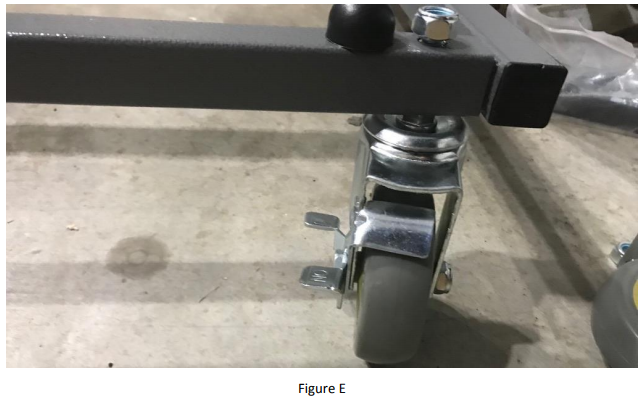
4. Place the casters (locking) under the backside of the platform (the side with HAC-008) on each side (Figure E).
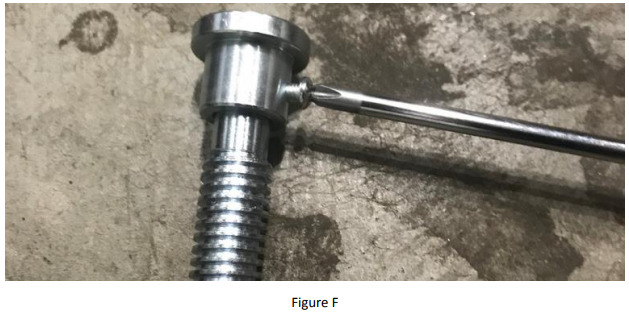
5. Remove the screw from HAC-030 then remove the spindle foot (Figure F).
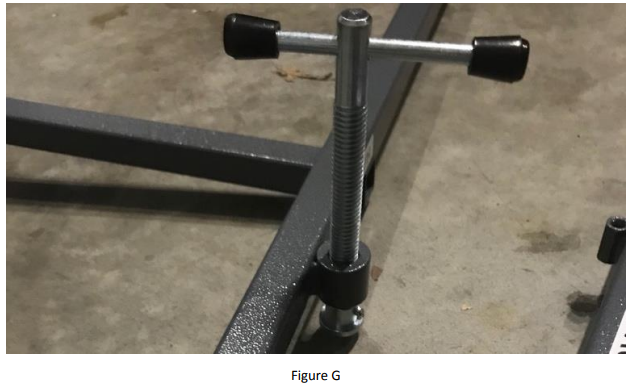
6. Screw HAC-030 into the welded slot of the platform and return the spindle foot and return the screw (Figure G).
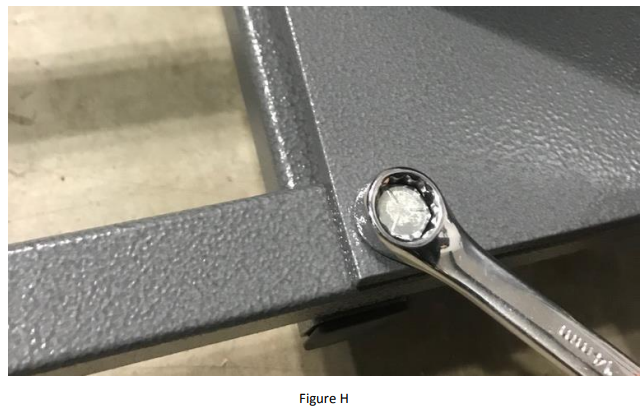
7. Tighten all bolts on the platform using a 14mm socket wrench (Figure H).
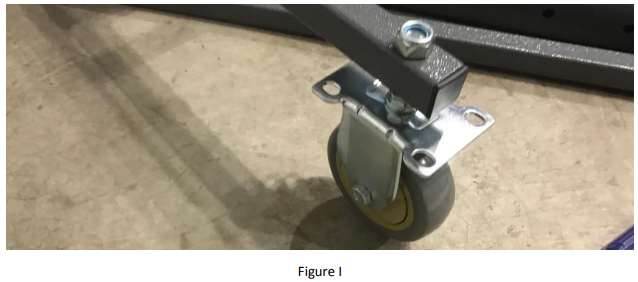
8. Place both HAC-006 bars into the slots on HAC-001 and HAC-002, then install casters (Figure I).
9. Place HAC-009 into HAC-008 and install two HAC-014 bolts (with HAC-015 nuts) at the bottom mount (Figure J).

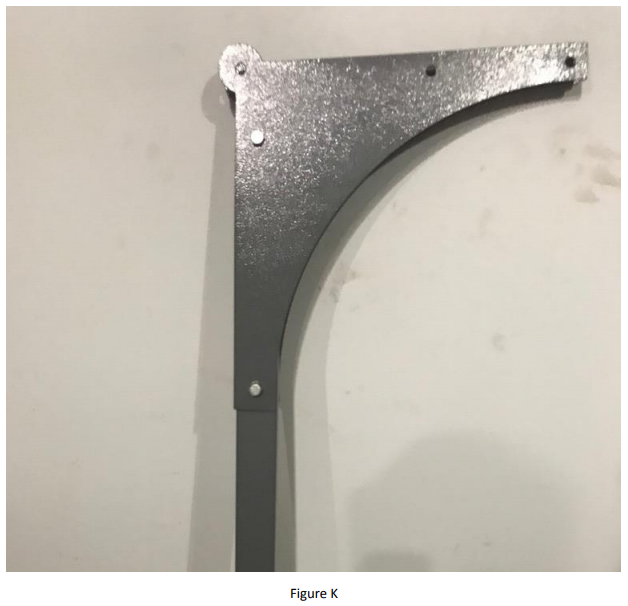
10. Install HAC-011 over HAC-012 and install in place using HAC-019 bolts and HAC-015 nuts (Figure K).
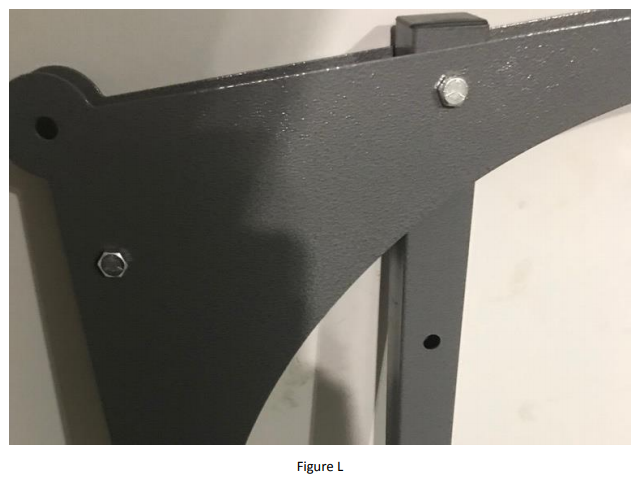
11. Install HAC-013 onto other end of HAC-011s using HAC-019 bolt and HAC-015 nut (Figure L).
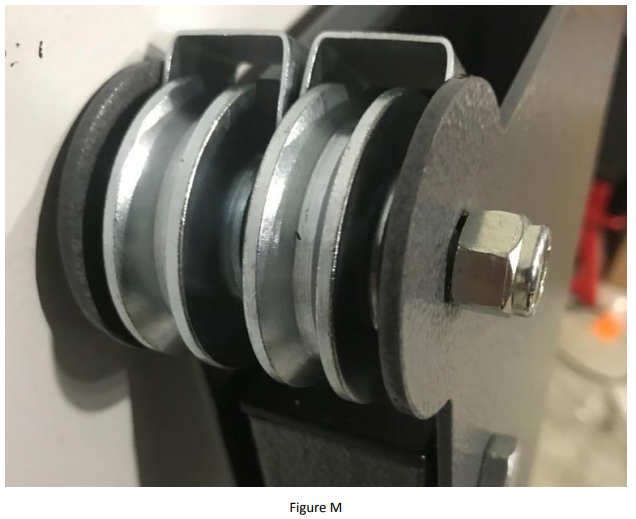
12. Insert two pulley wheels and pulley clips in the upper corner of HAC-011 (Figure M).
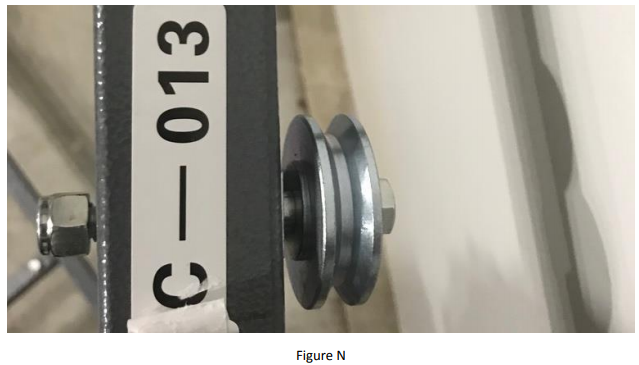
13. Insert a pulley wheel and pulley clip onto HAC-013 half way down (Figure N).
14. Insert another pulley wheel and pulley clip onto HAC-013 at the very end (Figure O).

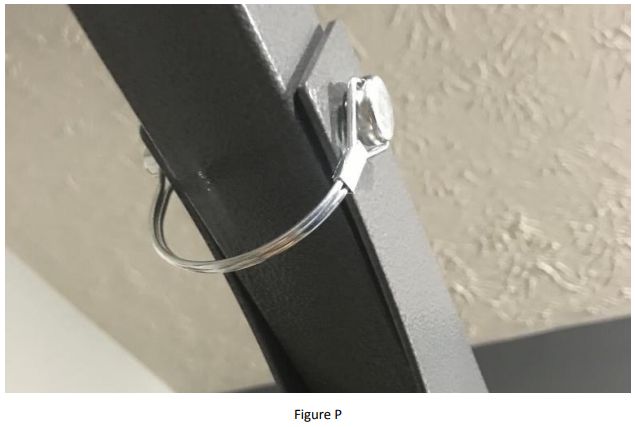
15. Straighten HAC-013 and place a Quick Release to hold in place (Figure P).
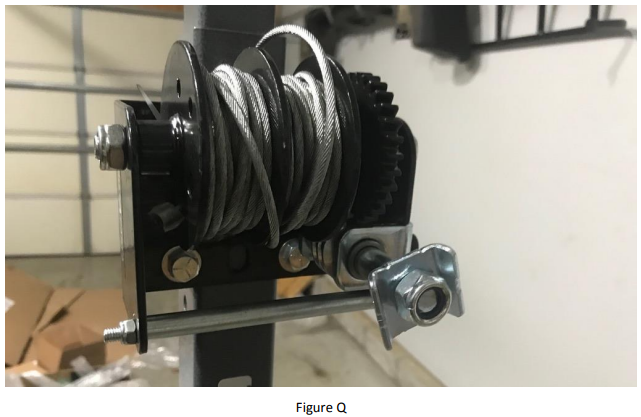
16. Attach the winch to the frame (Figure Q) using a 14mm socket wrench.
17. Run the left wire through the left side pulley wheel and the middle pulley wheel. Run the right wire through the right side pulley wheel and the far-end pulley wheel.
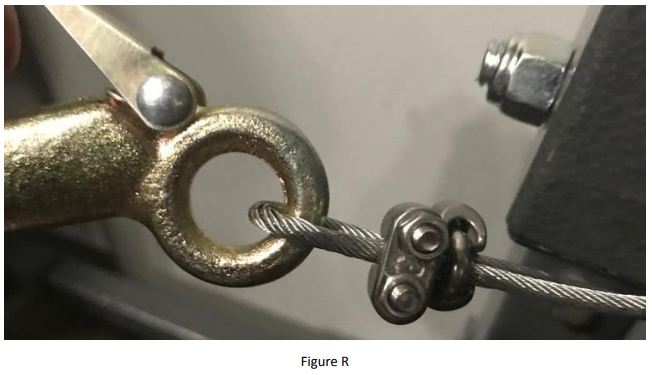
18. Add two wire clamps to the left wire approximately 10" down and feed the wire back through the wire clamps (Figure R) before tightening using a 7mm socket wrench.
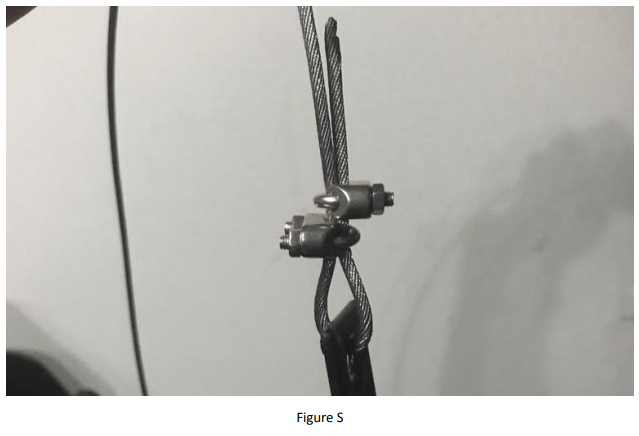
19. Add two wire clamps and the hook to the right wire approximately 2 ½" down and feed the wire back through the wire clamps and tighten (Figure S).
Installation Instructions Written by ExtremeTerrain Customer J. Sandlin 12/07/2017

