 FREE 1 to 3-Day Delivery on Orders $149+ Details

How to Install DV8 Off-Road Tire Carrier on your Wrangler
Installation Time
1 hours
Tools Required
- 19mm Socket
- 13mm Socket
- Ratchet
- T15 Torx Driver
- T50 Torx Driver
- Painters Tape
- Dremel Tool
- Hammer
- 9/32” Nutdriver
- Center Punch
- Drill with 1/8” and 5/16” bits

Shop Parts in this Guide
This guide is for installing the DV8 Tire Carrier (J104640) on the back of a 2007-2017 Jeep Wrangler in place of the OEM stock spare tire carrier. Read all instructions carefully before starting.
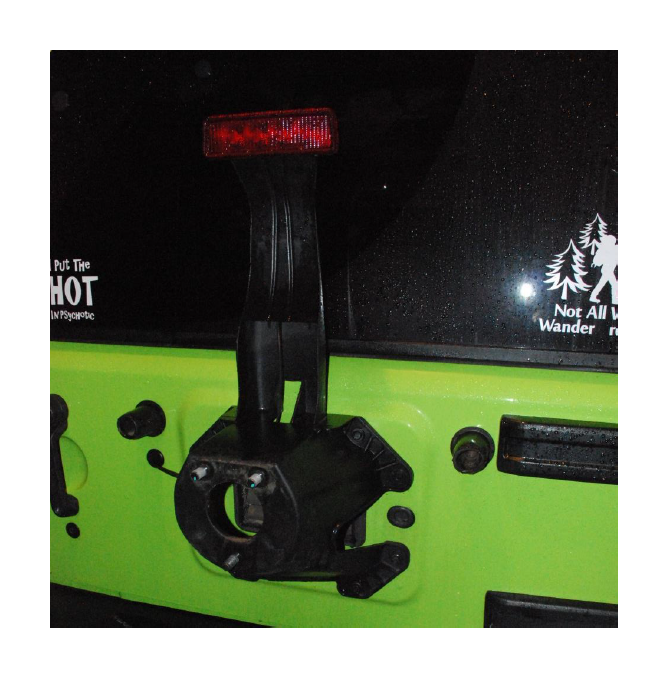
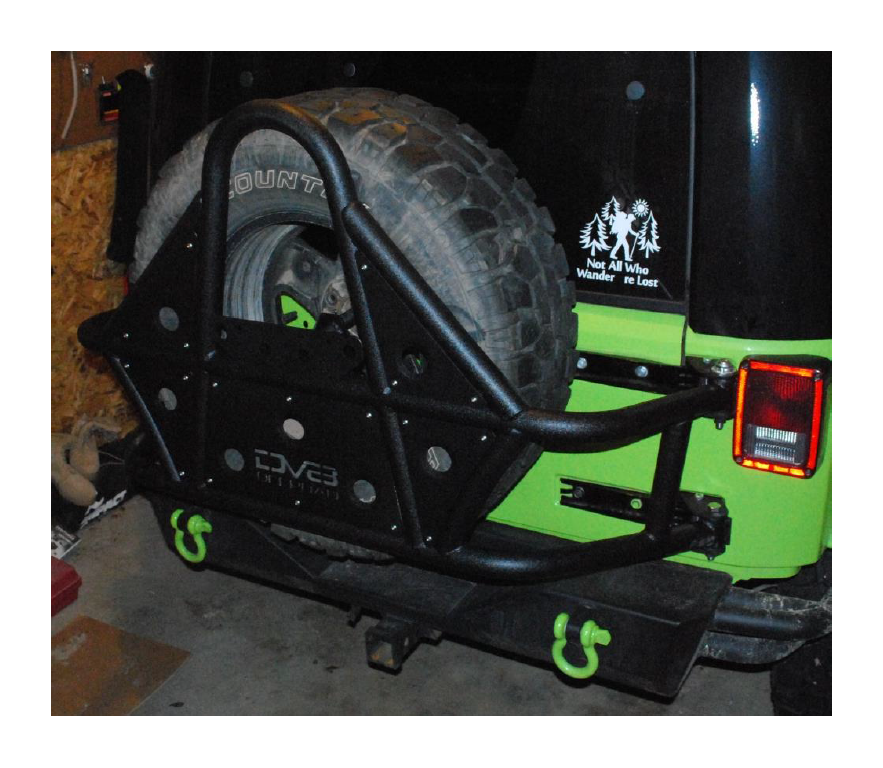
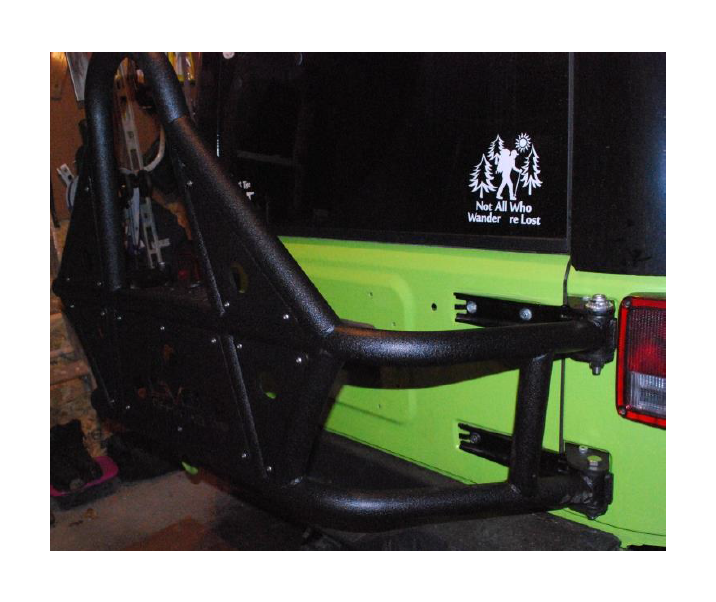
Before
After
Installation Instructions:
1. Remove your spare tire from your stock carrier using a 19mm socket wrench.
2. Using a 13mm socket wrench, remove the eight (8) bolts holding the carrier to the tailgate.
3. a. If you wish to use the original brake light wiring in the future, use a T15 Torx driver to remove four (4) screws to take apart brake light. Unclip the wiring from the tire carrier. (This carrier does not have a brake light installed, so an aftermarket brake light will be needed if you wish to have one)
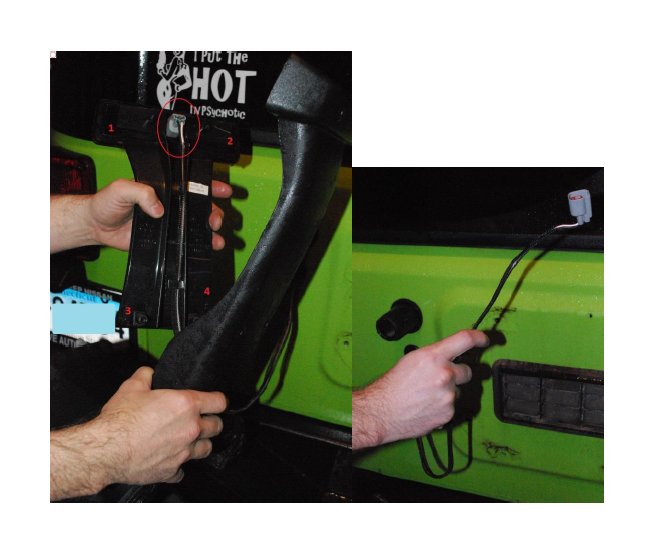
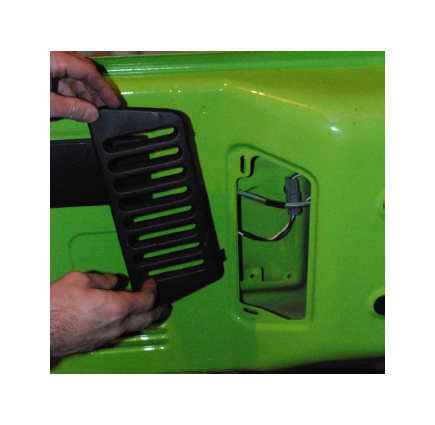
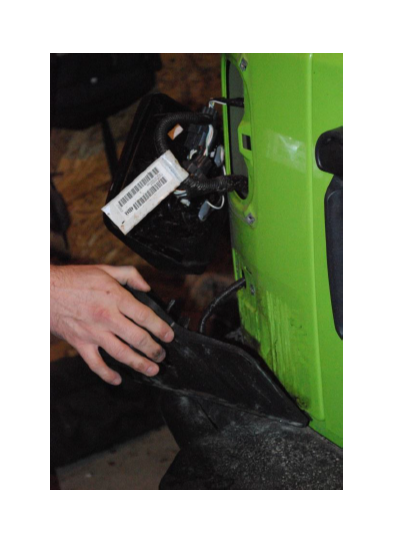
b. If you do not wish to use the original brake light wiring in the future, open the tailgate, pop out the plastic cover (shown below) and unplug the grey wire connector.
4. Remove the rubber tire stops from the tailgate by gently pulling them out.
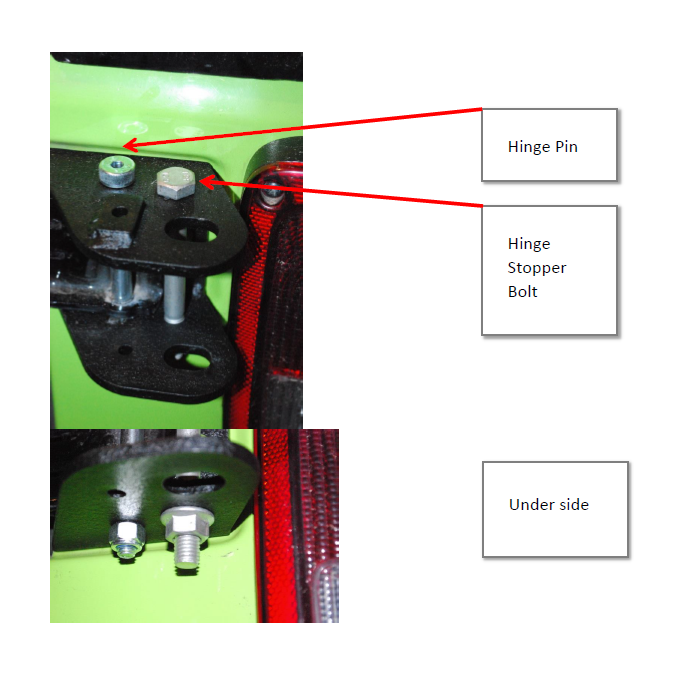
5. Remove the plastic hinge covers by gently pulling them off. Use a 13mm socket wrench to remove the two (2) bolts from the top hinge ONLY (removing both hinges at the same time will cause the tailgate to slip, which may cause damage or injury).
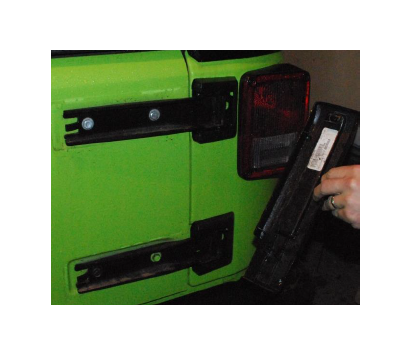
6. Use a T50 Torx driver to remove the three (3) T50 Torx bolts from the body-side of the hinge.
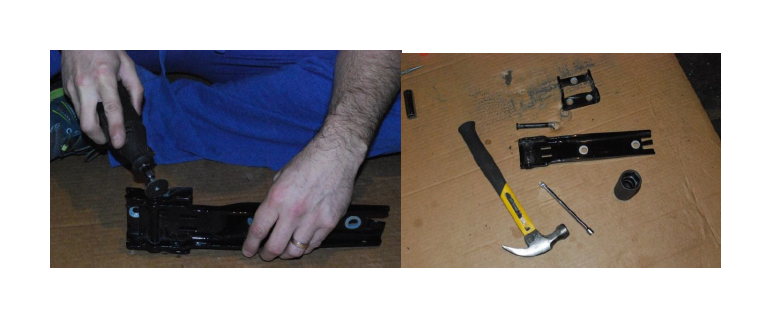
7. Using a dremel tool, remove one end of the hinge pin from the original hinge (you will need the tailgate-side of the original hinge for your new carrier). Place the non-dremeled side of the pin over something hollow and sturdy (we used a long and wide socket). Use a long object (we used an extension for a socket wrench) and a hammer to remove the hinge pin from the hinge, trying not to damage the long (tailgate) side of the hinge. CAUTION: When using the dremel, wear protective eyewear!
8. Install the upper hinge (with elongated bolt hole) using the three (3) T50 Torx bolts.
9. Line up the original tailgate hinge piece to the new body-side hinge piece and reinstall the original two (2) 13mm bolts to hole the hinge in place. Use the included new hinge pin to ensure proper alignment, and secure with a nut (included).
10. Repeat steps 5-9 for the bottom hinge.
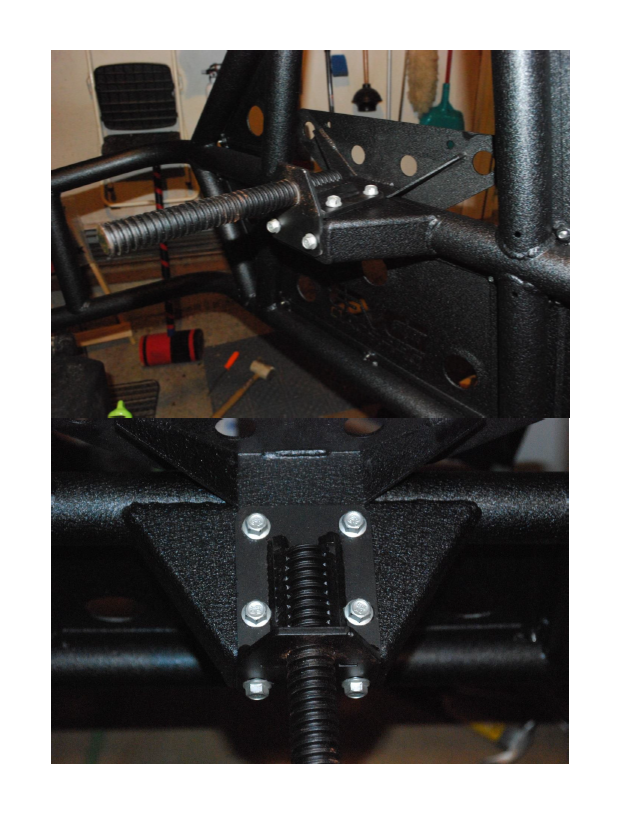
11. Place the hinge stopper bolt into the top hinge. (keeps carrier from swinging out too far)
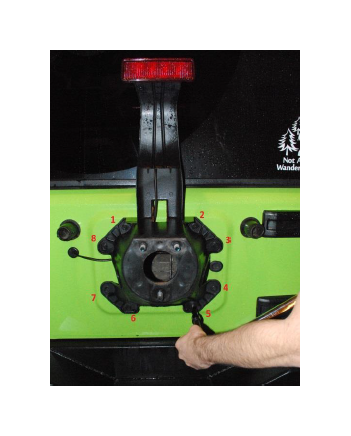
12. Using a 9/32” nut driver, remove the four (4) license plate bolts. Remove the four (4) bolts from the tail light above the license plate as well.
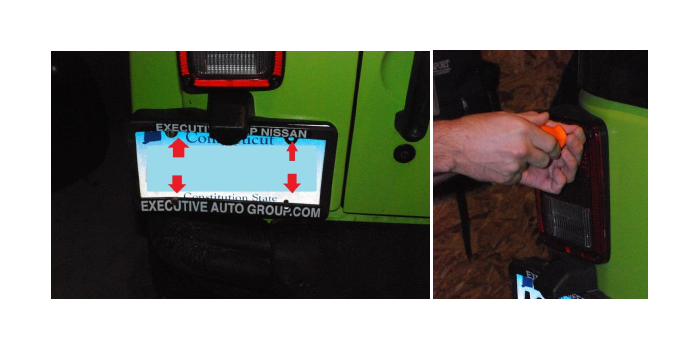
13. Disconnect the wiring from your license plate holder to remove. Tuck the wires into the body of the Jeep. Install the license plate holder delete plate using two strips of 3M double-sided adhesive tape (included).
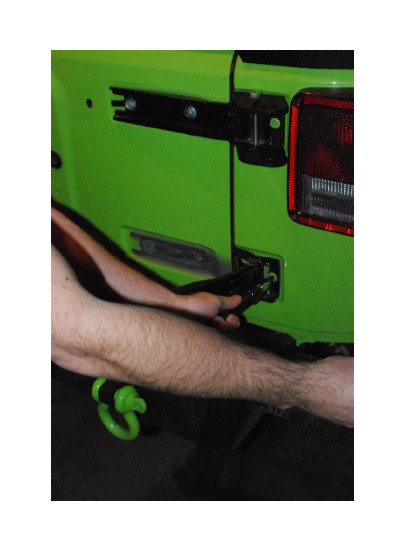
14. With the help of a friend, install the new tire carrier (without the tire) onto the new hinges and insert the hinge bolts to hold it in place.
15. Swing the carrier open and install the tire stud and license plate holder with the six (6) 12mm bolts provided.
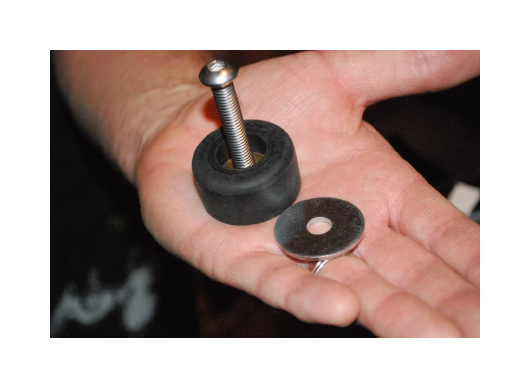
16. Install your spare tire onto the new carrier tire stud. Secure the tire in place with the tire mount wing nut. Note: Depending on the style of wheel you have, you may or may not require the circular spacer.
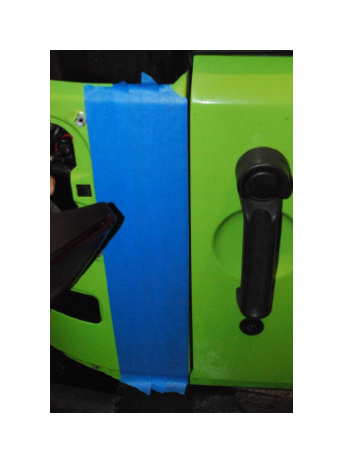
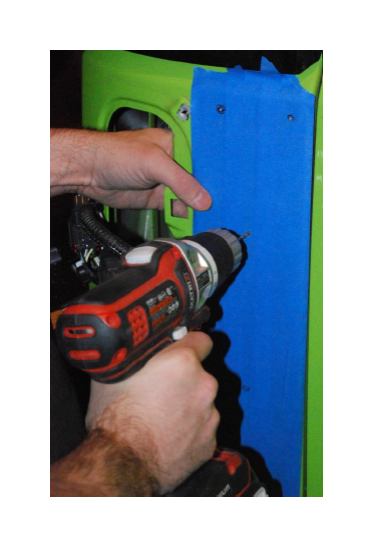
17. To prevent excessive scratches or gouges from the drill, place two layers of painters tape from top to bottom, covering the area the new carrier latch will be (from tail light to door opening, top to bottom).
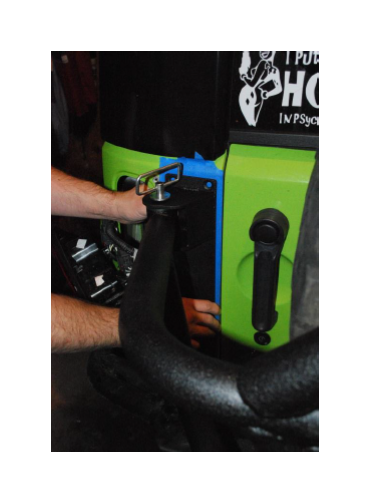
18. With the tire mounted to the carrier (to ensure proper weight), attach the tire carrier body bracket to the door-side of the new carrier by inserting the two (2) quick release pins (with the rectangular handles). Gently close the new carrier so that the body bracket lines up properly to the body, and use a pen or marker to mark where the five (5) holes are in the bracket. Mark precisely, because this is where you will drill into the body.
19. Gently use a center punch and hammer to mark the center of your mounting marks. Using a 1/8” drill bit, drill pilot holes into the five (5) marks you have made. Once the 1/8” pilot holes are drilled, use a 5/16” drill bit to drill out the five (5) holes. (Note: In some areas, you will be drilling through two layers of sheet metal)
20. Remove the painters tape and close the tire carrier. Use the provided hardware to mount the bracket to the body with 5/16” bolts, and secure with nuts on the inside of the vehicle body.
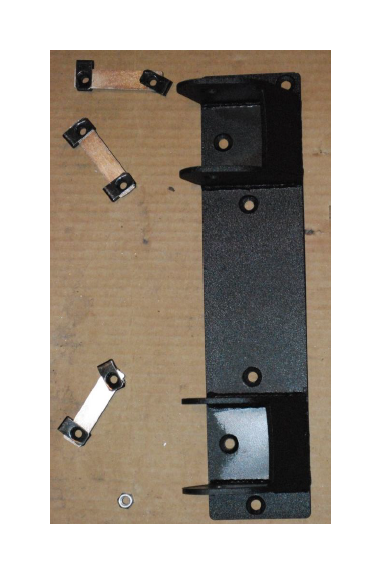
21. Remove the quick release pins and open the tire carrier. Mark the last two (2) holes that were covered by the closed carrier. Remove the bracket and repeat drilling instructions for the remaining two (2) holes (center punch, 1/8” pilot hole, then 5/16” hole). Reinstall the bracket, install first five (5) bolts and nuts, then install the two (2) rubber bumper stops with button head bolts and washers, making sure not to over-tighten (to avoid collapsing the stopper).
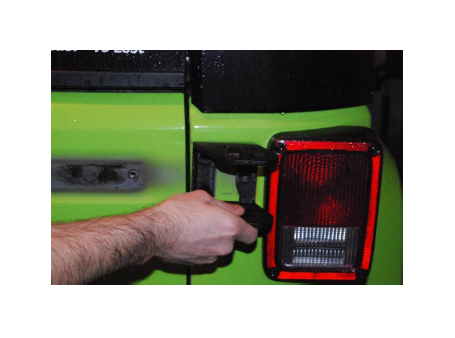
22. Reinstall the rear tail light using the four (4) original 9/32” bolts. Note: If the installed body bracket is in the way of reinstalling the tail light, you may need to loosen the bracket to fit the light in. Once the light is reinstalled, tighten the bracket again.
23. To adjust the tire carrier up or down for proper alignment, turn the adjustable cam on the carrier hinge clockwise or counter-clockwise.
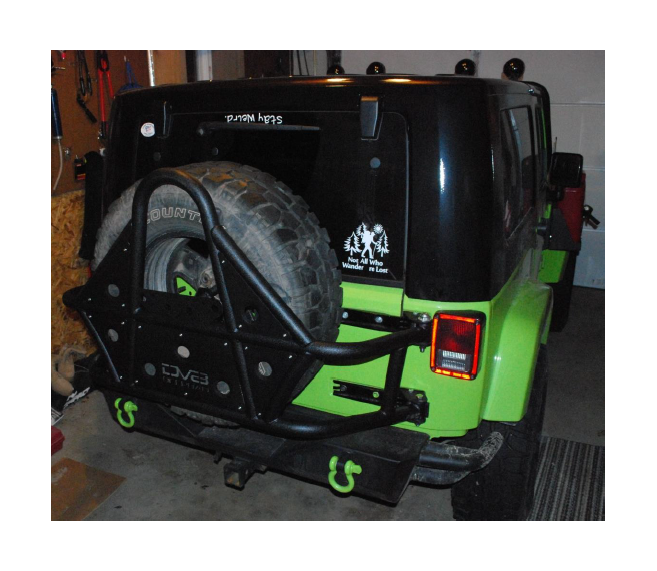
24.Post Installation: Verify the carrier is secure. Close the carrier and check that everything fits easily. It should not be difficult to open and close your carrier. Enjoy your DV8 Tire Carrier!
