


Installation Time
(approx) 1 Hour
Difficulty Level:
Light to Moderate mechanical skill required.
Installation Guides
No guide available for this part yet.
 FREE 1 to 3-Day Delivery on Orders $149+ Details


$899.99 each
Save with Open Box
From $317.79
CONFIRM THIS FITS YOUR VEHICLE!
Saved - View your saved items
We're sorry. We couldn't save this product at this time.


DV8 Offroad Front Aluminum Inner Fenders; Black (18-23 Jeep Wrangler JL)
 51
51

DV8 Offroad Replacement Grille; Black (18-26 Jeep Wrangler JL)
 18
18

RedRock Deep Woods Grille; Matte Black (18-26 Jeep Wrangler JL w/o TrailCam)
500+
Features, Description, Reviews, Q&A, Specs & Installation
| Brand | DV8 Offroad |
| Hood Style | Vented |
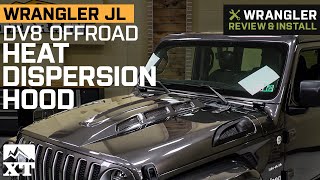
Heat Dispersion Vented Hood. The DV8 Offroad Heat Dispersion Vented Hood, unpainted, is designed to improve engine cooling by increasing airflow through its dual-vented construction. This hood effectively disperses heat build-up during low-speed crawling or extreme driving conditions, helping maintain optimal engine temperatures and overall vehicle performance. Its vented design is ideal for Jeep enthusiasts wanting to enhance both functionality and aggressive styling.
Construction and Appearance. Constructed from stamped steel, this hood combines durability with lightweight strength. It features a rust inhibitor base coat and comes with an insulated under-hood liner to reduce heat transfer. The product ships unpainted and is ready for professional priming and finishing, allowing customization to match your vehicle’s paint.
Installation. Installation requires moderate mechanical skills and is recommended to be performed by a professional to ensure proper fitment. The process includes prepping the hood, fitting, seam sealing, and painting to achieve the best results.
Warranty. This product is covered by a one-year limited warranty against defects in workmanship and materials.
Application. This hood fits 2018 through 2026 Jeep Wrangler JL models but is not compatible with Rubicon 392 or Mojave variants.
DV8 Offroad HDMBJL-01
CA Residents:  WARNING: Cancer and Reproductive Harm - www.P65Warnings.ca.gov
Installation Info
Installation Time
(approx) 1 Hour
Difficulty Level:
Light to Moderate mechanical skill required.
Installation Guides
No guide available for this part yet.
What's in the Box

