 FREE 1 to 3-Day Delivery on Orders $149+ Details

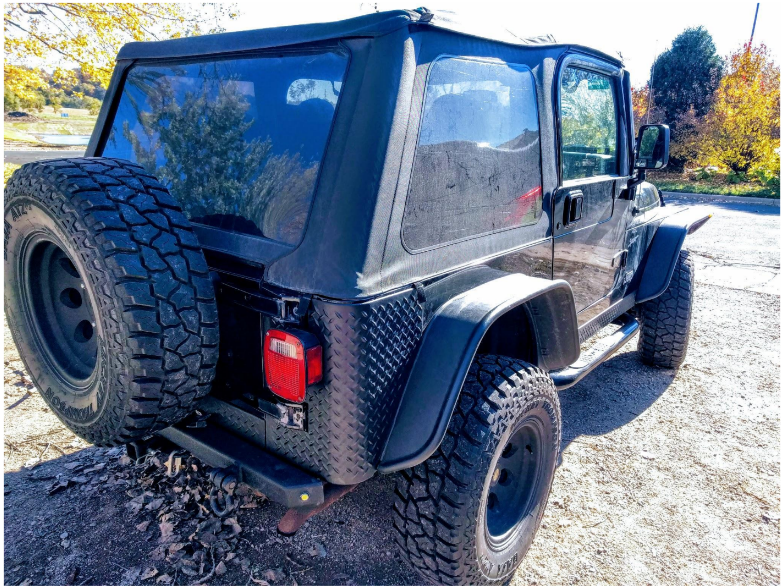
How to Install Bushwacker Textured DiamondBack Six Piece Set for Flat Style & Factory Flares (97-06 Jeep Wrangler TJ) on your Jeep Wrangler
Installation Time
90 minutes
Tools Required
- 10mm Socket, Short Extension & Ratchet/Driver
- T25 & T30 Torx Drivers
- #2 Phillips Screwdriver
- Lug Nut Wrench/Socket (3/4” OEM, aftermarket may vary)
- Alcohol or PrepAll & Towels
Note: Test fit EACH piece before removing tape backing. It is very common to require minor trimming modification of armor pieces for an exact fit, and even more so when installing alongside existing aftermarket accessories. Trim using a pair of strong scissors for the cleanest cut. For a strong, permanent installation prepare all surfaces using rubbing alcohol or a PrepAll type product to thoroughly remove all dust/dirt before installation.
Installation Instructions:
1. Let’s start at the front! Remove 4-10mm bolts (2 on each side) securing OEM Front Sway Bar Shroud and remove.
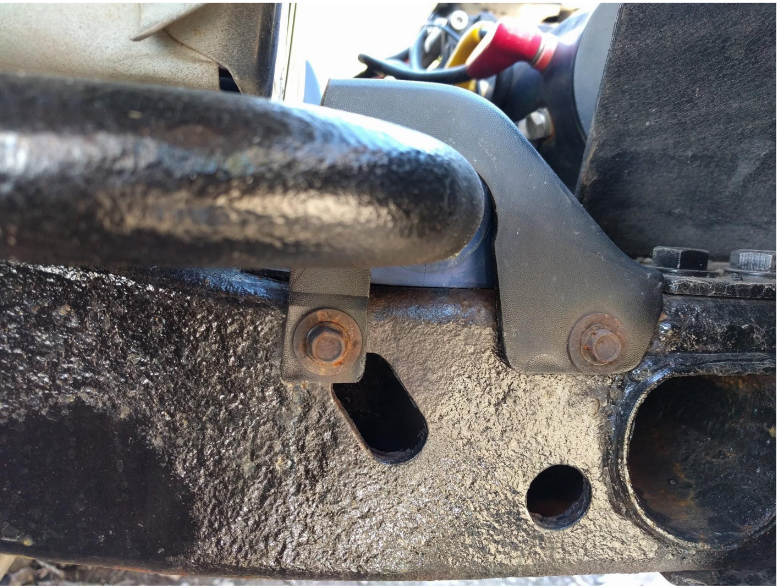
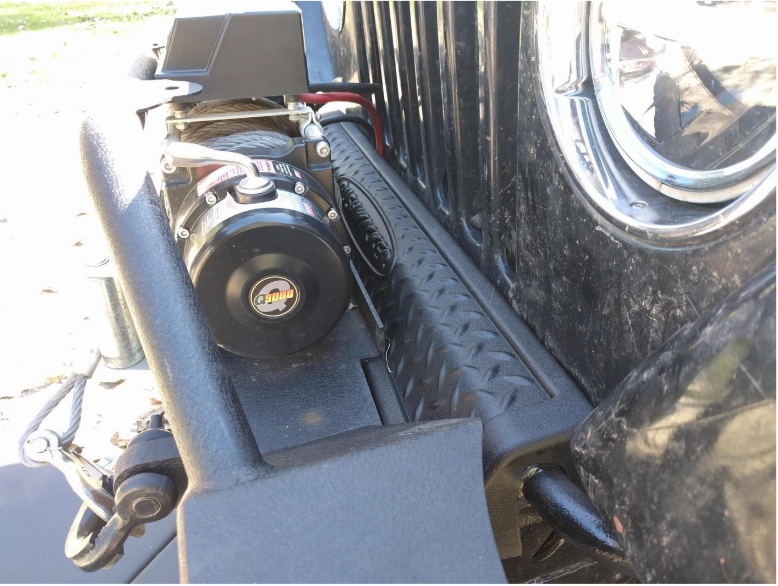
2. Install New Front Shroud using OEM 10mm Bolts. NOTE: Some trimming of front edge may be required with aftermarket bumpers/winches.
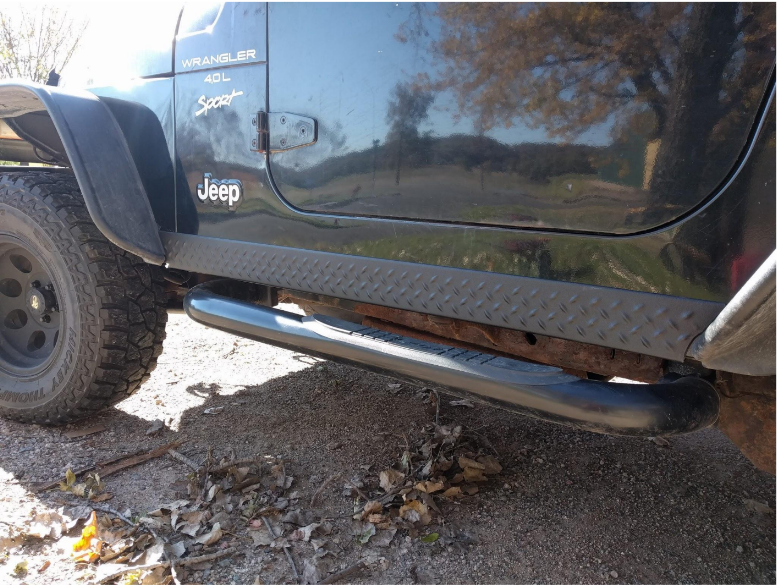
3. Side Rocker Panels: Factory Cover Pieces are typically secured with adhesive, but select years/models may use fasteners. Remove OEM trim pieces using firm pressure and a PLASTIC scraper/trim tool to gently loosen adhesive tape if necessary. Clean any remaining adhesive residue with alcohol or PrepAll.
4. Identify Right vs Left panel using either the model number on the reverse side or identifying orientation based on location of fastener slots and using 3 plastic push fasteners lock first panel into place along bottom edge.
5. Adjust right to left as necessary to center between fender flares and the pull back top edge just enough to reach behind and begin peeling red tape backing to expose adhesive. PRO TIP: Use the tip of a knife to start peeling the backing. Lift up on rocker panel as you work your way along to ensure a tight fit on the bottom edge. Do not use firm pressure to press into place until tape is fully exposed, then go back and apply at least 30lbs of pressure per inch all the way along taped edges. Repeat process on opposite side of vehicle.
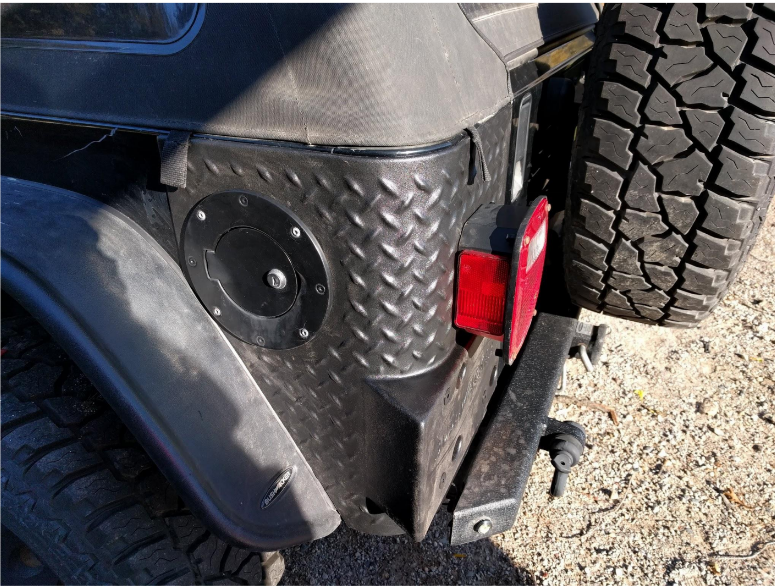
6. Rear Corner Guards: This will largely detail the driver’s side because of the additional steps necessary, passenger side is the same minus the gas cap and license plate considerations. Using your #2 screwdriver, remove taillight lens to expose 3 - 10mm bolts securing light housing to body. CAREFULLY remove those bolts, as they are a very fine thread and it is easy to strip out the hole in body. Draw wire harness out to point where you can unclip connector, or alternately, disconnect harness by reaching up inside body corner from the underbody access cavity.
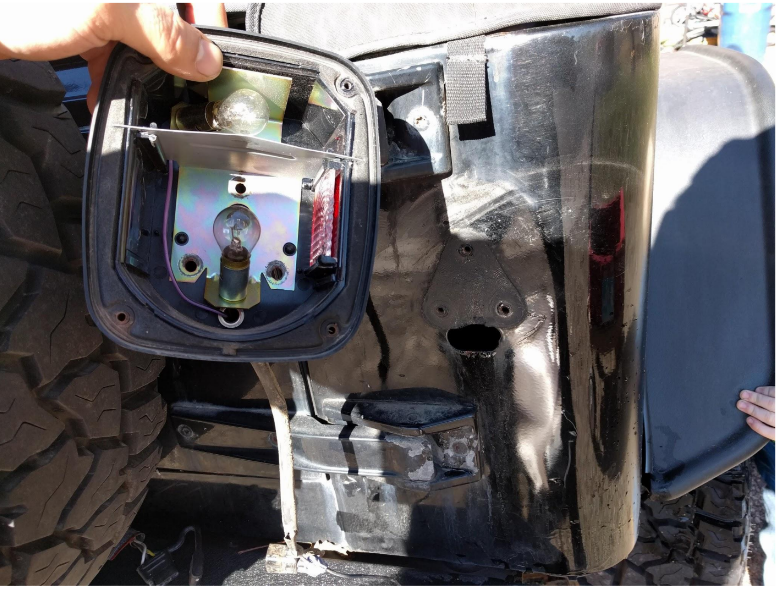
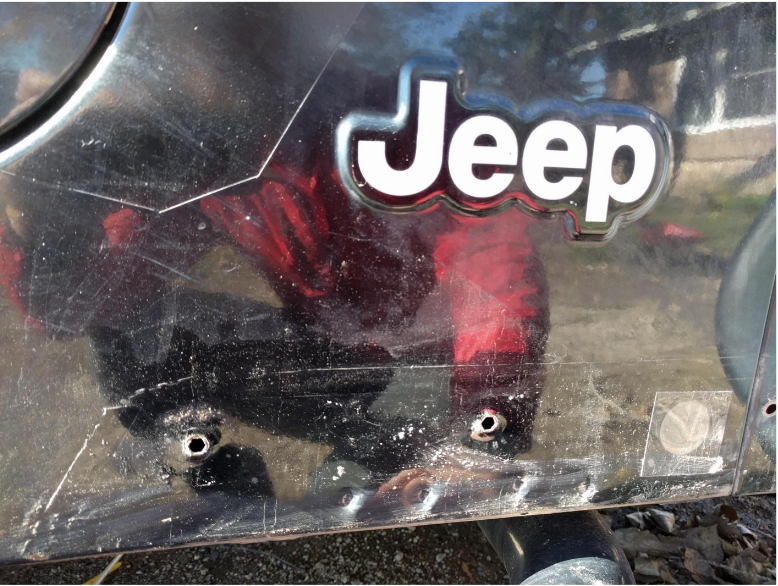
7. Remove gas cap. Remove 8 screws securing gas tank outer flange using T25 driver. Remove license plate holder using 10mm socket.
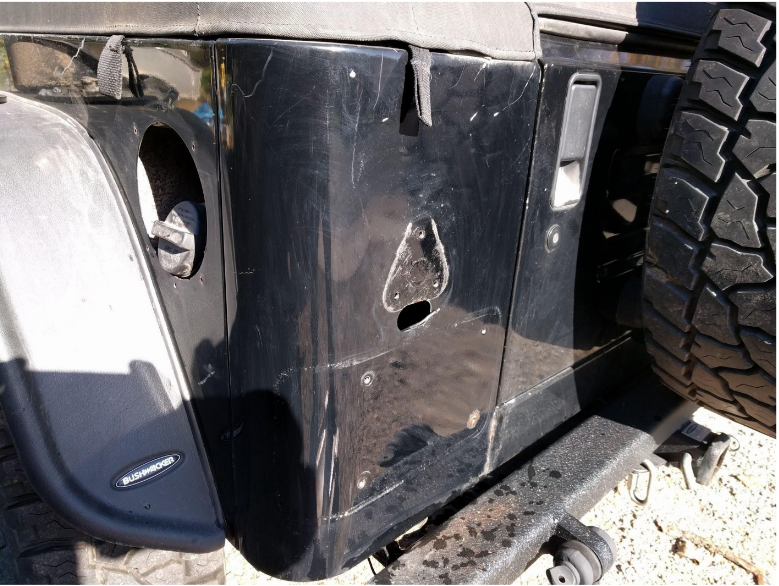
8. After test fitting to verify that corner guard is compatible with your fender flares etc., align corner guard with fastener holes and secure outer two bolts in molded license plate holder. This ensures maintained alignment while securing the tape. Verify that all remaining holes align with holes in body, then beginning at the lower rear corner (directly below license plate mount on the spare tire side), remove red tape backing and applying pressure towards the spare tire from the corner to ensure no air gap at the outside corner of vehicle, affix lower corner. Begin working counterclockwise around cover panel. Again, it is wise to not press too firmly in the event the alignment requires minor adjustment as you go. If screw/bolt holes are not 100% aligned at this step, don’t sweat it, the holes are easy to tweak while installing fasteners, just ensure that the holes are mostly visible.
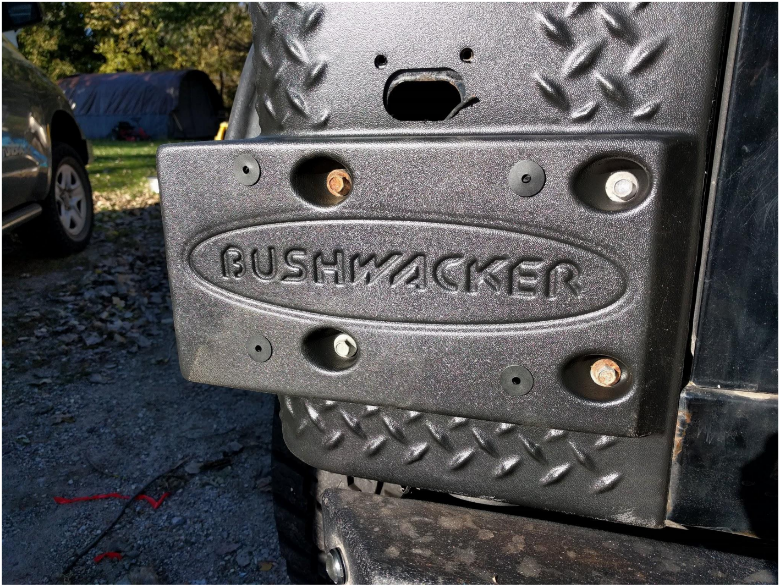
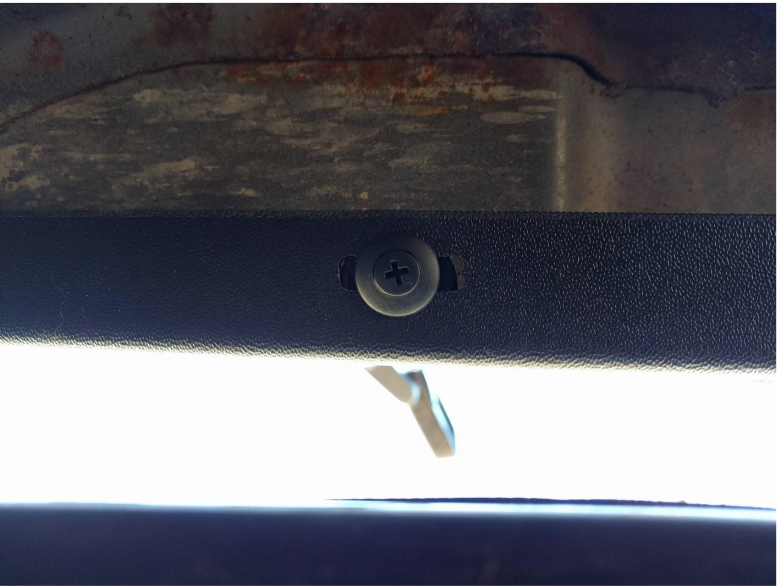
9. Reinstall gas tank cover and taillight. NOTE: Before installing license plate grommets, it is a good idea to verify that the provided holes line up with your license plate. They did not line up with my MN plate. If not, you have two options. cut the mounting area to turn the square holes into slots to move the mounting points as
necessary, or what I ended up doing, and enlarging the holes in my license plate itself to accommodate. Install 4 plastic grommets into square holes on license plate mount, and reinstall license plate using 4 10mm bolts provided. Repeat process on opposite side of vehicle, being aware of any modifications necessary to the corner guard to accommodate aftermarket tailgate hinges.
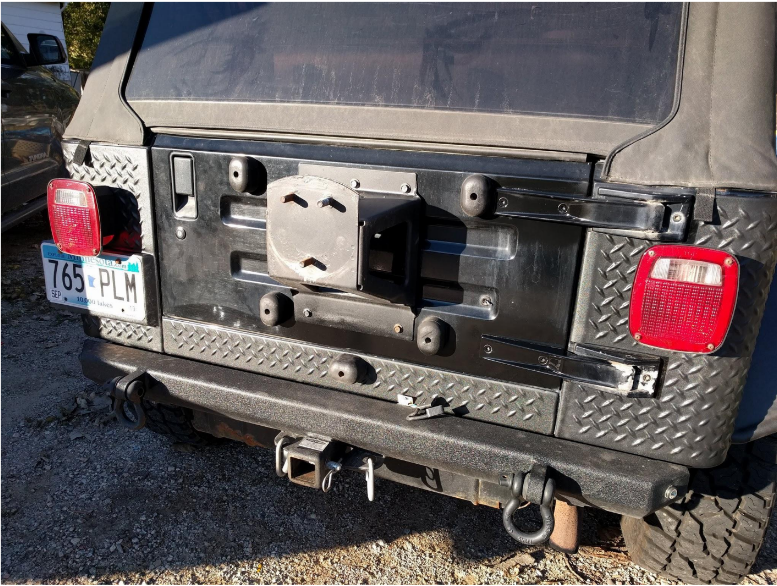
10. Rear Center Cover: Using Lug Wrench remove spare tire and then use T30 driver to remove lower Spare Bump Stop.
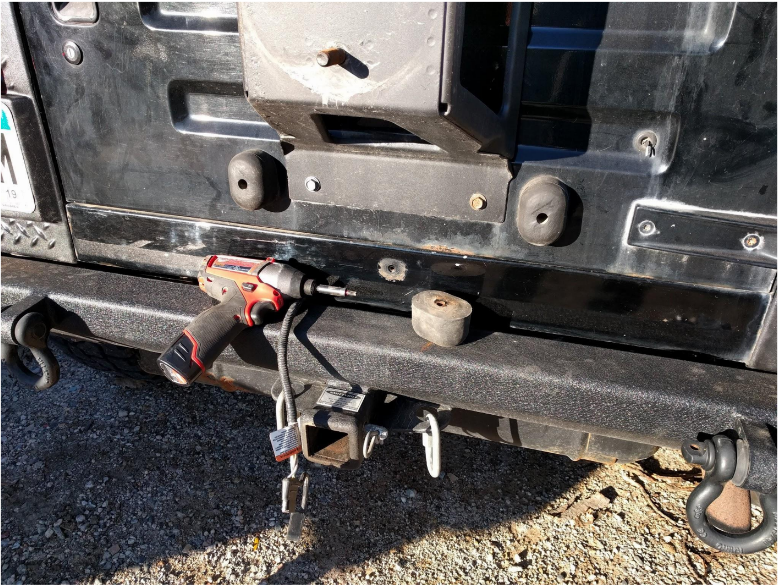
11. Put rear cover into place and verify that the hole for the bump stop lines up with the one in the body while still centering cover between corner guard panels. Adjust bump stop hole as necessary and then remove tape backing and using upward pressure to keep bottom edge snug work your way along the top edge until secure. Reinstall bump stop. Reinstall spare tire.
12. Congrats, you’re done!
Installation Instructions Written by ExtremeTerrain Customer 10/18/2018
