FREE 1 to 3-Day Delivery on Orders $149+ Details

How to Install a Bestop Sunrider for Hardtop - Black Diamond on your Jeep Wrangler

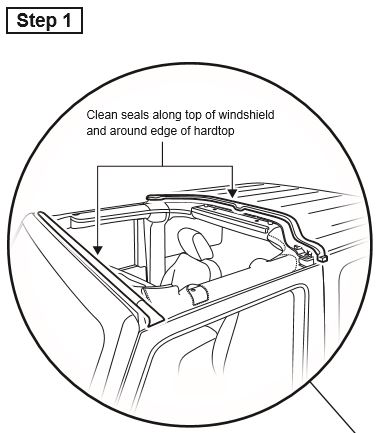
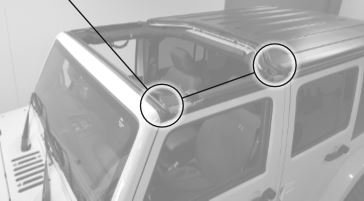
Section 1: Remove Hardtop Freedom Panels & Clean Windshield and Hardtop Seals
STEP 1:
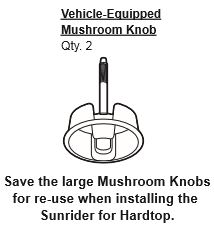
Remove both hardtop freedom panels, according to instructions in your owner’s manual. Save the large Mushroom Knobs for re-use when installing the Sunrider for Hardtop.
Clean the windshield and hardtop seals with soap, warm water and a soft cloth.
Rinse thoroughly with clean water to remove all soap residue, and dry the seals before installing the Sunrider for Hardtop.
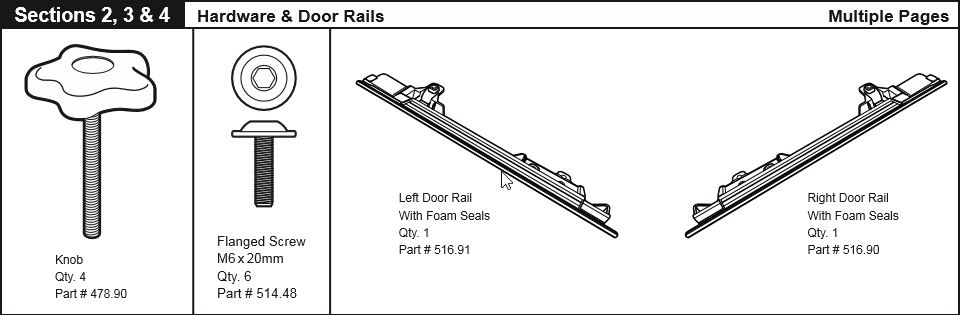
Section 2: Install Door Rails
Step 1
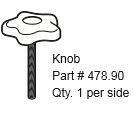
Install the Left Door Rail #516.91 on the vehicle using one of the supplied Knobs #478.90. Only install the front knob at this step.
Do not tighten the #478.90 knob completely at this point.
Repeat on the right side of the vehicle.
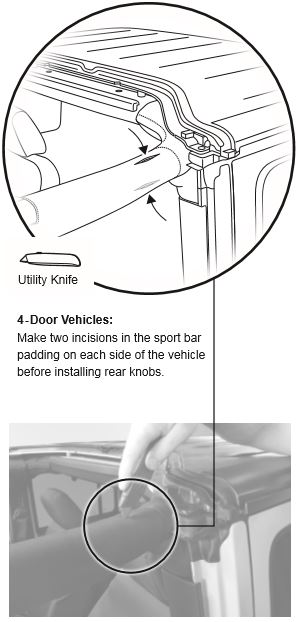
NOTE: 4-Door vehicles will require two incisions in the sport bar padding on each side to install the rear knobs.
DO NOT REMOVE the foam pieces installed on the door rails. They are pre-installed to provide protection and seal the top from water leaks.

Section 3: Install Deck Assembly
Step 1
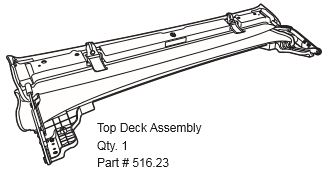
Install the deck assembly on the vehicle.
The molded side of the deck assembly rests on top of the sport bar padding.
Line up the holes through the footpad on the deck assembly with the holes in the rear of each door rail. Install a knob #478.90 through each hole.
Do not tighten the knobs at this time.
TIP: You can use a small screwdriver to help align the Top Deck Assembly and Door Rail. Be sure to align the pieces and press up from below when installing the knobs.

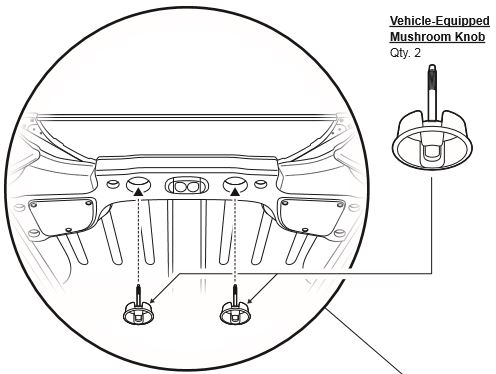
Section 4: Install Vehicle-Equipped Mushroom Knobs; Install Flanged Screws
Step 1
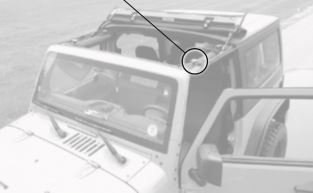
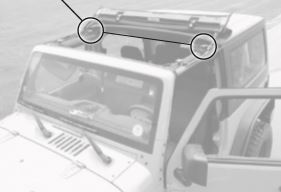
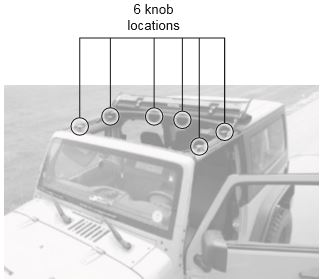
Install the vehicle-equipped mushroom knobs originally supplied with the vehicle hardtop panels, and removed in Section 1, up through the bottom of the sound bar in the locations shown.
Do not tighten the vehicle-equipped mushroom knobs at this time.
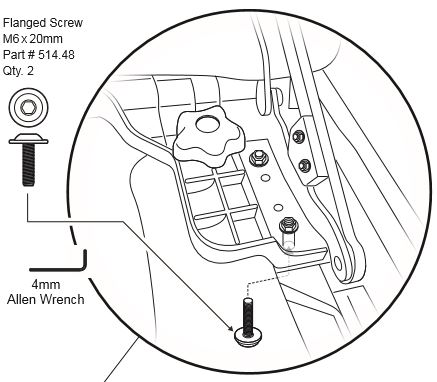
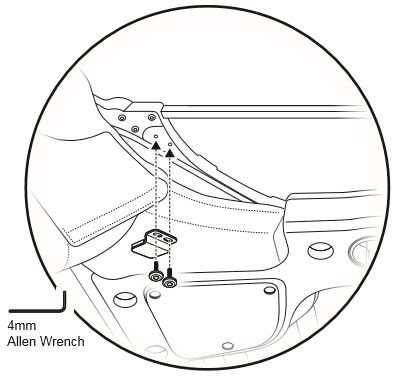
Step 2
Using the 4mm Allen wrench, install a M6x20mm Flanged Screw #514.48 through the left door rail and into the metal bracket with the weld-nut, from the underneath side.
Make sure to tighten this screw firmly.
Repeat this process on the right side of the vehicle.
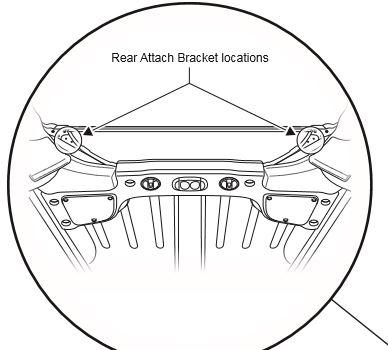
Section 5: Install Rear Attach Brackets
Step 1
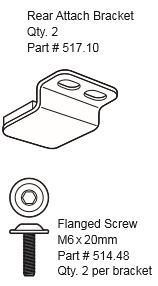
Using the 4mm Allen wrench, install the Rear Attach Brackets #517.10 with two (2) M6x20mm Flanged Screws per bracket.
The brackets are installed on the underneath side of the Sunrider injection-molded rear assembly, and secure the Sunrider for Hardtop to the vehicle hard top.
One bracket for each side of the vehicle.
Section 6: Tighten All Knobs
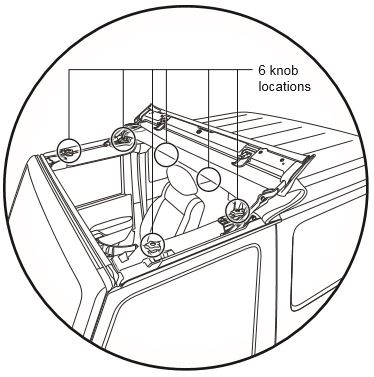
Step 1
Tighten all six of the knobs at this time - the four #478.90 knobs, and the two vehicle-equipped mushroom knobs.
Step 2
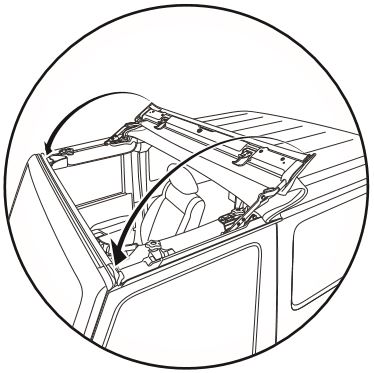
Fold down the Sunrider for Hardtop by pulling the header toward the front of the vehicle, and down into the closed position.
Section 7: Close the Windshield Header Latches
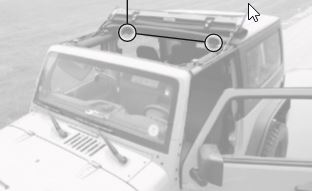
Step 1
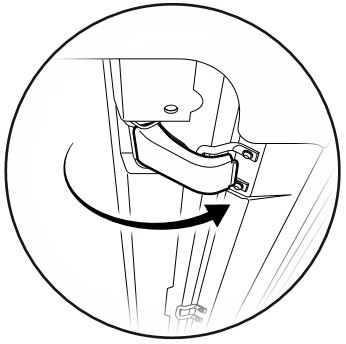
From inside the Jeep, locate the two Windshield Header Latches. To close the latch, pivot the latch handle to the completely open position to allow the hook to engage the windshield loop. Now pivot the hook forward to engage the windshield loop.
Because of the tightness of the fabric, you may have to pull down on the Header Assembly to get the hooks to engage the windshield loops. TIP: Moving the sun visor out of the way makes this step easier.
Repeat on both sides of the vehicle before proceeding to Step 2.
Step 2
When the hook is engaged with the windshield loop, close the latch by pivoting it forward toward the windshield.
Repeat on both sides of the vehicle.

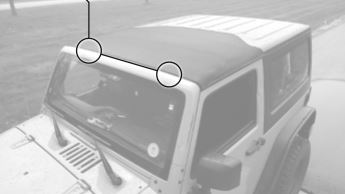
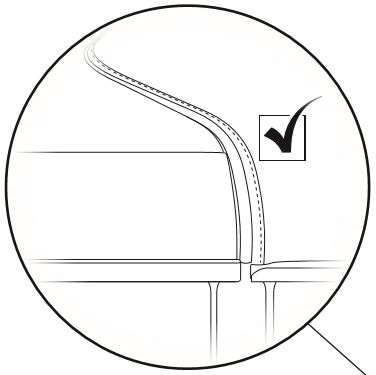
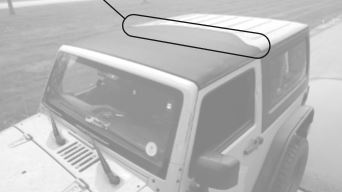
Section 8: Check the Seal for Fit
Step 1
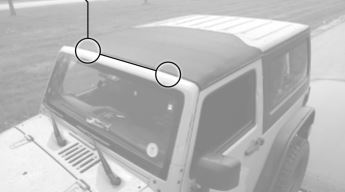
With the Sunrider for Hardtop latched, check the seal between the Sunrider for Hardtop and the rear hardtop. The seal should fit well and cover the channel between the Sunrider for Hardtop and the rear hardtop, with no kinks, folds, or bulges visible from the outside.
If the fit is not good, unlatch the Sunrider for Hardtop, and go back to Step 1 on Page 10, making sure that the seal fit is good before latching the Sunrider for Hardtop again.
NOTICE
Check the seal position and adjust as required to be sure it fits and covers the channel between the rear hardtop and the Sunrider for Hardtop for maximum water leak protection.
Jeep hardtop seals vary by model year. Some seals contain stuffers in the center section that may cause the Sunrider for Hardtop rear seal to stick out in the center.
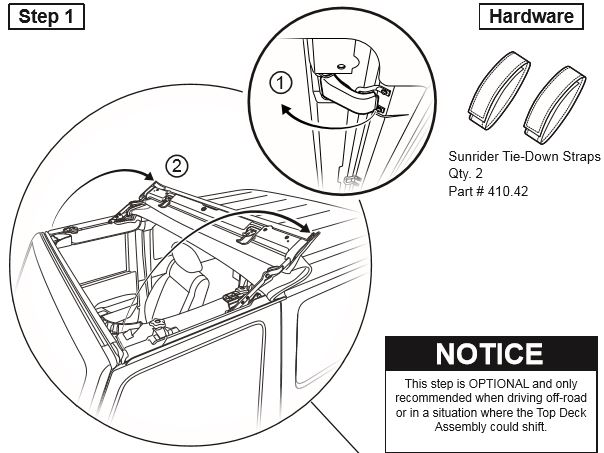
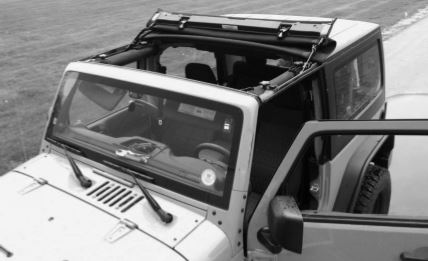
Section 9: Open and Secure Sunrider (optional)
Step 1
From inside the Jeep, locate the two Windshield Header Latches.
1 Open both latches and,
2 fold the Sunrider back.
Step 2
Secure the Sunrider with the Tie Down Straps, #410.12. Wrap each strap around the arm twice and secure the hook-and-loop strap.
Secure both sides of the Sunrider.