 FREE 1 to 3-Day Delivery on Orders $149+ Details

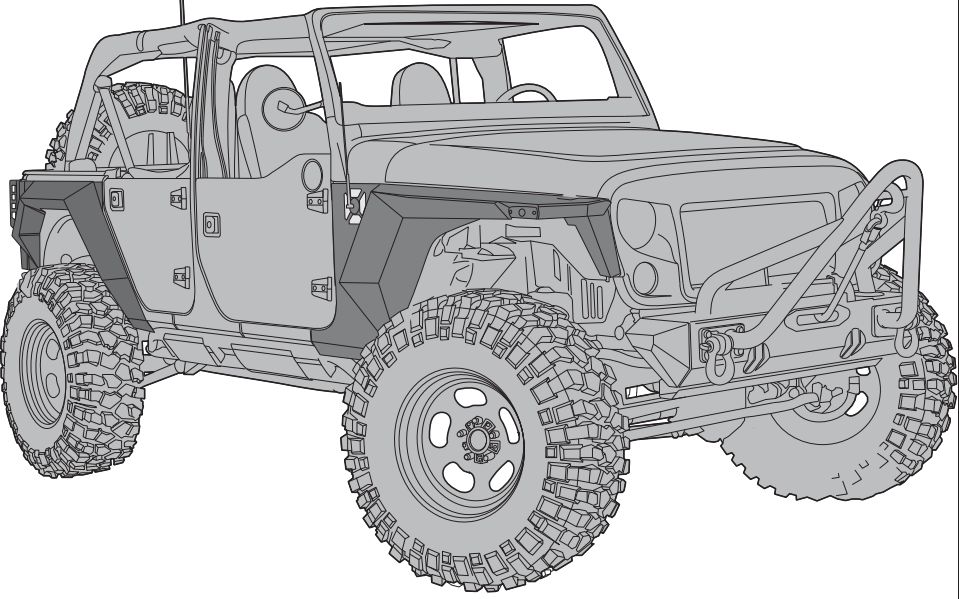
How to Install Rugged Ridge XHD Steel Body Armor Fender Flares (07-17 Wrangler JK) on your Jeep Wrangler

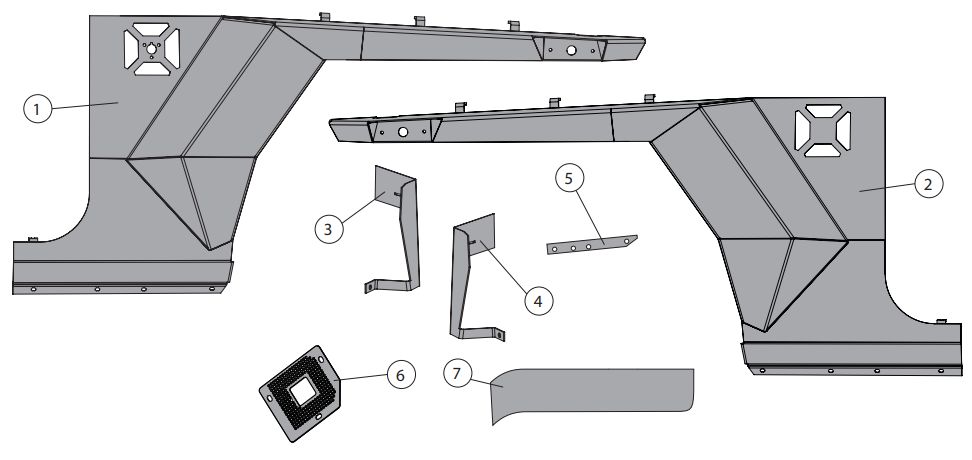
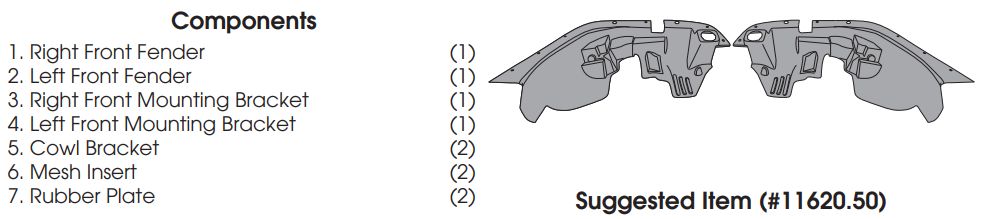
Shop Parts in this Guide
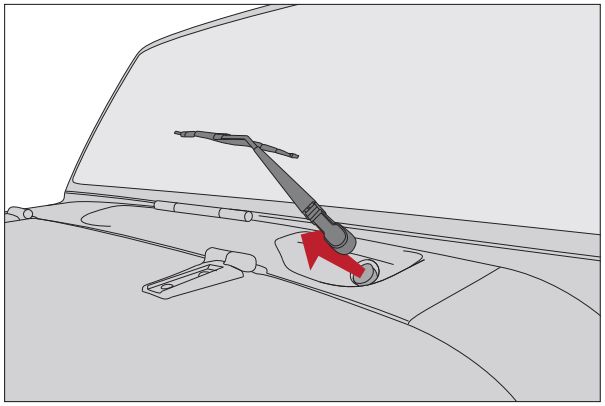
1. Using T-40 socket, remove six bolts securing Windshield Bracket. Remove and set aside Windshield Bracket.

2. Using 13mm wrench, remove both wiper arms.
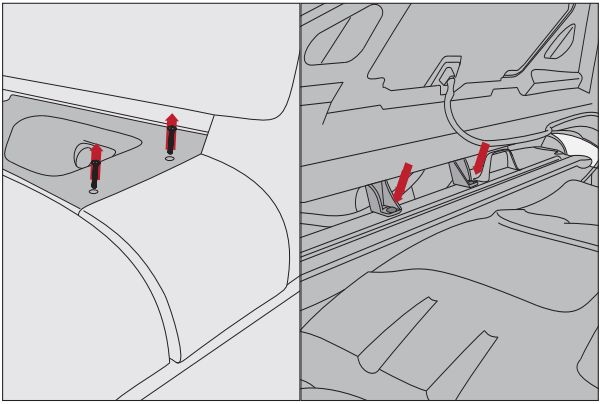
3. Remove cowl screws using T30 socket. Lift hood. Carefully remove cowl center plastic retainer clips
using flat head screw driver and carefully remove cowl cover from vehicle. Close hood.
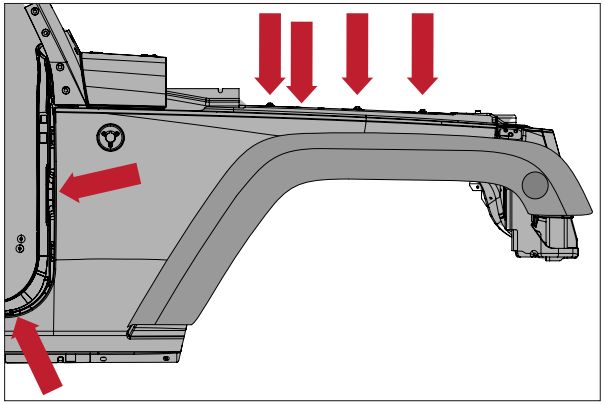
4. Using 10mm wrench, remove top four fender bolts and loosen two fender bolts inside door jamb.
NOTICE: To allow for easier install, remove front doors. Follow owner manuals instructions for removal of doors.
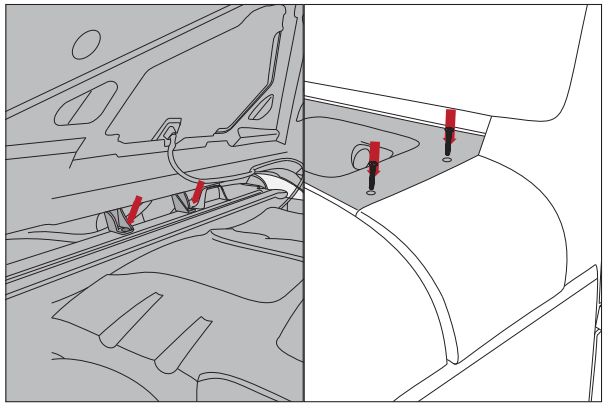
5. Remove two inner cowl bolts located under Cowl Cover. OE bolts will be reused.
6. If top cowl section of fender is adhered to body, use small flat head screw driver or putty knife to release cowl section from body.
NOTICE: Painters tape can be used to protect windshield paint if leverage is needed to release top cowl section.
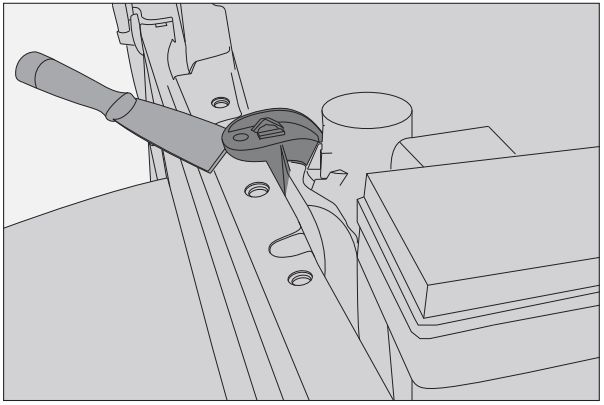
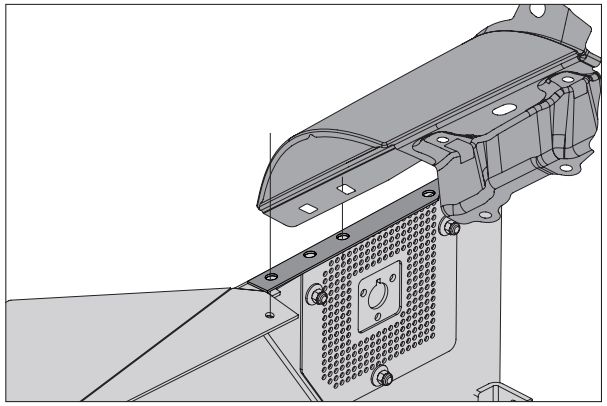
7. Remove 7 inner fender bolts and retain for later use. Remove lower pinch seam bolts.
NOTICE: If using OE inner fender liners with Rugged Ridge Armor Fender, remove inner fender liner from Flare Support Bracket by removing plastic push retainers using a Panel Clip Tool.
8. Remove Lower Hood Catches from fenders using 10mm socket. Set aside hardware and Lower Hood Catches.
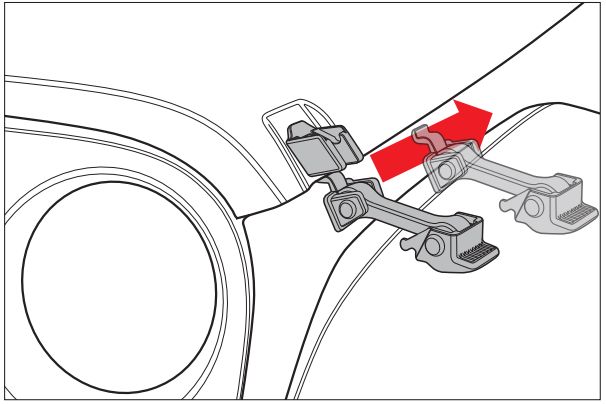
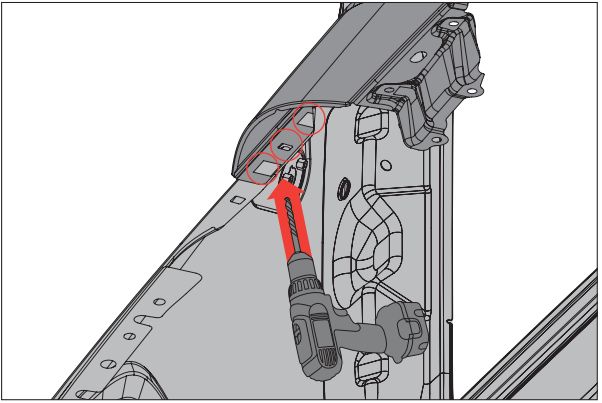
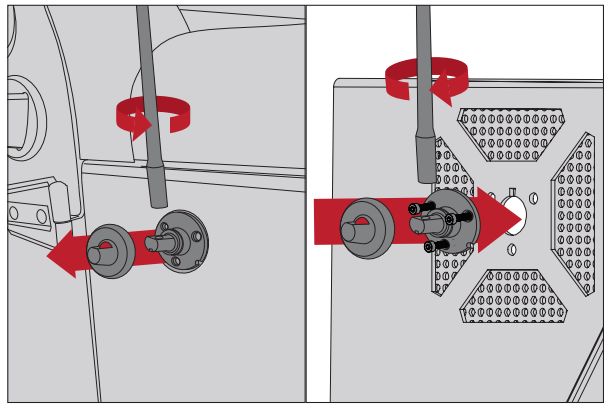
9. Remove Side Marker Bulb and disconnect wire harness, retaining clip from flare.

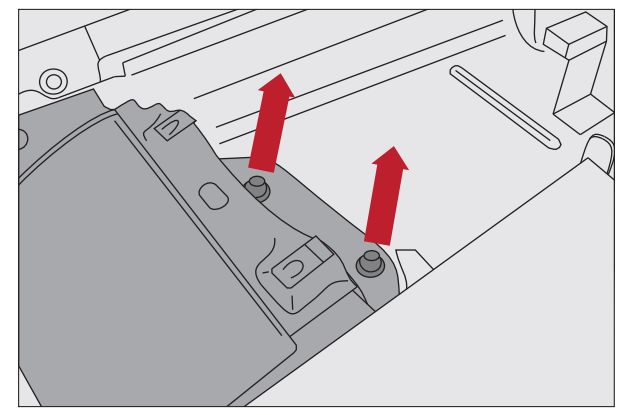
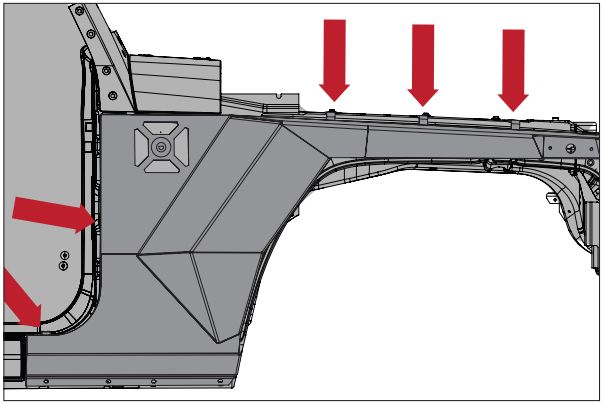
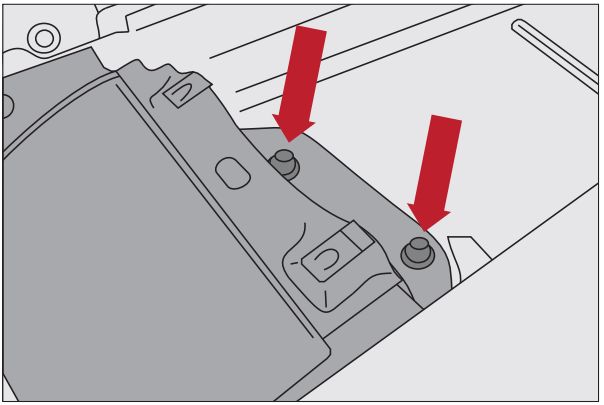
10. Lift mounting brackets on top of fender away from fender using flat head screw driver or putty knife.
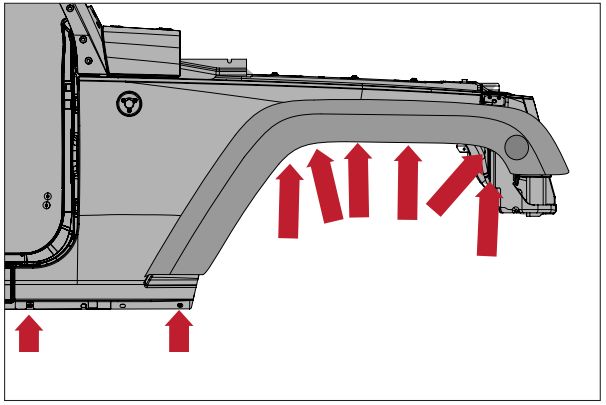
11. Carefully pull fender assembly away from vehicle. For passenger side, once fender is away from vehicle, disconnect radio antenna cable with pair of pliers in a twisting motion
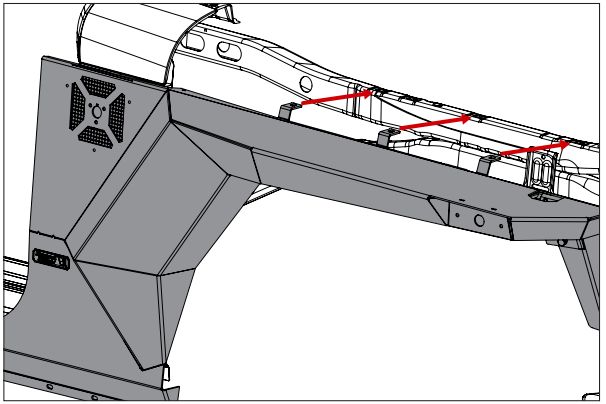
12. OE Fender should be supported to avoid damage. Locate spot welds securing upper cowl to fender. Using a 1/8” drill bit, drill center guide holes into each spot weld. A wood bock should be placed inside Cowl as guide holes are drilled to reduce any chance of damaging cowl sheet metal.
13. Enlarge 1/8” guide holes with 5/16” drill bit. Open guide holes making sure to place wood block over holes. With spot welds cleared, carefully remove Upper Cowl from fender and set aside.
NOTICE: Fenders can be damaged if welds have not been opened completely.
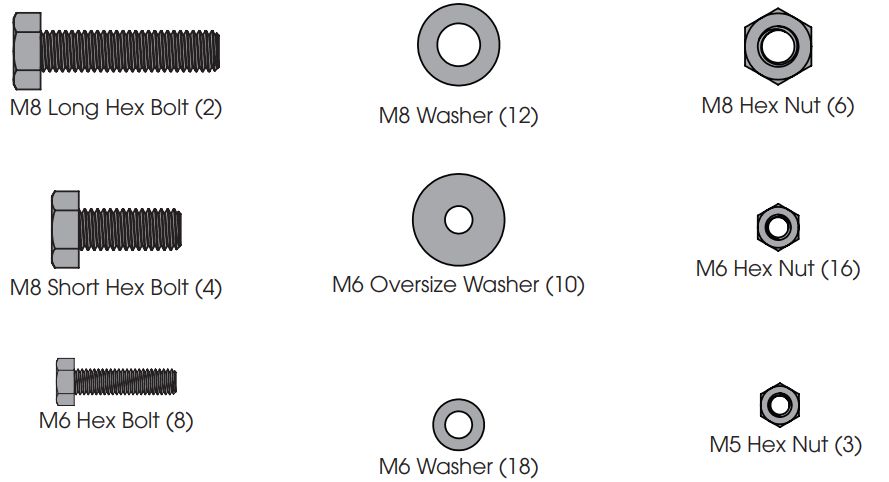
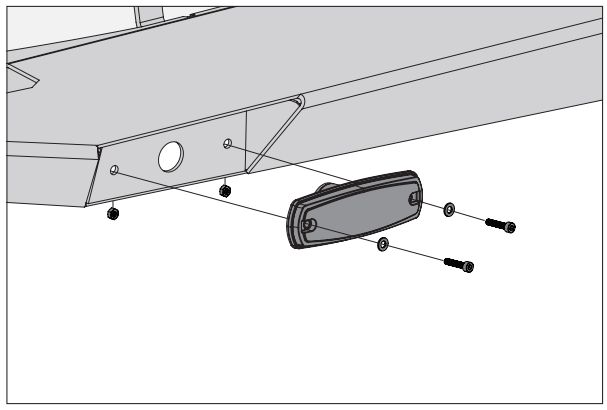
14. Attach supplied Side Marker Lenses, using supplied M4 Socket Head Bolts, Washers, and Nuts to
Fender Armor.
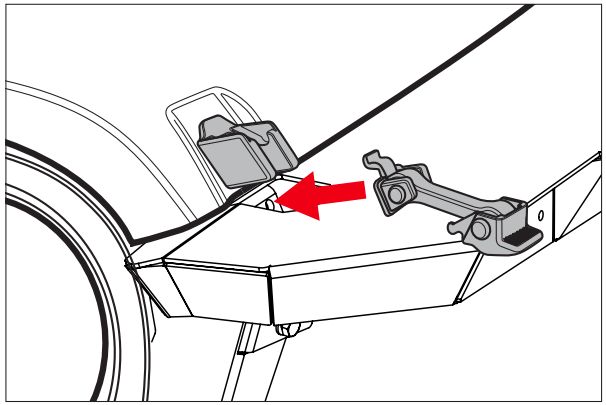
15. Attach Lower Hood Catch to Fender Armor reusing OE hardware.
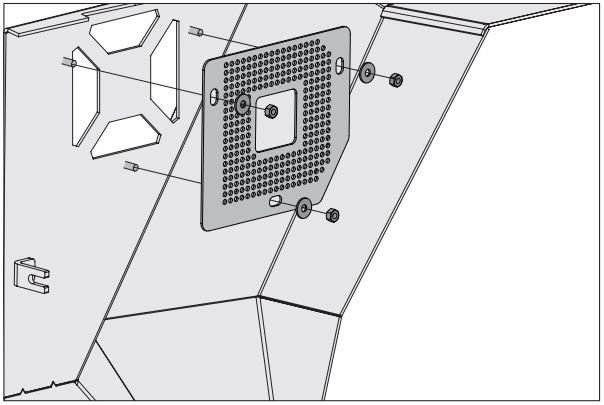
16. Attach Mesh Inserts to Fenders using supplied M5 Nut and Washer.
NOTICE: Mesh Inserts can be painted before attaching to Fender Armor.
17. Using supplied M6 Stianless Steel Bolt, Washer, and Nut, loosely affx Upper Cowl to Cowl Bracket. Loosely attach Upper Cowl and bracket to Fender Armor.
18. Unscrew antenna mast, remove plastic cover, and unbolt antenna base from OE fender.
NOTICE: Use masking tape around antenna while removing plastic cover to prevent damage OE fender.
19. Using OE bolts and supplied M5 nuts and washers, attach antenna base to passenger side Armor Fender. Reattach plastic cover and antenna mast.
NOTICE: Trailrated Badge can be removed from OE fender and applied to driverside Armor Fender.
20. With a second person, align Armor Fenders to vehicle. Reconnect radio atenna cable. Mounting tabs of engine bay components will need to be lifted up to allow Fender Armor to mount.
NOTICE: Be careful not to scratch grille while mounting Armor Fenders.
21. Loosely attach Upper and Door Jamb Mounting Tabs to vehicle using OE bolts. Loosely attach Armor Fenders to Flare Mounting Bracket using supplied M8 bolt, washers, and nut.
22. Align Upper Cowl and Armor Fenders and tighten Upper Cowl and Cowl Bracket hardware. Use OE hardware to loosely attach Upper Cowl to vehicle.
23. Tighten OE bolt at Door Jamp Mounting Tab.
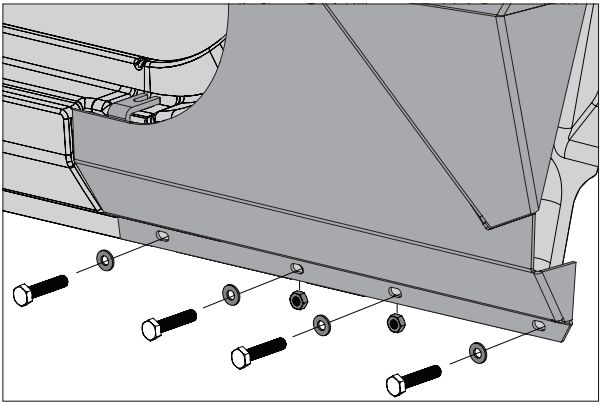
24. Using supplied M6 Hex Bolts, Washers, and Nuts, attach Armor Fenders to pinch seam.
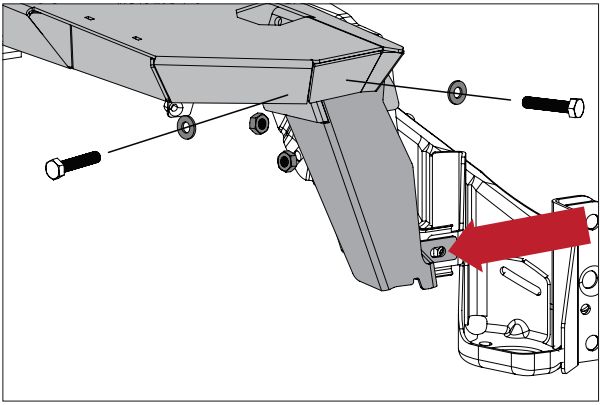
25. Using supplied M8 Hex Bolts, Washers, and Nuts, attach Front Mounting Brackets to Armor Fenders. Using OE bolts, attach Front Mounting Brackets to vehicle.
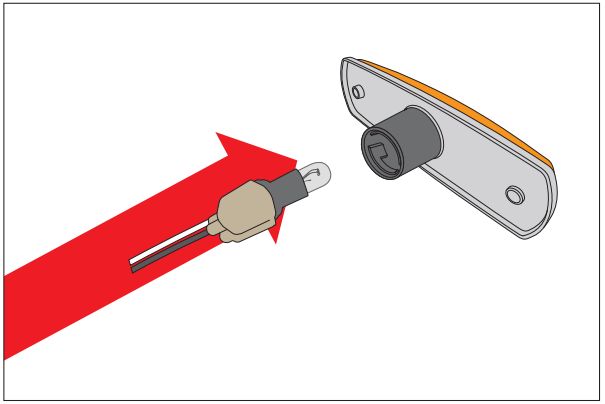
26. Connect OE Side Marker bulb into supplied Side Marker Lens. Tighten all mounting hardware.
27. Reusing OE hardware, reattach Cowl Cover, Windshild Brackets, and Wiper Arms. Full tighten all OE hardware.
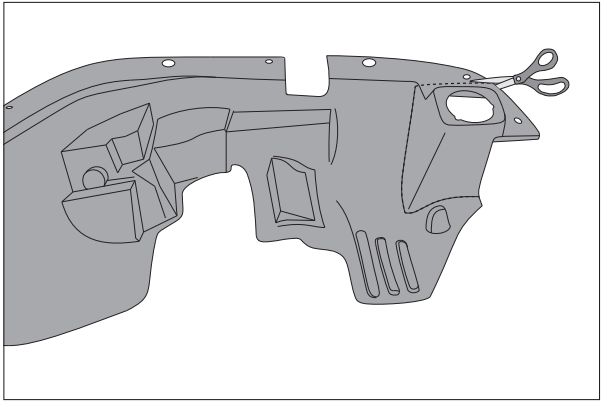
NOTICE: Proceed to step 28 if using Rugged Ridge Inner Fender Liners (#11620.50). If using OE liners, skip to step 30.
28. Cut out side marker section of the Rugged Ridge Inner Fender Liner.
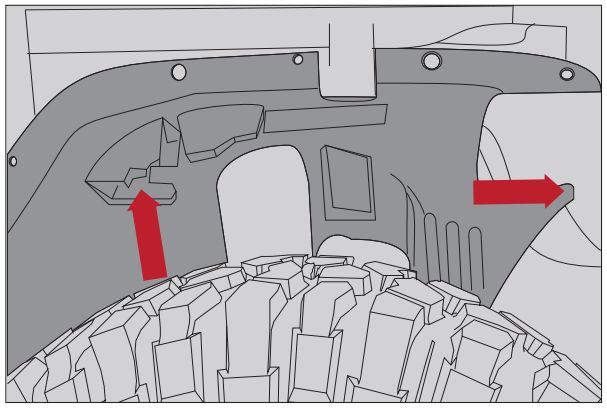
29. Attach Rugged Ridge front fender liner reusing factory bolts.
NOTICE: If using Rugged Ridge Inner Fender Liners, a hole can be drilled in liner and mounted to Front Mounting Bracket of Armor Fender.
30. Attach front wheel liner, mark and cut a line that follows edge of fender.

31. Position supplied Rubber Plate next to cut OE fender liner as shown. Cut opening for flare support bracket. Using supplied sheet metal screws, attach Rubber Plate to cut OE fenders. Fold rubber plate into Armor Fender.


