 FREE 1 to 3-Day Delivery on Orders $149+ Details

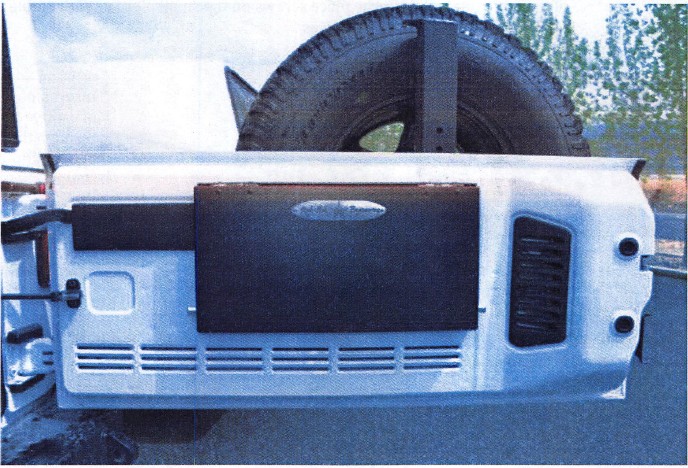
How to Install Rock-Slide Engineering Tailgate Table on your Wrangler
NOTE: The Tailgate Table and Large Tailgate Table can be mounted to any flat surface. These instructions will show installation on a Wrangler tailgate, but the same procedures will apply to install to the flat area of your choice.
Parts List
1-Tailgate Table
6-Self-Tapping machine screws
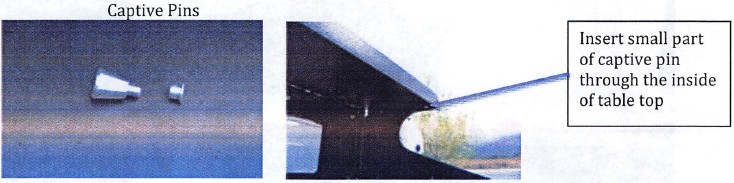
2-Captive Pins
1-Rubber strip
TAILGATE TABLE INSTALLATION
1. Attach the Captive Pins to your Tailgate Table. These pins hold your tailgate together when it is in the closed position
a. The pins have two parts to each side. The small piece slides from the inside of the table top and the large piece screws on the small piece with the table top sandwiched between the pieces

2. Choose the location to mount your Tailgate Table
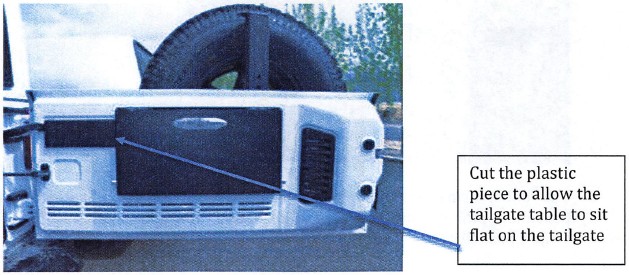
3. If mounting on a Jeep JK Model, some of the black plastic trim covering the 3rd brake light wires on the tailgate will need to be removed
Hold the tailgate table to desired spot and mark where the plastic trim needs to be cut. Ensure the tailgate table is high enough to clear the cargo tray
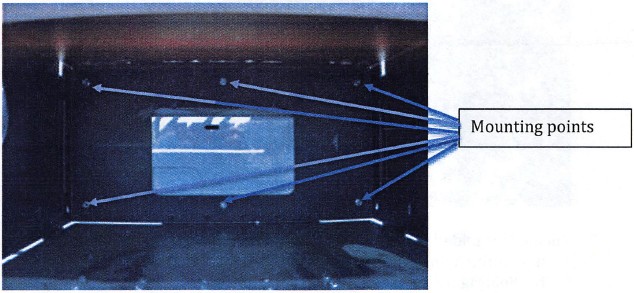
4. With the tailgate table folded open, hold it in the desired position and screw it into the tailgate. There are six holes for mounting and 6 screws provided
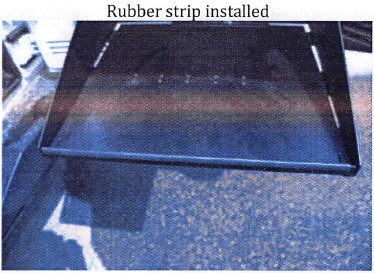
5. A rubber strip is provided to hold the table together tighter and ensure it does not rattle. The rubber strip is attached to the front lip of the bottom table surface.
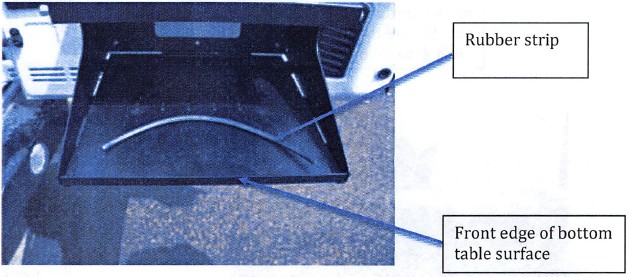
6. The rubber strip can be customized. The entire strip can be put on the edge or cut the rubber into put smaller pieces on if you don't want the fit to be as tight. The strip is pushed onto the edge of the metal
7. The table is folded up by folding in this order:
a. Bottom table is folded in half and put at the back
b. Fold right arm in against bottom table
c. Fold left arm in against right arm
d. Fold top table down
e. Rotate capture pins clockwise until they push in to lock table together
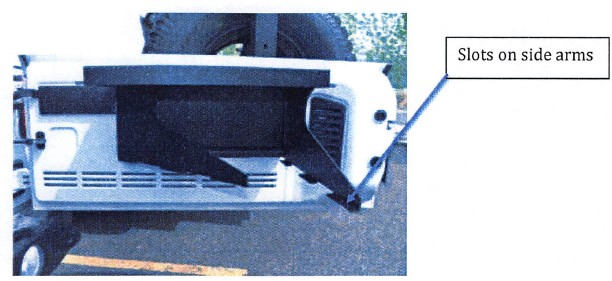
8. To open the table, turn capture pins counterclockwise and pull out. Fold table out in this order:
a. Lift table top up
b. Pull left arm out
c. Pull right arm out
d. Fold bottom table out and click table surface into the slots on both arms
Thank you for choosing Rock-Slide Engineering products. We value your business and welcome your feedback/suggestions. If you have any concerns please contact us directly @ 435-752-4580. We are here to help you!

