 FREE 1 to 3-Day Delivery on Orders $149+ Details

How to Install Body Armor 4x4 Front Bumper on your 07-18 Jeep Wrangler JK; 2018 Jeep Wrangler JL

Shop Parts in this Guide
** Inspect bumper prior to installation.
** Due to the weight of the bumper it is recommended at least two people for installation
Removing Bumper:
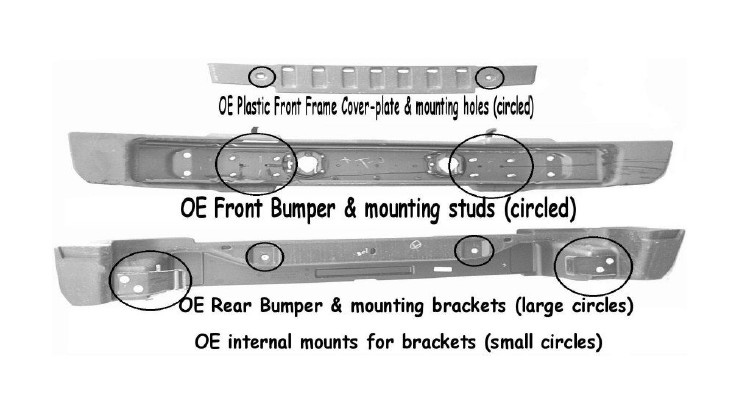
Step 1 Remove the (2) push-pin screws to remove the plastic frame cover-plate.
Step 2 If equipped, disconnect the OE driving lights at the back of the light housings. Insulate ends and tie the wires to the frame. Do not cut ends.
Step 3 Using appropriate tools, remove the OE front bumper by removing the hex nuts holding the bumper to frame mount flanges. Installation kit contains all new necessary attaching hardware for your Body Armor JK Bumper. The Plastic bumper face is separate from the internal frame.
Installation:
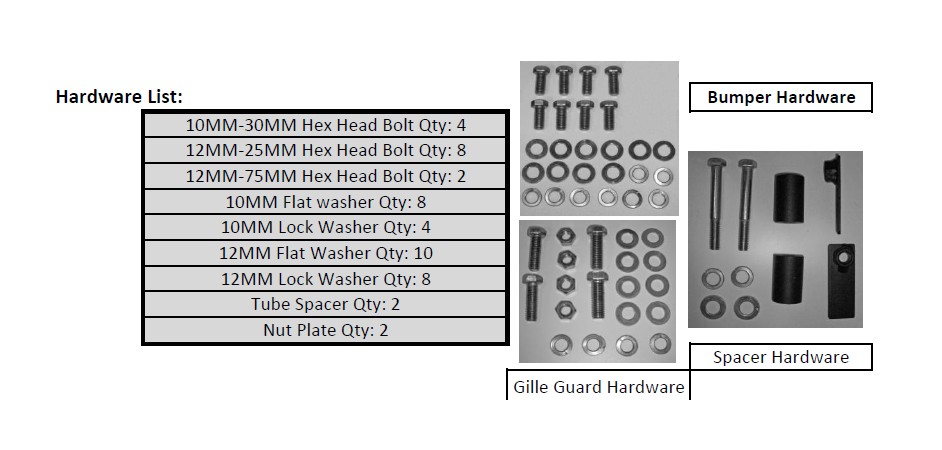
Step 1 Attach grille guard hoop to the bumper using the 4-10MM hex head bolts, flat and lock washers.
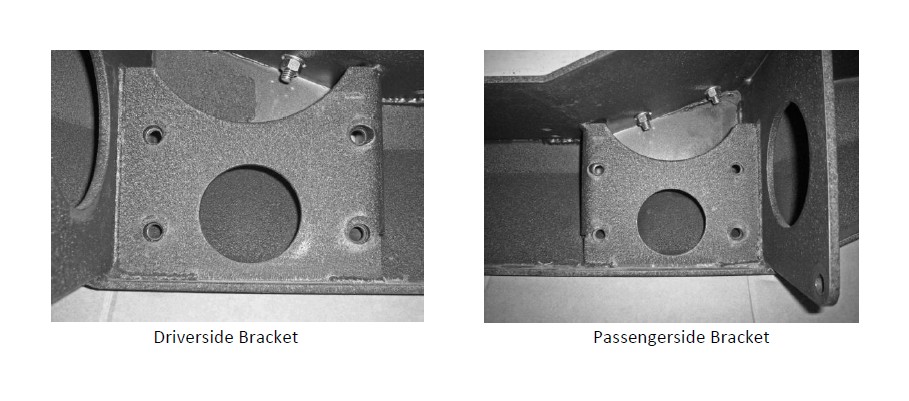
Step 2 Locate 12MM-25MM hex head bolts flat washers and lock washers. Place the lock washer over the bolt first followed by the flat washer. You will need 4 bolts and washers per side of the bumper. With a helper lift the bumper so that the mounting holes line up on each side. Losely attach the bumper with the 8 12MM bolts.
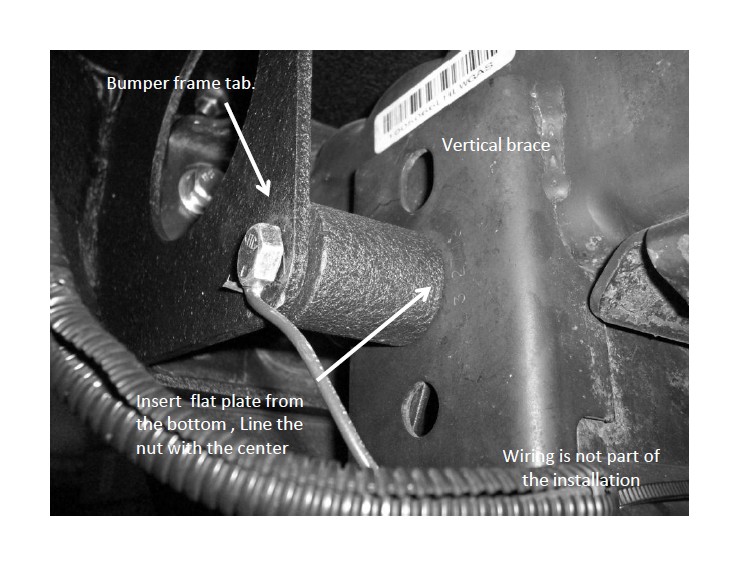
Step 3 Locate the 2 flat plates with the welded nut, 2-12MM-75MM bolts washers and lock washers and 2 black spacer tubes. Insert the plates into the vertical cross member brace. Carefully line up the 12MM-75MM bolts with washers through the lower tab into the spacer attching to the nut on the flat plate that is inserted into the vertical brace.
Step 4 Tighten all bolts and install winch and wire lights if used.
** Install optional Body Armor skid plate Part Number JK-5123.

