FREE 2 or 3-Day Delivery on 10,000+ Items. Details

Talk to Wrangler Enthusiasts
1-877-870-8556
M-F 8:30A-11P, Sat-Sun 8:30A-9P
Logo Image
$20K Sweeps! 10 Chances to Win! Enter Daily >
The ExtremeTerrain Show is Back! Register Now >

Spectre Performance Cold Air Intake; Polished (18-23 3.6L Jeep Wrangler JL)

Item J131160-JL
Call a Wrangler Enthusiast at 1-877-870-8556
M-F 8:30A-11P, Sat-Sun 8:30A-9P
$0.00
Market Price $225.99 You Save 12% ($26.00)
Our Price

$199.99 (kit)

FREE Shipping

Will this fit your Vehicle?

Select a different vehicle Help?
Update or Change Vehicle
Ship to: Ashburn - 20149
Sorry, please enter a valid US or CA postal code
We're sorry, zip can't be updated at this time.
    Create a list
    Add to New List

    Saved - View your saved items

    We're sorry. We couldn't save this product at this time.

      Video Review & Installation

      Hey, guys, today I'm here with the Spectre Performance Cold Air Intake fitting all 2018 and newer JL Wranglers with the 3.6-liter V6 motor. So, if you're looking for an effective yet affordable way to upgrade the airflow underneath your hood for your 3.6 liter, this option by Spectre is gonna be a good choice to take into consideration. So, anytime you're opening up airflow, whether it be intake or exhaust, you are gonna see some performance gains. And this option by Spectre is gonna do just that by increasing your airflow and increasing that filtration with a conical filter and a straight-through style intake tube. Now, those performance gains are usually gonna stick to those higher RPM ranges where us as Jeep owners don't spend a lot of time but you can expect to see a small increase in your MPG as well as feel a little bit of throttle response when you're in those higher RPM ranges. Not to mention this is gonna add an upgraded look underneath your hood with the red conical filter and that aluminum polished intake tube giving you a bit of a polished look in your engine bay.Now, I would recommend this to somebody who is in a drier climate just because this only comes with the heat shield, so the filter is gonna be a little bit more exposed. So, if you are in a wetter climate, if you do do some water forging with your Wrangler, and you're concerned about water getting to that filter, I would recommend to check out some closed box options, some airbox options or even looking at some snorkel choices. Now, I personally think this is a great choice for somebody who's not really concerned about that and is looking for a no-fuss intake to increase that airflow on their 3.6 liter. Not to mention again, this is gonna be incredibly affordable at roughly $200 making this one of the most affordable choices for cold air intake on the page. Now, other options that may be a little bit more expensive, those are usually going to include a little bit more into their design. They may include some closed box options or even those snorkel options like I mentioned before, they may have dry filters instead of an oiled filter like this one or they just may have a little bit more to their design as far as the actual intake tube and the heat shield go.Now, my personal opinion I think again, if you're looking for something that's no-fuss, very easy to install and is gonna save you some money in the long run while also getting that performance gain, this is going to be a great choice. So, install is gonna be pretty easy at a one out of three wrenches on the difficulty meter. You're gonna need some very basic hand tools to get this job done. So, speaking of that install, let's jump into that now. The tools that I used for my installer were an impact wrench, a pair of snips, an adjustable wrench, a flathead screwdriver, a 14-millimeter shallow socket, an 8-millimeter and 10-millimeter deep socket, a T20 and T30 Torx socket, quarter-inch drive ratchet, a trim removal tool, and white lithium grease. Our first step to taking apart our factory airbox is to remove our IAT sensor and our crankcase hose. So, this is going to be our IAT sensor, we can just depress this clip and pull back. We're also gonna have two Christmas tree clips that are holding on the sensor to our resonator here, so I'm gonna take a trim removal tool and just wiggle those out.And our clip on the back is already disconnected but on this hose here there will be a little Christmas tree that you do have to take off as well. We can put this aside and move to our crankcase tube. So, for this there's just a little tab here that we have to pinch and then we can pull back. Right, then we can put that aside as well. Next, we can remove the two bolts that are holding on the front of our intake tube with a 10-millimeter socket. We also have a bolt that's holding in the side of the airbox, I'm gonna use that same 10-millimeter socket to remove it. Last but not least, we can loosen up the clamp at the throttle body with an 8-millimeter socket, or you could also use a flathead, I just find that a socket is a little bit easier. We don't have to fully disconnect it, we just got to make sure that it's not tight so we can pull back and slip it off the throttle body. Now, we're ready to pop our intake out of place by pulling up. So, this air dam is a part of our intake system that we will have to remove. It's going to be held in by a grommet down at the bottom, but it's also held in at the front of our radiator support with two screws so we will have to remove our grille.So, we are going to remove the six clips that are holding on our grille. I'm just using a flathead screwdriver, you can also use a trim removal tool in order to get these out. If you do run into an issue where a clip doesn't want to come loose, I just use a trim removal tool. Usually, a flathead does the trick, but sometimes these can be tricky. Once the last one is removed, we can pull up on the top here, make sure the two pins that sit in this front support are out. Now, we can just give the grille a good tug, it's held in by a couple of clips down here at the bottom and we can put this aside. Next, we're gonna remove this bar, there's two T30 Torx that are holding it on, I'm gonna use a T30 Torx socket to remove them. That's gonna expose the two screws that are holding on our air dam, I'm going to use a T20 Torx socket to remove those two screws. And then we'll be able to pull the air dam out through where the airbox was sitting. Right. So, we can give that a good tug out of that grommet there and then wiggle this out.Before we hop into the install, what I wanna do is put our grille back together because we won't need it off for the actual install portion. So first, I'm gonna put this bar back on. Tighten it up with that T30 Torx socket, then we can reattach our grille. Next, we can pop this into place aligning all the pins at the bottom and we can give this a good press, make sure that all of the holes up at the top are aligned and then we can reinstall our pins. Before we hop into the install I wanted to put the two intakes on the table and give you guys a little bit of comparison, show you what benefits are gonna come out of this new Cold Air Intake by Spectre in comparison to your factory setup. Now, starting off they are going to be completely different, you're getting a completely different design with this new cold air intake. The airbox itself is going to do a great job on the factory one at protecting that filter, however, it's not going to have the best airflow. With this new option by Spectre, this is gonna have a heat shield design.So, it is gonna be more open, less protective, more for somebody who's in a drier climate, it's not so much worried about water, but it's gonna help out all of that airflow, while still creating a seal on the hood to keep all that hot engine bay air out. Now, that's gonna go hand in hand with this new filter. This option is going to come with a large conical filter that will be pre-oiled. So, essentially what that means is that this is going to be cleanable, reusable, and essentially last the lifetime of your Wrangler, you won't have to replace it all like your factory filter. The factory filter is going to be just paper, you will have to replace that over so many miles and it's not going to do the best job at filtration. Now, it's going to be perfect for stock application. However, if you're looking to get a little bit of performance, less restriction and better filtration, this is going to do a really good job at that.Moving over to the intake tube on this new Spectre intake, you are getting a straight-through style design. On the factory airbox in the factory intake tube, you can see that we have a couple of mounts here as well as a resonator and the tube itself is actually kind of flattened out in the middle. Now, that's going to cause some restriction, it's not gonna have the most direct airflow. And with this new option, you're getting direct airflow from your filter through the intake tube directly to that throttle body, which is going to help out your performance. Not to mention you're getting everything that you need with this new setup, you're getting all silicone couplers as well as all of the clamps and even the studs to hold it in place. So, overall this is gonna do a lot better job at increasing your performance for your Wrangler than your factory one is able to do. Now, what we have to do next is swap over our IAT sensor and then we can install this on our Wrangler. What we need to do is transfer over our IAT sensor, our intake air temperature sensor, so I usually take a flathead. What we need to do is turn it counterclockwise, but there is a little tab here that we have to make sure that this tab on the sensor itself has to go over.So, I just take a small flathead and kind of help it over while we turn. And then once it's turned, we can kind of wiggle it back. There is going to be an O-ring in there, it's gonna make it a little bit difficult to pull out. But once it's out, we can put our factory airbox aside and move over to our new one. So, on the side of our intake tube, we are gonna have a cut out for this temperature sensor. What we need to do is insert the provided grommet, there's gonna be a slit in between that we just have to work into the intake tube. Might help to use a flathead, make sure that it is flat on the other side, everything is sealed. What we can do now is attach our IAT sensor. It might be helpful to take some white lithium grease and just kind of go around that O-ring just to help it go through this grommet here because it is a little bit difficult at first. So, once our tab is sitting flat on that grommet we can go ahead and put our intake together. What we can do next is attach our seal, this is gonna go around our heat shield to make sure that this is sealing to our hood and that no hot engine bay air is gonna get into our filter.I'm just going to start the bottom of our airbox here. So it looks like we're gonna have to trim a little bit of our seal. So, I'll grab a pair of snips and we can cut it right at where the metal is and then where the seal is. So, I like to use a pair of snips just because we're not only cutting this rubber piece, there is metal inside of here that's integrated into the actual seal that makes it stick onto the heat shield. Right. So, once that is trimmed and on there, what we can do is attach our studs at the bottom. So, now we can attach our studs at the bottom, we will be reusing the grommets on our factory airbox in just a second, so these can sit in the air...in the jeep correctly. So, we can take our bolt and our lock washer, put that through the bottom of our airbox or our heat shield and thread our stud onto place. Now, I'm just gonna hand-tighten that at the moment, get the other one installed. And then we can go back and tighten it down. These don't have to be incredibly tight but we want them to stay in place so the airbox is not rattling around inside the engine bay.So, on either side of this stud, there are two flat spots. I'm gonna take an adjustable wrench just to keep it still while we tighten down the bolt on top. And for that top bolt I'm gonna use a 14-millimeter socket and do the same thing for the other one. Then we can install our spacer. So, we need to remove these two grommets on the bottom of our airbox before we install our heat shield, I just twist and pull, they should come right off. Then we'll install these on the Jeep before we install our heat shield. So, what we can do is attach these, these just go into the factory location and our heat shield will be held in by these two grommets. Before we attach our heat shield, we do need to remove this bolt up at the front of our bracket on our battery tray here, I'm gonna use a 10-millimeter socket to remove that. This is where our spacer is gonna come into play and prevent any rattling from metal to metal while the heat shield is installed on our Jeep. What we can do at this point is take our heat shield, line that up with our two grommets there and press it into place.Once that's sitting in place we can grab our spacer and thread that in and line that up with our heat shield. And then we can secure that down with the flat washer and nylon lock nut and tighten that up with the 10-millimeter socket. What we can do next is install our filter. We wanna make sure that this adapter is in place, right, that's gonna fit in the heat shield like that. Make sure that you have access to that clamp there. What we're gonna do is tighten that up with an 8-millimeter socket so it stays in place. With both clamps on the silicone coupler, we can attach that to the outside of that tube there or the adapter. We can tighten down the one that's connected to the adapter, same 8-millimeter socket. Then we can grab our intake tube, making sure we have the coupler on the end with the two clamps. Now we can tighten those up, 8-millimeter socket. Now we can tighten down this clamp at the intake tube coupler. Then last but not least, we can attach our crankcase hose just by pressing forward and then our intake air temp sensor.After everything is plugged in and tightened down, then you're all set to go. So, that's gonna wrap it up for my review and install. Make sure you like and subscribe and for more videos on products like this, always keep it right here at extremeterrain.com.

      Product Information

      Features, Description, Reviews, Q&A, Specs & Installation

      Features

      • Filters Out Harmful Debris While Providing Power Gains
      • Get Faster Throttle Response With Improved Acceleration
      • Round, Non-Woven Synthetic Red Filter
      • Polished Aluminum Intake Pipe
      • Comes With Black Powder-Coated Heat Shield
      • Easy Installation
      • Not CARB Certified, Thus Not Legal for Sale or Use in California
      • Backed by a 90-Day Warranty
      • Fits 2018-2023 3.6L Jeep Wrangler JL Models

      Description

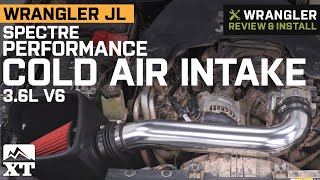
      Benefits of a Cold Air Intake. In the off-roading game, you need all the help you can get. That’s why you need the Spectre Performance Cold Air Intake with a polished finish. With this ace up your sleeve, you get a faster throttle response so you can maneuver your way through challenging trails. You can also expect horsepower and torque gains as your engine breathes better.

      Washable Synthetic Filter. The system comes with a non-woven synthetic filter that’s completely washable and reusable. As such, you won’t need to spend money on replacements, saving a considerable amount, over time.

      Tough Aluminum Construction. The Spectre Performance Cold Air Intake features aluminum tubing with a polished chrome finish to guarantee a lightweight yet strong construction. A powder-coated heat shield also comes with the kit. This effectively keeps the heat from the engine bay from entering the tubing and warming up the cold air headed for the engine.

      DIY Installation. All the fittings and hardware you will need to install the Spectre Performance Cold Air Intake comes with the kit. While you won’t need a professional installer for this procedure, it’s smart to go over the included detailed instructions before starting the installation.

      Ninety-Day Warranty. The Spectre Performance Cold Air Intake comes with a 90-day warranty that covers materials and workmanship defects. However, damages due to installation, shipping, improper use, and accidents will not be covered. For a full list of exclusions and other details about their warranty policies, please visit the manufacturer’s website.

      Not CARB Certified. This Cold Air Intake is not CARB certified at this time. It may not be sold or used in California or other states where California emission regulations are adopted.

      Application. The Polished Spectre Performance Cold Air Intake will fit 2018-2023 3.6L Jeep Wrangler JL models.

      Fitment:

      Details

      Spectre SPE-9089

      CA Residents: WARNING: Cancer and Reproductive Harm - www.P65Warnings.ca.gov

      Installation & What's in the Box

      Installation Info

      What's in the Box

      • (1) Intake Tube
      • (1) Cone Air Filter, 8.50 inches Red
      • (1) Heat Shield
      • (1) Flex Coupler, 3 inches
      • (1) Coupler, 3 inches
      • (1) Velocity Air Funnel
      • (1) Edge Trim, 47 inches
      • (4) Clamps, #48
      • (1) Grommet 1 inches
      • (1) Rubber Mounted Stud
      • (2) Air Box Mount Stand Off
      • (2) M8x16mm Hex Bolts
      • (2) 8mm Split Lock Washers
      • (1) 6mm Flat Washer
      • (1) M6x1.0 Nylock Nut
      4.5

      Customer Reviews (103)

        Questions & Answers

        10 More Questions

        Will It Fit My Wrangler

        • JL Rubicon 2 Door - 18, 19, 20, 21, 22, 23
        • JL Rubicon 4 Door - 18, 19, 20, 21, 22, 23
        • JL Rubicon 4xe 4 Door - 21
        • JL Wrangler 2 Door - 18, 19, 20, 21, 22, 23
        • JL Wrangler 4 Door - 18, 19, 20, 21, 22, 23
        • JL Wrangler 4xe 4 Door - 21, 22