FREE 1 to 3-Day Delivery on Orders $149+ Details

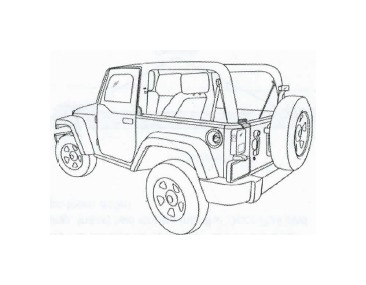
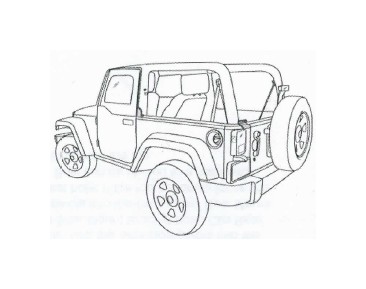
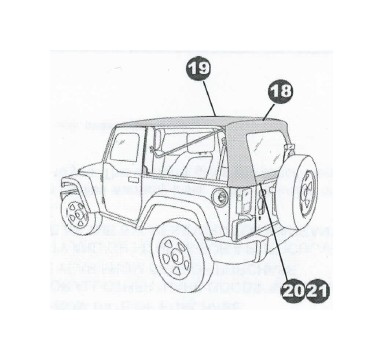
How to Install Bestop OE Style Soft Top Replacement Bow & Frame Kit (07-17 Wrangler JK 2 Door) on your Jeep Wrangler

Shop Parts in this Guide
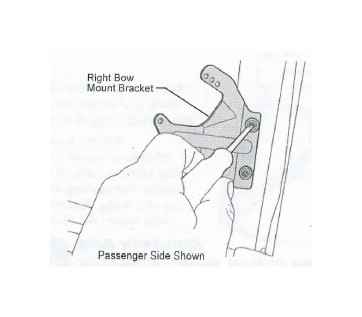
Install Bow Mount Brackets on Sport Bars
Unzip the sport bar cover, if equipped. Use Bow Mount Screws to install Bow Mount Brackets on rear sport bar.
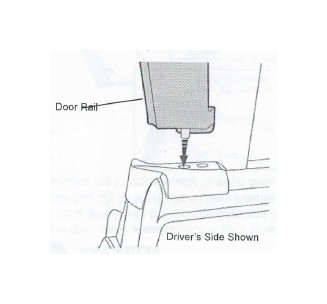
Install Door Rails
Locate the left and right Door Rails. Insert the pin in the bottom of the Door Rail into the hole in the belt rail behind the door.
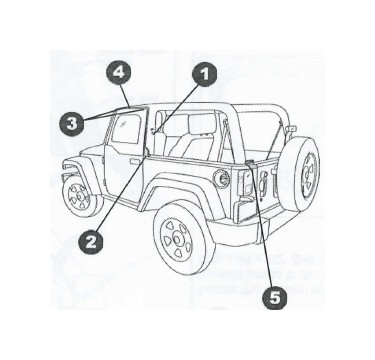
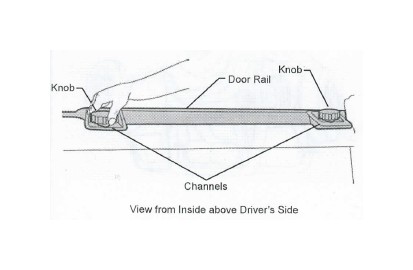
Secure Door Rail
Press the channels along the top of the Door Rail around the horizontal sport bar, above the door opening. Insert two Knobs into the Door Rail and tighten them down.
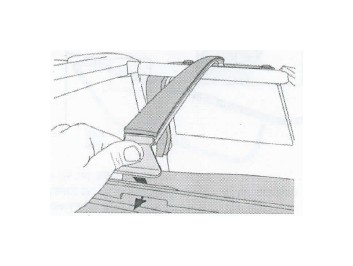
Install Top Arch
Insert one end of the Top Arch in to the slot in the middle of one of the Front Door Rails. Push the other end inward to flex the bow and insert it into the slot on the other side of the vehicle.
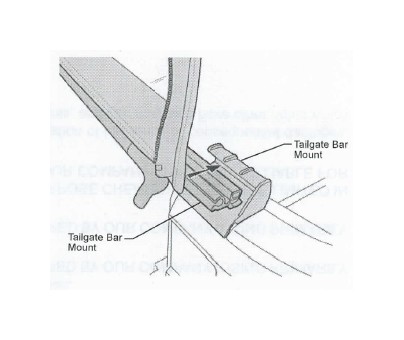
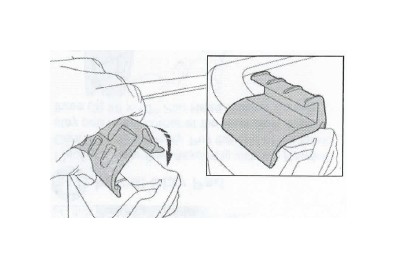
Install Tailgate Bar Mounts
Locate the left and right Tailgate Bar Mounts. Orient them on the vehicle. Hook the bottom of one mount under the belt rail and roll it toward the inside of the vehicle until it clips into place. Repeat this with the other Tailgate Bar Mount.
Mount Side Bows to Header Assembly
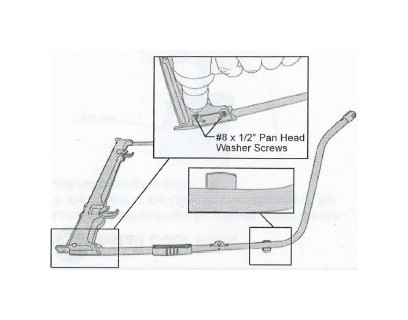
Place the Lower Header on the Side Bows. Orient the Side Bows with the Brackets toward the inside. Install two (2) #8 x 1/2" Pan Head Washer Screws to secure the Lower Header to each Side Bow.
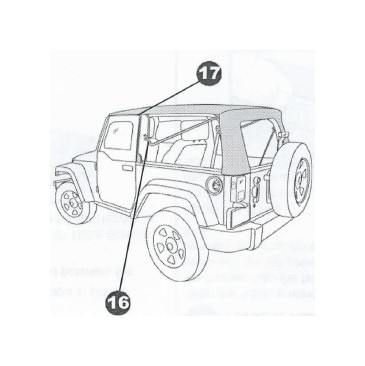
Assemble Center Bow to Header / Side Bow Assembly
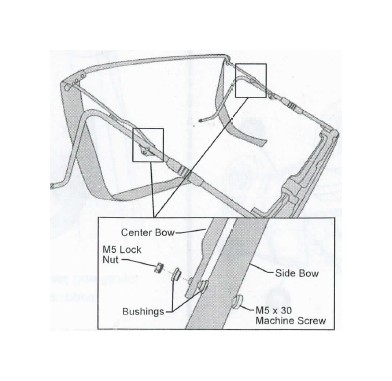
Locate the Center Bow Assembly. Place it on the Side Bow/Header Assem-bly so that the fabric stay pads on the corners go toward the rear. Install an M5 x 30 Machine Screw with two (2) Bush-ings and an M5 Lock Nut.
Install Stay Pad
Place the Rear Bow Assembly with the Header/ Center Bow Assembly. Pull the end of the fabric stay pad to the corner of the Rear Bow. Install three (3) #8 x 1/2" Pan Head Washer Screws.
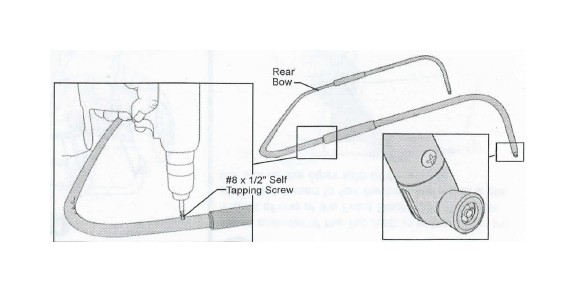
Mount Side Bows to Rear Bow
Locate the left and right Rear Bow Legs and orient them with the pivot knuckle knobs to the outside. Mount them to the Rear Bow Center section with a #8 x 1/2" Self Tapping Screw on each side.
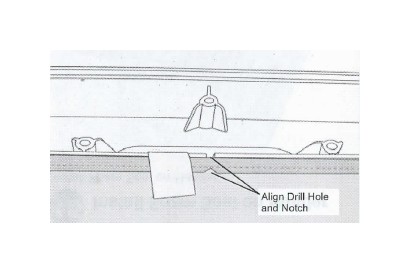
a) Align Top Fabric with Header
Lay the front edge of the top fabric on the Lower Header with the backing side up. Make sure the drill hole in the center of the fabric lines up with the notch in the Lower Header. Tape the fabric in place.
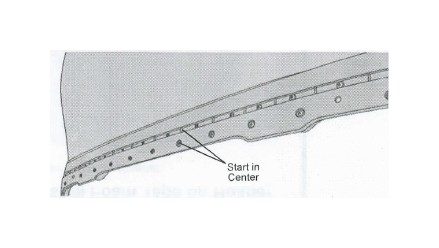
CID Secure Top Fabric to Header
Place Edge Protector over front edge of Upper Header and tape in place. Lay the Upper Header on top so that the fabric is sandwiched between the Upper and Lower Headers. Start with the center hole and install twenty-three (23) #8 x 1/2" Hi-Lo Screws to attach the Upper Header to the Lower Header. Secure the Upper Header to each Side Bow with four (4) #8 x 1/2" Pan Head Washer Screws.
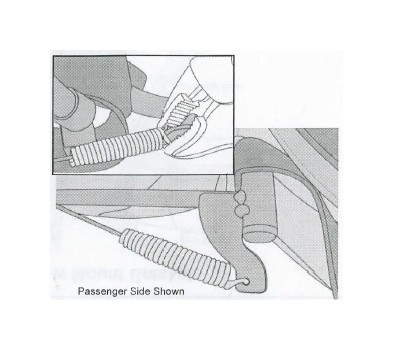
Secure Cable Spring
Secure Cable Spring to bracket on bow and crimp spring.
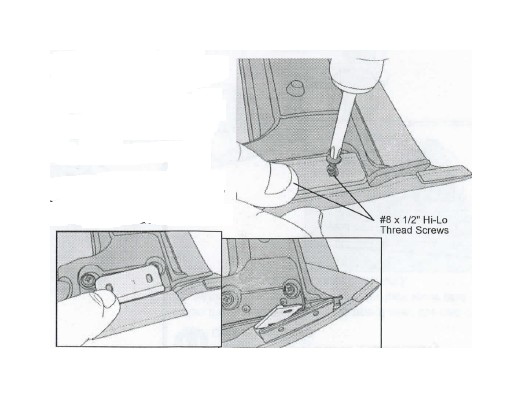
Install Side Bows on Header Assembly
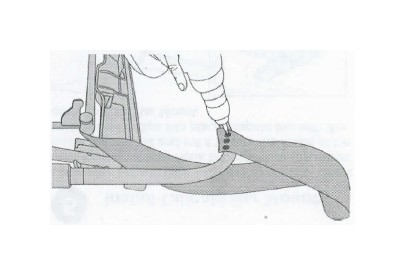
Wrap the fabric around the edge of the header. Slip the fabric pocket sewn into the top between the headers and position the anchor foot.
Install two (2) #8 x 1/2" Hi-Lo Thread Screws through the fabric and metal flag into the Lower Header on each side.
Install Foam Tape on Header
Install Foam Tape on Header.
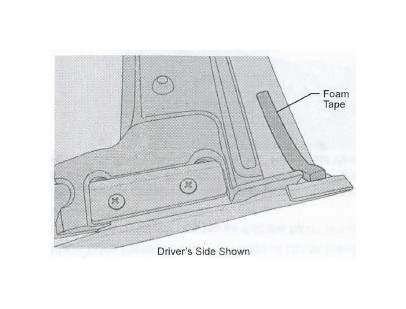
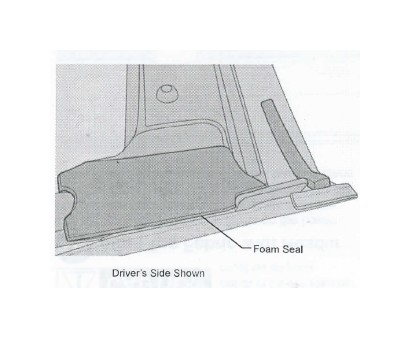
(E) Install Foam Seal on Header
Install Foam Seal on Header.
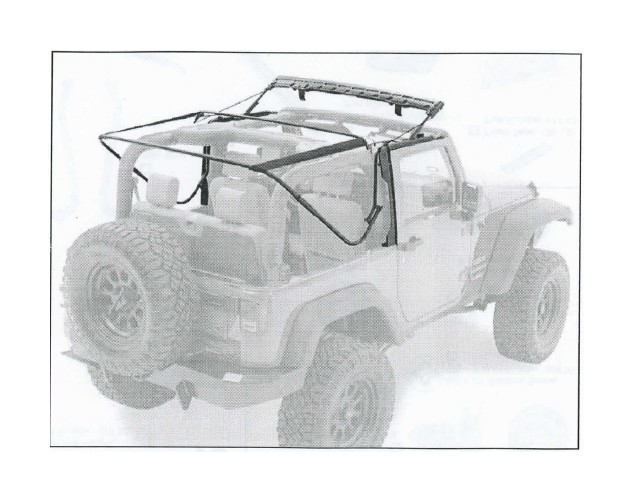
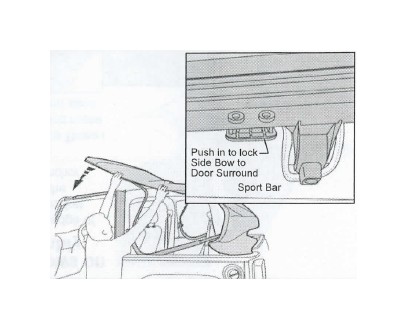
Drag Top Fabric Assembly over Vehicle
Open the Top Assembly and drape it over the cab of the vehicle. Push in on the Sunrider lock lever and lock the Sioe Bow to the Door Surround.
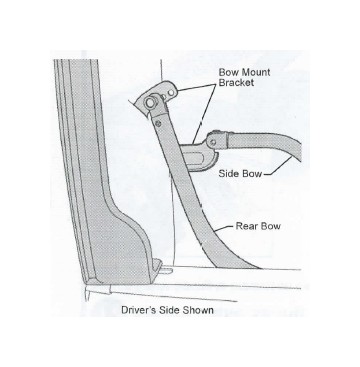
Secure Top Fabric Assembly to Bow Mount Bracket
Place the top assembly on the back of the vehicle. Clip the Side Bow pivots into the lower Bow Mount Bracket hole. Clip Rear Bow pivots into the front upper Bow Mount Bracket hole. If the top becomes loose the Rear Bow can be moved to a rearward hole to tighten the top.
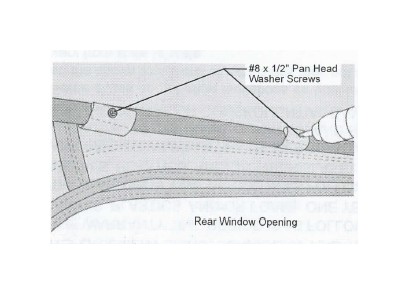
Secure Top Fabric to Rear Bow
Once the top is in place, locate the four (4) flaps sewn inside the top above the rear window open-ing. Install a #8 x 1/2" Pan Head Washer Screw to secure each flap to the Rear Bow.
Secure Top Fabric to Center Bow
Locate the flaps inside the top in the center. Wrap them around the bow and install five (5) #8 x 1/2" Pan Head Washer Screws.
Install Tailgate Bar
Slide the channel in the Tailgate Bar onto the tubing along the bottom of the Rear Window on the inside.
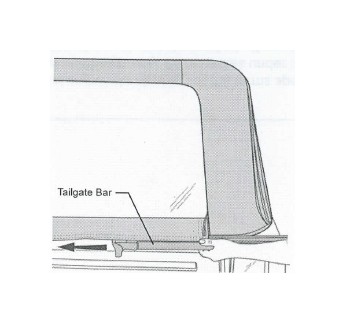
Secure Tailgate Bar
Slide the Tailgate Bar into the Tailgate Bar Mounts on each side of the tailgate opening.