 FREE 1 to 3-Day Delivery on Orders $149+ Details

How to Install Barricade Trail Force HD Front Bumper (2018 Jeep Wrangler JL) on your Jeep Wrangler
Installation Time
2 hours
Tools Required
- Trim Removal tool or small Flathead Screwdriver
- Ratchet
- 18mm Deep Well Socket
- 16mm Socket
- 7mm Socket
- 8mm Socket
- Phillips #2 Screwdriver
- File or Rotary Tool/Drill with Grinding Stone
- Torque Wrench
- Diagonal Cutters (optional)
- Zip Ties
- Touch up paint or Black Spray Automotive Enamel

Shop Parts in this Guide
Installation Instructions:
1. Remove the upper splash guard: use a trim removal tool or a small screwdriver to remove pop-clips and just pull the upper splash guard out.
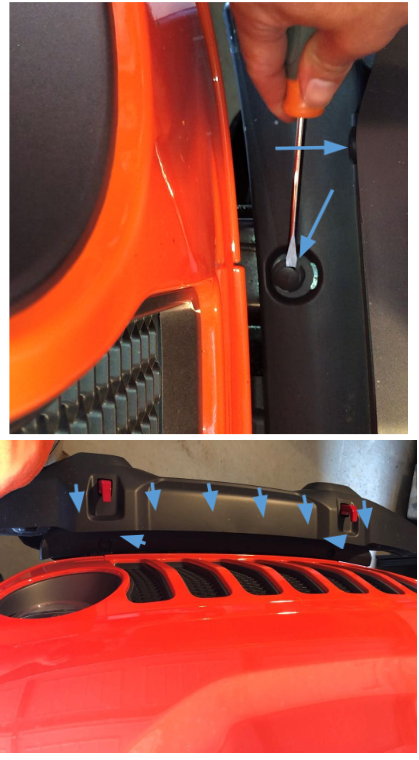
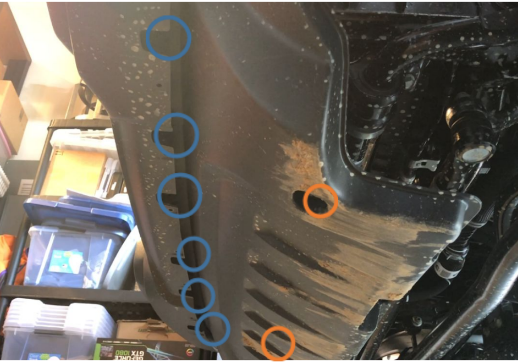
2. Remove lower splash guard: use a trim removal tool or a small screwdriver to remove pop-clips (blue) and then use a 8mm socket to remove the two screws securing the splash guard to the skid plate (orange).
3. Remove side trim panels: use a trim removal tool or a small screwdriver to remove pop-clips.

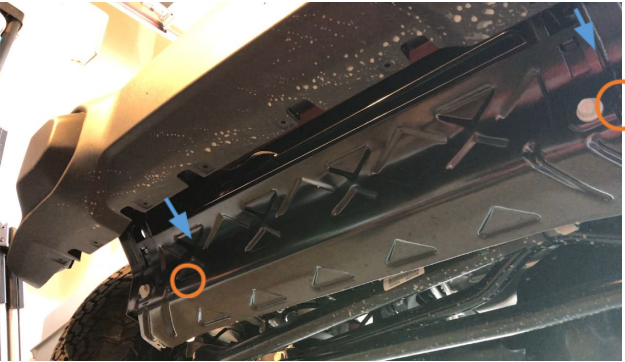
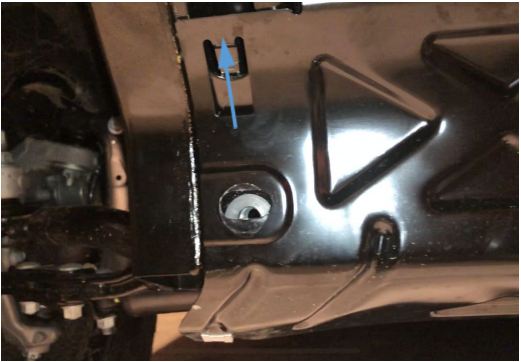
4. Remove Skid Plate: remove two bolts (orange) then slide whole skid plate down to release from clips (blue).
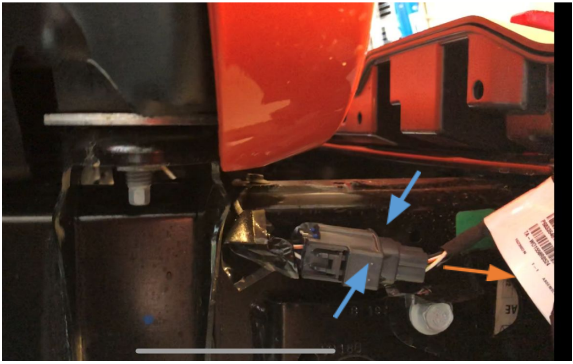
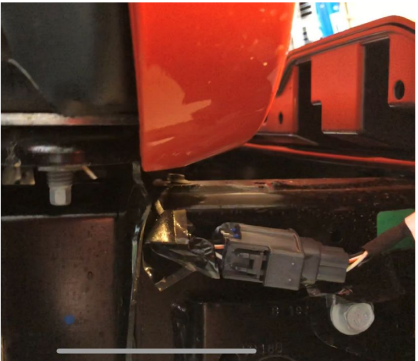
5. Unplug fog light harness: unplug the wiring harness from the vehicle by squeezing the clip (blue) then pulling it out (orange).
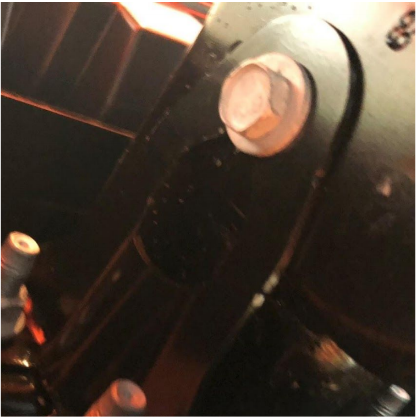
6. Unbolt bumper: may need to use a breaker bar or torque wrench to remove all the nuts (four on each mount).
7. Loosen bumper support brackets (four): loosen the bumper support brackets nut but do not remove. Remove the brackets and put them to the side, keeping track of which bracket goes where.
8. Remove bumper: lift bumper off frame using the recovery hooks.
9. Remove fog lights: unplug fog lights from wiring harness and use 7mm socket to remove 4 screws from each fog light.
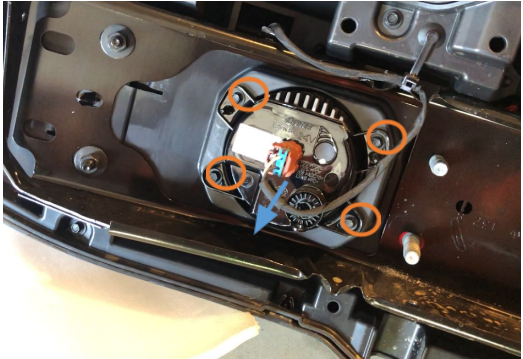
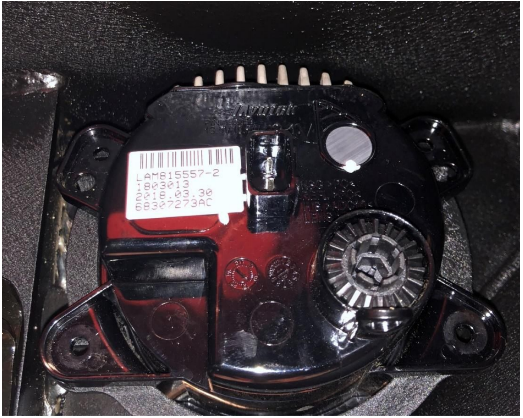
10. Mount fog lights to Trail Force bumper: use supplied machine screw and serrated face nuts to mount the fog lights to the trail force bumper. Notice the orientation of the fog light, the heatsink should be towards the top of the bumper.
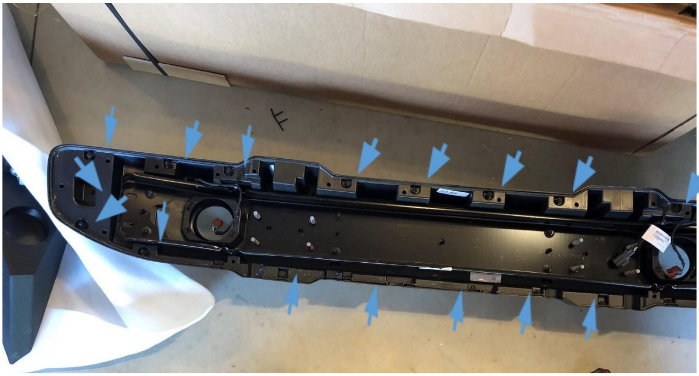
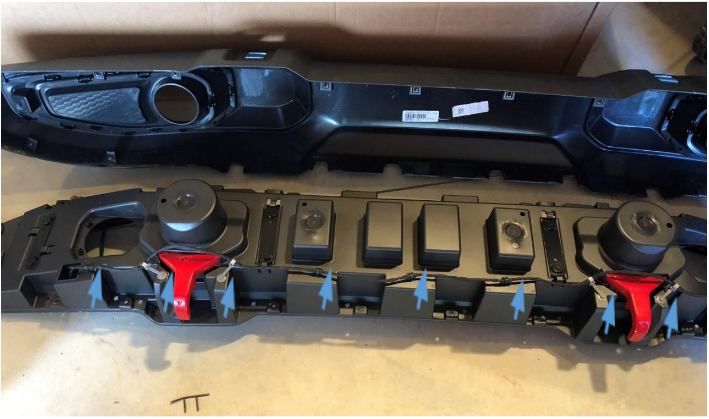
11. Remove trim from bumper: use the 7mm socket to remove all screws holding the front trim onto the bumper. When removing, the trim will need to be pulled down over the recovery hooks.
12. Remove wiring harness for fog lights: unplug fog lights from wiring harness, then use a trim removal tool or a small screwdriver to remove pop-clips.
13. Trim harness of clips (optional): If desired, trim the excess pop clips off the fog light wiring harness with diagonal cutters.
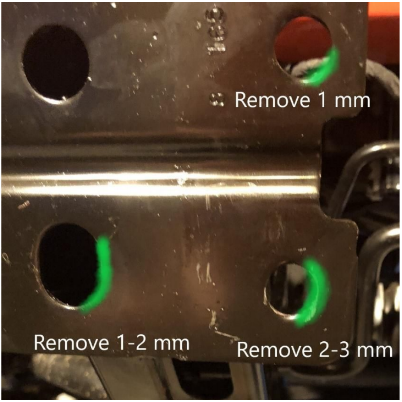
14. Prepare Frame Mounts: file or grind the frame mount holes on the passenger side only, according to the green markings in the picture. Then use the paint to cover the bare metal to prevent rust.
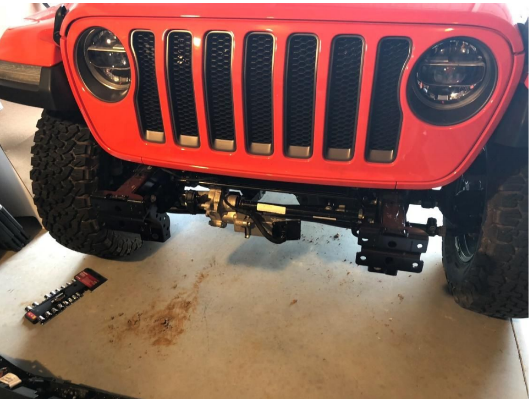
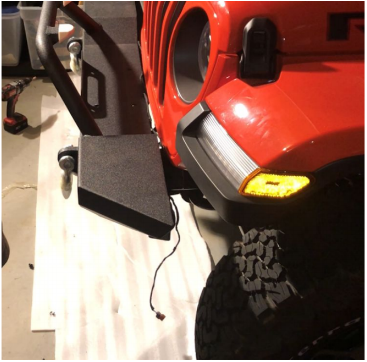
15. Mount Bumper: just lift bumper onto mounts. The bumper is heavy so be careful and consider using a jack or team lifting it into place.
16. Remount bumper support brackets: set them loosely in place, do not tighten.
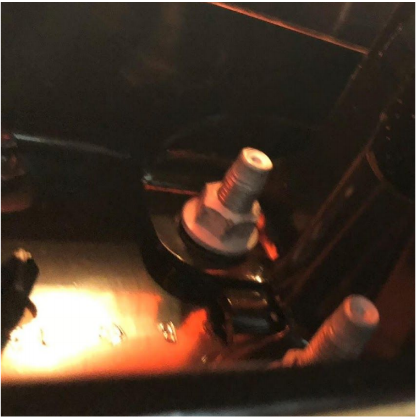
17. Thread nuts and bolts: place a flat washer, a lock washer, then a nut onto each bumper bolt, then hand tighten. Put a lock washer then a flat washer on each of the two loose bolts, then hand thread them into hole in bumper.
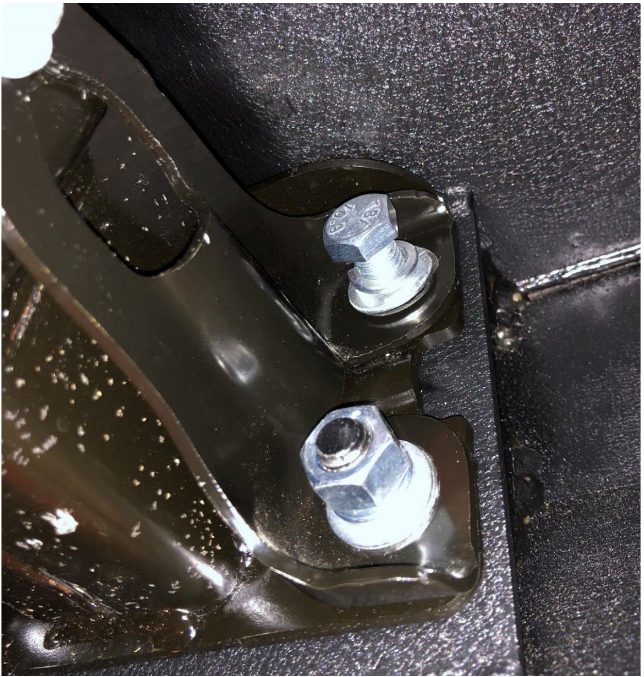
18. Tighten frame mounting nuts and bolts: use a torque wrench to tighten nuts and bolts to 66 ft. lbs.
19. Tighten bumper support bracket: use a torque wrench to tighten support bracket bolts to 15 ft. lbs.
20. Run fog light wiring: Drape fog light wiring between bumper and grill.
21. Plug wiring harness into both fog lights and vehicle harness.
22. Zip tie slack to bumper support brackets, making sure not to stress connections.
23. Replace front skid plate: Slide skid plate into slots and hand thread bolts and torque to 48 ft. lbs.
24. Test fog lights.

Installation Instructions Written by ExtremeTerrain Customer Justin Ames 08/23/2018
