 FREE 1 to 3-Day Delivery on Orders $149+ Details

How to Install Alloy USA Differential Permanent Lock Kit for Front Dana 30 (87-95 Wrangler YJ) on your Jeep Wrangler

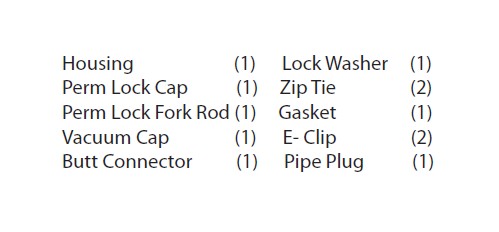
Shop Parts in this Guide
Contents:
PLEASE READ AND UNDERSTAND ALL INSTRUCTIONS BEFORE YOU BEGIN
Warning: Always park on a level surface, apply emergency brake and chock wheels when working on drivetrain components.
Note: When the actuator housing is removed some fluid may leak out. Replace with factory recommended fluid type.
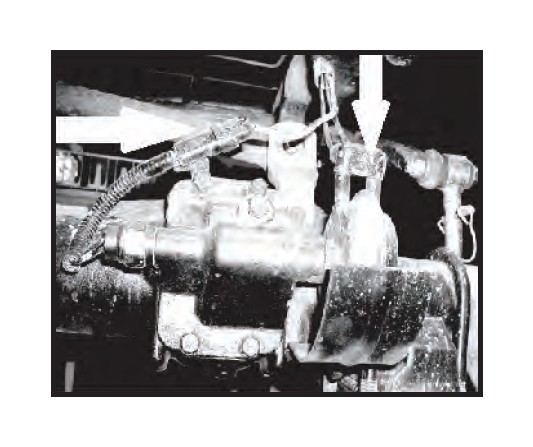
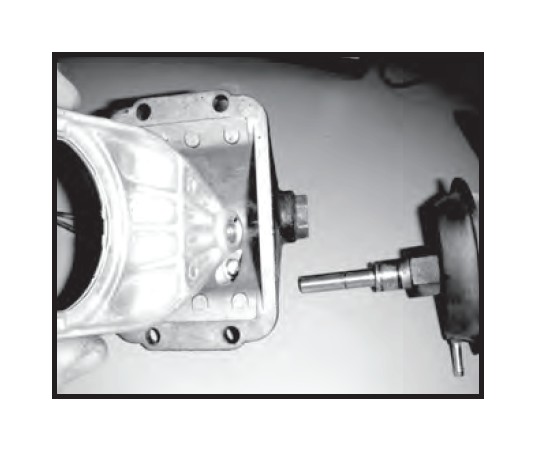
Step 1. Remove the factory actuator housing. Unplug the factory wiring clip from the sensor on the actuator housing (If Equipped). Remove the vacuum lines form the vacuum diaphragm. Before you unbolt the actuator housing, place a drain pan under the axle to catch any fluid that may drain out. With the actuator housing removed, all gasket material and dirt or debris will need to be cleaned and from the surface and inside the housing. The diaphragm shield may be removed and discarded.
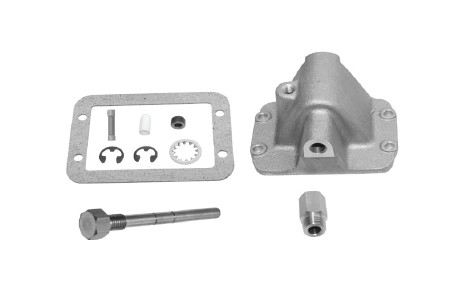
Note: If a new shift fork is being used this step will be skipped. Disassembly will not be neccessary. Item #450100 shift fork.
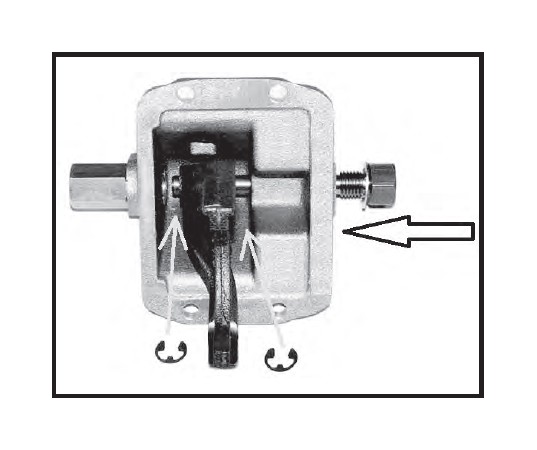
Step 2. Remove the shift fork from the actuator housing. This can be done by removing the three E-clips that are attached to the mode shaft inside the actuator housing. When removing the shift fork it will be necessary to inspect for cracks or wear. If any damage is found on the shift fork it will need to be replaced for proper function and reliability. Note the direction the fork is facing when removed.
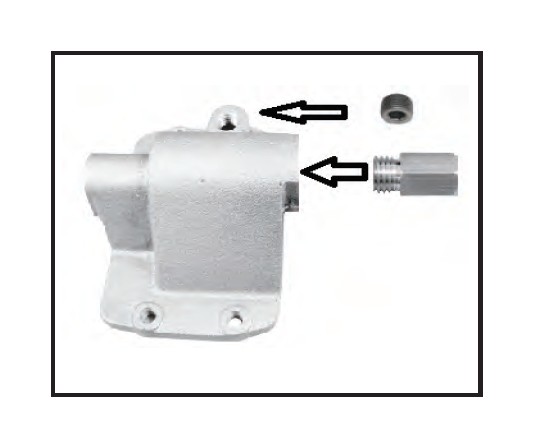
Note: If your vehicle was equipped with a vent tube in the original housing it will need to be reused in the new housing. If your vehicle did not have a vent tube then the supplied plug will need to be installed using thread sealant.
Step 3. Install the perm lock rod cap into the housing. Apply thread sealant the the threads on the cap. Tighten cap.
Step 4. Install the fork and fork rod into the housing with the fork facing the same direction as previously removed. Place a lock washer on the rod and insert it into the housing guiding it thru the fork. Place an E-clip on both sides of the fork. Tighten the rod. Inspect the wear pads on the fork. If the pads are damaged they must be replaced. Verify proper position of pads before cover is installed onto the axle.
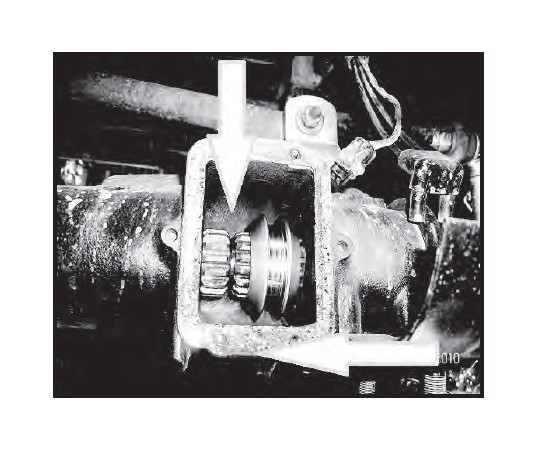
Step 5. Center the slip collar in the axle housing locking both axle halves together. Install the new cover and gasket onto the axle aligning the fork into the slip collar. Sealant is not required on the gasket. Torque the bolts to 10 ft-lbs.
Step 6. After installation is complete check for proper engagement. With the front wheels on the ground, the front driveshaft will no longer turn freely if the axles are connected correctly. If the driveshaft does turn freely verify axles are connected correctly and check for broken or damaged components.
Step 7. Check differential fluid level and fill as needed.
Step 8. Check all hardware for proper torque.
Step 9. Check all components and hardware after 500 miles.


