FREE 1 to 3-Day Delivery on Orders $119+ Details

How to install Rugged Ridge Aluminum Hood Catch Kit, Textured Black on your Wrangler
Shop Parts in this Guide
Contents:
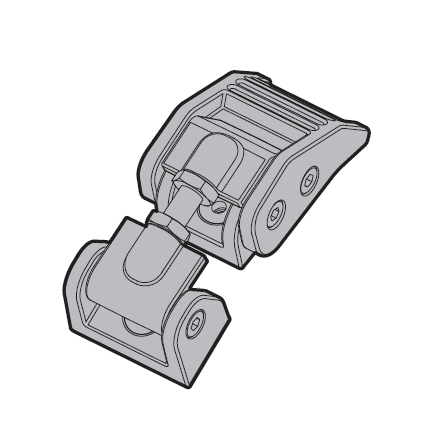
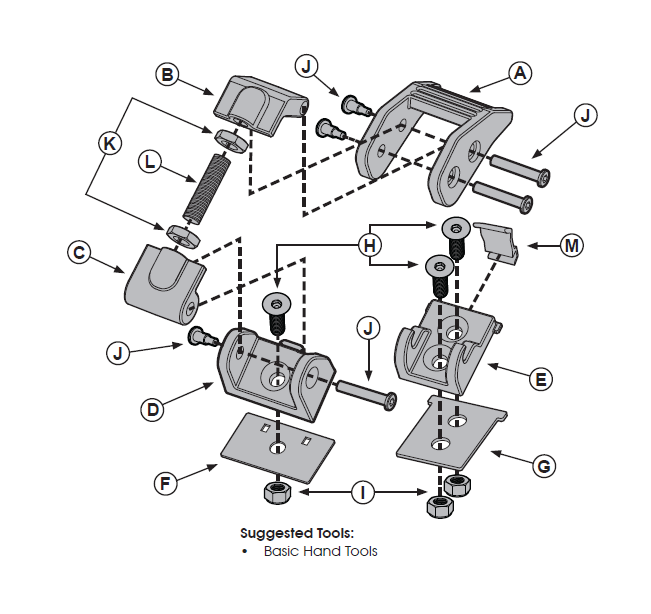
• A - Latch
• B - Latch Joint
• C - Pivot Base Joint
• D - Pivot Base
• E - Catch
• F - Pivot Base Gasket
• G - Catch Gasket
• H - Flat Head Bolts
• I - Lock Nuts
• J - Binding Posts
• K - Jam Nuts
• L - Adjustment Rod
• M - Safety Snap
CAUTION: Hood catch is intended only as supplemental to Jeep® supplied latch at front of hood. To avoid risk of property damage or injury: Always;
• Assure hood is fully secure by undamaged Jeep® front latch & supplemental side
catches.
• Do not modify hood or catches to defeat intended safety of Jeep® primary latch &
supplemental catch system.
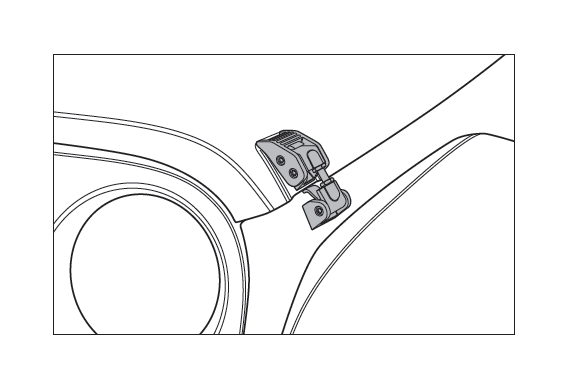
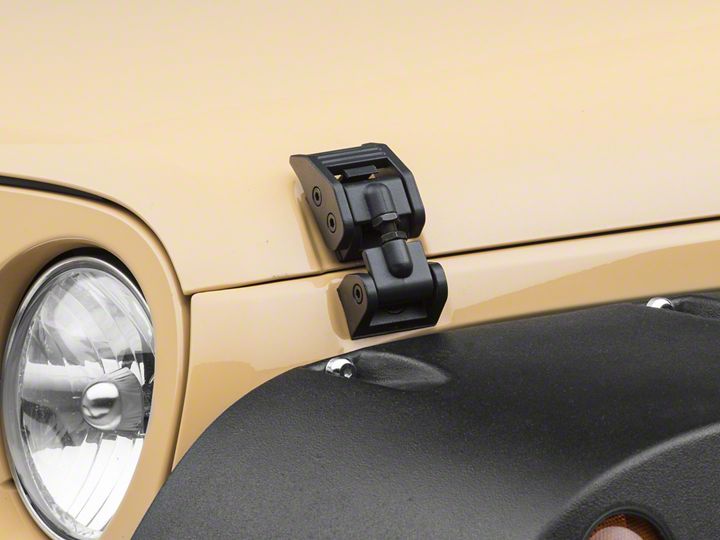
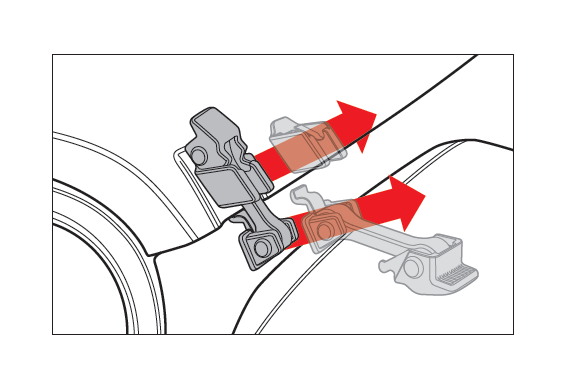
1. Remove the factory hood catch.
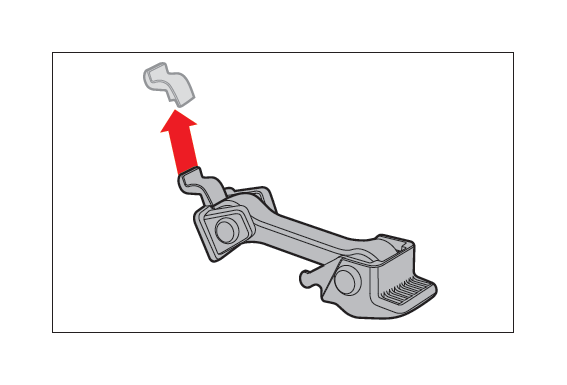
2. Pull/remove the hood bumper from the factory hood catch.
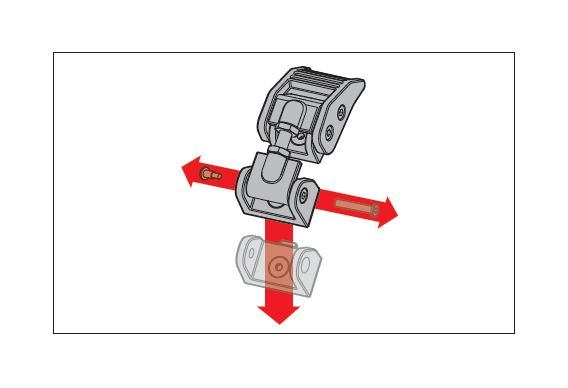
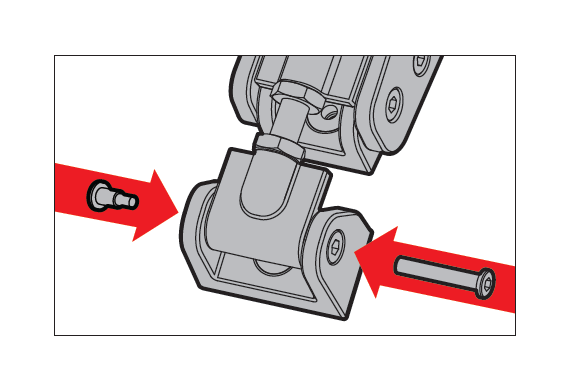
3. Remove the pivot base from the Aluminum Hood Catch assembly.
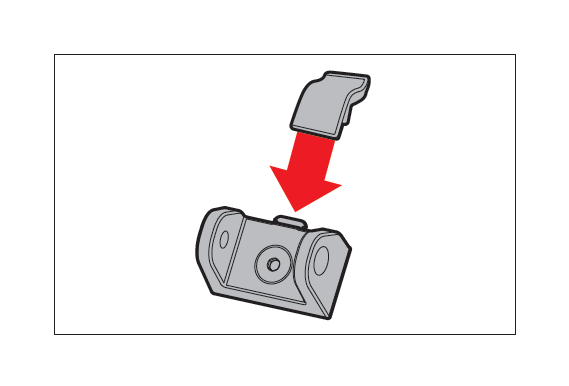
4. Attach the hood bumper (Removed in Step 2) to the pivot
base.
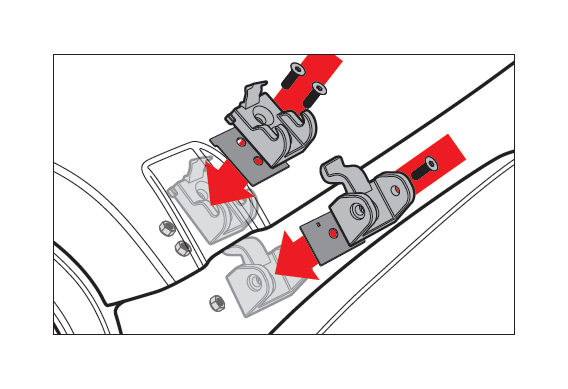
5. Fasten the catch to the hood. Fasten the pivot base to the
fender.
Notice: Be sure safety snap is securely attached to catch.
6. Re-attach the Aluminum Hood Catch assembly to the pivot base using the binding posts removed in Step 3.
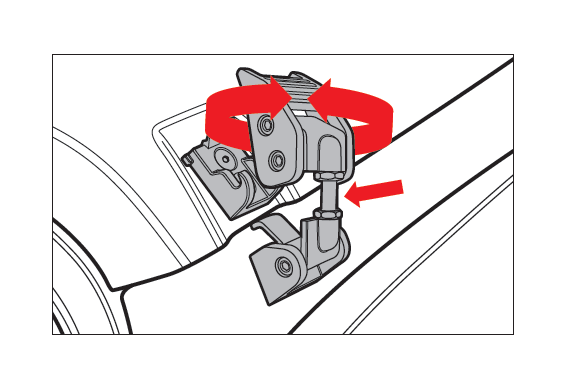
7. Adjust the Aluminum Hood Catch by first releasing the latch.
With jam nuts loose, rotate latch clockwise to increase tension or
counter clockwise to decrease tension. When adjusted properly,
hood should contact and slightly compress the hood bumper.
Notice: Be sure adjustment rod has thread engagement equal or greater to 3 threads on each end. Operating vehicle with inadequate thread engagement could result in damage to vehicle.
8. Your Aluminum Hood Catch is installed and road ready!