FREE 1 to 3-Day Delivery on Orders $119+ Details

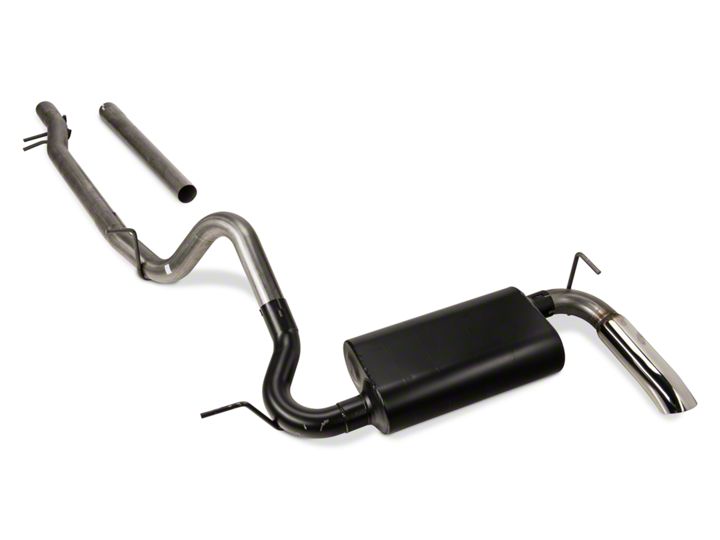
How to Install a Flowmaster Force II Stainless Steel Catback Exhaust on your 2007-2017 Wrangler JK
Shop Parts in this Guide

Removal:
1) Raise the vehicle up on a hoist or rack to working height. If you do not have access to a hoist or rack raise the vehicle and support securely with jack stands.
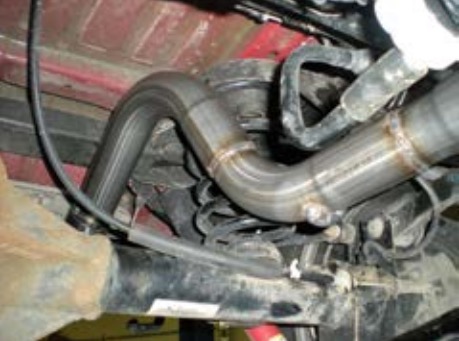
2) Loosen the band clamp on the inlet side of the muffler (left side).
3) Support the muffler with a stand, and separate the two hanger rods from the rubber mounts. Remove the muffler assembly.
4) Loosen the band clamp at the rear of the factory Y-pipe and separate the two hangers on the pipe from the rubber mounts on the vehicle. Lower the pipe from the vehicle and set aside.
Installation:
1) Before installing anything, prep the clamps supplied in the hardware kit by removing the nuts, and applying a thick lubricant such as white grease or anti-seize to the threads.
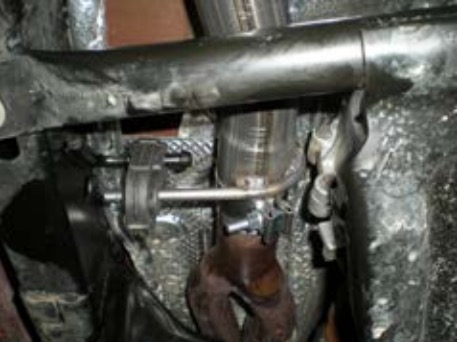
2) Place a provided clamp onto the slip-fit of inlet pipe assembly #16667S and slide over the back of the factory Y-pipe. Connect the hanger on the pipe to the rubber mount on the vehicle and tighten the clamp enough to hold but still allow for adjustment. The hanger closest to the slip-fit is for 07-11 models, the other hanger is for the 2012-2013 model. You may choose to trim off the hanger that is not used.
3) For 4 Door Model Vehicles: Place a provided clamp onto the slip-fit of extension pipe #16668S and slide over the back of inlet pipe #16667S. Tighten the clamp enough to hold but still allow for adjustment.
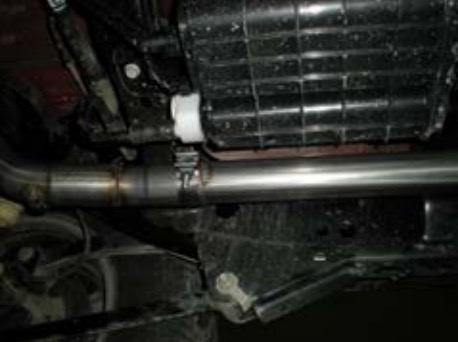
4) Place a provided clamp onto the slip-fit of over-axle pipe assembly #16669S and slide onto the back of the front pipe. Connect the hanger on the pipe to the rubber mount on the vehicle and tighten the clamp enough to hold but still allow for adjustment.
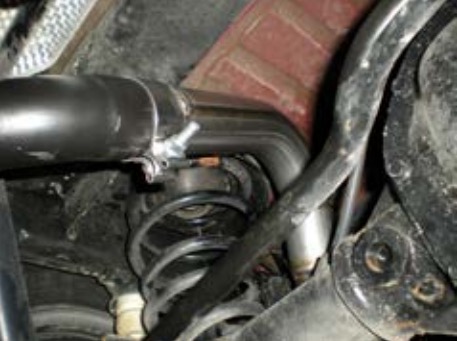
5) Place a provided clamp onto the slip-fit of muffler assembly #852558-189 and slide onto the back of over-axle pipe #16669S. Support the muffler with a stand and connect the hanger on the pipe to the rubber mount of the vehicle. Tighten the clamp enough to hold but still allow for adjustment.

6) Place a provided clamp onto the outlet of the muffler. Connect the hanger of exit-pipe #16596S to the rubber mount on the vehicle and slide into the muffler outlet. Tighten the clamp enough to hold but still allow for adjustment. Install the push-on hanger keeper onto the left side hanger rod to prevent it from slipping out of the rubber mount.
7) Adjust the position of the muffler, pipes and exit pipe to provide a satisfactory fit. Maintain a minimum of 3/4" clearance between the Flowmaster system, the drivetrain and chassis components, while also keeping suspension travel and vibration in mind. Tighten down all clamped connections securely. For a cleaner appearance and more secure installation, we highly recommend welding all slip-fit connections.
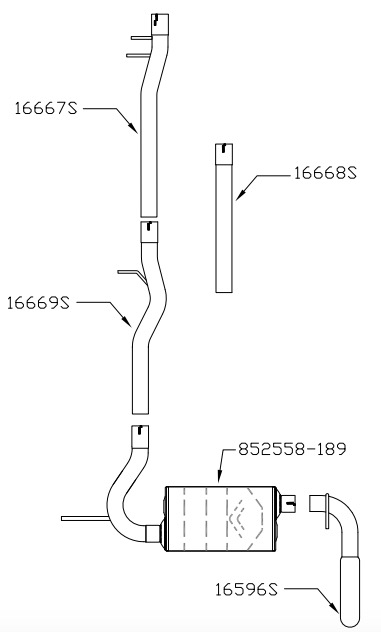
Packing List
| Qty | Description | Part # |
|---|---|---|
| 1 | Inlet Pipe Assembly | 16667S |
| 1 | 4 Door Extension Pipe | 16668S |
| 1 | Over-axle Pipe | 16669S |
| 1 | Muffler Assembly | 852558-189 |
| 1 | Exit Pipe Assembly | 16596S |
| 1 | Parts kit | PK577 |
| 5 | 2 ½” Clamp | MC250SB |
| 4 | 7/16” Hanger Keeper | HW502 |