 FREE 1 to 3-Day Delivery on Orders $119+ Details

How to Install Smittybilt GEAR Overhead Console - Black on your 1997-2006 Wrangler
Shop Parts in this Guide
NOTE: It is recommended to have the soft top folded down or hardtop removed when
installing this product
Step 1: Lay the over head main frame on a flat surface. (Fig A)
Step 2: Determine which front mounting bracket you will need and mount bracket loosely to frame using the included 3/8” x 1” hardware. (Fig A) (The flat bracket is for late TJ’s and the bracket with side extensions is for early TJ’s.)
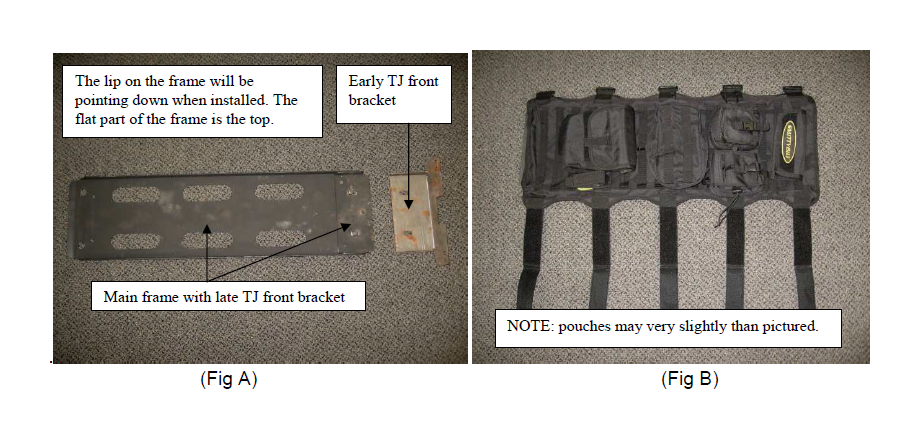
Step 3: Lay the G.E.A.R. cover over the frame is it lies on the floor. (Fig B)
Step 4: Flip the frame over and secure by fastening the Velcro straps. (Fig C)
Step 5: If installing on an early model TJ remove the inner two bolts on both the driver and passenger side sun visors. Loosely attach the front bracket to the windshield using
the hardware you just removed. (Be sure to mount sun visors back on over the
bracket.) The rear of the main frame rests on top of the center sport bar.
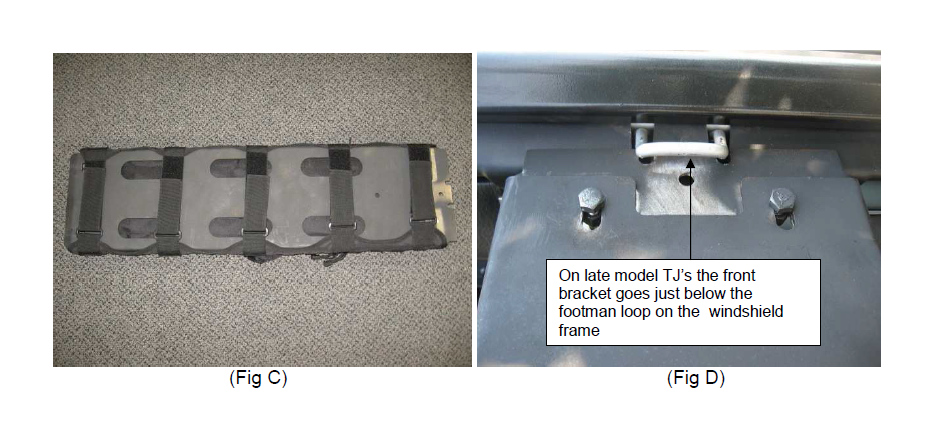
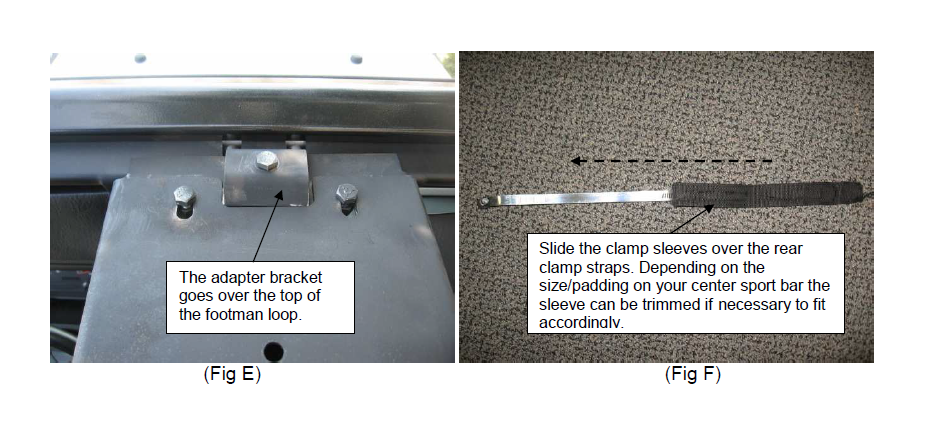
On late model TJ’s the front bracket goes just below the footman loop on the
windshield frame. (Fig D) The adapter bracket goes over the top and loosely attach
using the 3/8 x 1 ¼” hardware. (Fig E) The rear of the main frame rests on top of the
center sport bar.
Do not fully tighten hardware at this time.
Step 6: Slide the clamp sleeves over the rear clamp straps. (Fig F) Depending on the size/padding on your center sport bar the sleeve can be trimmed if necessary to fit accordingly.
STEP 7: Slide the rear clamp straps around the center sport bar and through the slots in the rear of the overhead frame. (Fig G)
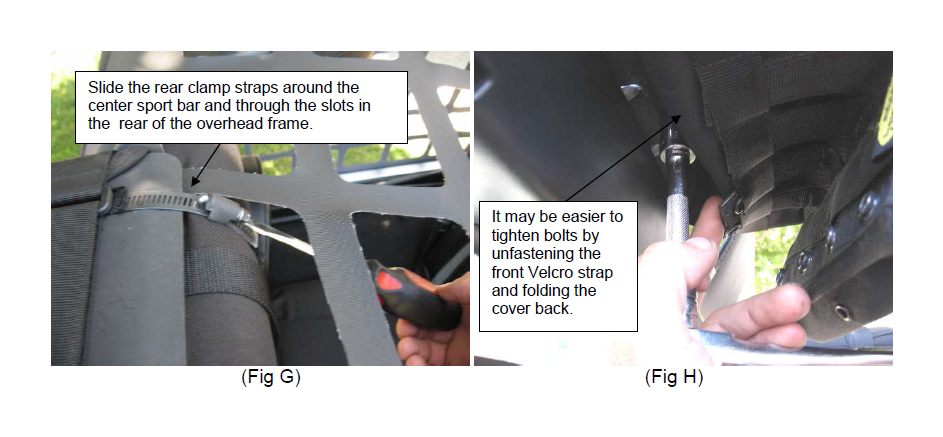
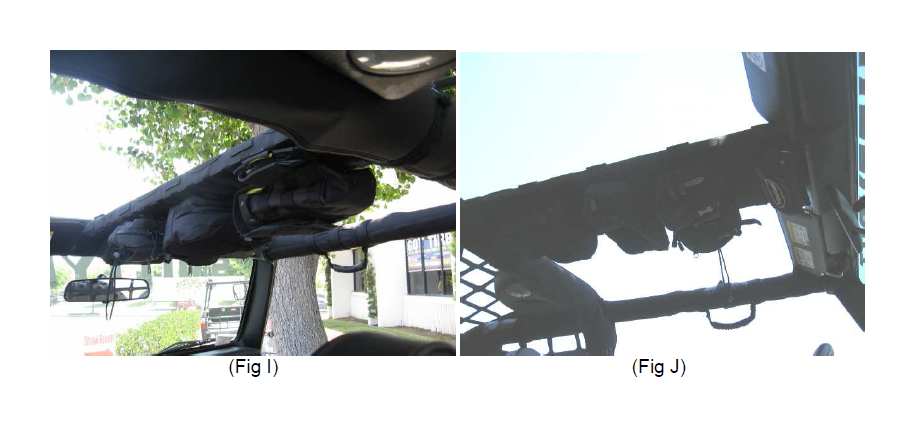
Step 8: Make sure the overhead is straight and then begin to secure, by tightening all of the hardware. (Early TJ’s front two 3/8” bolts and rear sport bar straps) (Late TJ’s front three 3/8” bolts and rear sport bar straps.) It may be easier to tighten bolts by unfastening the front Velcro strap and folding the cover back. (Fig H)Check to make sure all Velcro straps are secure after tightening all mounting hardware. Installation is now complete. (Fig I,J)
Step 9: (Late TJ’s only) If you’re using a standard top/bikini and want to utilize the center strap, attach the included footman loop to the overhead. First determine the best location; depending on the style it may in the front or the rear. Once you have determined the best location, hold the footman loop up and mark the two holes. Then drill the two holes using a ¼ drill bit and attach with included screw and cap-nut. You can either install it over the G.E.A.R. cover or drill through both the cover and frame, or drill through the frame and carefully make a small cut in the cover to expose the footman loop. (Fig K, L)

NOTE: The pouches can be installed in a variety of places, by sliding the pouch straps through the webbing on the overhead (Fig M) then fold the strap back up and place it through the webbing on the back of the pouch.(Fig N) Then slide the pouch strap through the next row of webbing on the overhead (Fig O) and then secure by fastening the snaps. (Fig P)

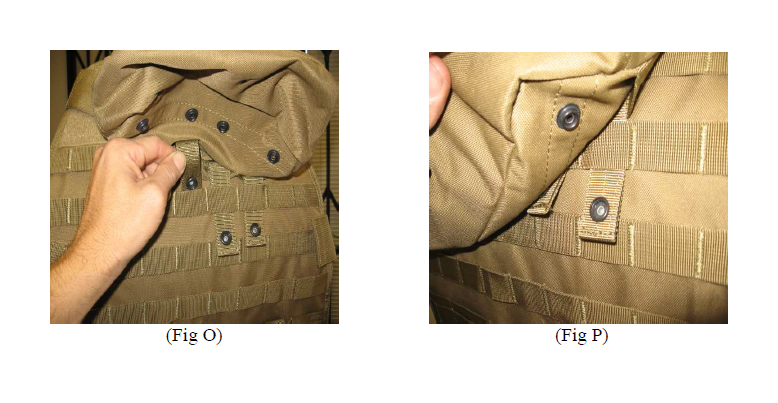
NOTE: When traveling be sure pouches are closed and secured.
