Talk to a Wrangler Sales Tech
1-877-870-8556
M-F 8:30A-11P, Sat-Sun 8:30A-9P
Logo Image
$20K Sweeps! 10 Chances to Win! Enter Daily >

M.O.R.E. Oil/Transmission Skid Plate (07-18 Jeep Wrangler JK)

Item J25077
Verify parts fit and get product recommendations.
Wrangler Sales Techs: Connect Now M-F 8:30A-11P, Sat-Sun 8:30A-9P
$0.00
Our Price

$479.85 (each)

FREE Shipping Market Price $551.83 You Save 13% ($71.98) Up to 10% off for Military & First Responders! See Details

Will this fit your Vehicle?

Select a different vehicle Help?
Update or Change Vehicle
Ship to: Ashburn - 20149
Sorry, please enter a valid US or CA postal code
We're sorry, zip can't be updated at this time.
    Create a list
    Add to New List

    Saved - View your saved items

    We're sorry. We couldn't save this product at this time.

    or use

      Product Videos

      0:00:01.140,0:00:04.290hey what's up guys ryan here from0:00:02.730,0:00:07.200extreme terrain and today i'm here with0:00:04.290,0:00:10.169the more mor e transmission in oil pan0:00:07.200,0:00:12.629skid plate fitting your 2007 to 20180:00:10.169,0:00:14.339Jeep Wrangler JK now this is going to be0:00:12.629,0:00:16.080for those of you Jeep owners that are0:00:14.339,0:00:17.580off-roading enthusiasts rock crawlers0:00:16.080,0:00:19.830and are looking for some serious0:00:17.580,0:00:22.080underneath protection for your rig now0:00:19.830,0:00:24.420this is going to fit both the 3.8 liter0:00:22.080,0:00:25.920and the 3.6 liter models as well as the0:00:24.420,0:00:27.7504 door and the two Turris or whatever0:00:25.920,0:00:29.850setup you have this bad boy is going to0:00:27.750,0:00:31.650bowl radon now as far as prices are0:00:29.850,0:00:33.180concerned this is coming in right around0:00:31.650,0:00:34.740three hundred dollars which i think is0:00:33.180,0:00:35.730pretty reasonable considering what0:00:34.740,0:00:37.740you're getting this is a very0:00:35.730,0:00:39.510high-quality item and you really get0:00:37.740,0:00:41.520what you pay for there are some cheaper0:00:39.510,0:00:43.530options out there on the website and0:00:41.520,0:00:45.840they do have some flaws whether it's0:00:43.530,0:00:47.790just fitment issues two-piece design so0:00:45.840,0:00:49.290on and so forth so overall this is a0:00:47.790,0:00:51.210very high quality product and it's0:00:49.290,0:00:52.980really gonna stand up to all the abuse0:00:51.210,0:00:55.110that you want to subject and put it0:00:52.980,0:00:57.239through now as far as install goes it's0:00:55.110,0:00:58.920a relatively simple install there is0:00:57.239,0:01:00.030some minor drilling I'm gonna give it a0:00:58.920,0:01:01.649one out of three wrenches on the0:01:00.030,0:01:03.120difficulty meter but overall you can get0:01:01.649,0:01:04.680this thing installed in about an hour0:01:03.120,0:01:06.180now if you do have the optional0:01:04.680,0:01:07.470transmission plate that's relatively0:01:06.180,0:01:08.760light duty and it's really not gonna0:01:07.470,0:01:10.770hold up when you're dragging your Jeep0:01:08.760,0:01:12.390over the rocks no skid plates or a great0:01:10.770,0:01:14.130upgrade and this is a great addition to0:01:12.390,0:01:15.840your Wrangler for a couple of reasons0:01:14.130,0:01:17.430this is gonna add a ton of protection0:01:15.840,0:01:18.900underneath where it's very vulnerable0:01:17.430,0:01:21.479and it's gonna give you that peace of0:01:18.900,0:01:23.010mind to go that extra step drive over0:01:21.479,0:01:24.720that extra obstacle and know that you're0:01:23.010,0:01:26.100not gonna ruin your entire day0:01:24.720,0:01:28.380now the underbelly of your Jeep is a0:01:26.100,0:01:30.630very susceptible area to damage you have0:01:28.380,0:01:32.159a ton of thin sheet metal pans under0:01:30.630,0:01:34.020there and if you were to come down on a0:01:32.159,0:01:35.610rock punch through that thing it's gonna0:01:34.020,0:01:37.470end your day and it's gonna ruin your0:01:35.610,0:01:38.580whole trip bring it to a stop this skid0:01:37.470,0:01:39.930plate is going to provide plenty of0:01:38.580,0:01:42.060protection for the engine transmission0:01:39.930,0:01:44.189and even that exhaust crossover0:01:42.060,0:01:45.780insulation is relatively simple for this0:01:44.189,0:01:48.420and the one thing that I like about this0:01:45.780,0:01:49.740is this is a frame mounted skid plate so0:01:48.420,0:01:51.840this is going to attach to your motor0:01:49.740,0:01:53.400mount frame mount brackets and it's also0:01:51.840,0:01:55.140going to attach to the crossover that's0:01:53.400,0:01:56.700going to provide full underneath0:01:55.140,0:01:58.650protection for anything that you may0:01:56.700,0:02:00.180drag yourself over one thing that I0:01:58.650,0:02:02.009would like to mention this is not0:02:00.180,0:02:04.200compatible with diesel model Jeep --ss0:02:02.009,0:02:06.180only works for the gassers talkin about0:02:04.200,0:02:07.590this skid plate this is a very nice kid0:02:06.180,0:02:09.179plate obviously this is a one-piece0:02:07.590,0:02:10.860design and that's what I really like0:02:09.179,0:02:11.580about this there's no real seams or0:02:10.860,0:02:13.349anything like that0:02:11.580,0:02:14.350that you're gonna get stuck on hung up0:02:13.349,0:02:15.700on and there's a0:02:14.350,0:02:17.290a couple other things that I really like0:02:15.700,0:02:20.050about this as well now this thing is0:02:17.290,0:02:22.240made from 3/16 in steel it's a one-piece0:02:20.050,0:02:23.740design and it's a very nice design you0:02:22.240,0:02:25.360have these rolled edges and you even0:02:23.740,0:02:27.280have these supports in here that's gonna0:02:25.360,0:02:28.840make this a very strong skid plate in a0:02:27.280,0:02:30.790very nice design this thing is gonna0:02:28.840,0:02:31.990stay tucked up nice and neat and it's0:02:30.790,0:02:33.850going to give you plenty of clearance0:02:31.990,0:02:35.560some of the issues with aftermarket skid0:02:33.850,0:02:36.970plates is going to be the width of them0:02:35.560,0:02:38.860they're gonna run in the drive shaft and0:02:36.970,0:02:40.090under that full flex and you're not0:02:38.860,0:02:42.520going to have this issue with this0:02:40.090,0:02:44.020particular skid plate now this has a0:02:42.520,0:02:45.280hole cut in it one of the issues with0:02:44.020,0:02:46.810having a skid plate under there of0:02:45.280,0:02:48.850course is going to be changing that oil0:02:46.810,0:02:50.980it has a nice hole cut in there that's0:02:48.850,0:02:52.780gonna allow you to access that boat in0:02:50.980,0:02:54.430the oil pan pull that out change your0:02:52.780,0:02:55.960oil you're not gonna make a huge mess0:02:54.430,0:02:57.880and one big thing is you're not gonna0:02:55.960,0:02:59.560have to take this back off to change0:02:57.880,0:03:01.270your oil now this whole pan is gonna0:02:59.560,0:03:02.440stay very nice and tight tucked up there0:03:01.270,0:03:04.090in there but it's still going to give0:03:02.440,0:03:05.980you plenty of clearance your exhaust0:03:04.090,0:03:08.080crossover is gonna be right about here0:03:05.980,0:03:10.150and one of the things is collecting crap0:03:08.080,0:03:12.040on top of this when you're out there on0:03:10.150,0:03:13.510the trails now this has some very nice0:03:12.040,0:03:15.460drain holes so anything that you may0:03:13.510,0:03:16.900slash up in here that's just gonna drain0:03:15.460,0:03:18.850back out it's also gonna give you a very0:03:16.900,0:03:20.440nice point where you can wash this thing0:03:18.850,0:03:22.120out that way that crossover tube isn't0:03:20.440,0:03:24.490gonna catch anything you get caught up0:03:22.120,0:03:26.620here on fire this pan is a completely0:03:24.490,0:03:28.450botan kit it comes with everything brand0:03:26.620,0:03:30.130new it comes with brackets it even fits0:03:28.450,0:03:32.230around the transfer case skid plate and0:03:30.130,0:03:33.640the whole thing is coated in a textured0:03:32.230,0:03:35.020black powder coating and of course0:03:33.640,0:03:36.280that's just going to add to the rugged0:03:35.020,0:03:37.660good looks of it it's also going to0:03:36.280,0:03:39.400protect your investment from the0:03:37.660,0:03:40.930elements providing a little bit of extra0:03:39.400,0:03:42.730corrosion protection when you're0:03:40.930,0:03:43.870dragging this thing on the rocks so with0:03:42.730,0:03:45.040that being said let's show you how to0:03:43.870,0:03:46.750get this installed and what it looks0:03:45.040,0:03:50.440like on the Jeep tools we use for this0:03:46.750,0:03:53.440install pry bar safety glasses safety0:03:50.440,0:03:57.700gloves 19 millimeter socket 180:03:53.440,0:04:00.580millimeter socket 5/16 Allen 3/8 Drive0:03:57.700,0:04:03.310impact 3/8 drive extension 3/8 drive0:04:00.580,0:04:05.080ratchet 18 millimeter wrench 190:04:03.310,0:04:07.150millimeter wrench other tools that0:04:05.080,0:04:08.590you'll need a torque wrench alright guys0:04:07.150,0:04:10.060so the first thing you need to do if you0:04:08.590,0:04:11.230do have that optional skid plate you0:04:10.060,0:04:13.060need to take that off we're just going0:04:11.230,0:04:14.170to jump right into the install first0:04:13.060,0:04:15.640thing we're gonna do we're gonna start0:04:14.170,0:04:17.530loosen up some bolts so we can get our0:04:15.640,0:04:18.970brackets on now over here on the0:04:17.530,0:04:21.280driver's side we're gonna have to loosen0:04:18.970,0:04:23.110up this long shish-kabob bolt for our0:04:21.280,0:04:25.210motor mount so you're gonna take an 180:04:23.110,0:04:26.680millimeter wrench 18 millimeter socket0:04:25.210,0:04:27.730so we're gonna back that nut off just a0:04:26.680,0:04:31.600little bit now0:04:27.730,0:04:34.660we can slide our bracket underneath so0:04:31.600,0:04:36.220it would be a good idea to spray these0:04:34.660,0:04:43.120threads with just a little bit of rust0:04:36.220,0:04:44.620busting lubricant you should take a dead0:04:43.120,0:04:48.730blow hammer that's just gonna be a0:04:44.620,0:04:50.350mallet like this slide that bolt back a0:04:48.730,0:04:51.880little bit if you use a regular hammer I0:04:50.350,0:04:53.680would back the nut all the way off so0:04:51.880,0:04:55.300it's flush with the threads that way you0:04:53.680,0:04:58.600don't mess up the end of the bolt the0:04:55.300,0:05:00.160brackets are pretty thick so we want0:04:58.600,0:05:02.440that bolt sticking out about a quarter0:05:00.160,0:05:03.790of an inch all right so now that we have0:05:02.440,0:05:04.750that sticking out next thing we're going0:05:03.790,0:05:06.580to do we're actually going to drop a0:05:04.750,0:05:08.050bolt through this hole right here so I'm0:05:06.580,0:05:10.150gonna go grab some of that hardware and0:05:08.050,0:05:12.460then we'll do that alright so we're0:05:10.150,0:05:13.570gonna take the 1/2 inch by 1 inch bolt0:05:12.460,0:05:15.520that they give us this is gonna be the0:05:13.570,0:05:17.590shortest bolt you get just a standard0:05:15.520,0:05:19.270hex head you're gonna get a you're gonna0:05:17.590,0:05:20.680put a flat washer on there and what we0:05:19.270,0:05:22.740need to do we need to drop it into that0:05:20.680,0:05:22.740hole0:05:24.970,0:05:28.760all right so next you gonna take your0:05:26.930,0:05:29.990bracket now these you want to face them0:05:28.760,0:05:31.790towards the inside of the vehicle0:05:29.990,0:05:34.750obviously they're only gonna go on one0:05:31.790,0:05:36.860way so you got a 50/50 percent chance0:05:34.750,0:05:41.360what we want to do it we want to slide0:05:36.860,0:05:43.490it up on top of that so you want it0:05:41.360,0:05:46.190inside of the washer on that shish-kabob0:05:43.490,0:05:48.470bolt and then we want that other bolt to0:05:46.190,0:05:51.320drop through after that we're gonna put0:05:48.470,0:05:53.960a flat washer on there so we're gonna do0:05:51.320,0:05:58.430another flat washer then we're gonna do0:05:53.960,0:05:59.690a net just like that now we're gonna0:05:58.430,0:06:01.280leave that loose and we'll go get the0:05:59.690,0:06:02.660other side installed so we're gonna do0:06:01.280,0:06:04.040the same thing on the other side this0:06:02.660,0:06:05.510bolt is gonna be facing the opposite way0:06:04.040,0:06:07.160so all I have to do is loosen up that0:06:05.510,0:06:10.180nut back it off a little bit and we'll0:06:07.160,0:06:10.180drop out other bolt through0:06:30.720,0:06:34.380alright guys so for the passenger-side0:06:32.850,0:06:36.180what you want to do is just take a pry0:06:34.380,0:06:37.920bar and just go in between the actual0:06:36.180,0:06:39.450bracket and the motor mount just have0:06:37.920,0:06:40.650someone push on it a little bit and0:06:39.450,0:06:42.390that's gonna allow you to get that bolt0:06:40.650,0:06:44.430in after that we're gonna hang the0:06:42.390,0:06:46.380bracket slide it underneath drop that0:06:44.430,0:06:48.840bolt down through and then same thing0:06:46.380,0:06:52.970we're gonna do a flat washer and then0:06:48.840,0:06:52.970we're gonna do one of the provided nuts0:06:57.270,0:07:00.300alright guys so next we're gonna do0:06:58.800,0:07:01.500we're gonna install a skid plate this is0:07:00.300,0:07:03.120pretty heavy so I'm actually gonna get a0:07:01.500,0:07:05.849friend to help me hold this up while I0:07:03.120,0:07:07.349get this first bolt started so the first0:07:05.849,0:07:08.910hole we're gonna start with is right0:07:07.349,0:07:10.319here in this crossmember you're gonna0:07:08.910,0:07:11.490take the longest bolt that they give you0:07:10.319,0:07:13.500in the kit and you're gonna use this0:07:11.490,0:07:16.080little skid washer right here so we're0:07:13.500,0:07:20.190just gonna get that started in this pre0:07:16.080,0:07:23.150threaded hole once you get it started0:07:20.190,0:07:25.169you can take a three-quarter inch socket0:07:23.150,0:07:26.310alright so then we're gonna go back up0:07:25.169,0:07:27.930to the front we want to get these0:07:26.310,0:07:30.150brackets situated that way it holds the0:07:27.930,0:07:31.620front of the skid plate so you're gonna0:07:30.150,0:07:33.419use the carriage bolts that they give0:07:31.620,0:07:35.490you these are going to go through the0:07:33.419,0:07:39.120inside out because that's where the0:07:35.490,0:07:41.880square is on the outside we're gonna do0:07:39.120,0:07:42.720a flat washer and then we'll do another0:07:41.880,0:07:44.550nut0:07:42.720,0:07:46.770we're gonna leave those loose we'll get0:07:44.550,0:07:47.819the other side installed so the same0:07:46.770,0:07:49.470thing goes for the other side we're0:07:47.819,0:07:50.880gonna use that carriage bolt you just0:07:49.470,0:07:53.580want to drop it through line up the0:07:50.880,0:07:57.419square head with the square hole flat0:07:53.580,0:07:58.979washer and then a nut and now that's0:07:57.419,0:08:00.120pretty much gonna set the front in place0:07:58.979,0:08:01.740so what we're actually gonna do we're0:08:00.120,0:08:03.570gonna go to the back and we're gonna0:08:01.740,0:08:04.889drill some holes so going back to the0:08:03.570,0:08:07.050backside of the skid plate we're gonna0:08:04.889,0:08:08.789have two bolt holes left in the skid0:08:07.050,0:08:10.349plate this one over here on the driver0:08:08.789,0:08:12.330side we actually have a hole in this0:08:10.349,0:08:13.710crossmember here if you don't have that0:08:12.330,0:08:15.599hole you'll need to drill with a 1/20:08:13.710,0:08:17.580inch drill bit we're gonna take the last0:08:15.599,0:08:19.349two button head bolts that we have that0:08:17.580,0:08:20.789are allen keys we're gonna put a flat0:08:19.349,0:08:22.440washer on those they're gonna go up0:08:20.789,0:08:24.509through the bottom inside we're gonna do0:08:22.440,0:08:28.919another flat washer and then we're gonna0:08:24.509,0:08:30.090do a nut so we got that one in what0:08:28.919,0:08:31.860we're going to do we're just gonna mark0:08:30.090,0:08:33.390and drill the other hole so on the0:08:31.860,0:08:35.219passenger side we need to drill through0:08:33.390,0:08:36.719here and through the frame rail so we0:08:35.219,0:08:37.740have a 1/2 inch drill bit a drill of0:08:36.719,0:08:39.450course you want to put your safety0:08:37.740,0:08:40.680gloves on and your safety glasses last0:08:39.450,0:08:42.450thing you want to do is get metal in0:08:40.680,0:08:43.829your eye we're just going to go up0:08:42.450,0:08:45.950through this hole and just drill all the0:08:43.829,0:08:45.950way through0:08:51.590,0:08:56.460[Applause]0:08:58.879,0:09:03.059and you want to get all the metal0:09:00.629,0:09:04.230shavings off you clean yourself off then0:09:03.059,0:09:06.239we'll put the rest of the hardware in0:09:04.230,0:09:07.739alright so after you drill that hole of0:09:06.239,0:09:09.569course you want to paint that fairmeadow0:09:07.739,0:09:11.129so you can just spray it with some spray0:09:09.569,0:09:12.869paint or you can just get a brush up in0:09:11.129,0:09:14.549there and kind of brush it after that0:09:12.869,0:09:16.649same thing we're gonna use that button0:09:14.549,0:09:19.730head bolt flat washer on it it's gonna0:09:16.649,0:09:19.730go up through that hole0:09:34.950,0:09:38.430so now that we have this whole thing0:09:36.510,0:09:40.380installed we're gonna go and tighten0:09:38.430,0:09:41.790everything up we're gonna start up here0:09:40.380,0:09:43.260at the front motor mount so we're gonna0:09:41.790,0:09:45.180tighten up the bolts that hold this0:09:43.260,0:09:46.920bracket in place so to make sure that0:09:45.180,0:09:48.750this bracket is flush with this other0:09:46.920,0:09:50.760bracket there's no gap in there we're0:09:48.750,0:09:53.459gonna tighten up that motor mount bolt0:09:50.760,0:09:55.920first so we use an 18 millimeter socket0:09:53.459,0:10:03.839on one side and that wrench on the other0:09:55.920,0:10:04.740side and we'll tighten that up so once0:10:03.839,0:10:06.660you get that bolt tight we're gonna0:10:04.740,0:10:07.769torque it to 45 foot-pounds and then0:10:06.660,0:10:09.540we're gonna tighten up this other bolt0:10:07.769,0:10:11.670now to tighten up this new bolt you'll0:10:09.540,0:10:19.050need a 19 millimeter wrench and a 190:10:11.670,0:10:20.010millimeter socket and then after that0:10:19.050,0:10:31.470we'll do the same thing on the other0:10:20.010,0:10:33.269side all right so next we're going to0:10:31.470,0:10:35.399tighten up where the skid plate attaches0:10:33.269,0:10:37.110to these brackets so you're not gonna0:10:35.399,0:10:38.190need a tool to hold the inside because0:10:37.110,0:10:40.260it's a carriage bolt it's gonna hold0:10:38.190,0:10:46.260itself so we'll just use a 19 millimeter0:10:40.260,0:10:47.640socket to tighten up the outside and0:10:46.260,0:10:51.240make sure that you press the skid plate0:10:47.640,0:10:54.290up get it in position come over the0:10:51.240,0:10:54.290other side do that same thing0:10:56.330,0:10:59.640so we're gonna go to the back we're0:10:58.140,0:11:00.810gonna tighten up those last three bolts0:10:59.640,0:11:01.260where you're going to start in the0:11:00.810,0:11:03.360middle0:11:01.260,0:11:05.250tighten it up that one with the skid0:11:03.360,0:11:11.370washer now you can use a 19 millimeter0:11:05.250,0:11:12.9303/4 whatever you have after that we're0:11:11.370,0:11:17.010gonna switch bits we're gonna go over to0:11:12.930,0:11:18.600a 5/16 Allen we're gonna grab 190:11:17.010,0:11:38.280millimeter wrench again we're gonna0:11:18.600,0:11:41.780tighten up these two end bolts all we0:11:38.280,0:11:41.780got to do is tighten up this last one0:11:47.910,0:11:51.280alright guys so now that we have this0:11:49.750,0:11:52.630thing fully tightened up that is going0:11:51.280,0:11:54.280to wrap it up for the review and install0:11:52.630,0:11:55.450there is one last thing that I would0:11:54.280,0:11:57.040like to mention this thing comes0:11:55.450,0:11:58.510powder-coated but when you go out there0:11:57.040,0:12:00.220on the trails if you scratch some of0:11:58.510,0:12:01.810that powder coating off just paint it0:12:00.220,0:12:03.700you can get a can of rust-oleum black0:12:01.810,0:12:05.140rust-oleum it's very cheap all you want0:12:03.700,0:12:06.640to do is just cover up those bare metal0:12:05.140,0:12:08.530spots keep this thing from rusting0:12:06.640,0:12:10.270however like I said this is gonna wrap0:12:08.530,0:12:11.650it up for the review and install for0:12:10.270,0:12:13.700more videos and products like this keep0:12:11.650,0:12:19.620it right here at extremeterrain.com0:12:13.700,0:12:21.680[Music]0:12:19.620,0:12:21.680you

      Product Information

      Features, Description, Reviews, Q&A, Specs & Installation

      Features & Specs

      • Oil Pan and Transmission Case Skid Plate
      • 3/16-Inch Plate Steel
      • Powder Coated Black
      • Protects Oil Pan, Transmission Case, and Parts of Exhaust System
      • Mostly Bolt-On, Some Drilling Required
      • Fits 2007-2018 Wrangler JK Models

      Description

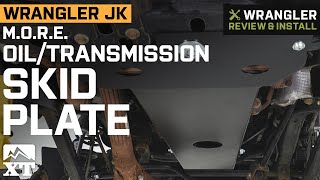
      Construction. M.O.R.E. offers under carriage protection for manual transmission JK's without a transmission skid plate. It also equips your automatic transmission JK with a more durable skid plate than provided from the factory. The black powder coated 3/16 an inch thick steel plate protects the under carriage of your Wrangler while you tackle the off-road!

      Protection. M.O.R.E.'s skid plate protects your transmission, oil pan, and exposed exhaust cross over tube from unforgiving off-road obstacles, preventing costly damage.

      Installation. This Oil pan/transmission case skid plate is designed to bolt to where the factory automatic transmission skid plate would be. It also uses motor mount brackets that bolt to the motor mounts to secure skid plate to the Jeep's undercarriage.

      Application. This M.O.R.E. Oil/Transmission Skid Plate is designed to fit on the 2007-2018 Wrangler JK models.

      Please Note. This Skid Plate is not compatible on models equipped with a diesel engine.

      Fitment:

      Details

      M.O.R.E. JKOPSP

      CA Residents: WARNING: Cancer and Reproductive Harm - www.P65Warnings.ca.gov

      Installation & What's in the Box

      Installation Info

      What's in the Box

      • (1) Oil Pan/Transmission Skid Plate
      • (1) Driver Side Bracket
      • (1) Passenger Side Bracket
      • (3) 1/2 x 1-1/2 Bolts
      • (1) 1/2 x 1-1/4 Bolt
      • (2) 1/2 x 1-1/4 Carriage Bolt
      • (6) 1/2 Lock Nuts
      • (11) 1/2 Flat Washers
      • (1) 12 mm x 1.5 x 45mm Bolt

      4.6

      Customer Reviews (131)

        Questions & Answers

        10 More Questions

        Will It Fit My Wrangler

        • jk Rubicon 2 Door - 07, 08, 09, 10, 11, 12, 13, 14, 15, 16, 17, 18
        • jk Rubicon 4 Door - 07, 08, 09, 10, 11, 12, 13, 14, 15, 16, 17, 18
        • jk Wrangler 2 Door - 07, 08, 09, 10, 11, 12, 13, 14, 15, 16, 17, 18
        • jk Wrangler 4 Door - 07, 08, 09, 10, 11, 12, 13, 14, 15, 16, 17, 18